Category Archives: 1.2 … And More

LL929 Starfleet Voyager (6929 Mod)


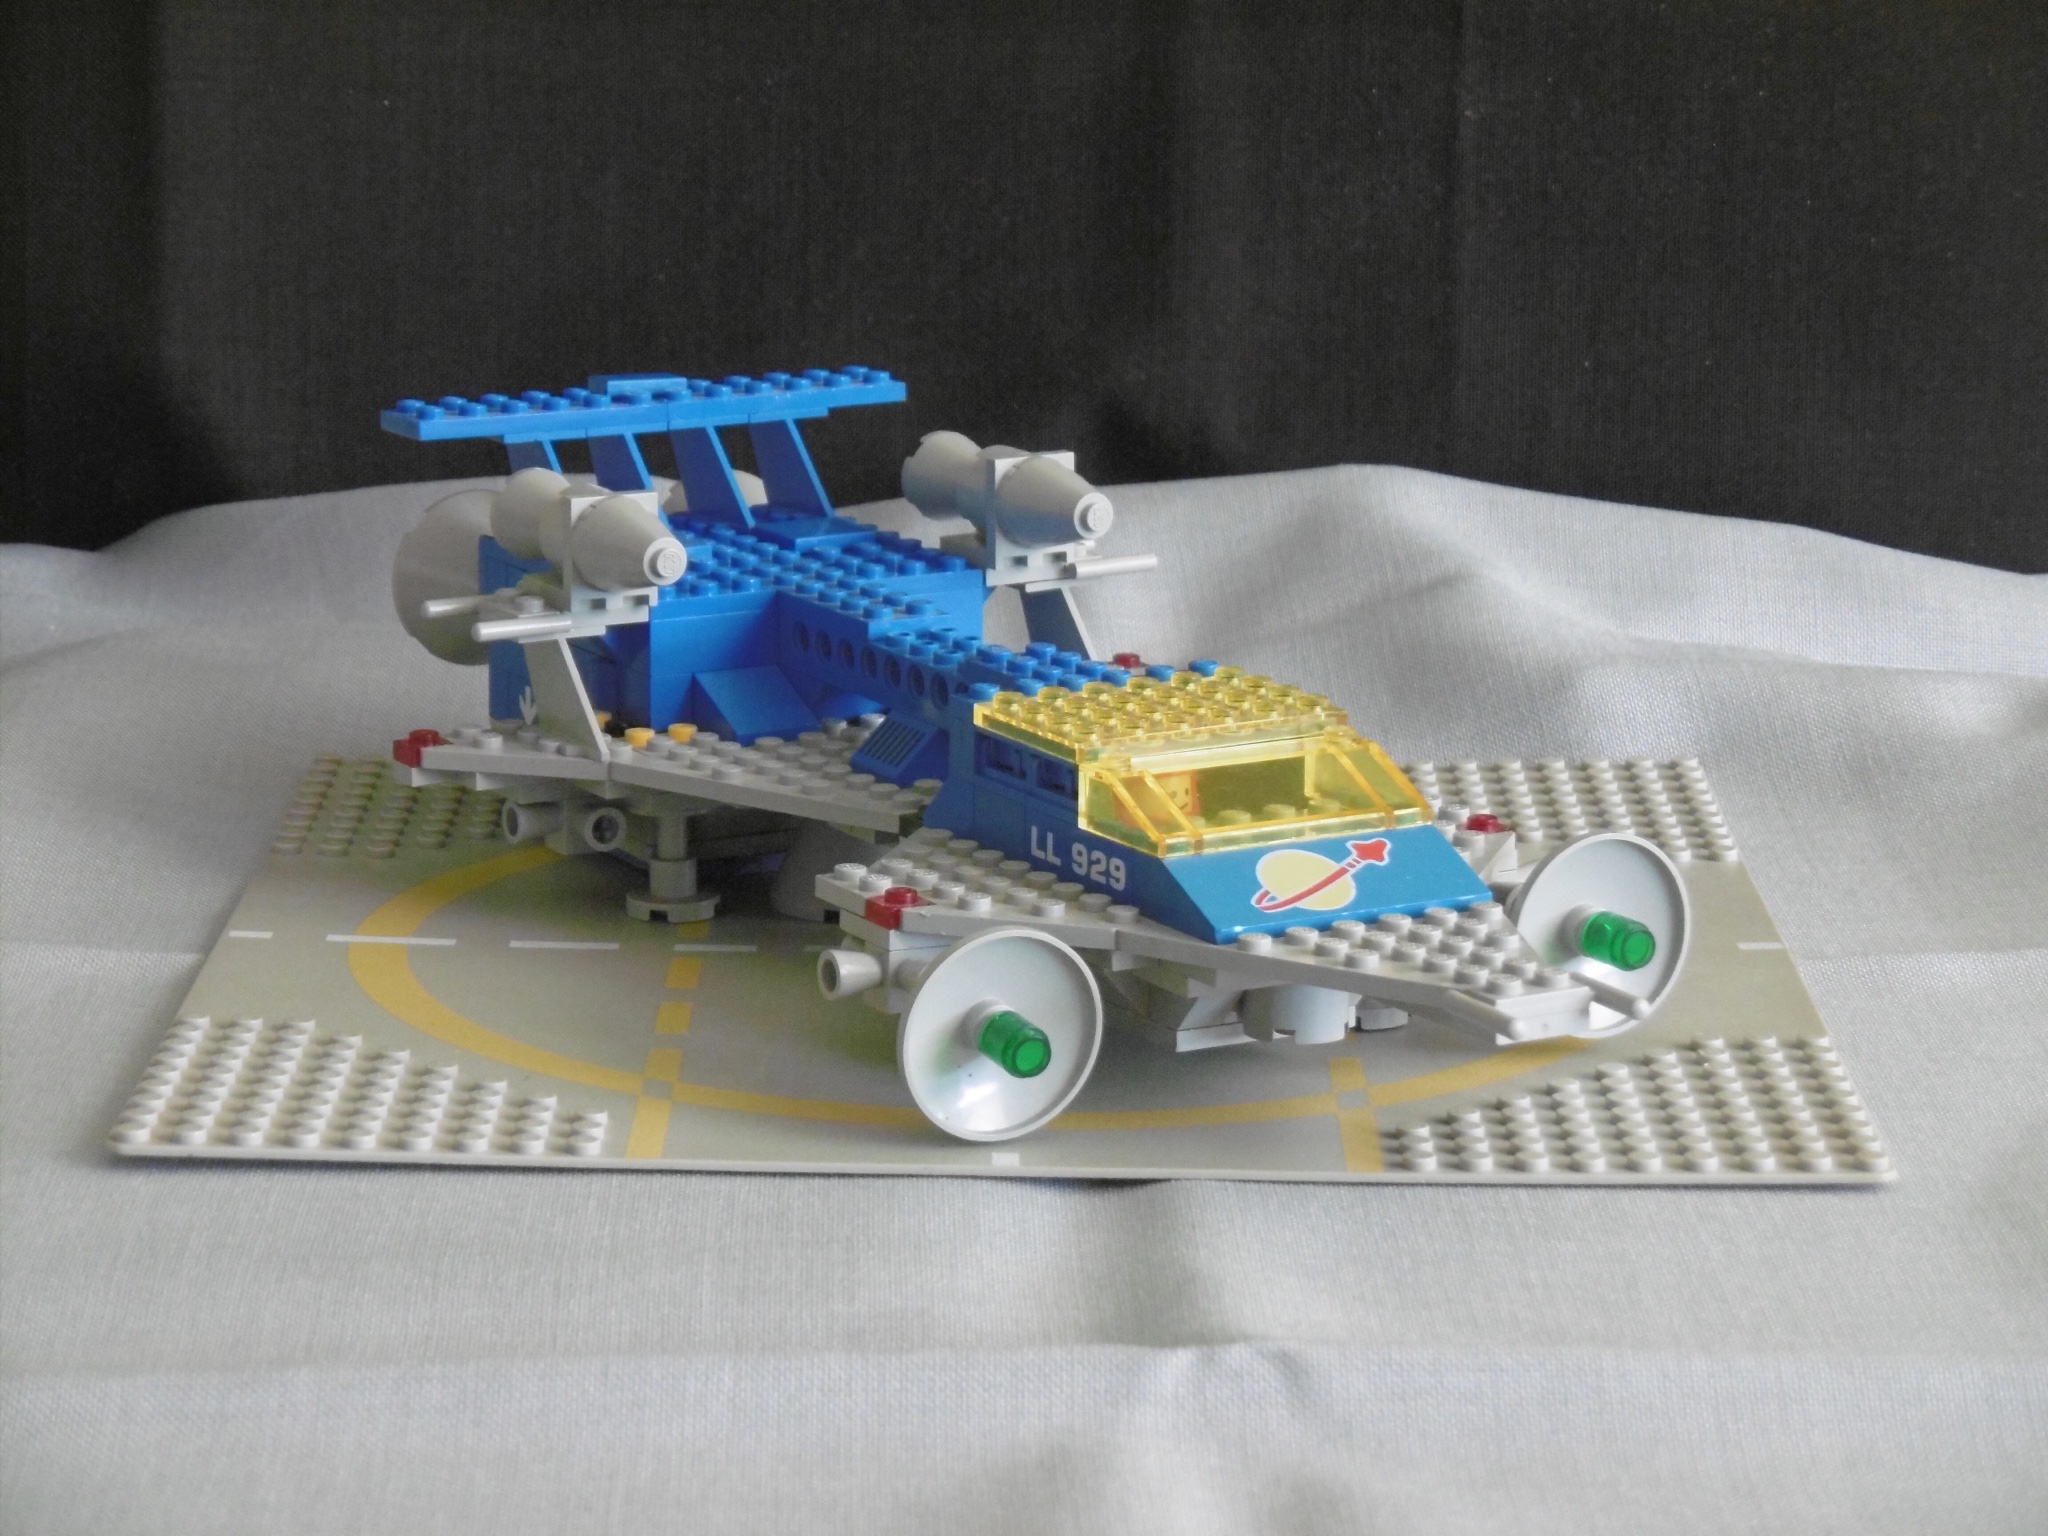
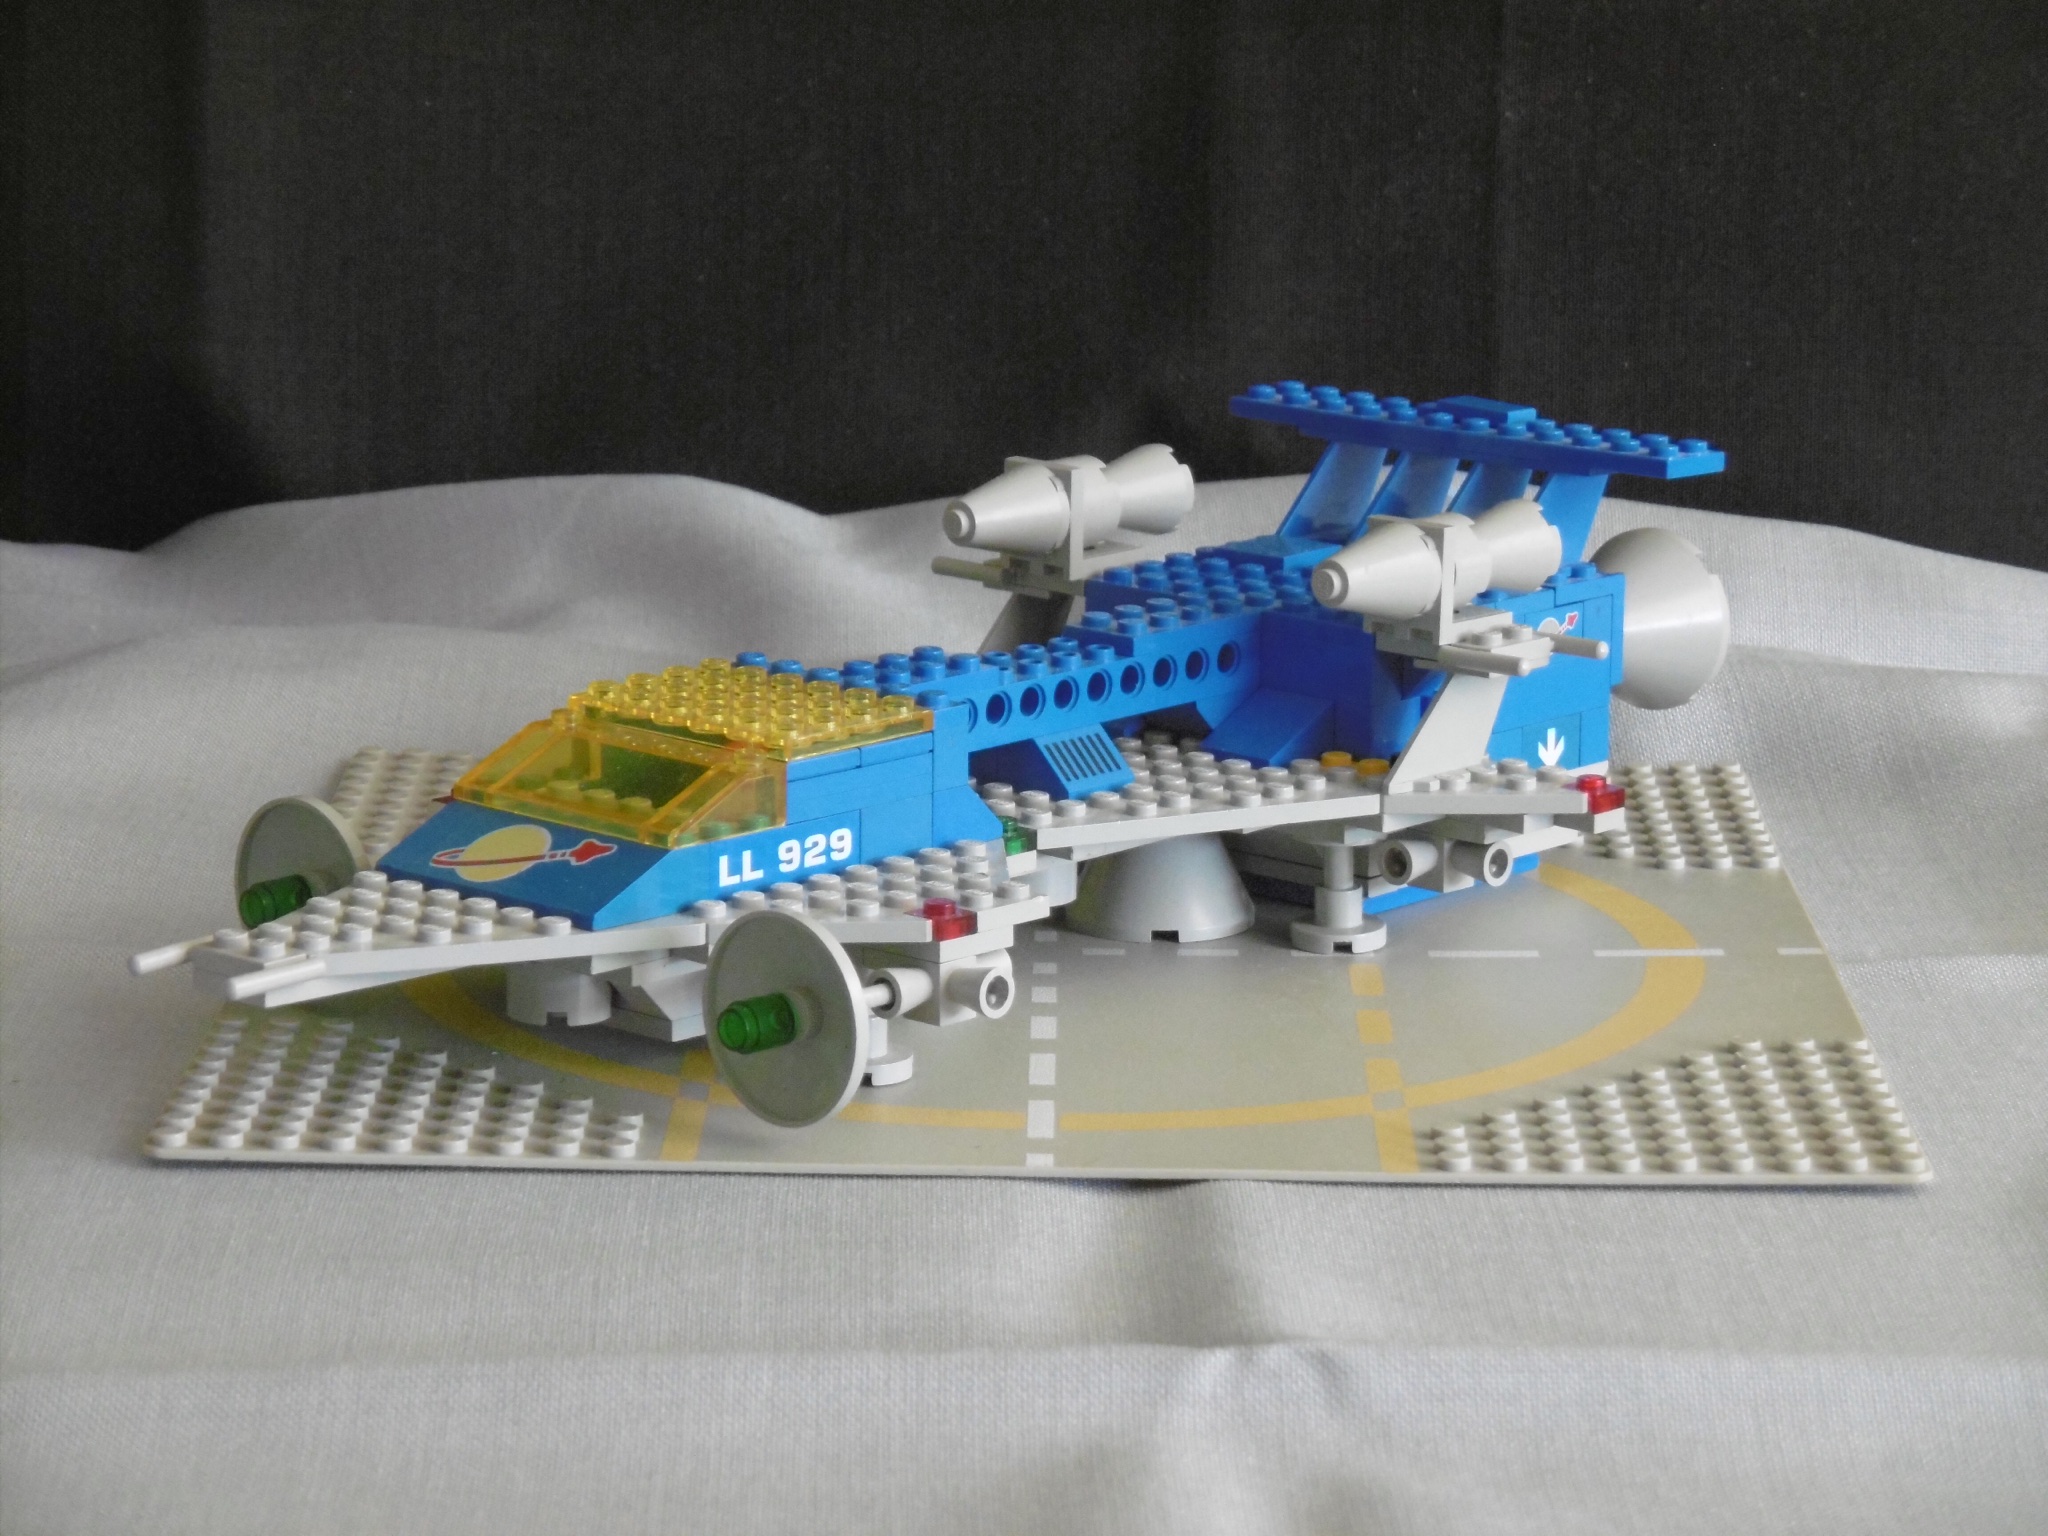
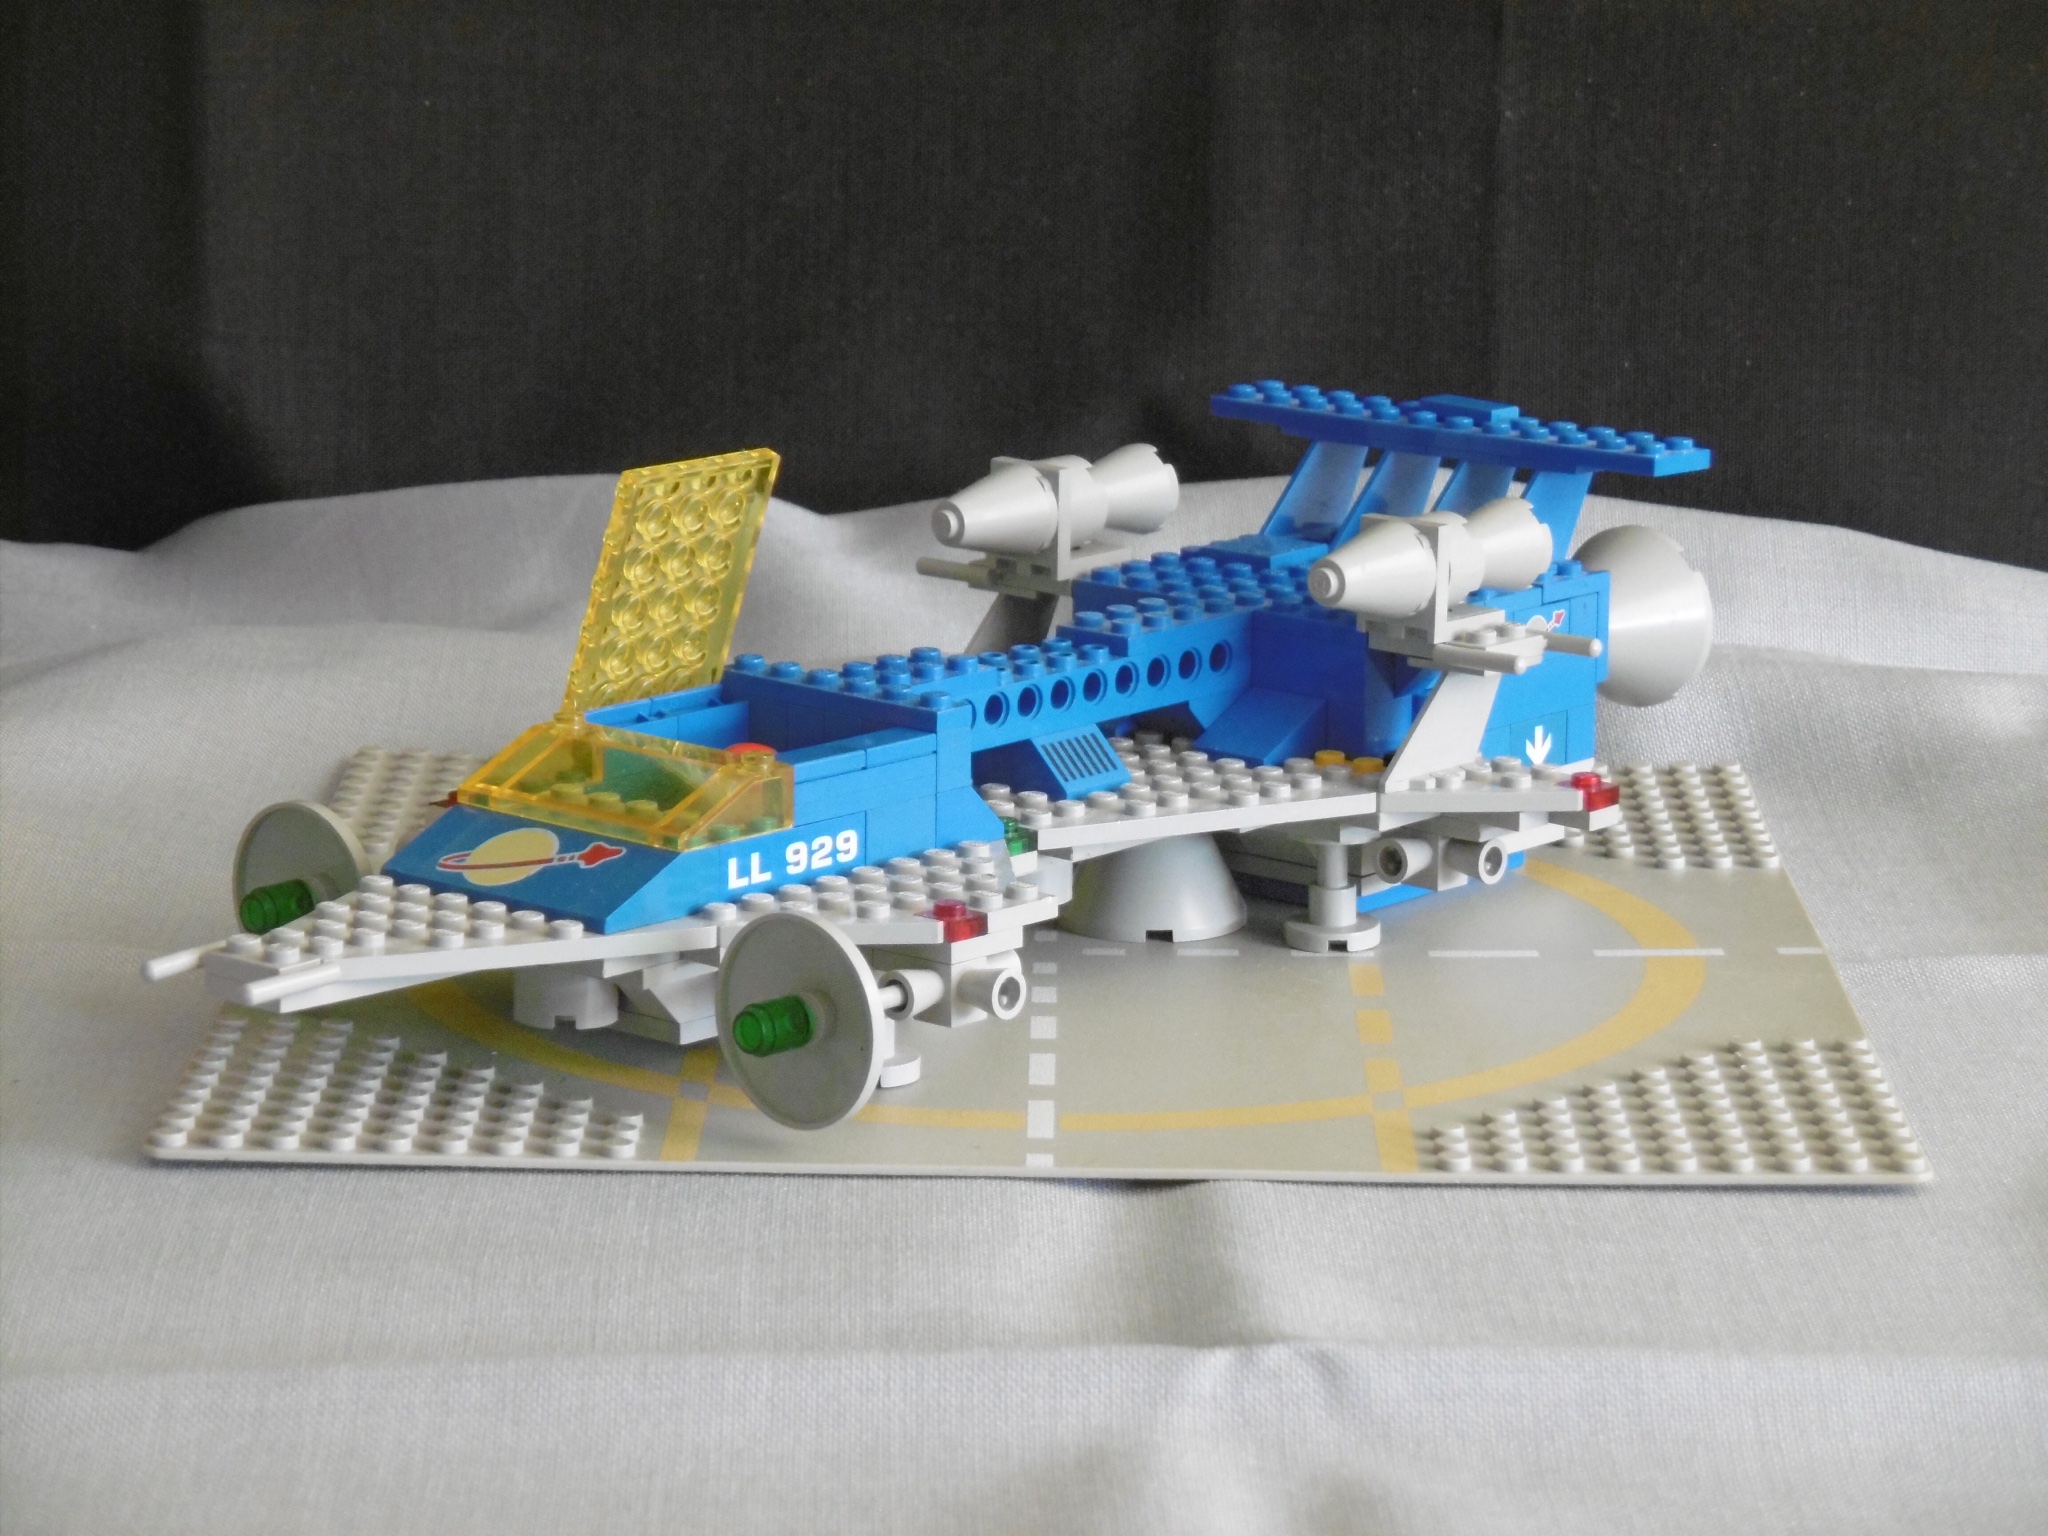
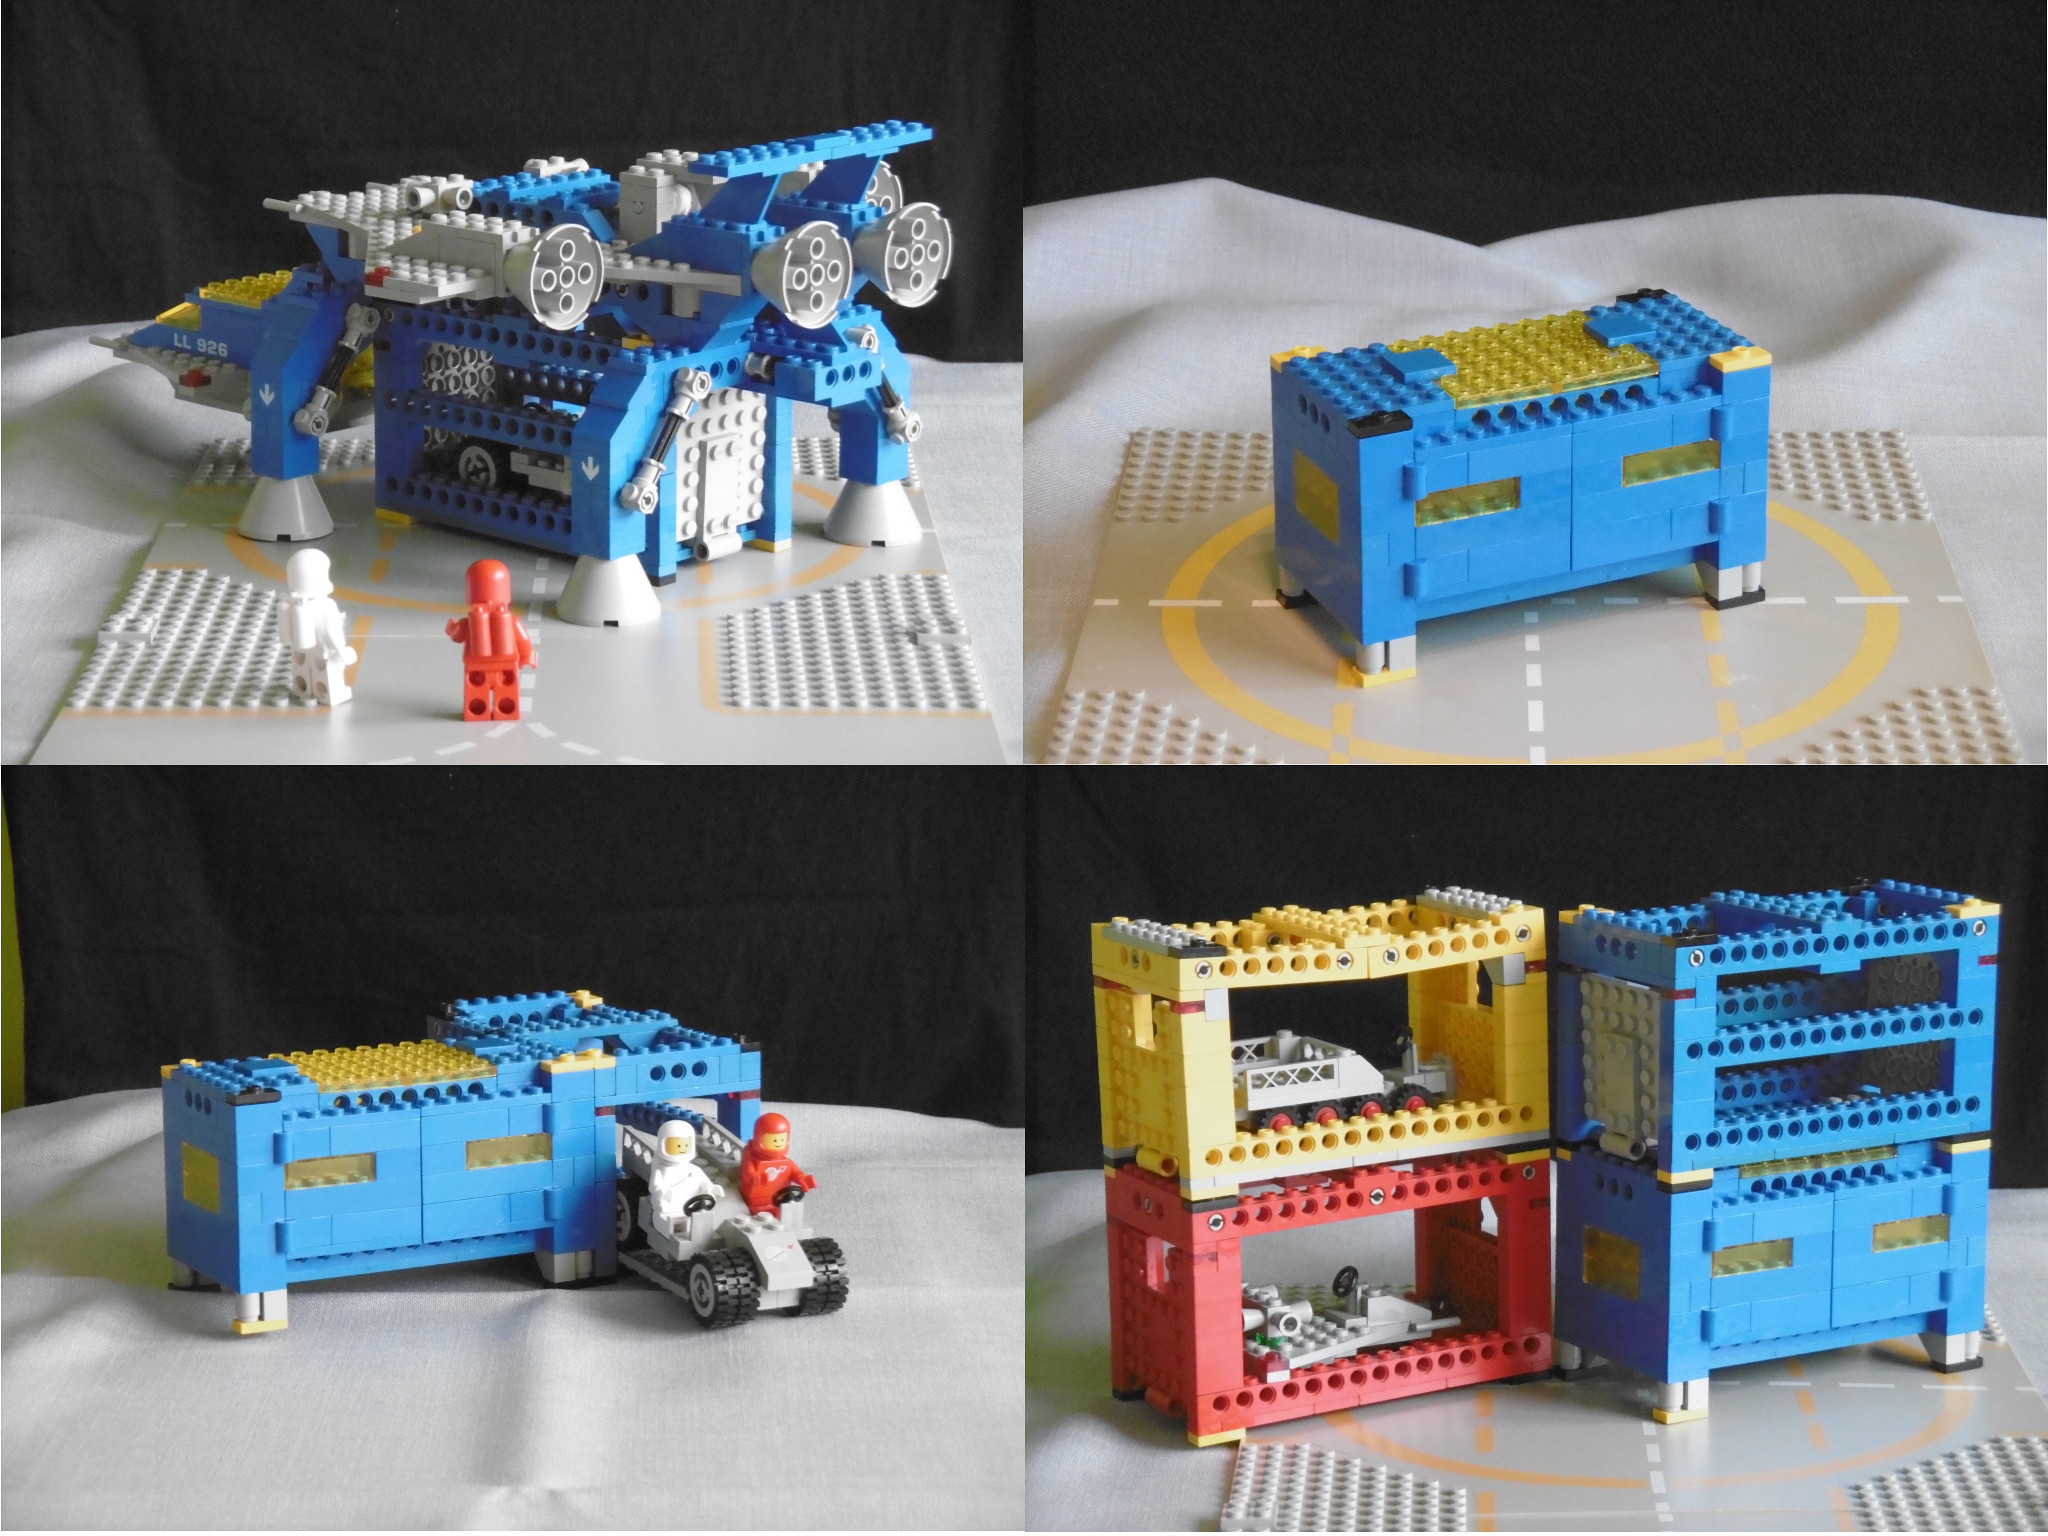
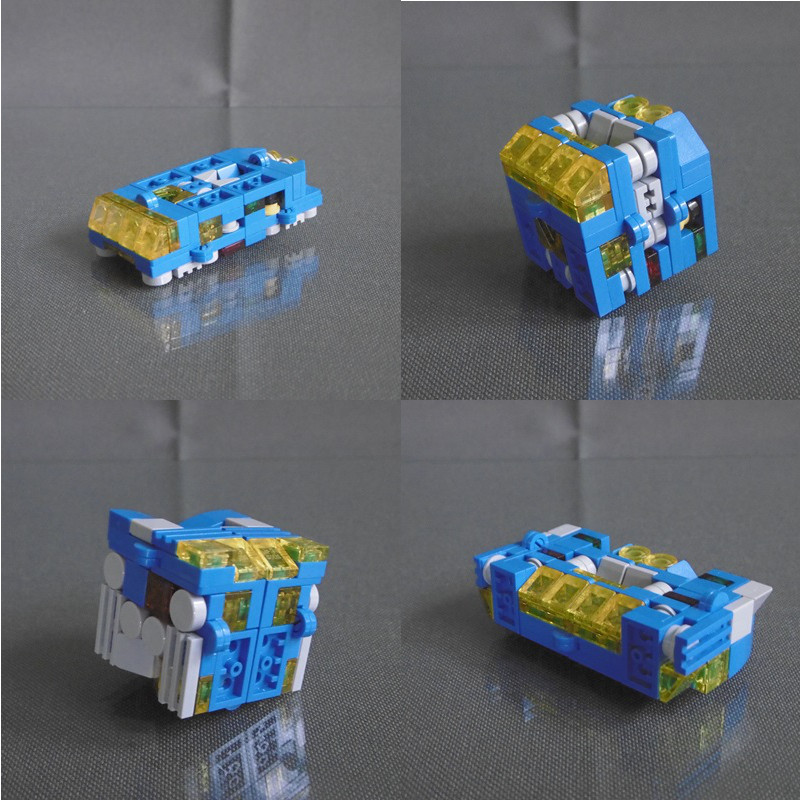
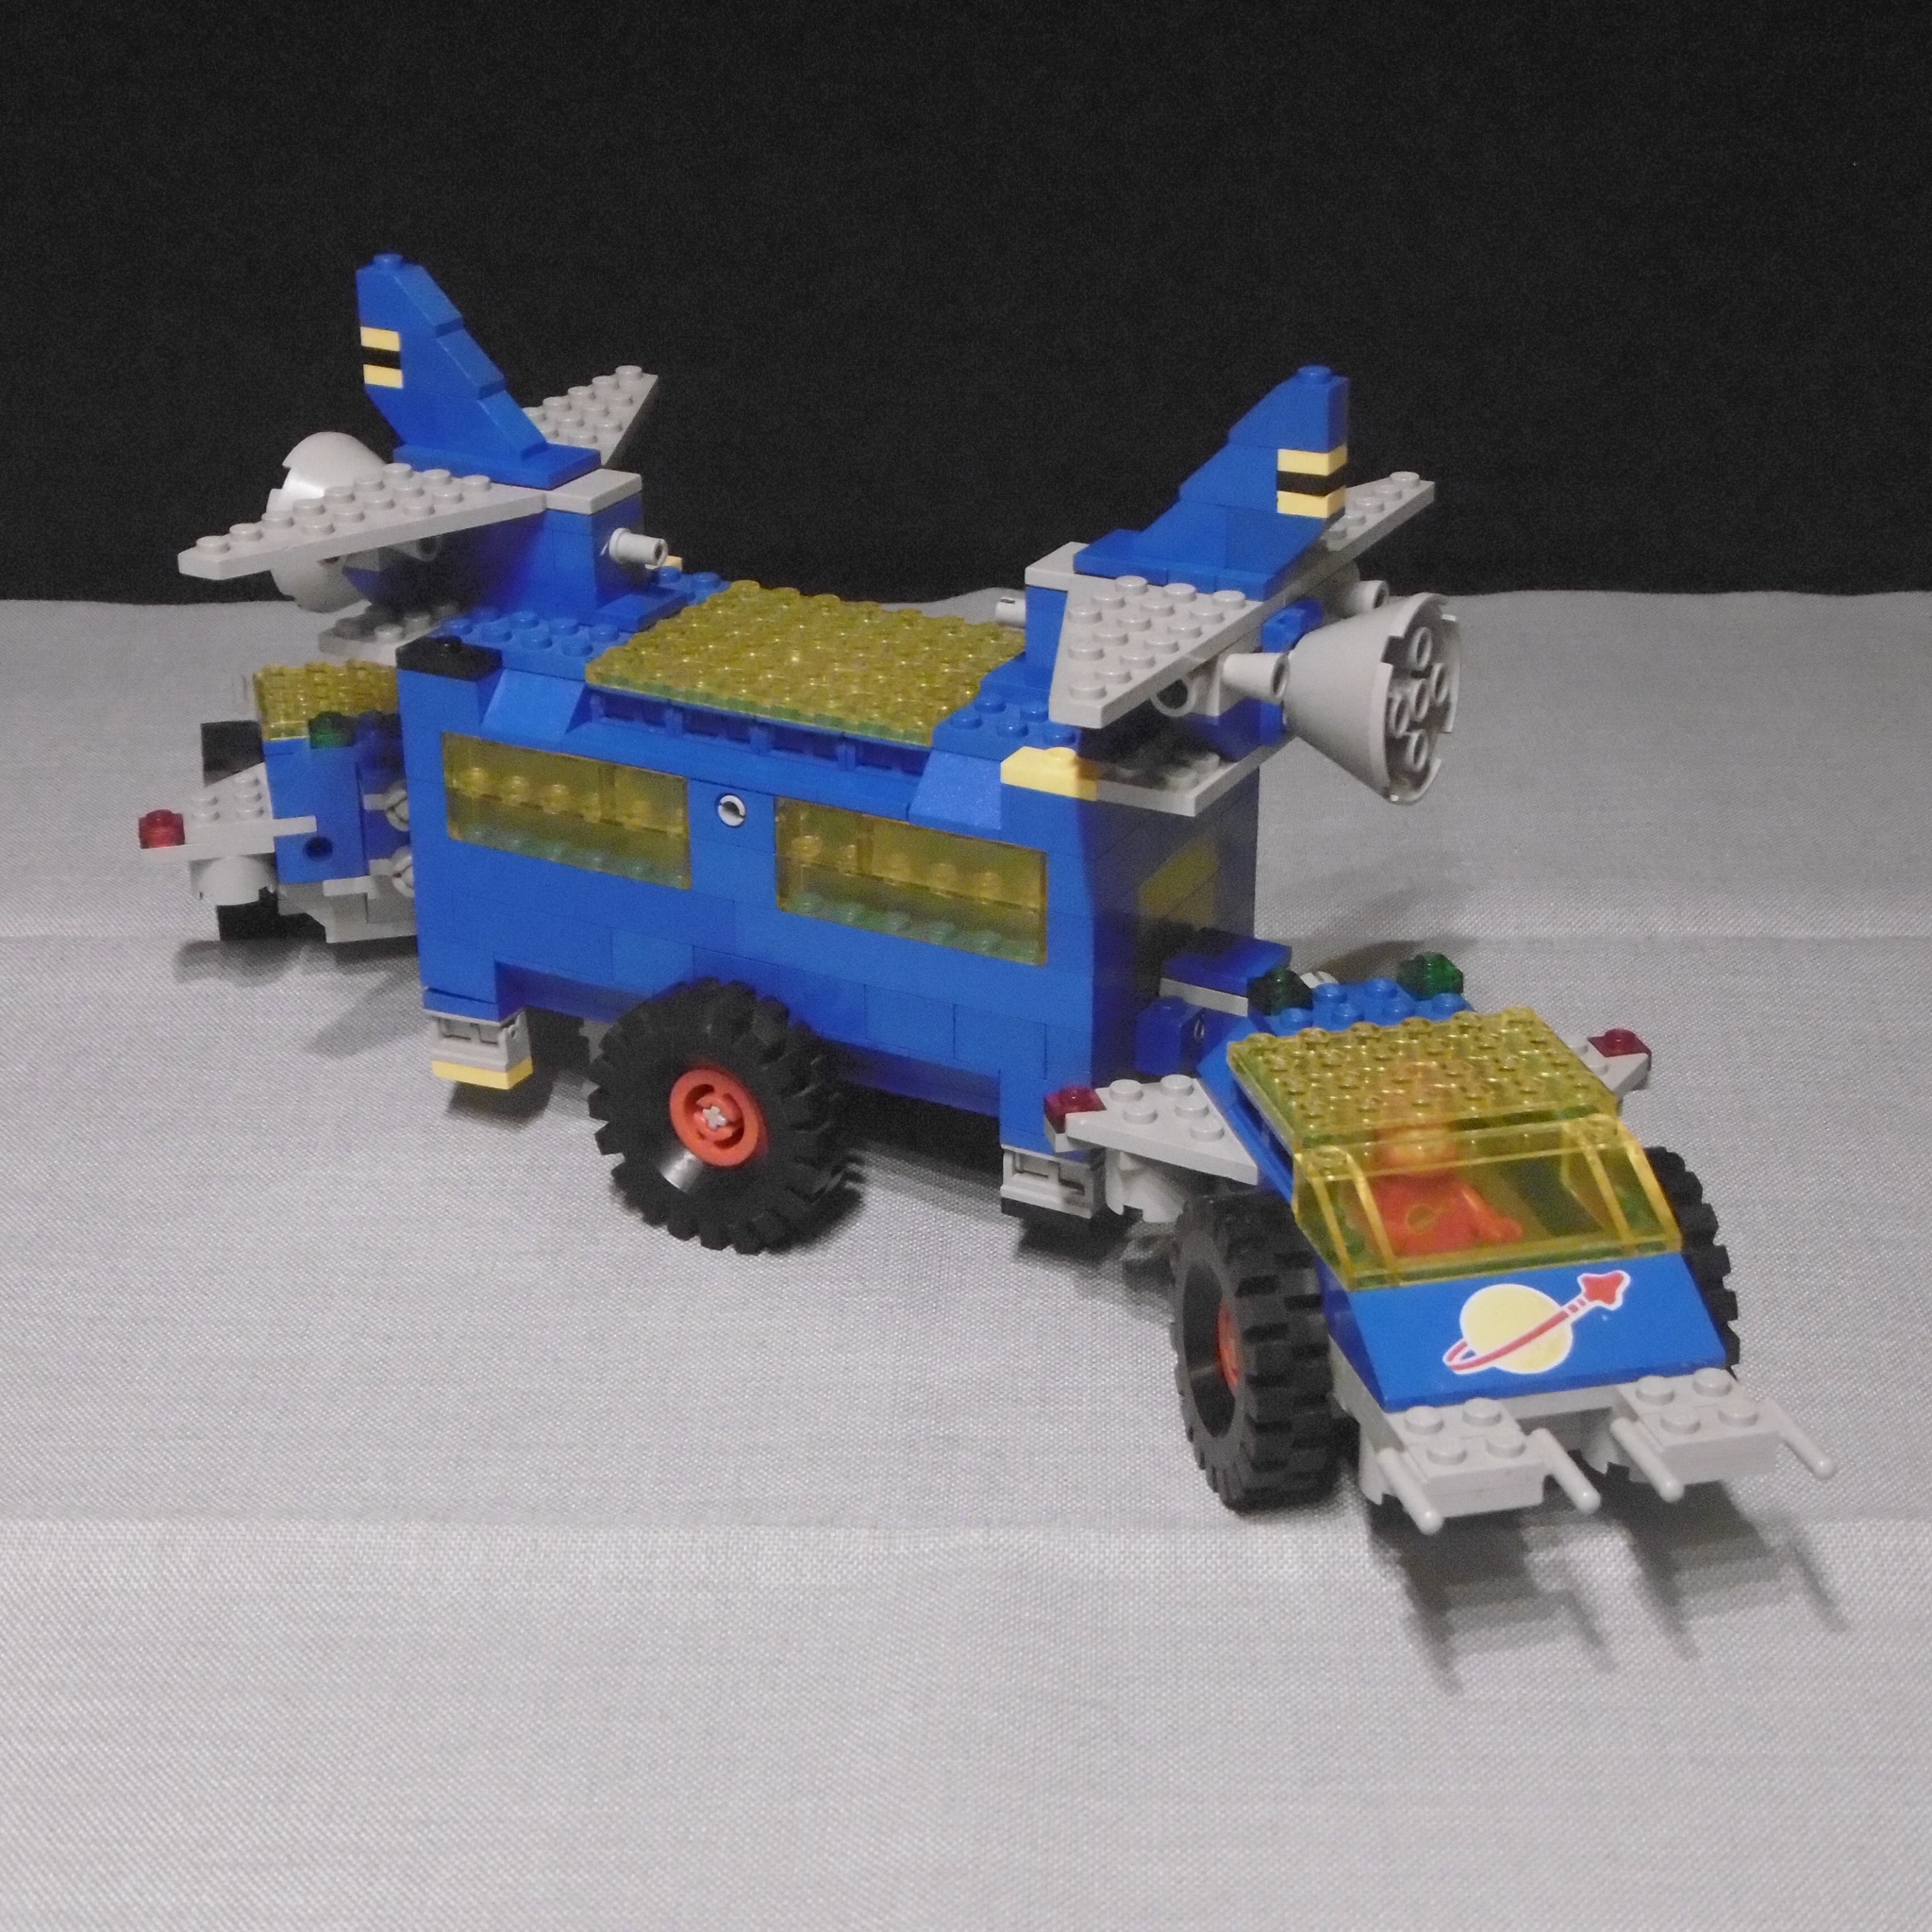
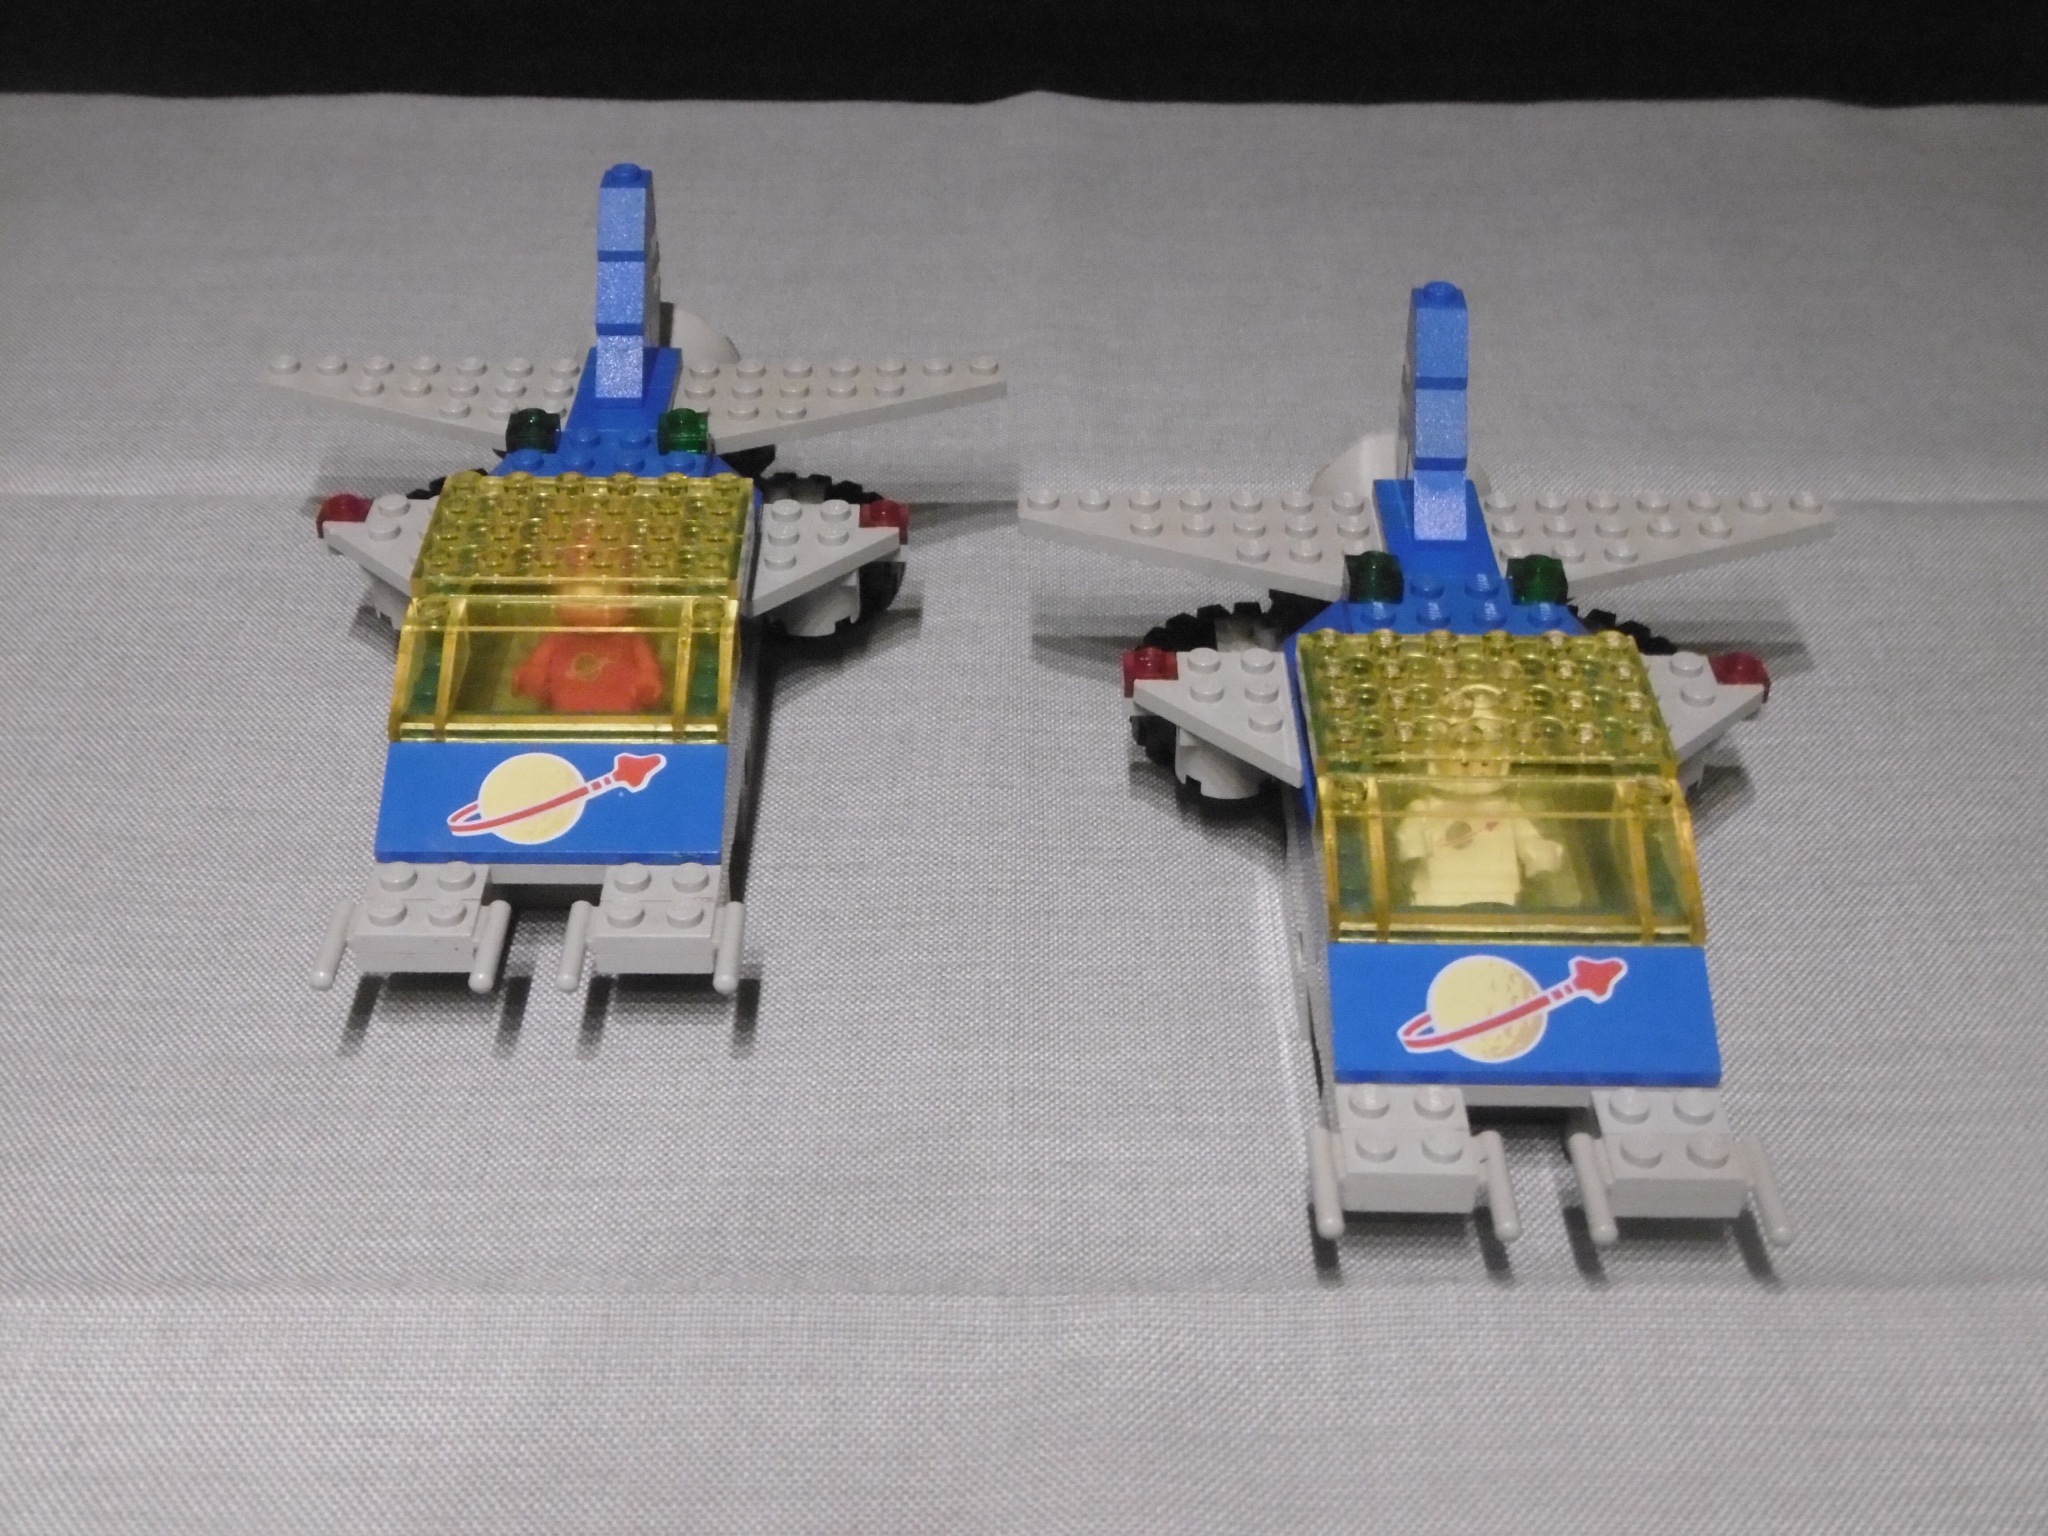
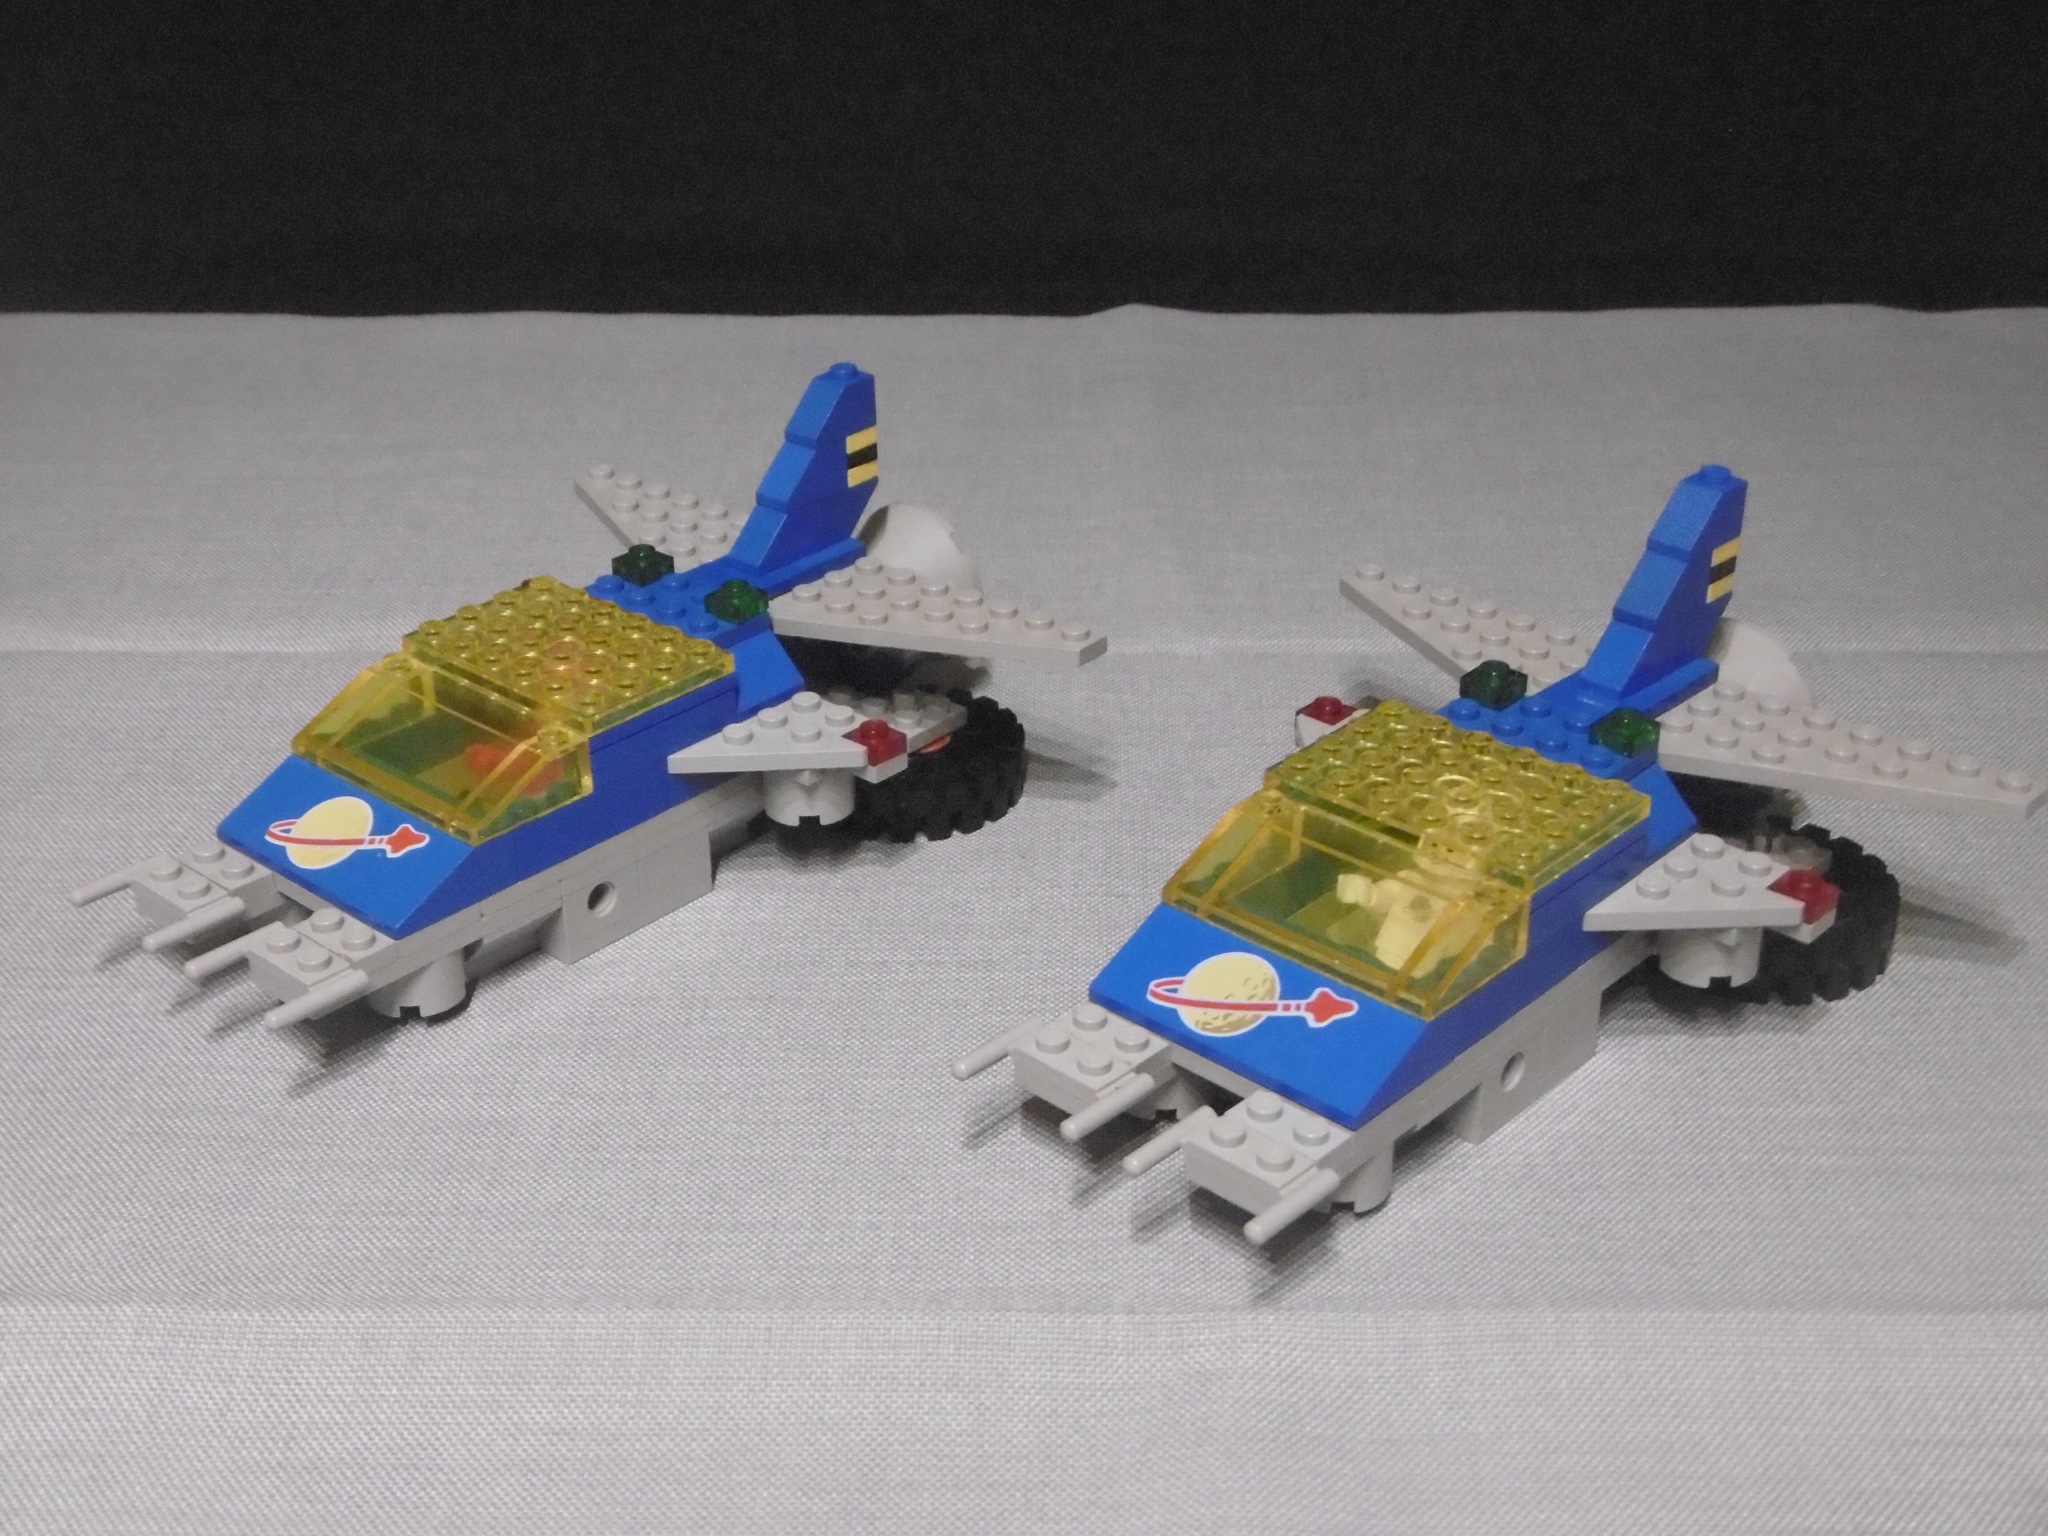
My 1979 version of the iconic Starfleet Voyager.

The Starfleet Voyager was one of the Lego model I always wanted to have. My cousin had one, one of my friends, too, but I didn’t.

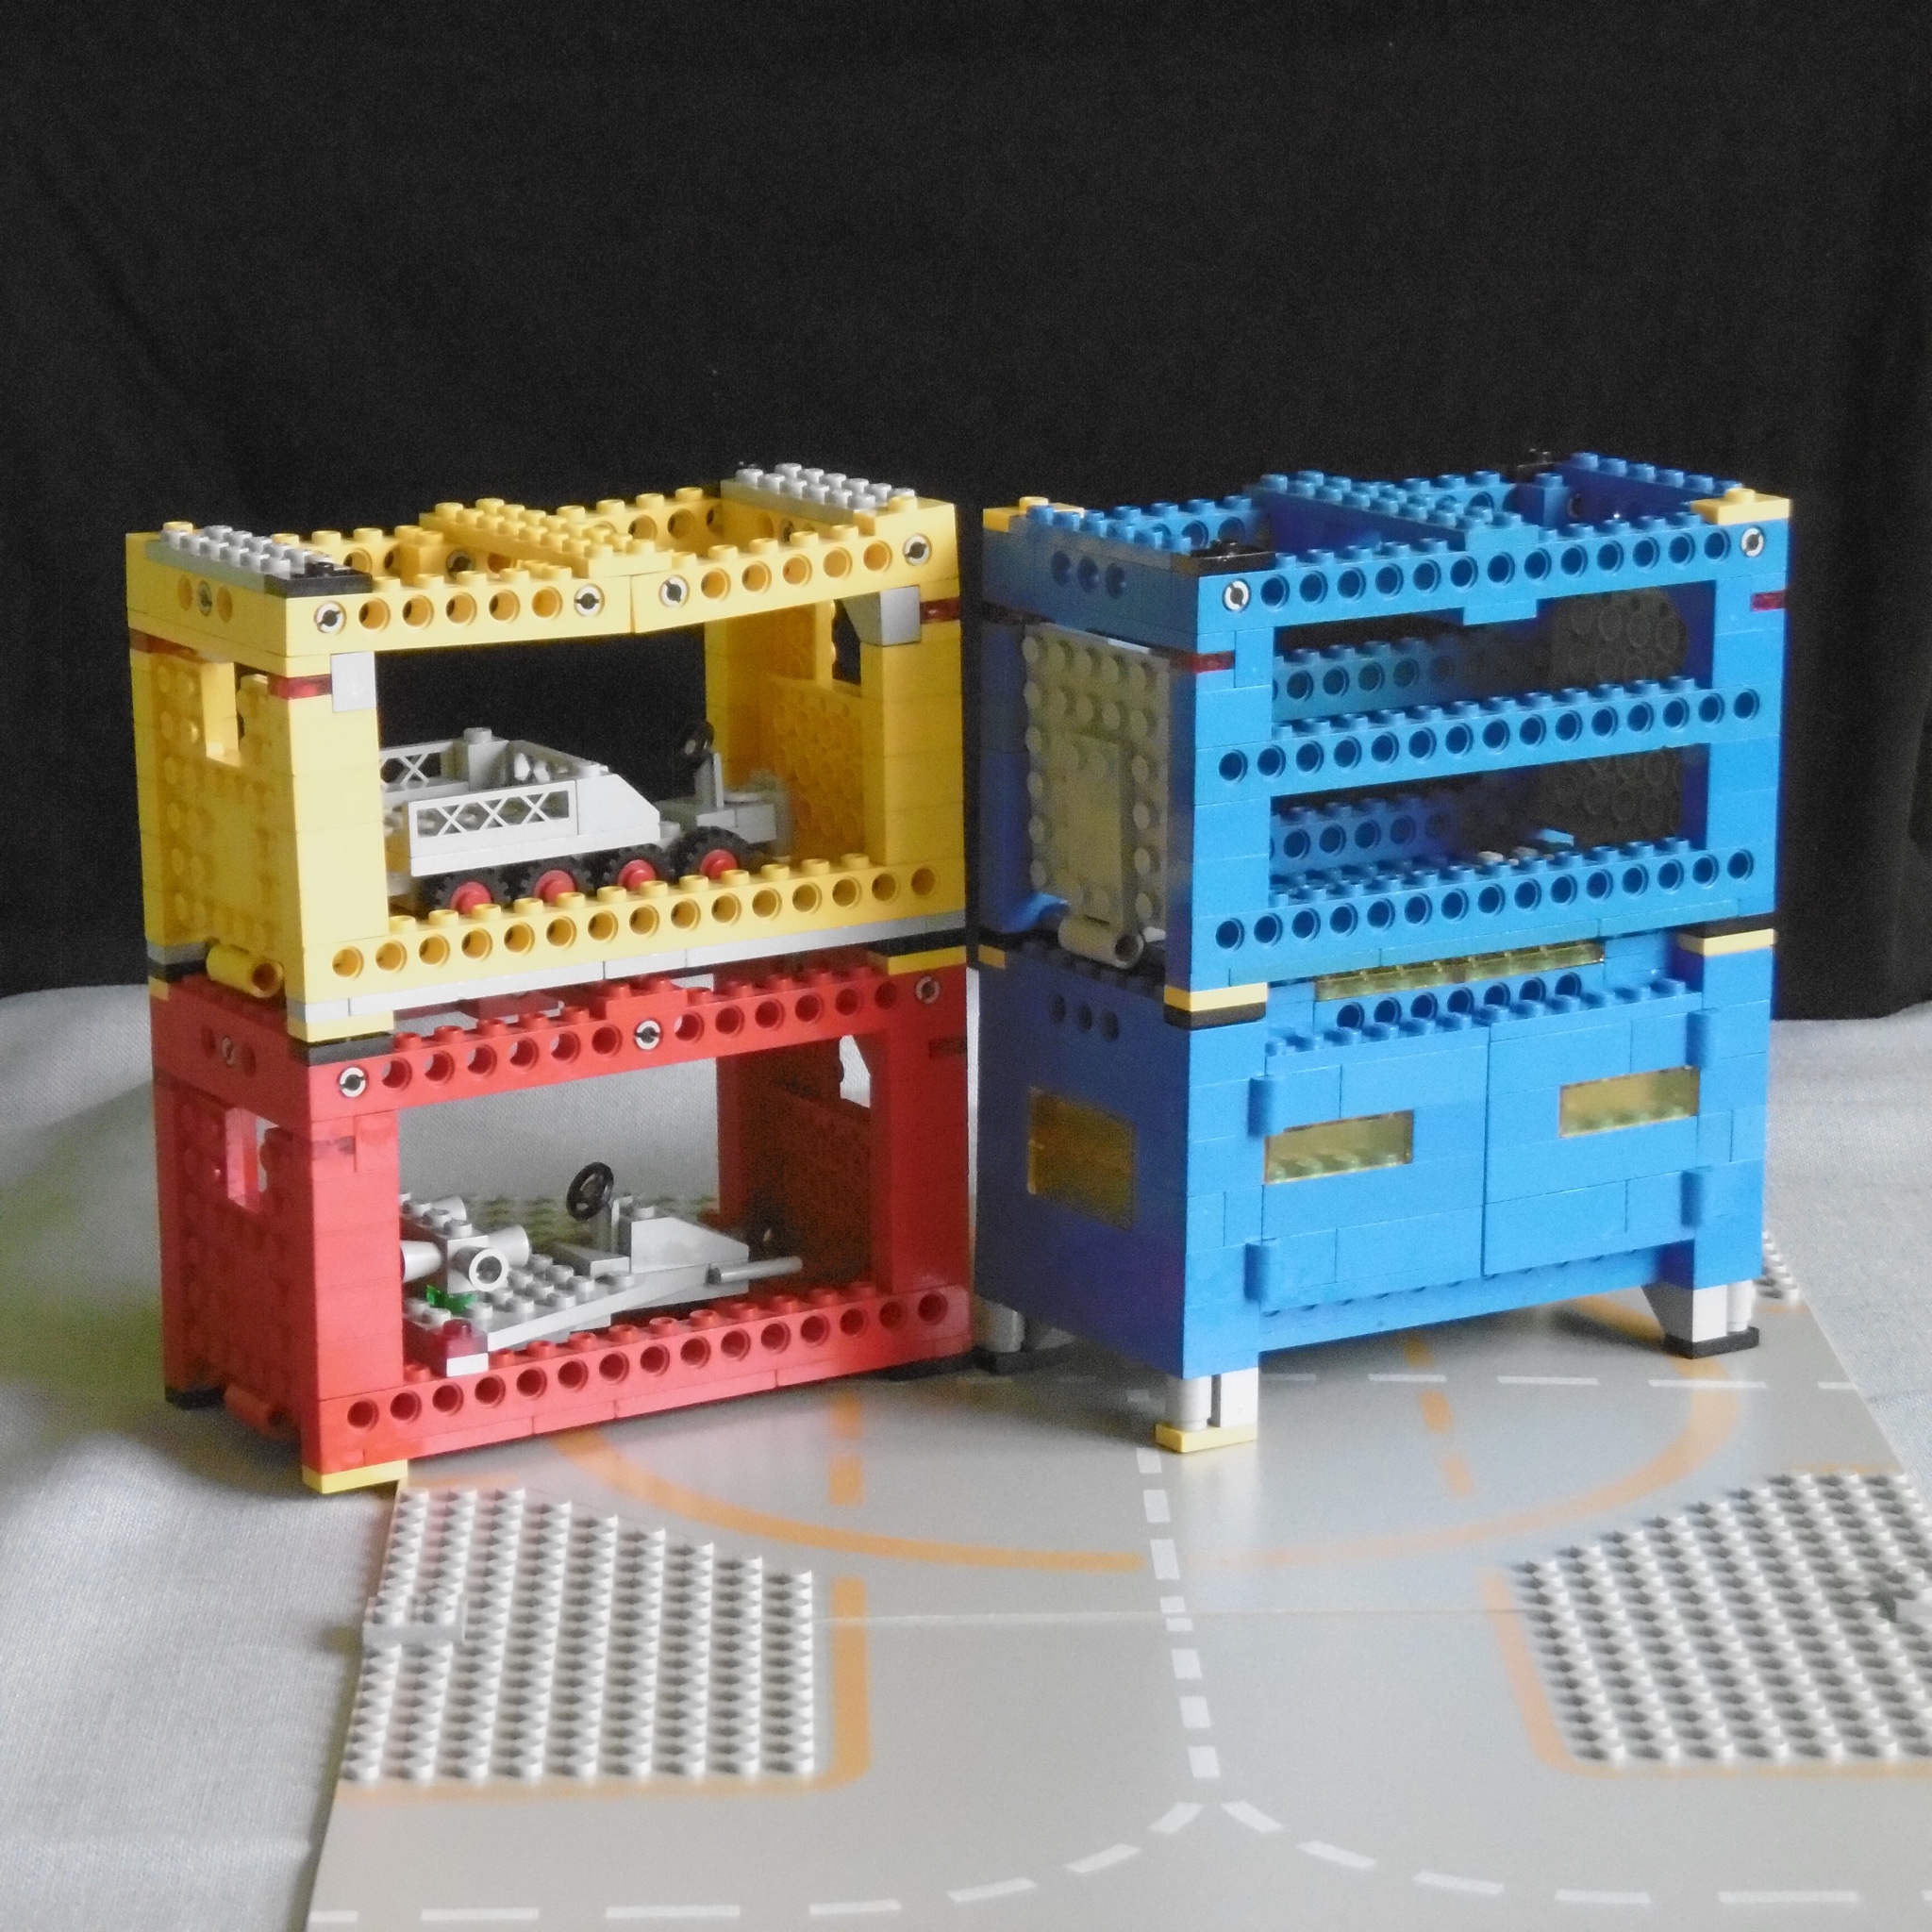
A few years ago I found out that my brother did also “have” one, in a weird kind of way: He had the infamous 1593 “Super Model”, a quite ugly spaceship made with the parts from the Starfleet Voyager and the 6880 Surface Explorer. I didn’t know that before, but back in the early 80s it wasn’t easy to get the building  instructions, either.

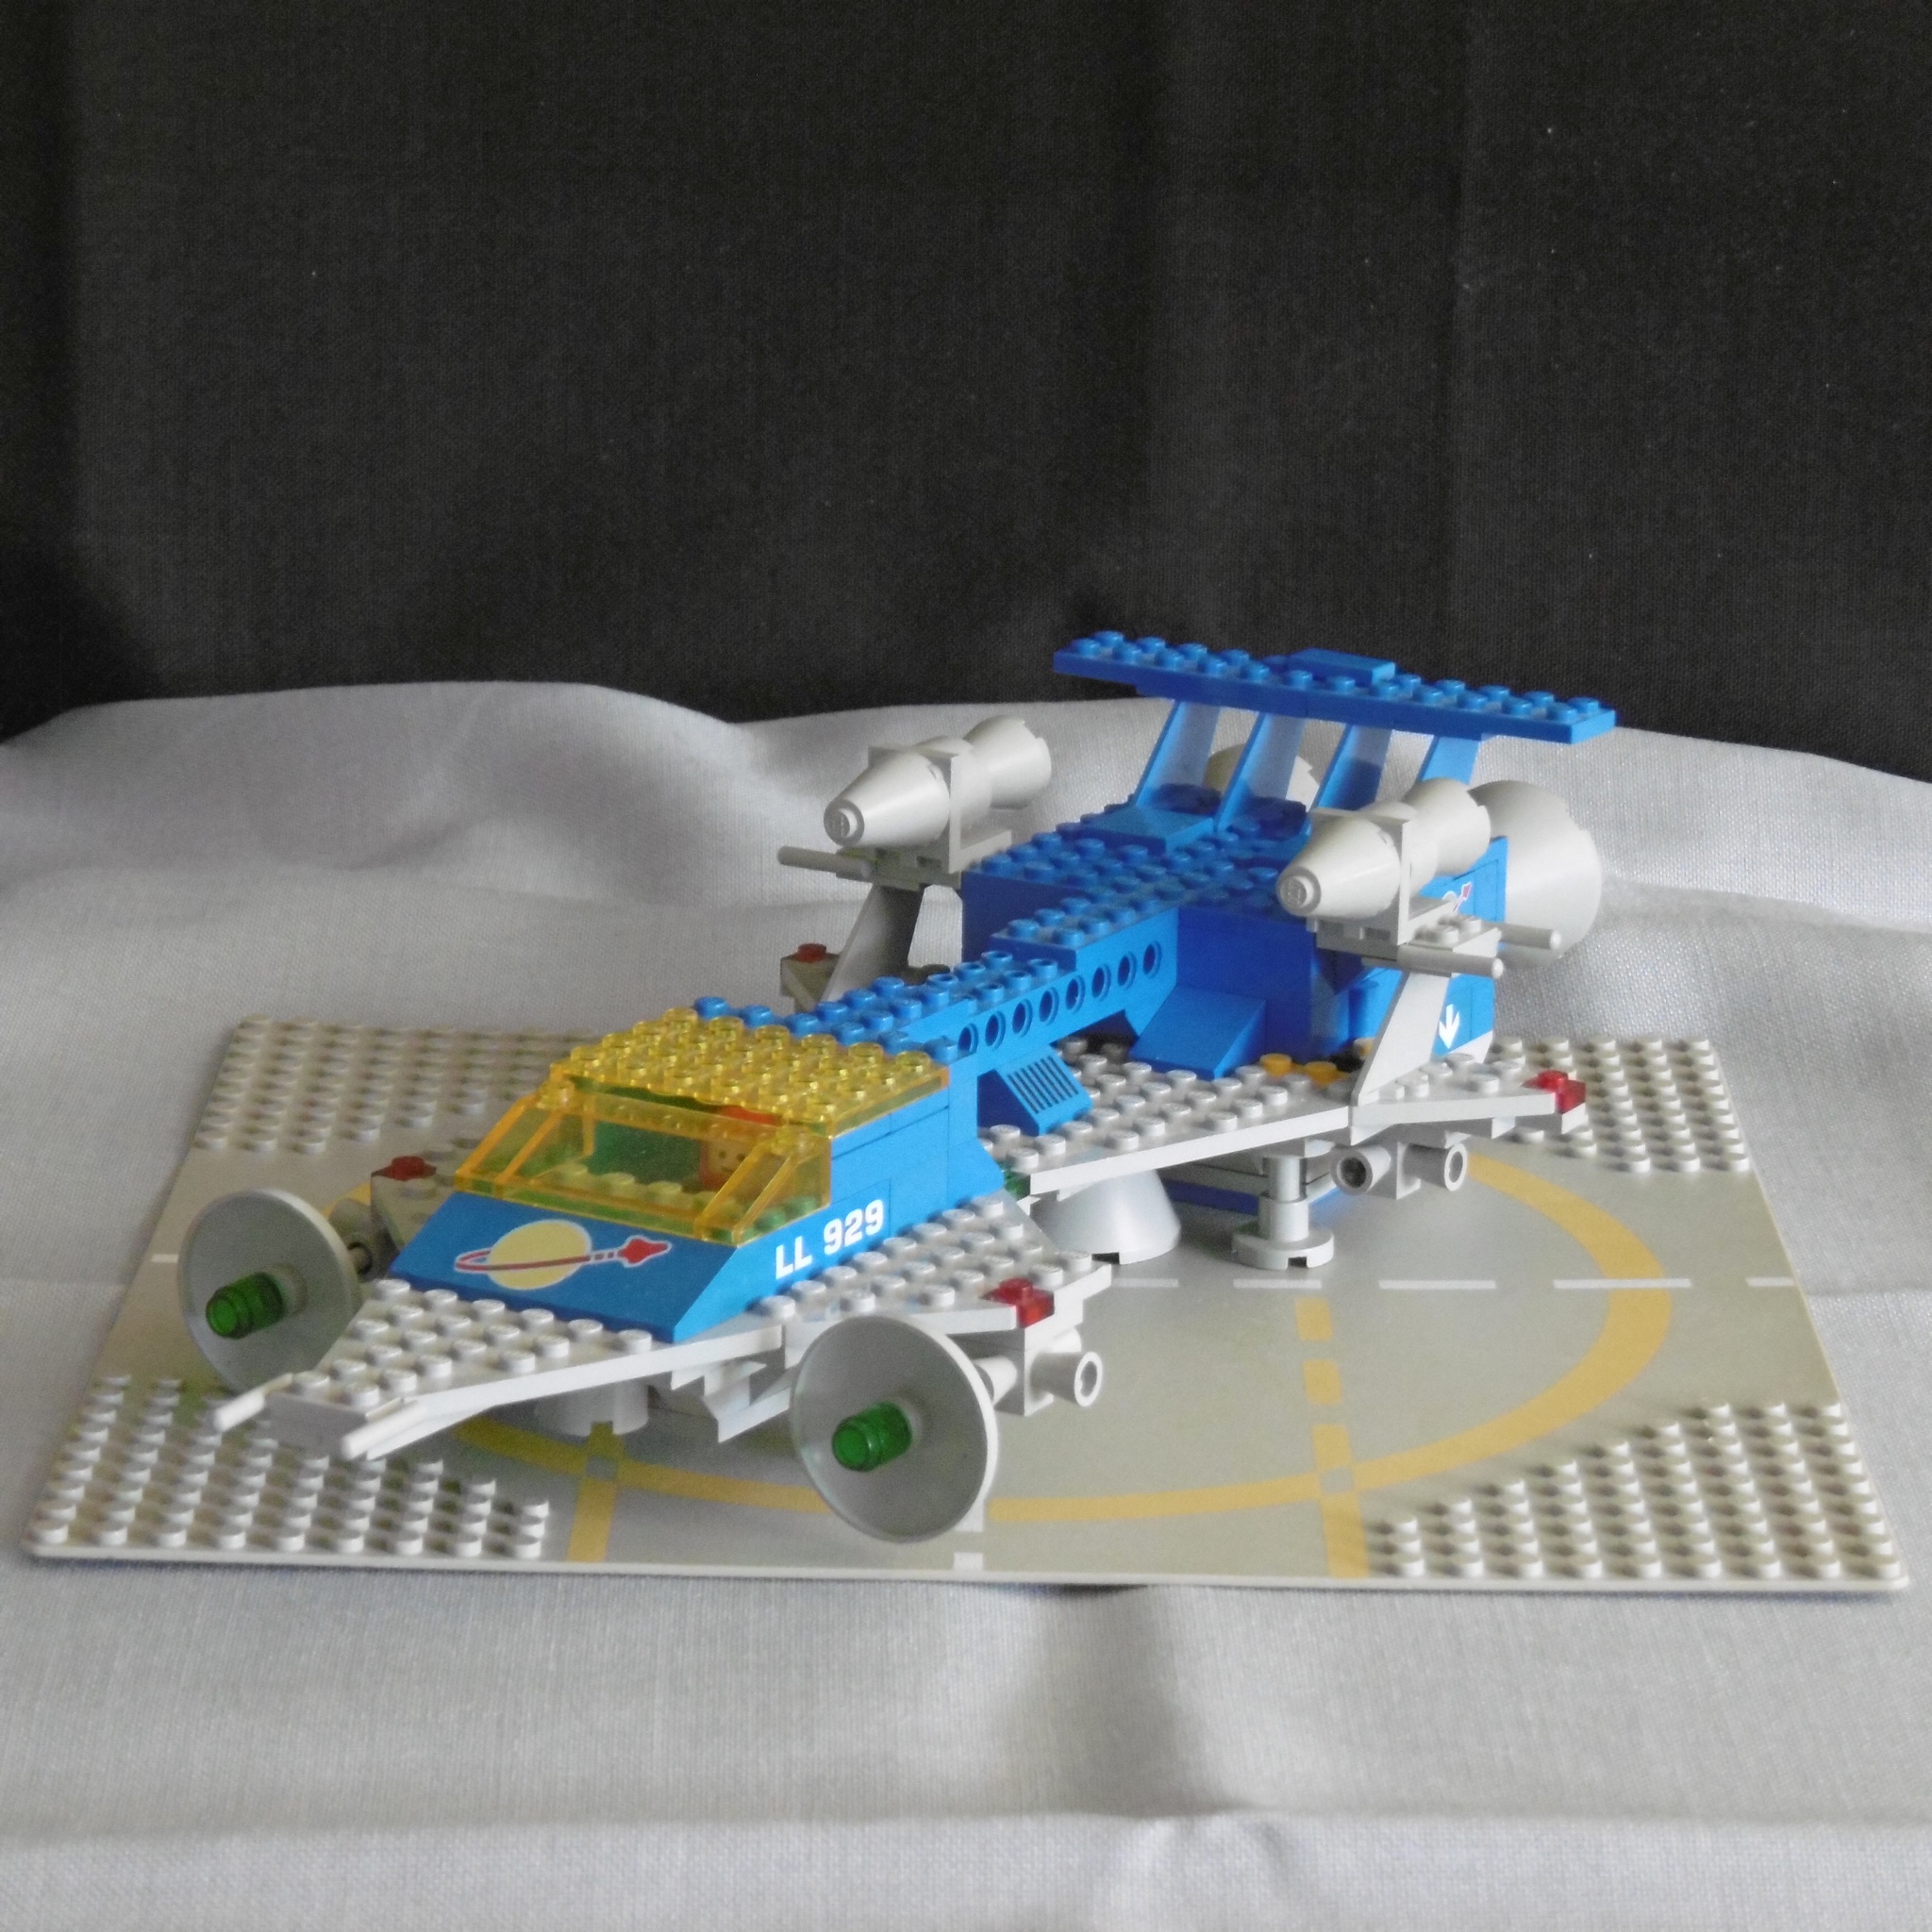
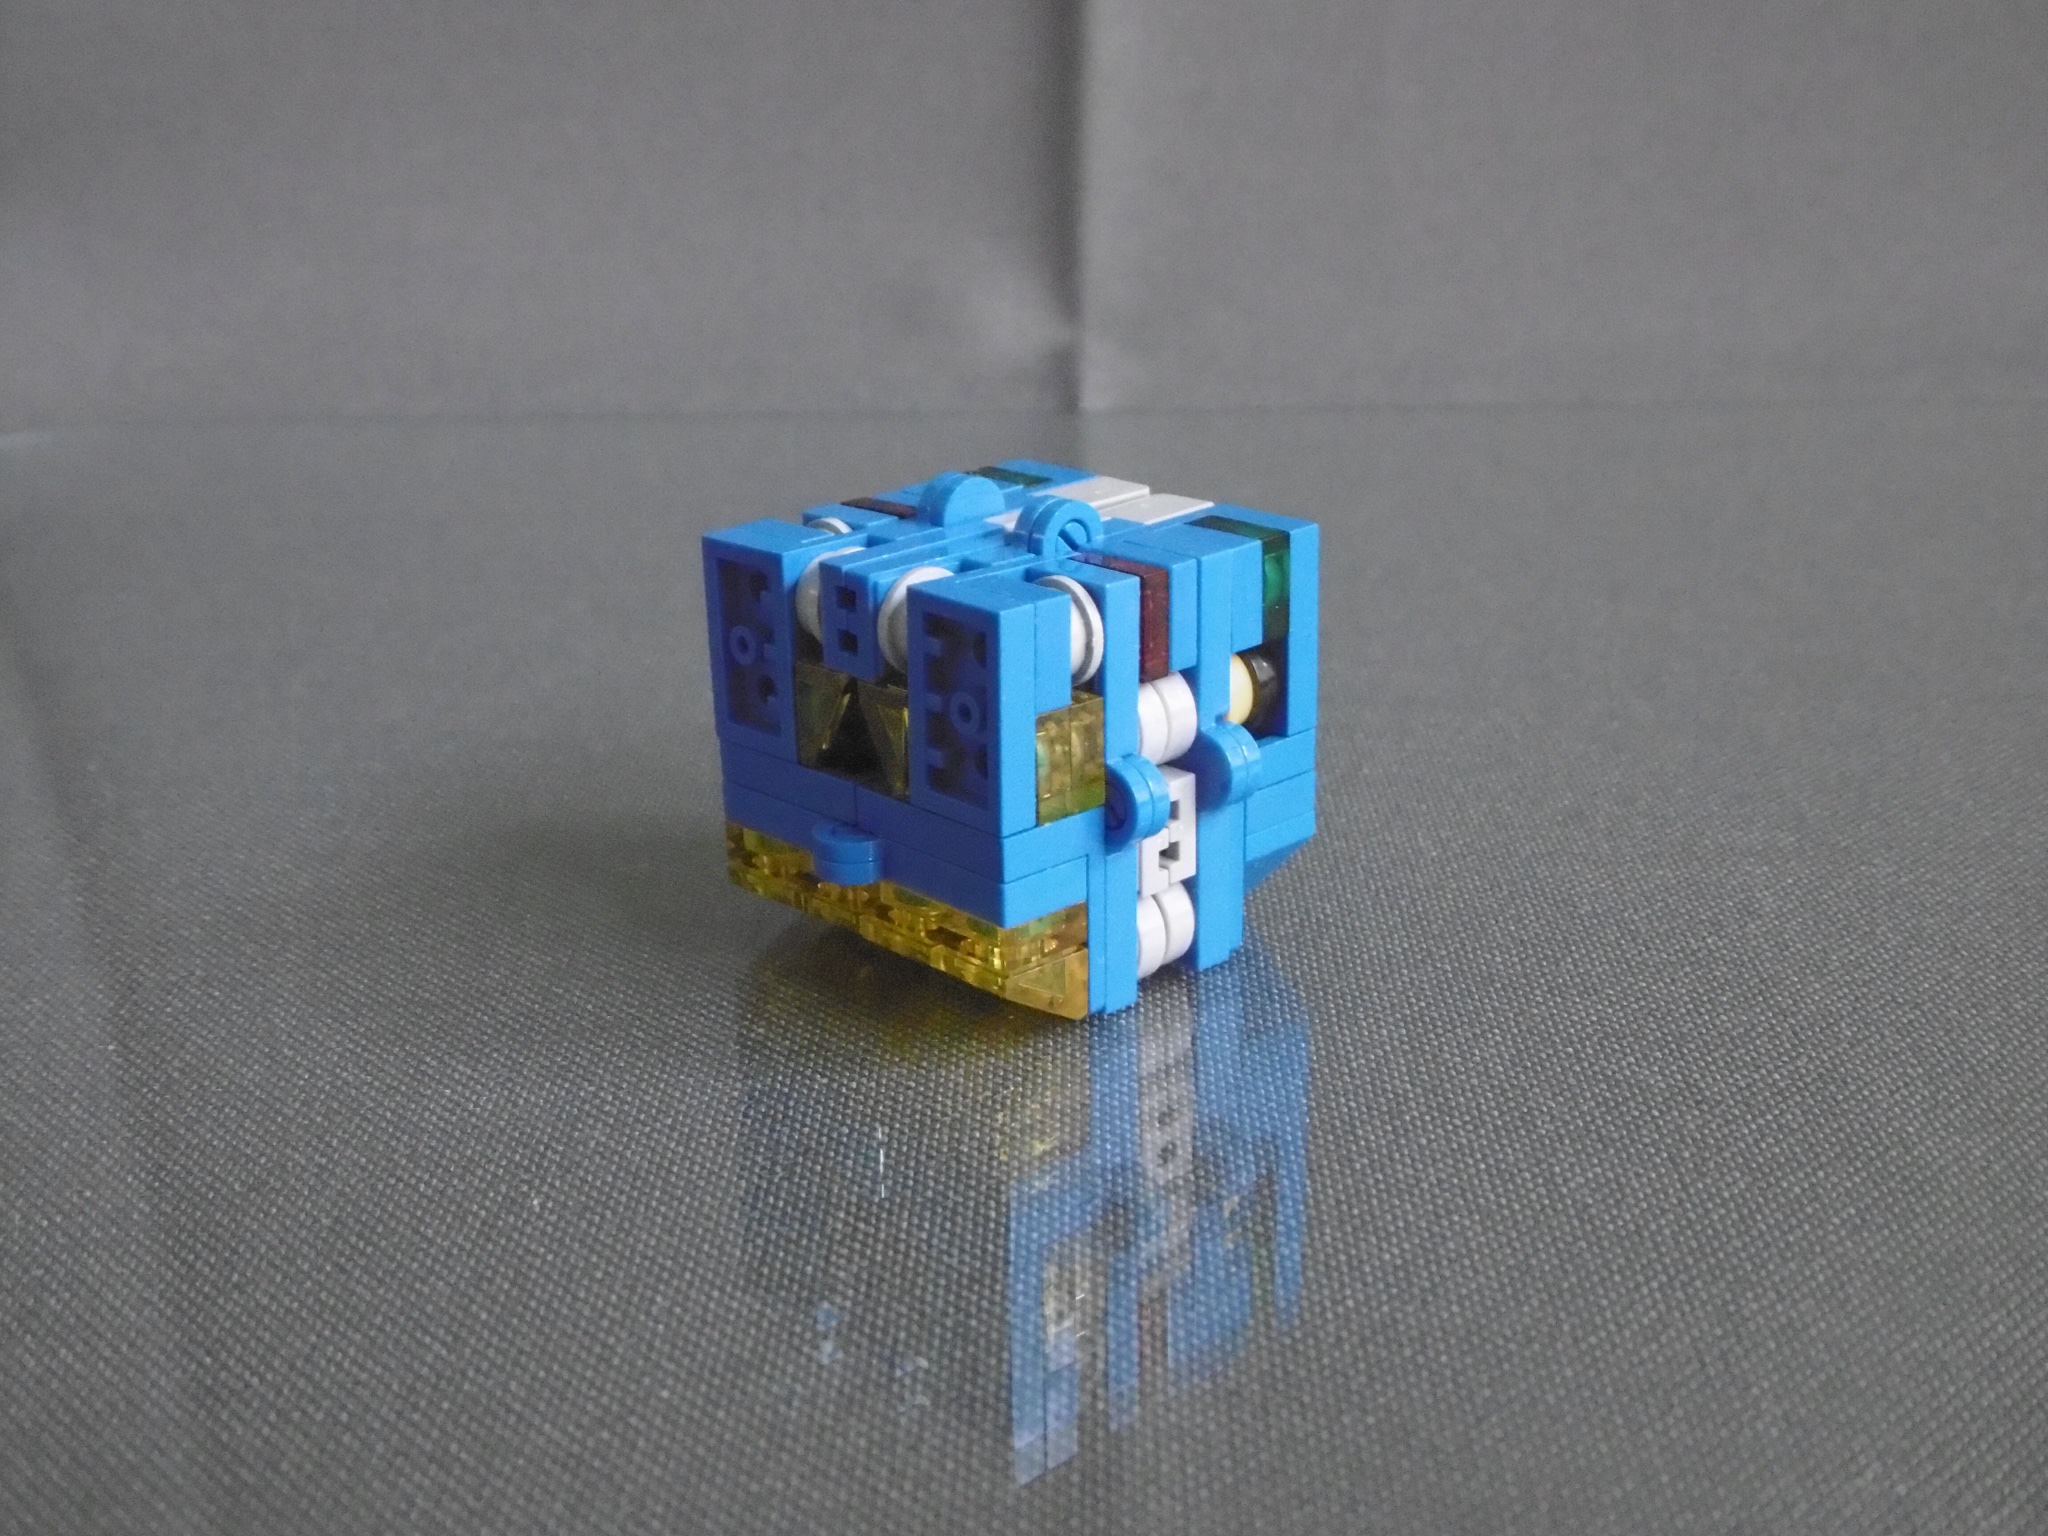
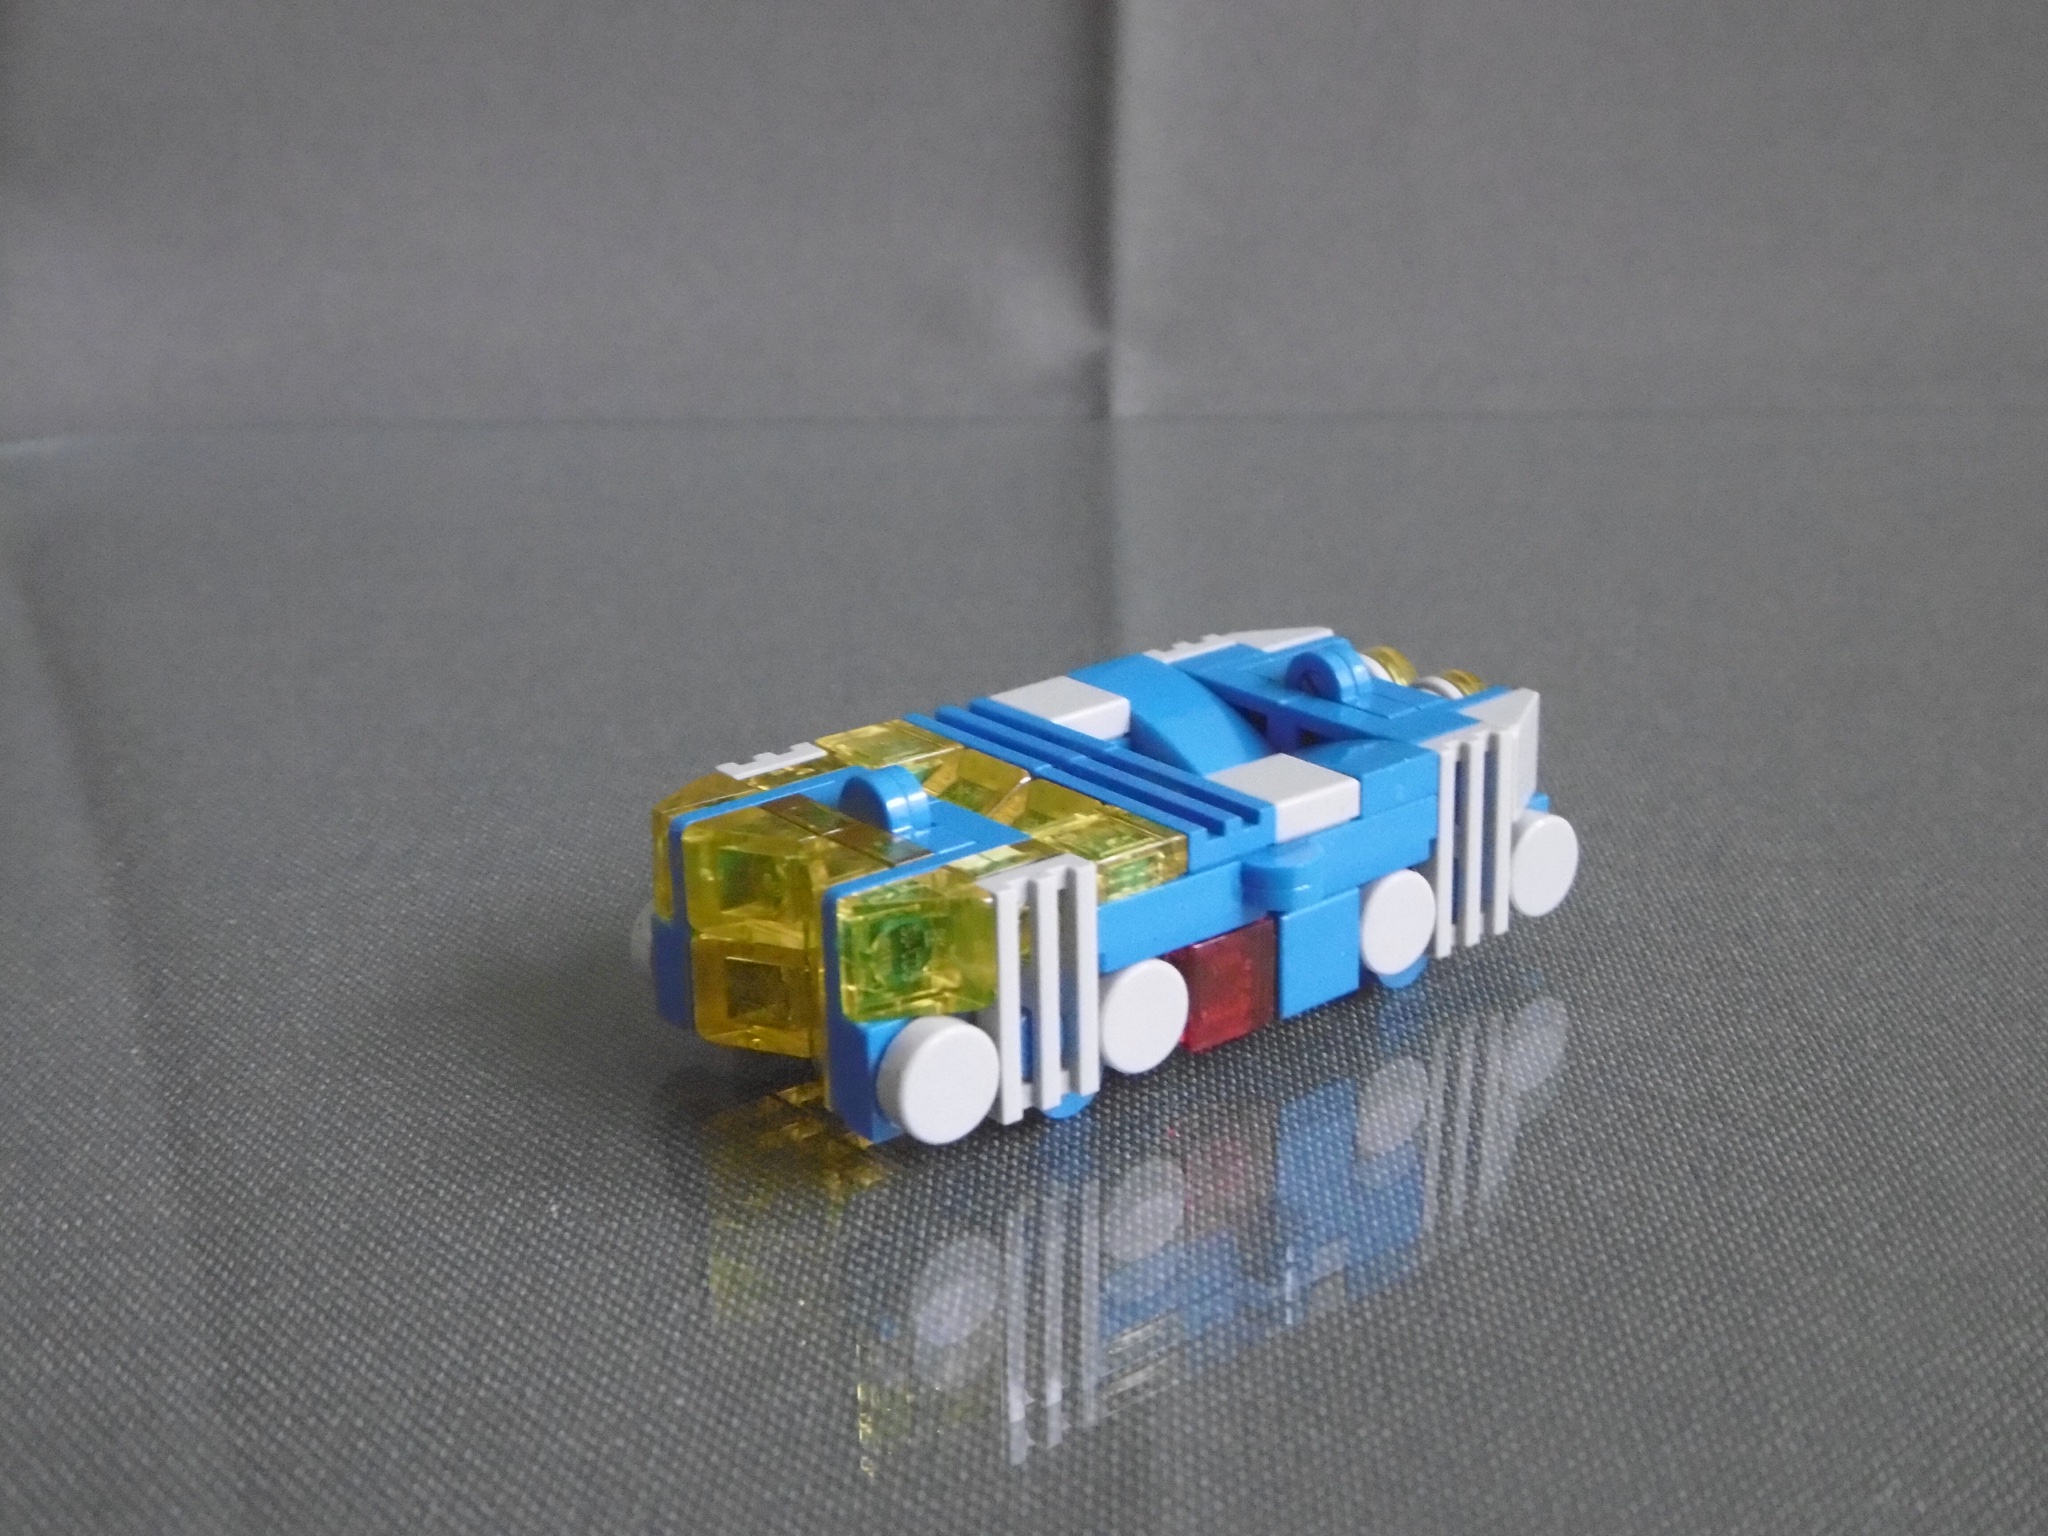
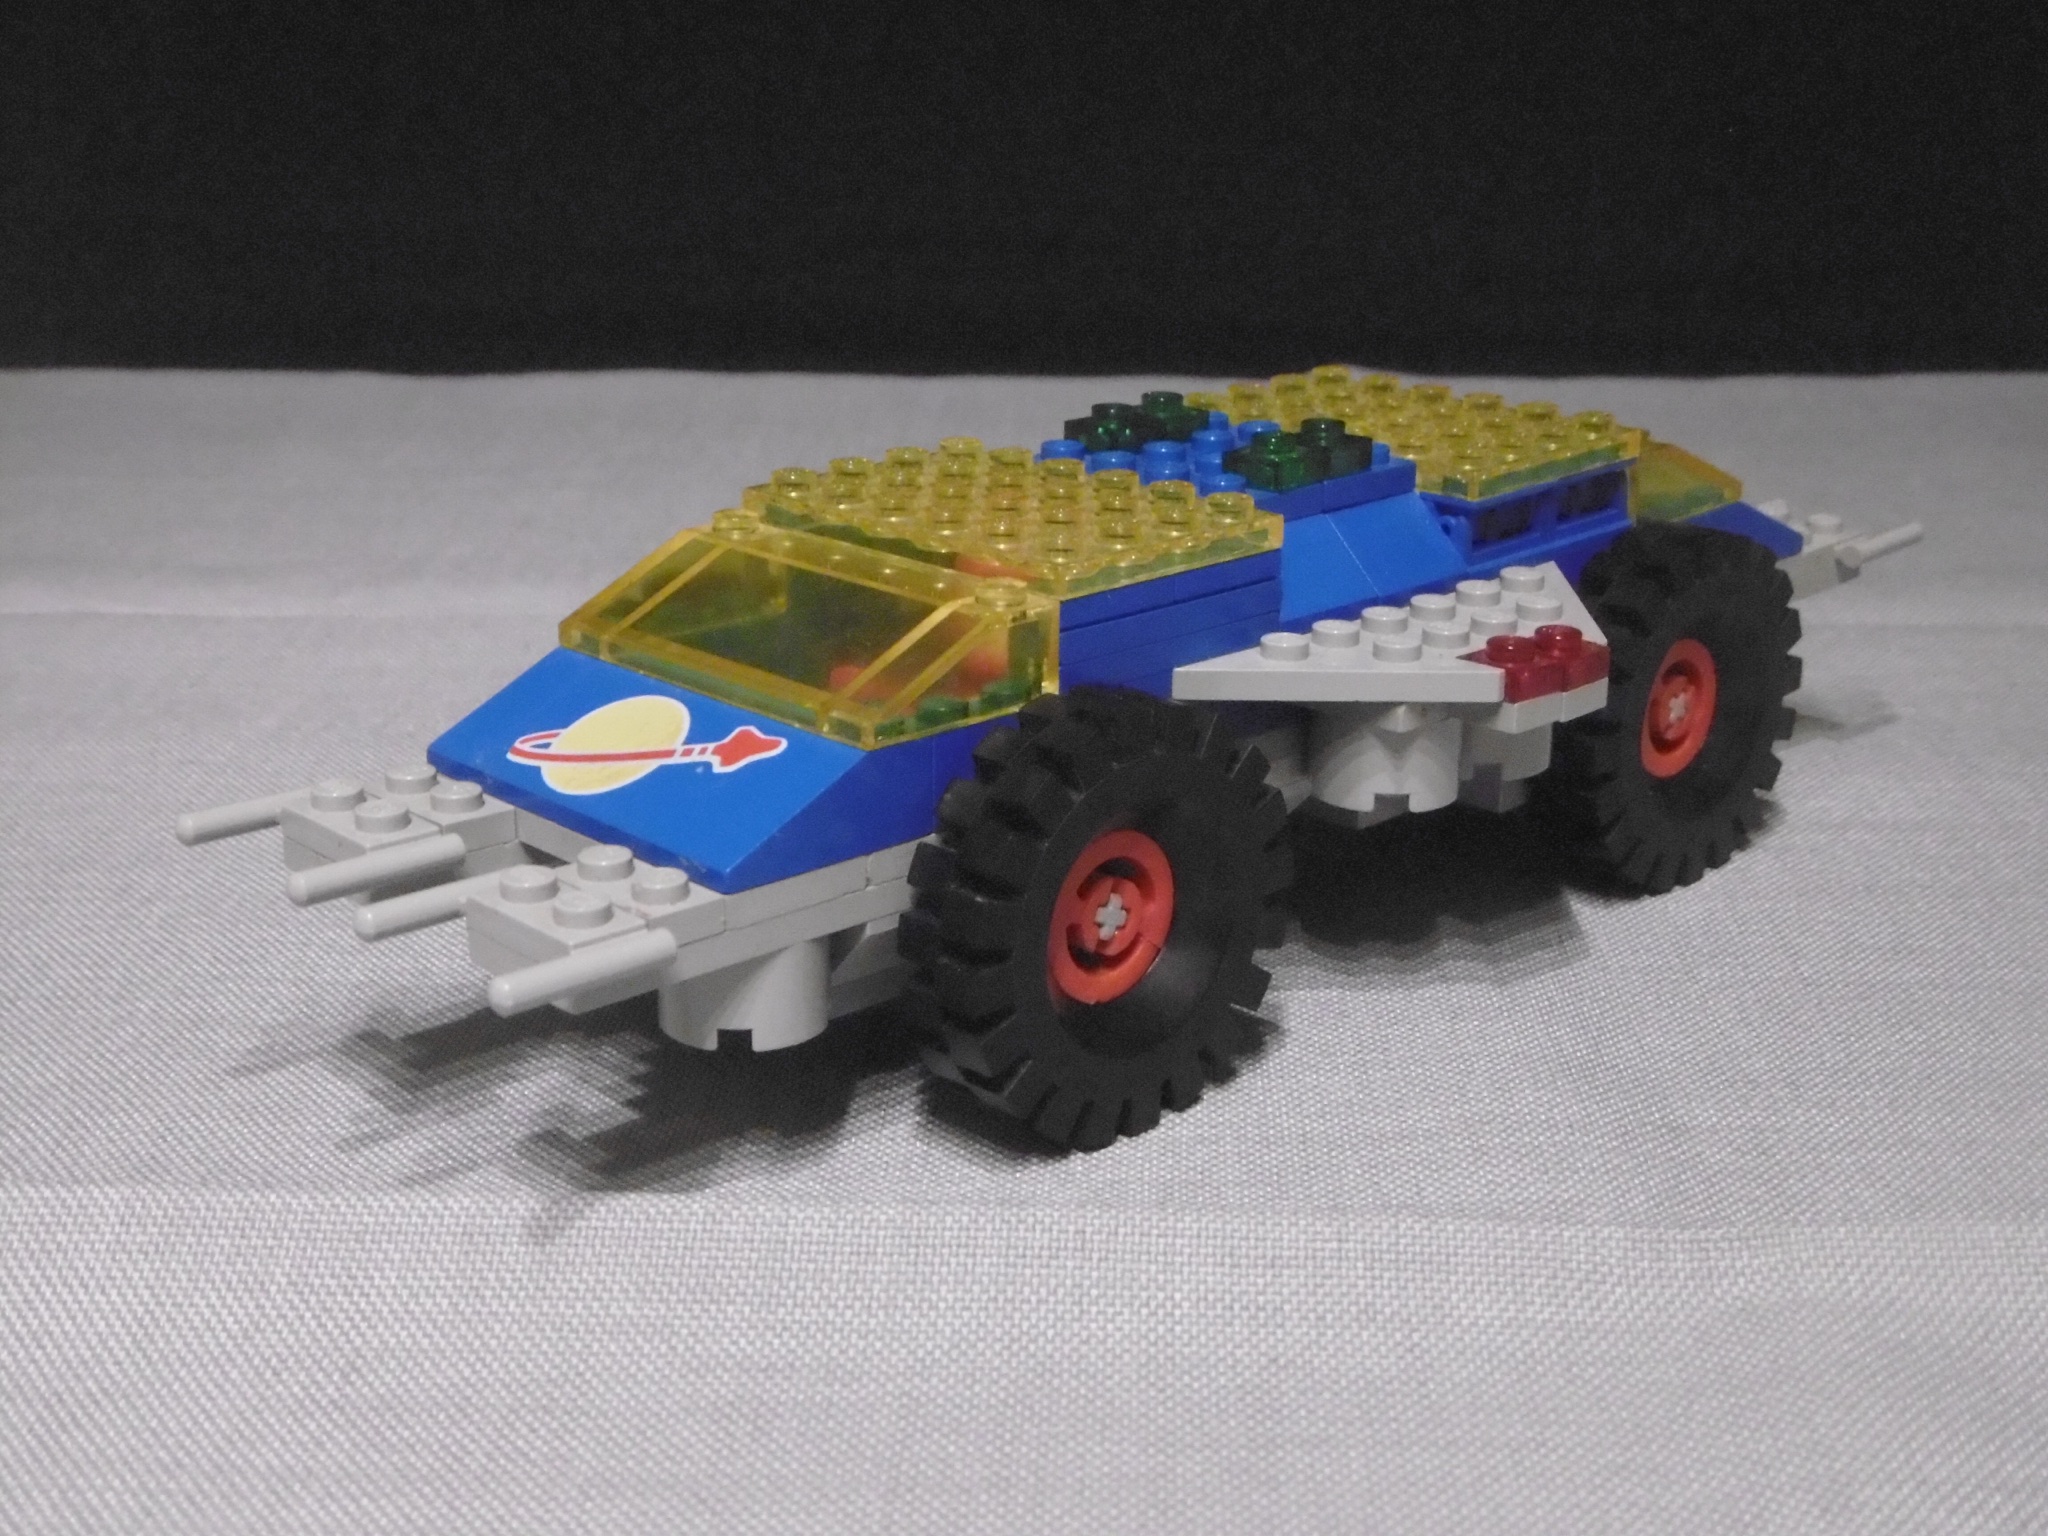
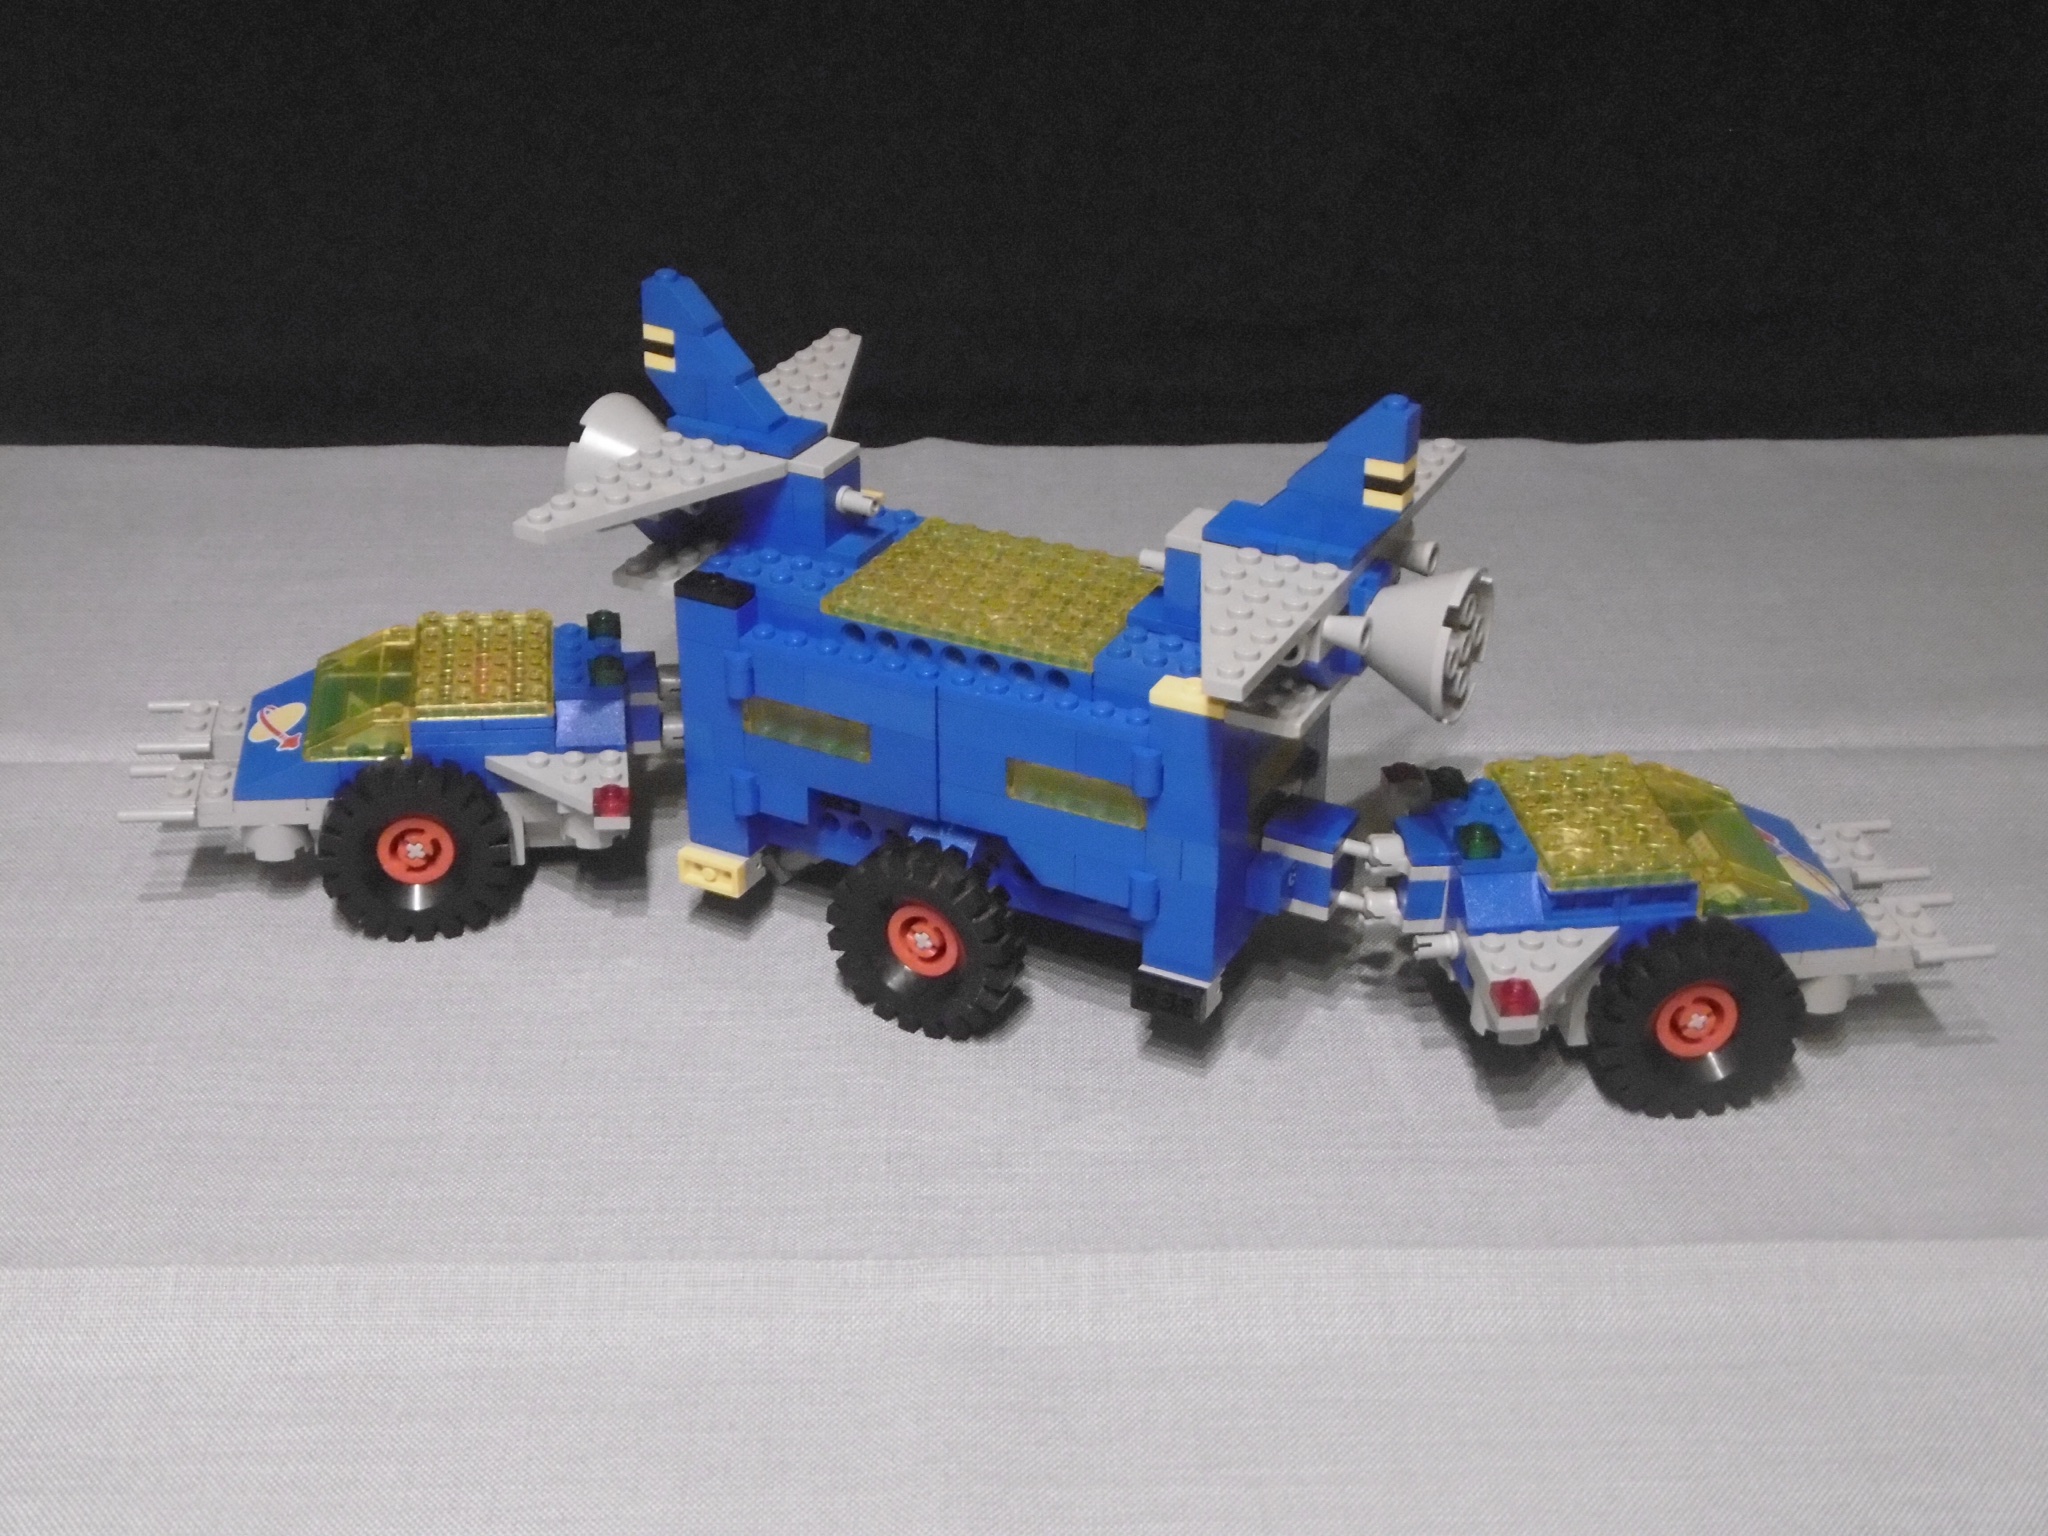
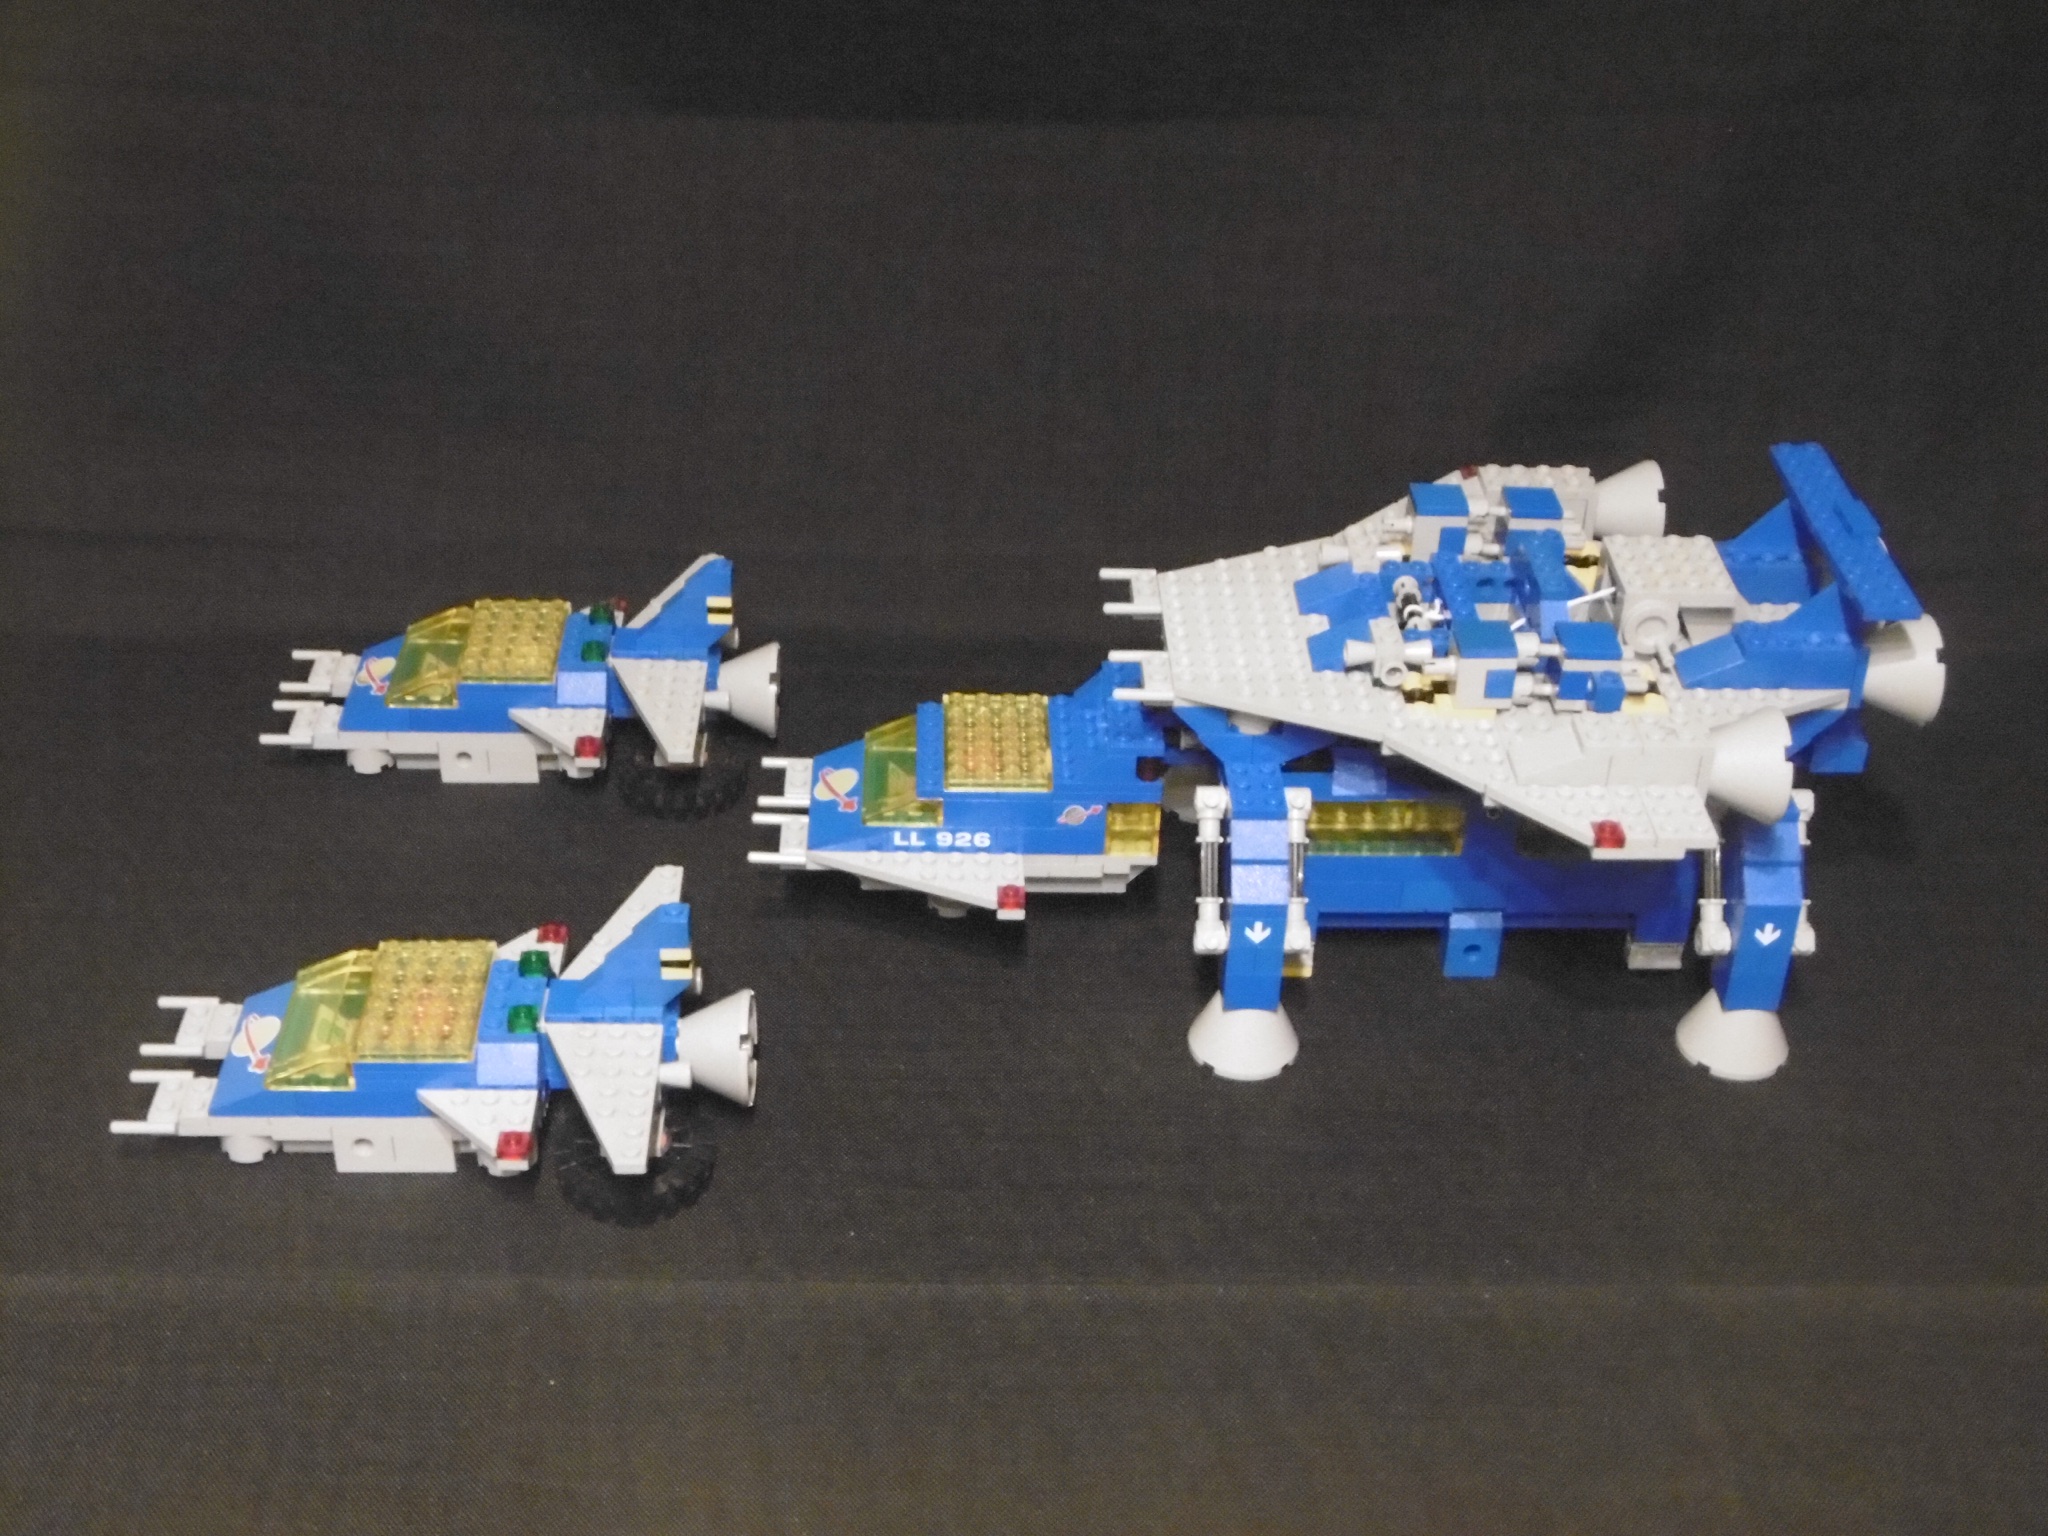
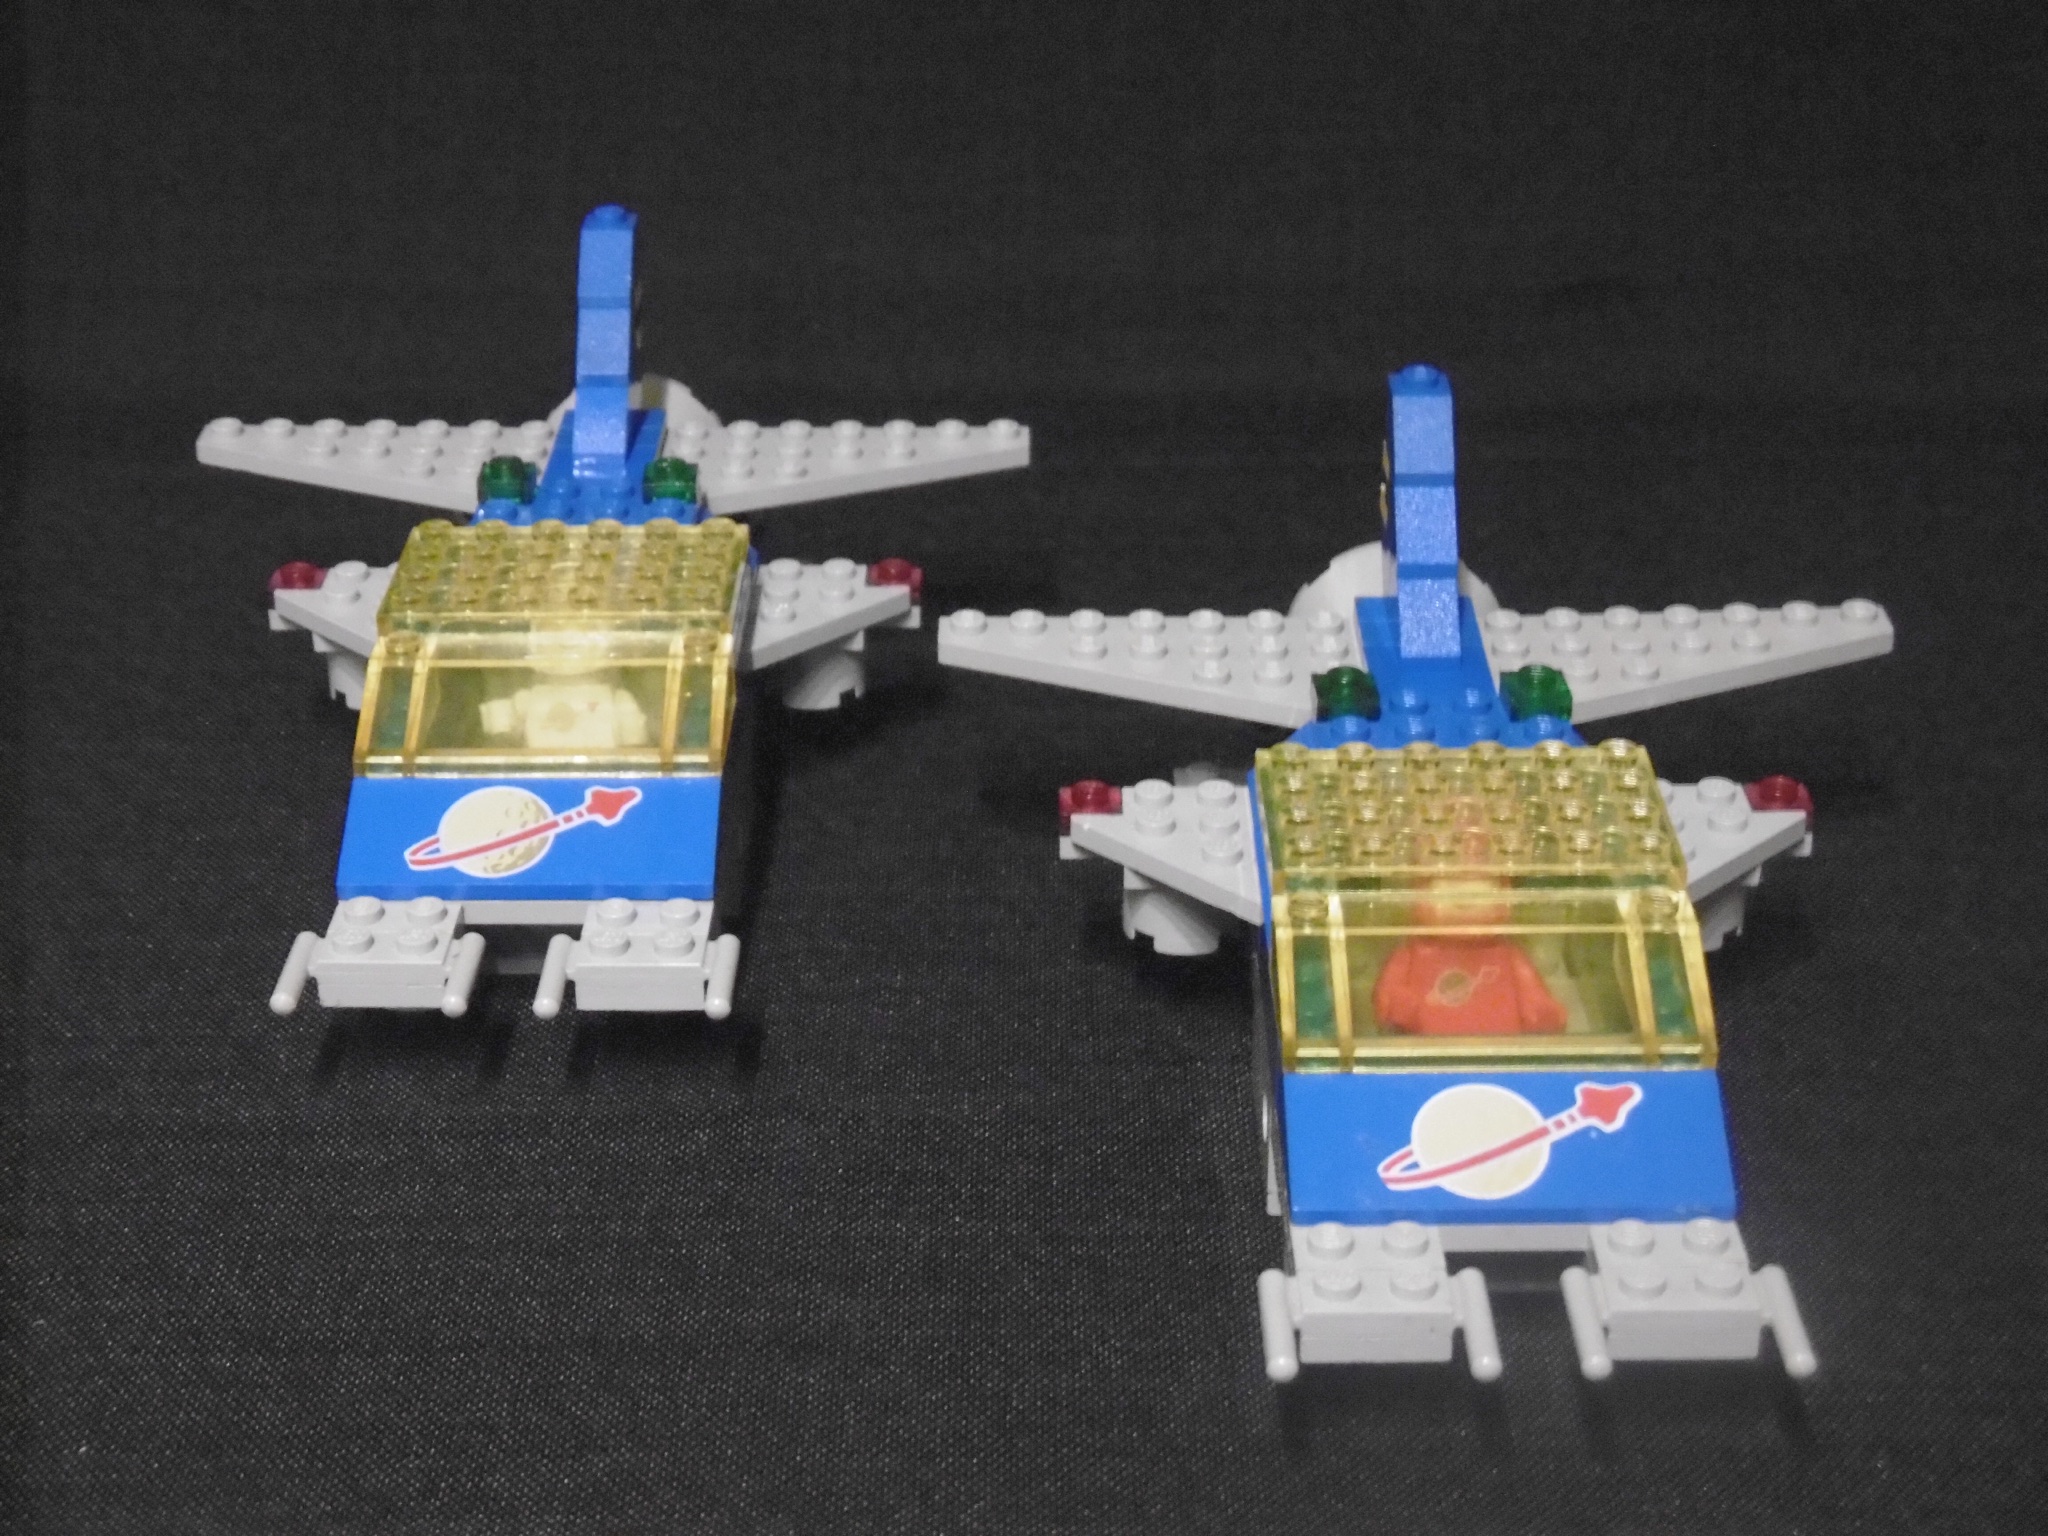
Now I had three ideas: I could search in my CS boxes for the parts (I’ve traded my Playmobil with my brother’s Lego a few years ago, so his parts are now mine). I could also buy a set on Bricklink. And last, but not least, I could build a modified version of the model using the iconic grey/blue/trans-yellow colour scheme from 1979/1980. As you can see, I chose the third idea.

But I didn’t just want to replace the trans-blue parts with trans-yellow ones and the white parts with blue ones. I tried to modify the design in a way that the Starfleet Voyager looked like a member of the original 1979 space fleet. For that I also eliminated all the parts that were new in 1981 and replaced them with parts available in 1979.

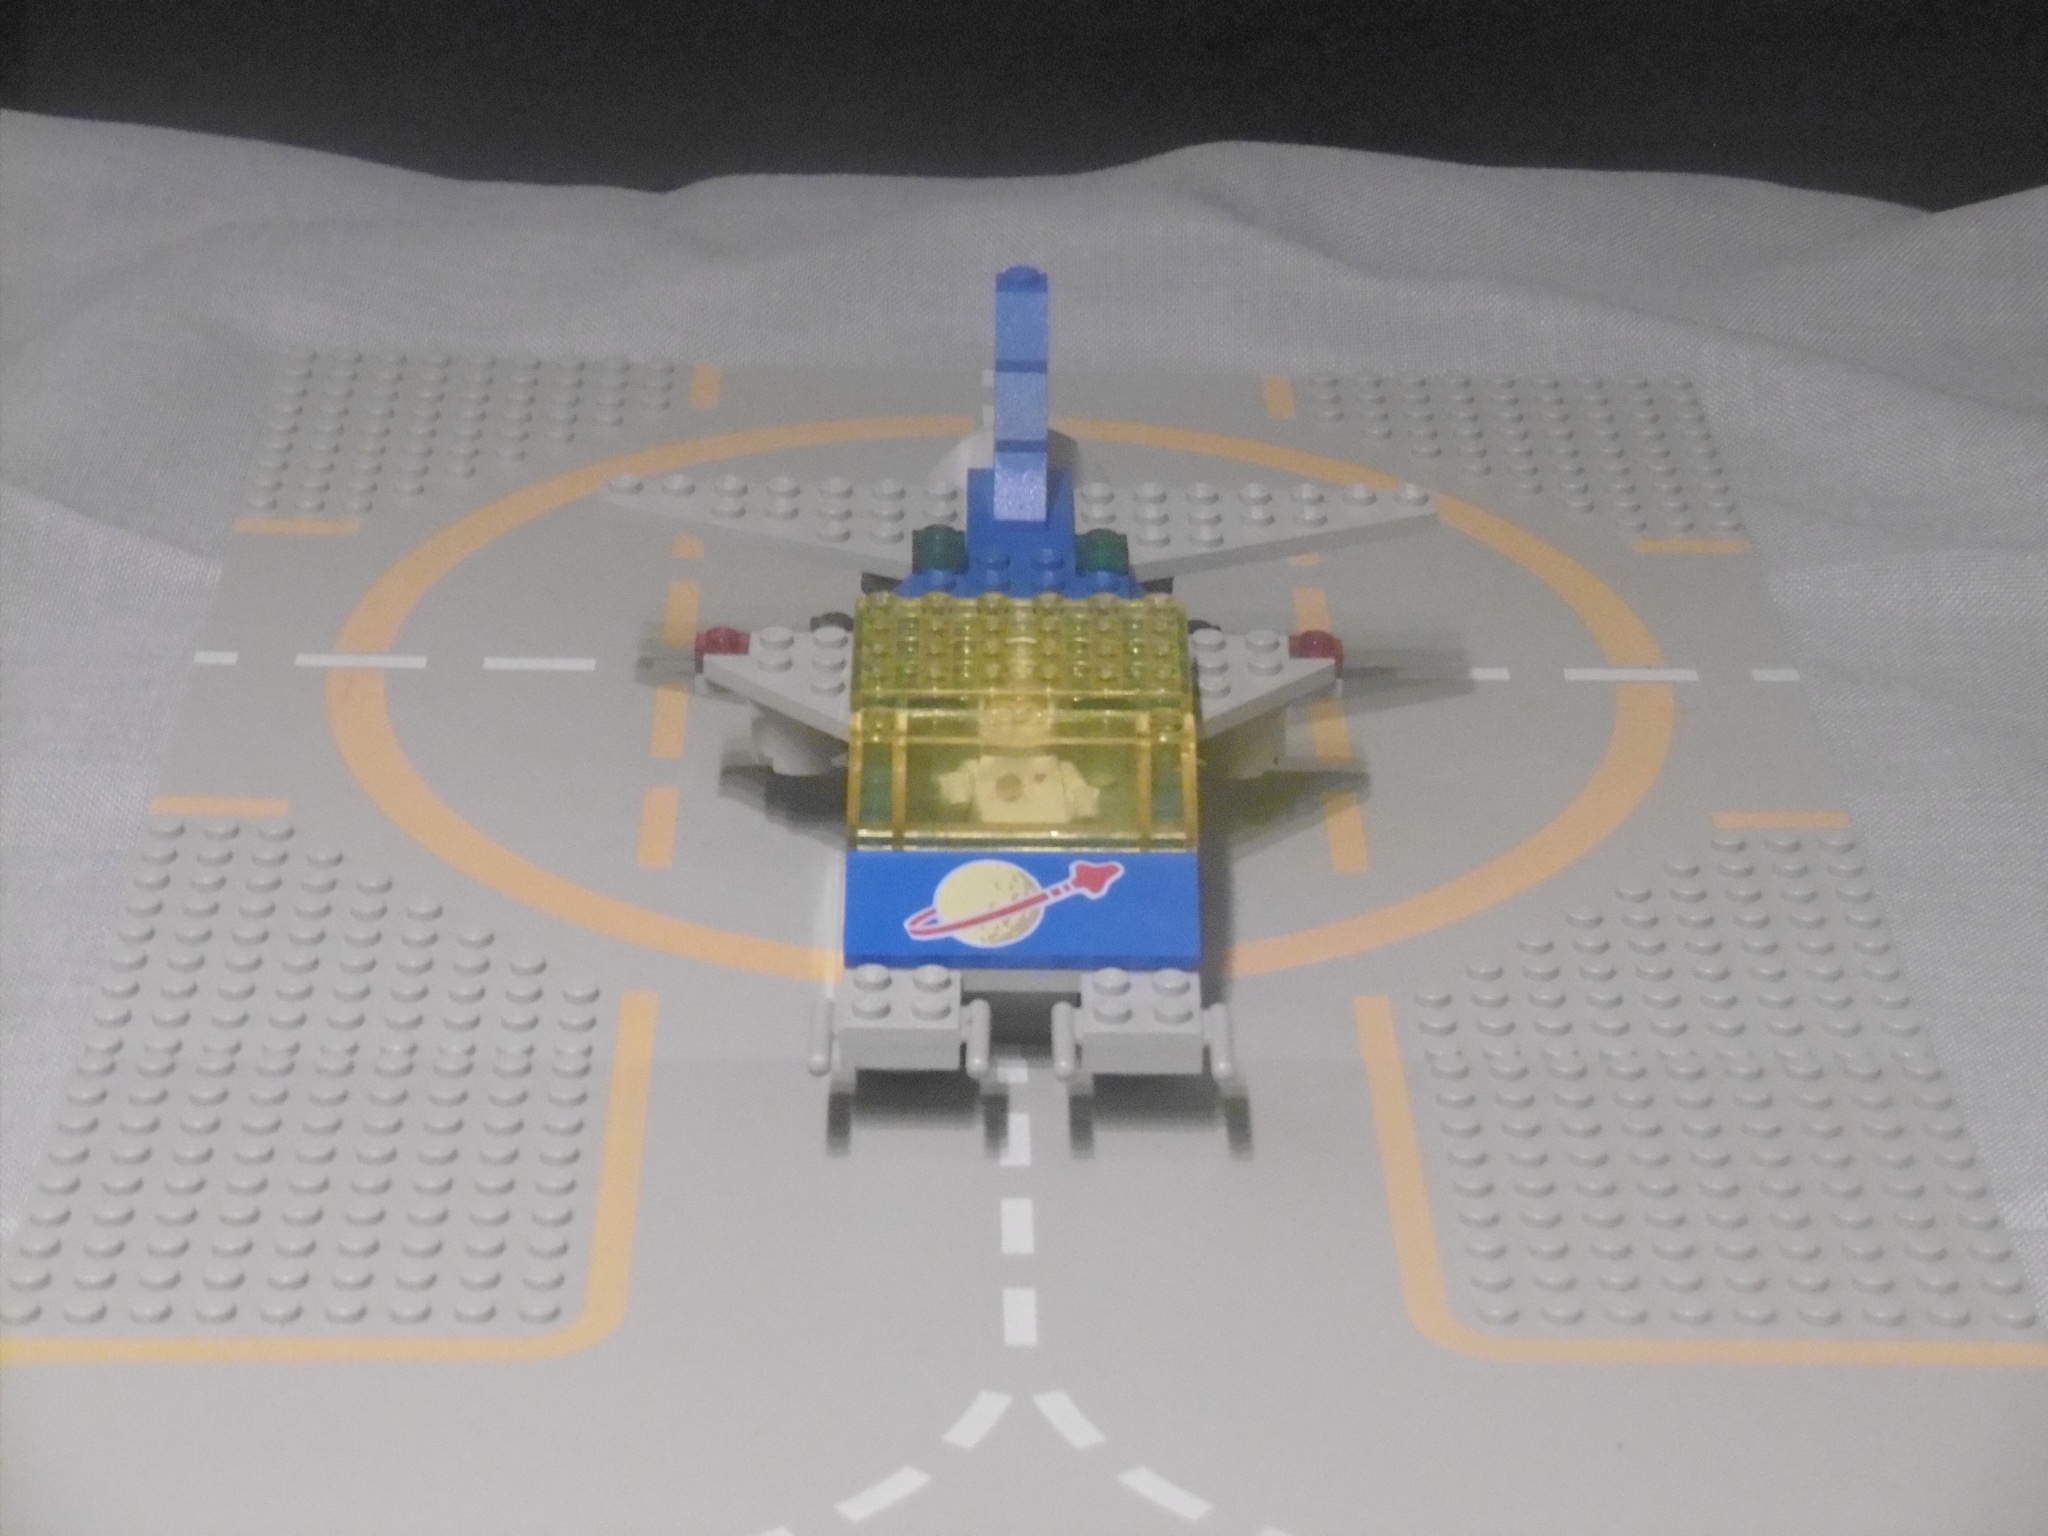
Finally I bought a set of custom printed bricks with “LL 929” Lettering. In fact, the original Starfleet Voyager has the set number 6929. So after the change to 4-digit model numbers and all Space models starting with a six, it is the legitimate “LL 929”.

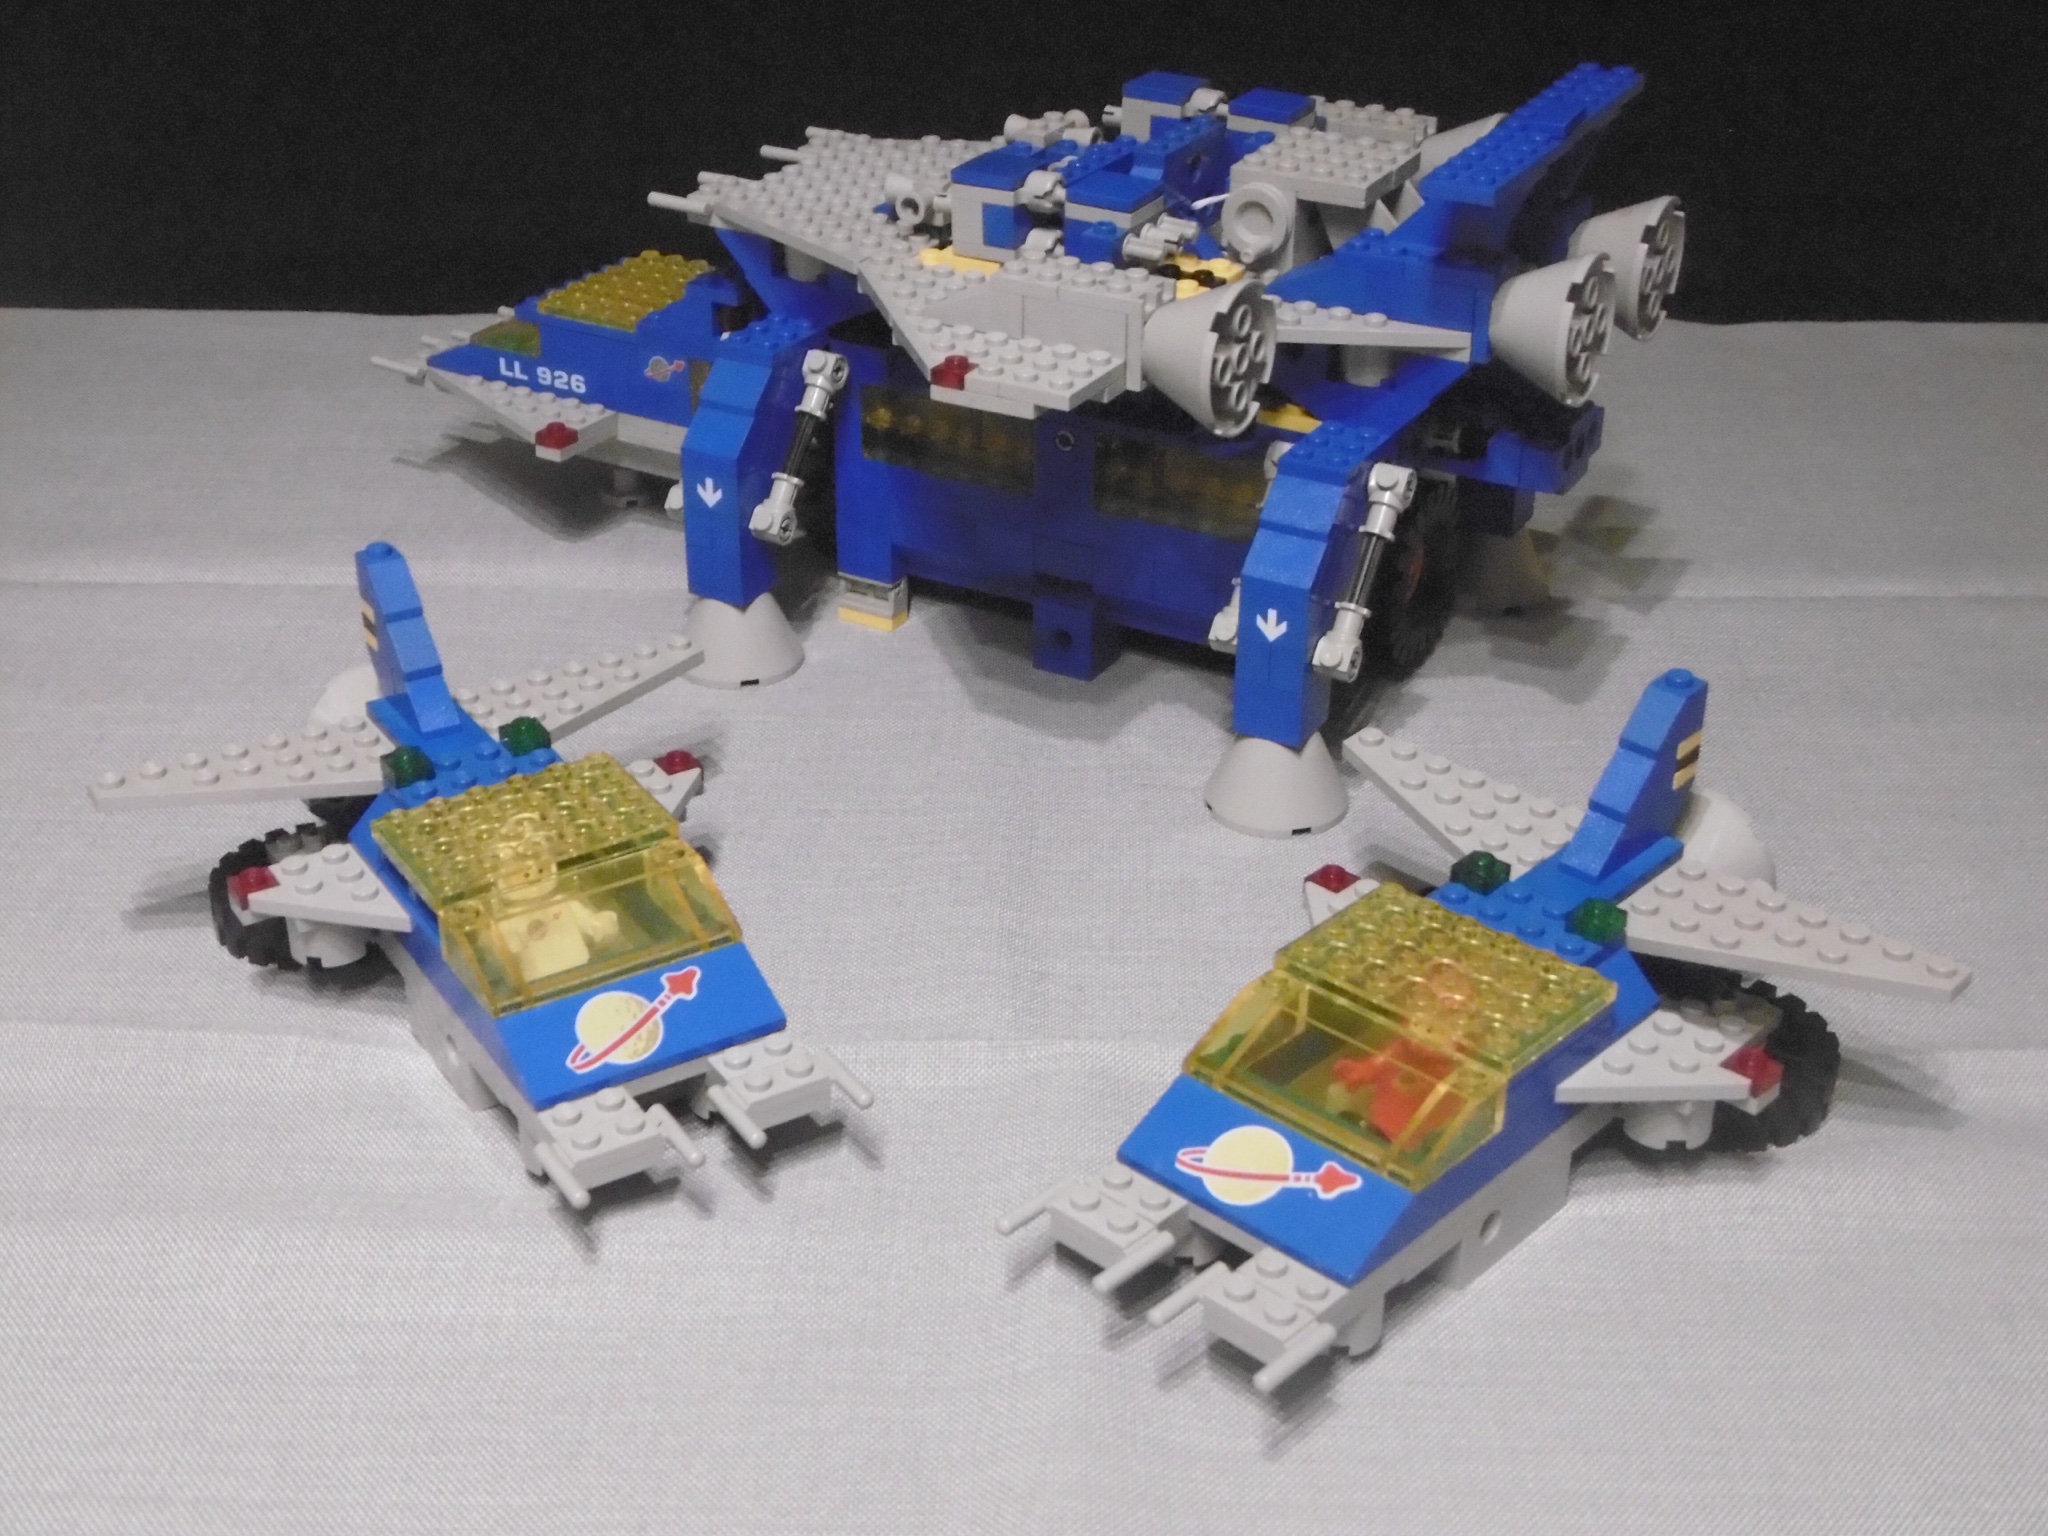
And now it’s time for some photos:

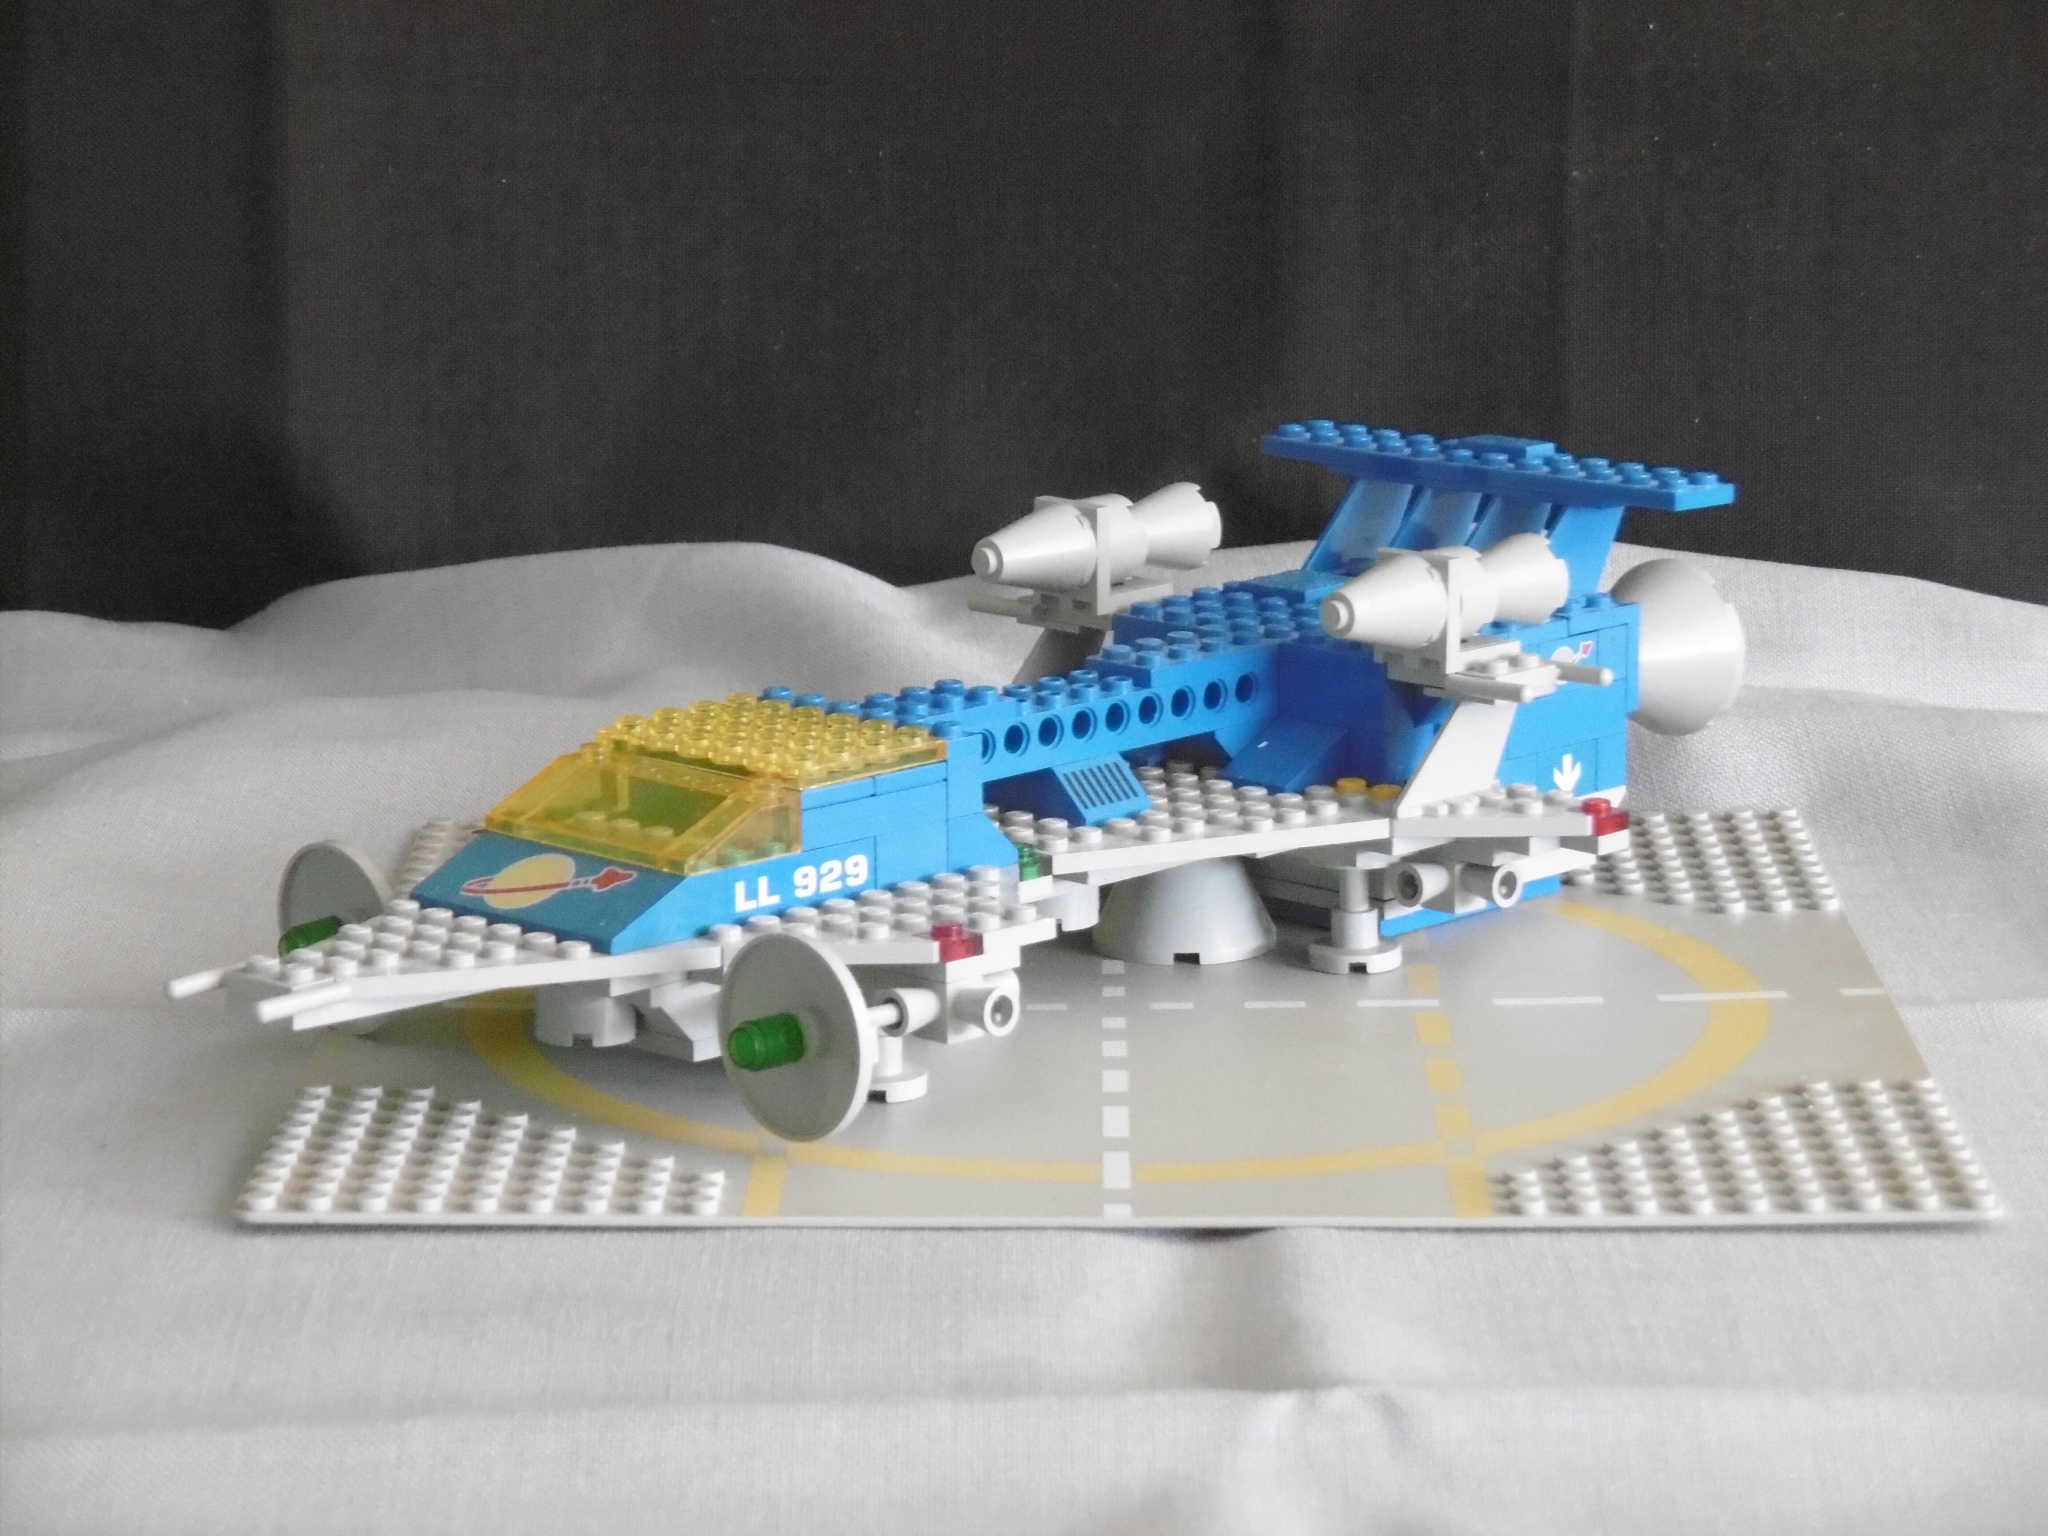
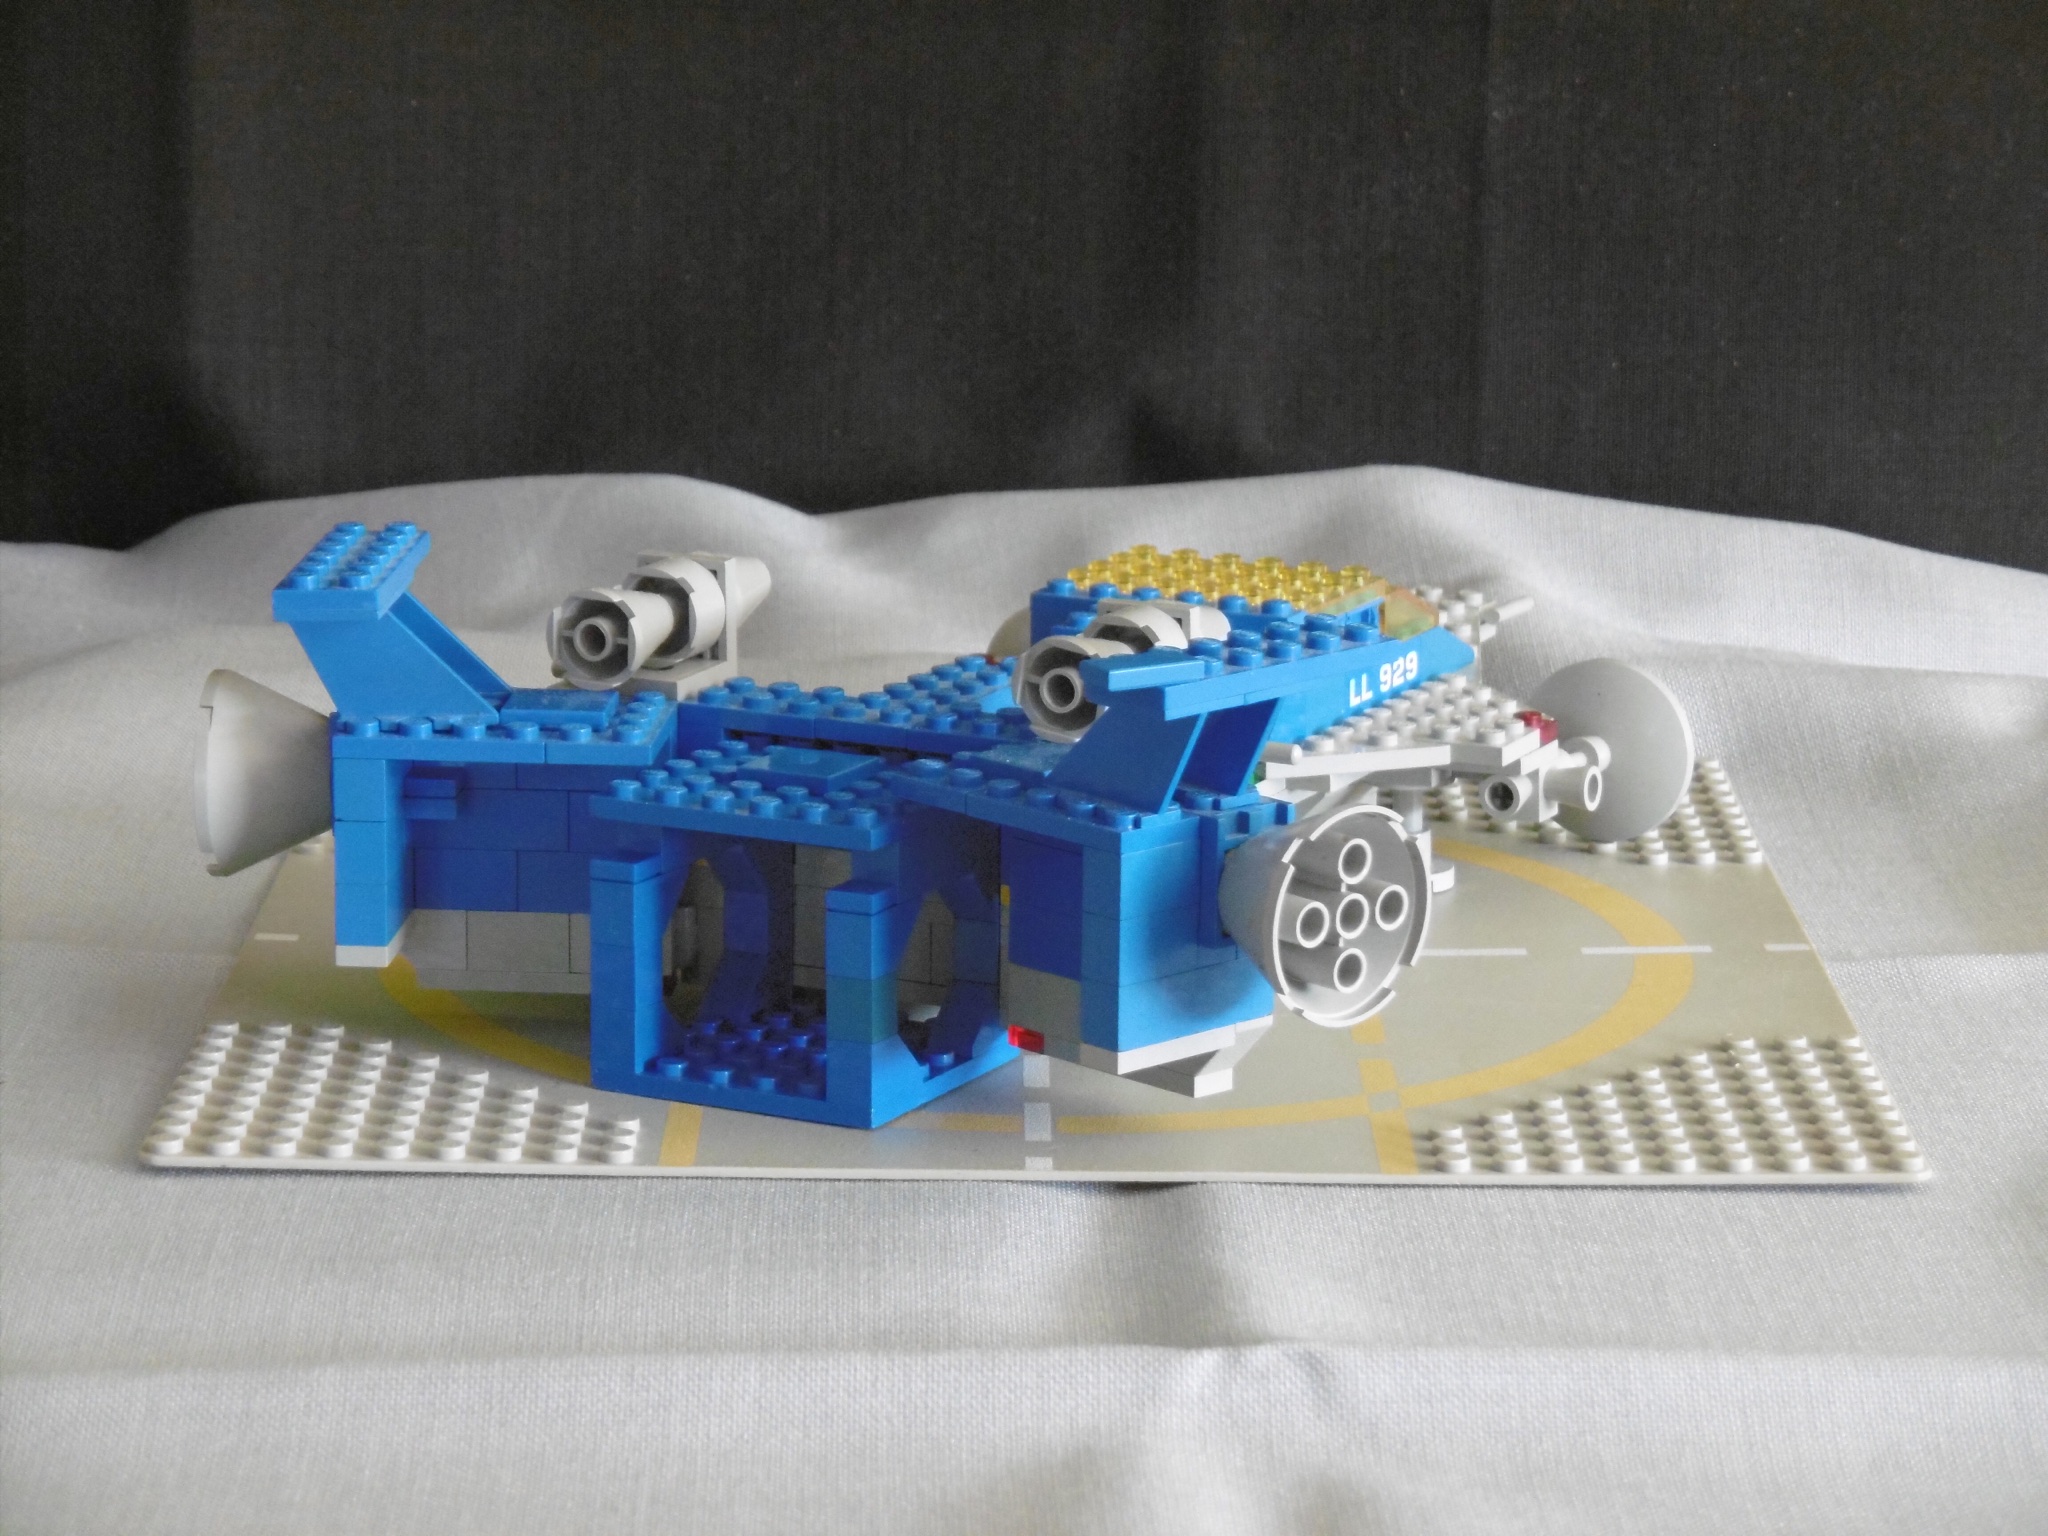
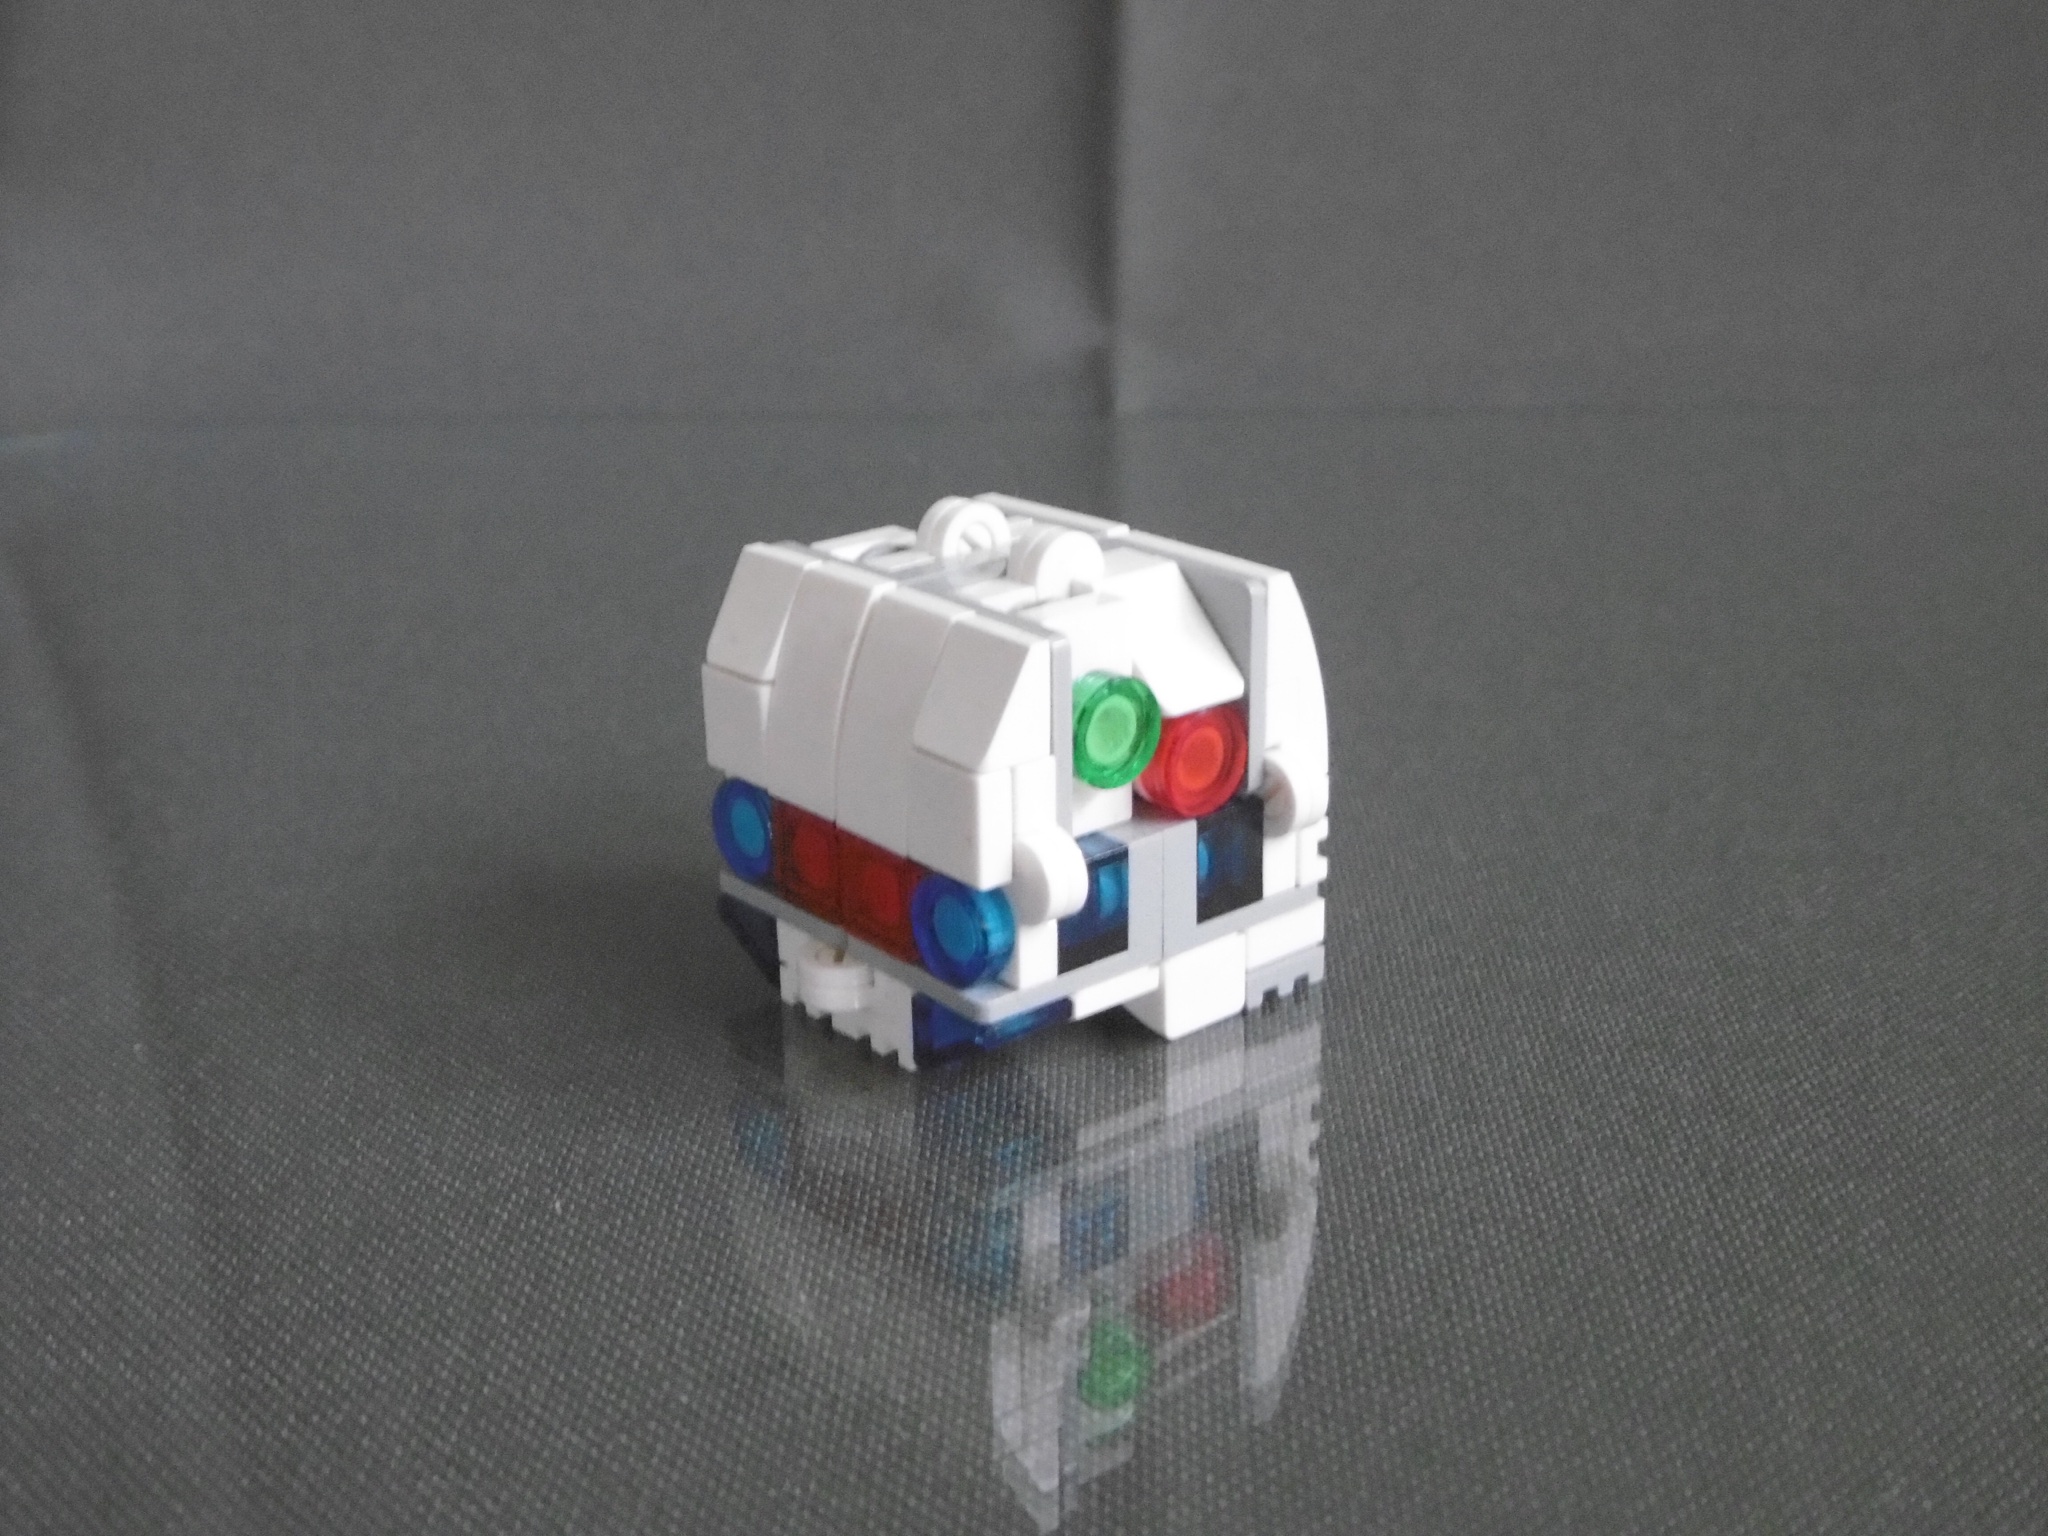
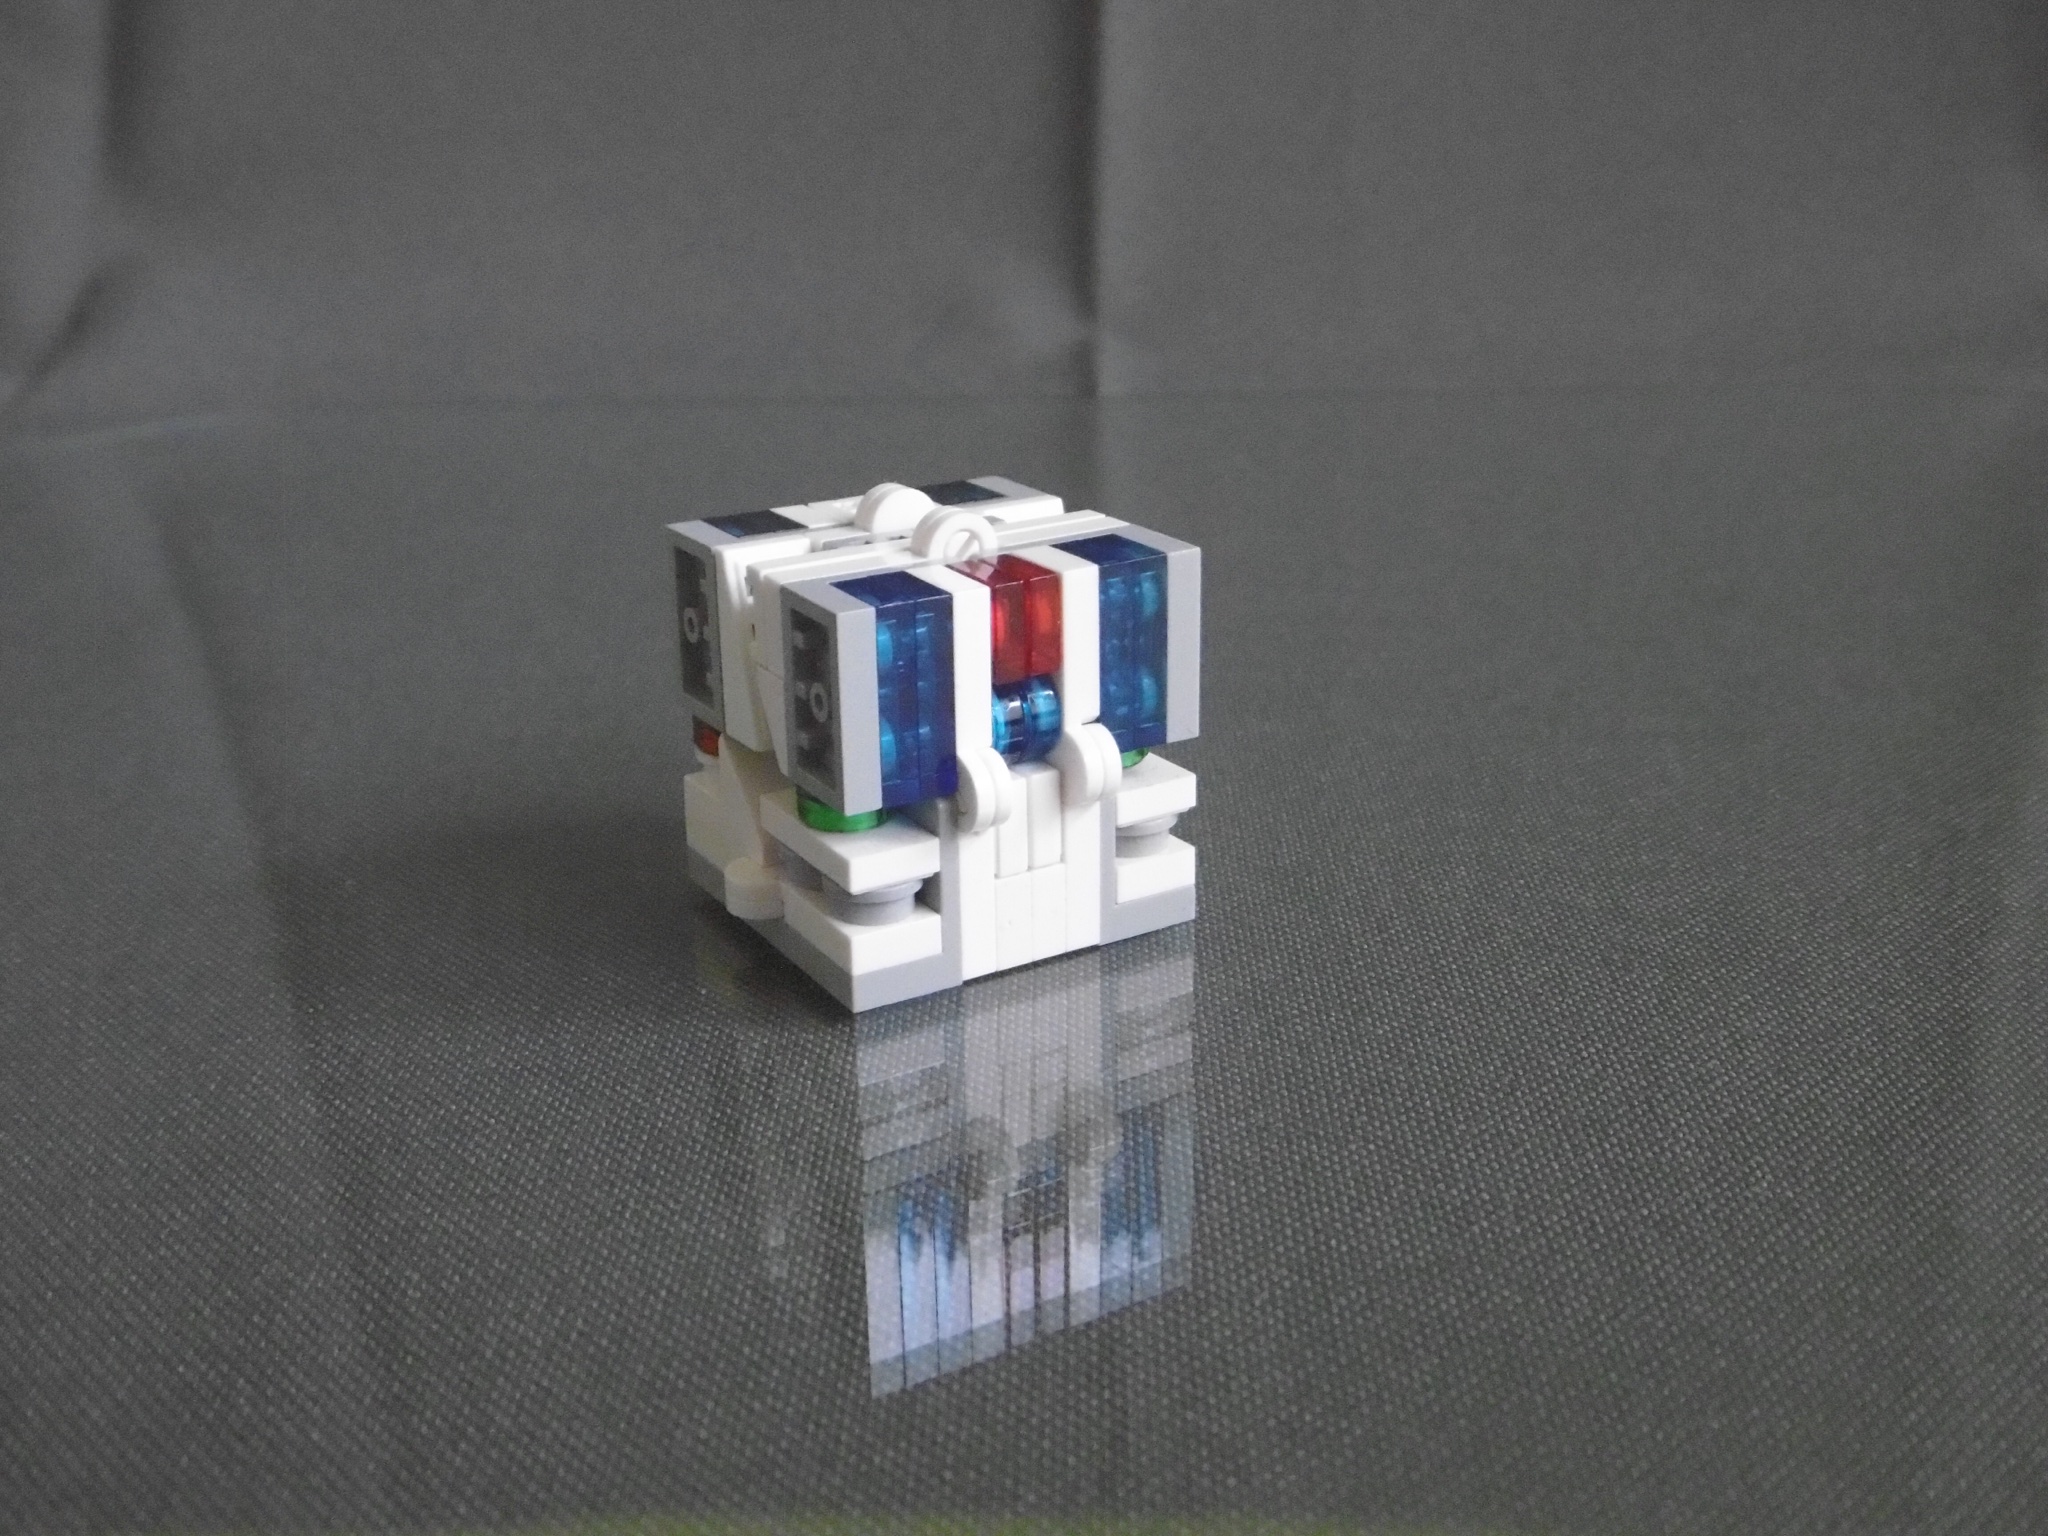
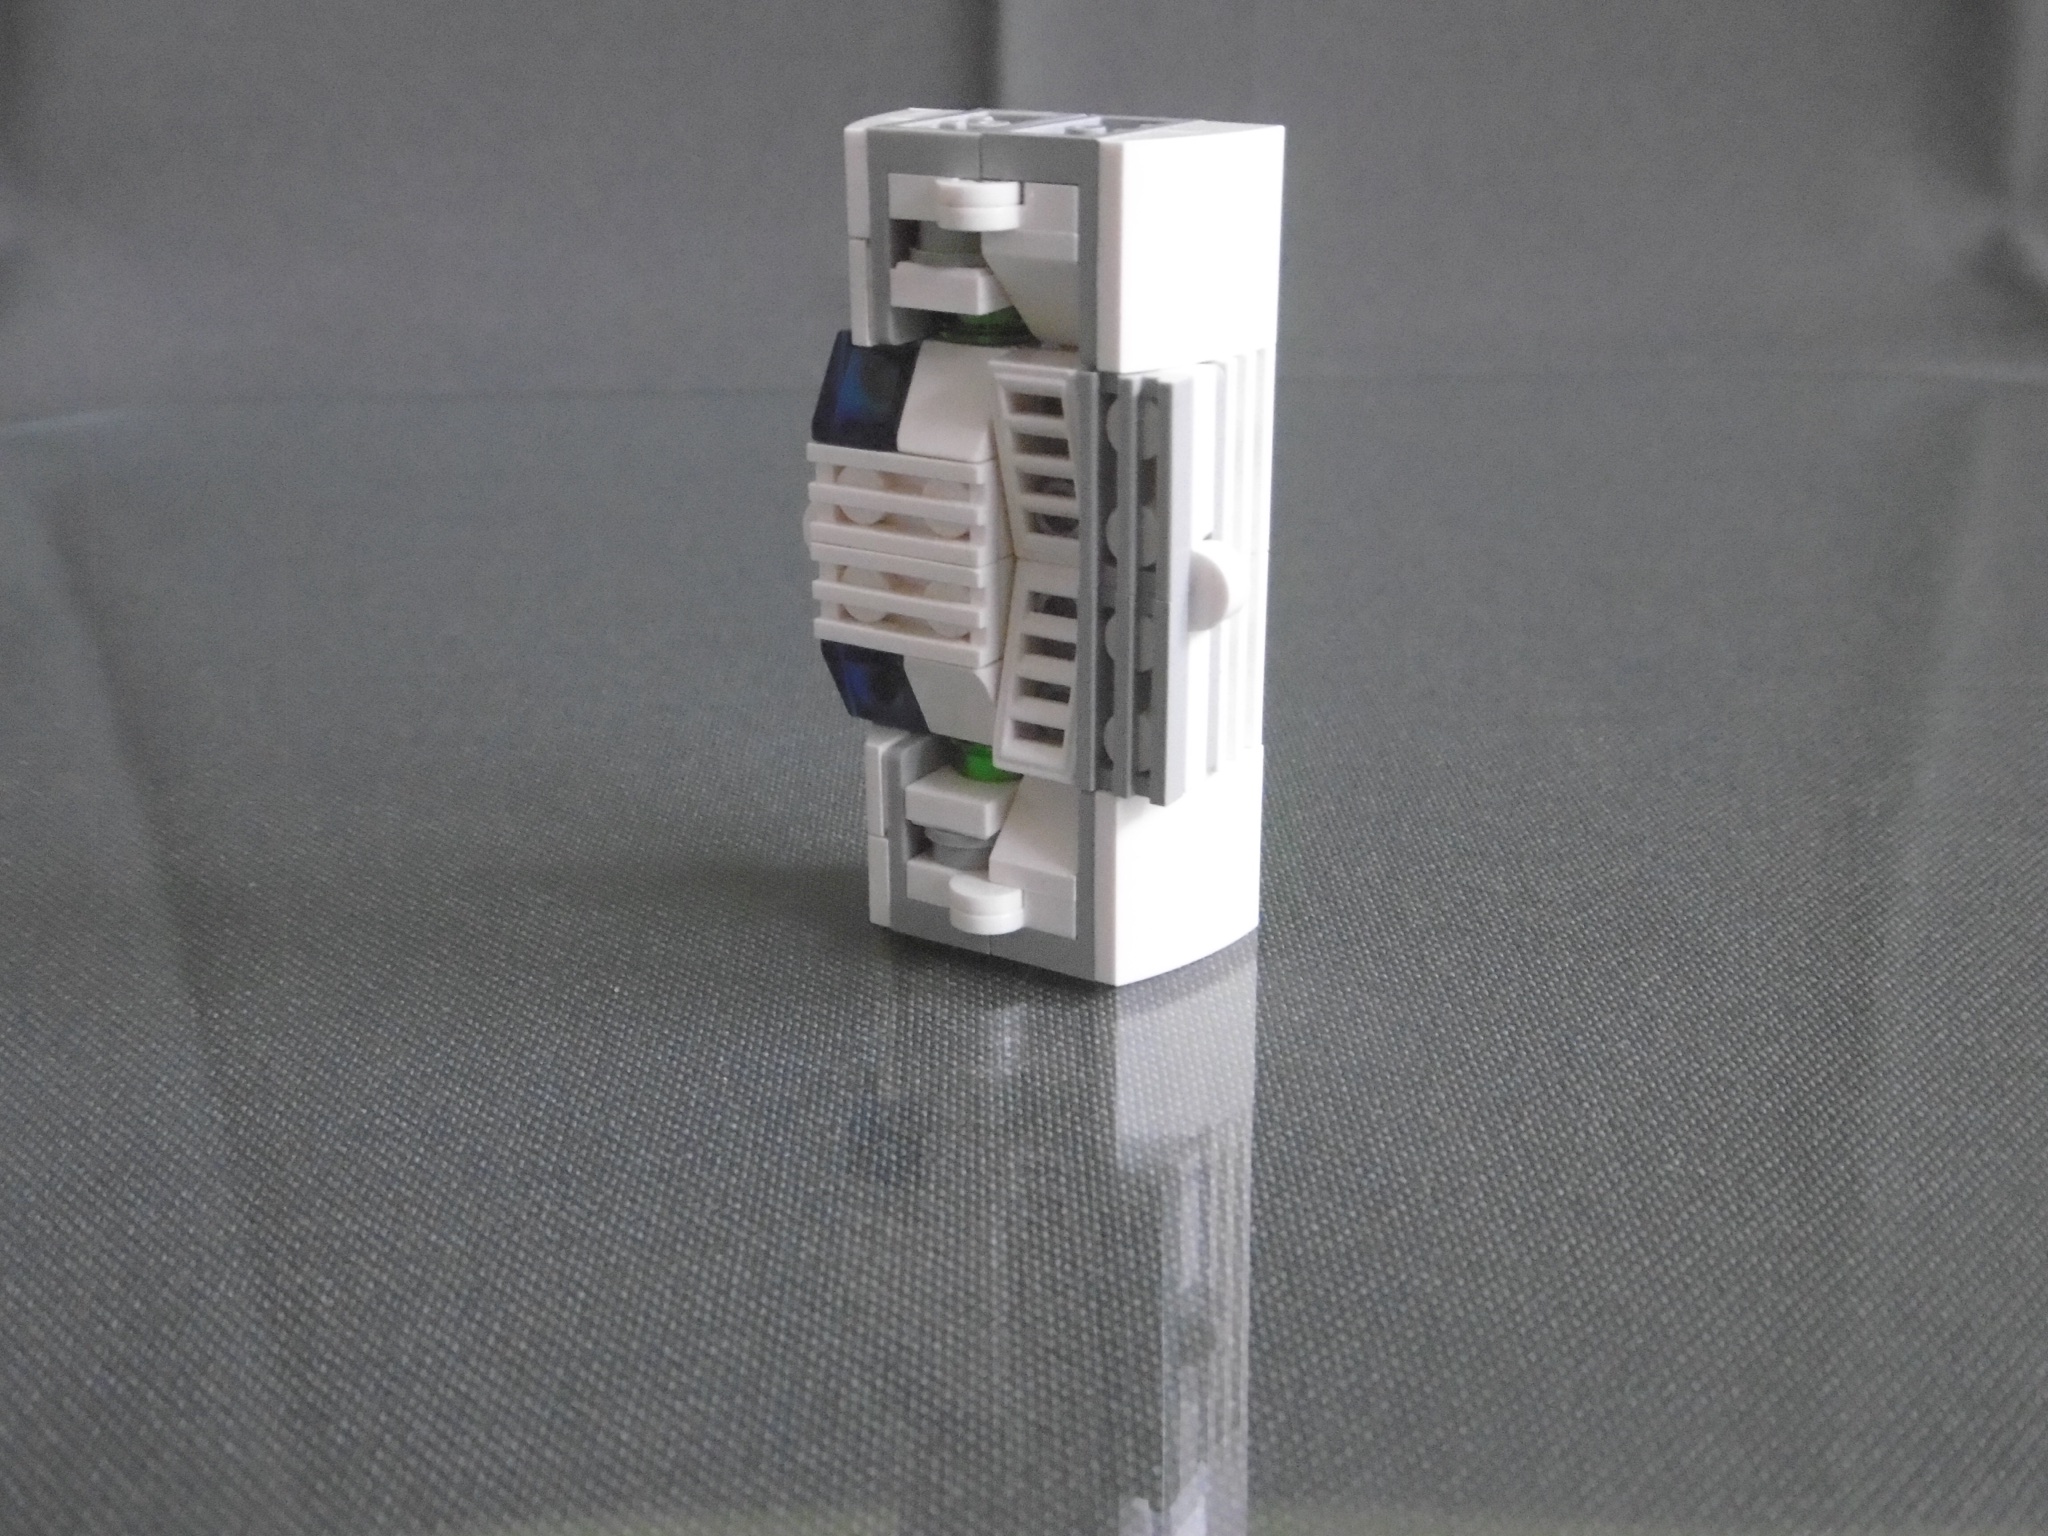
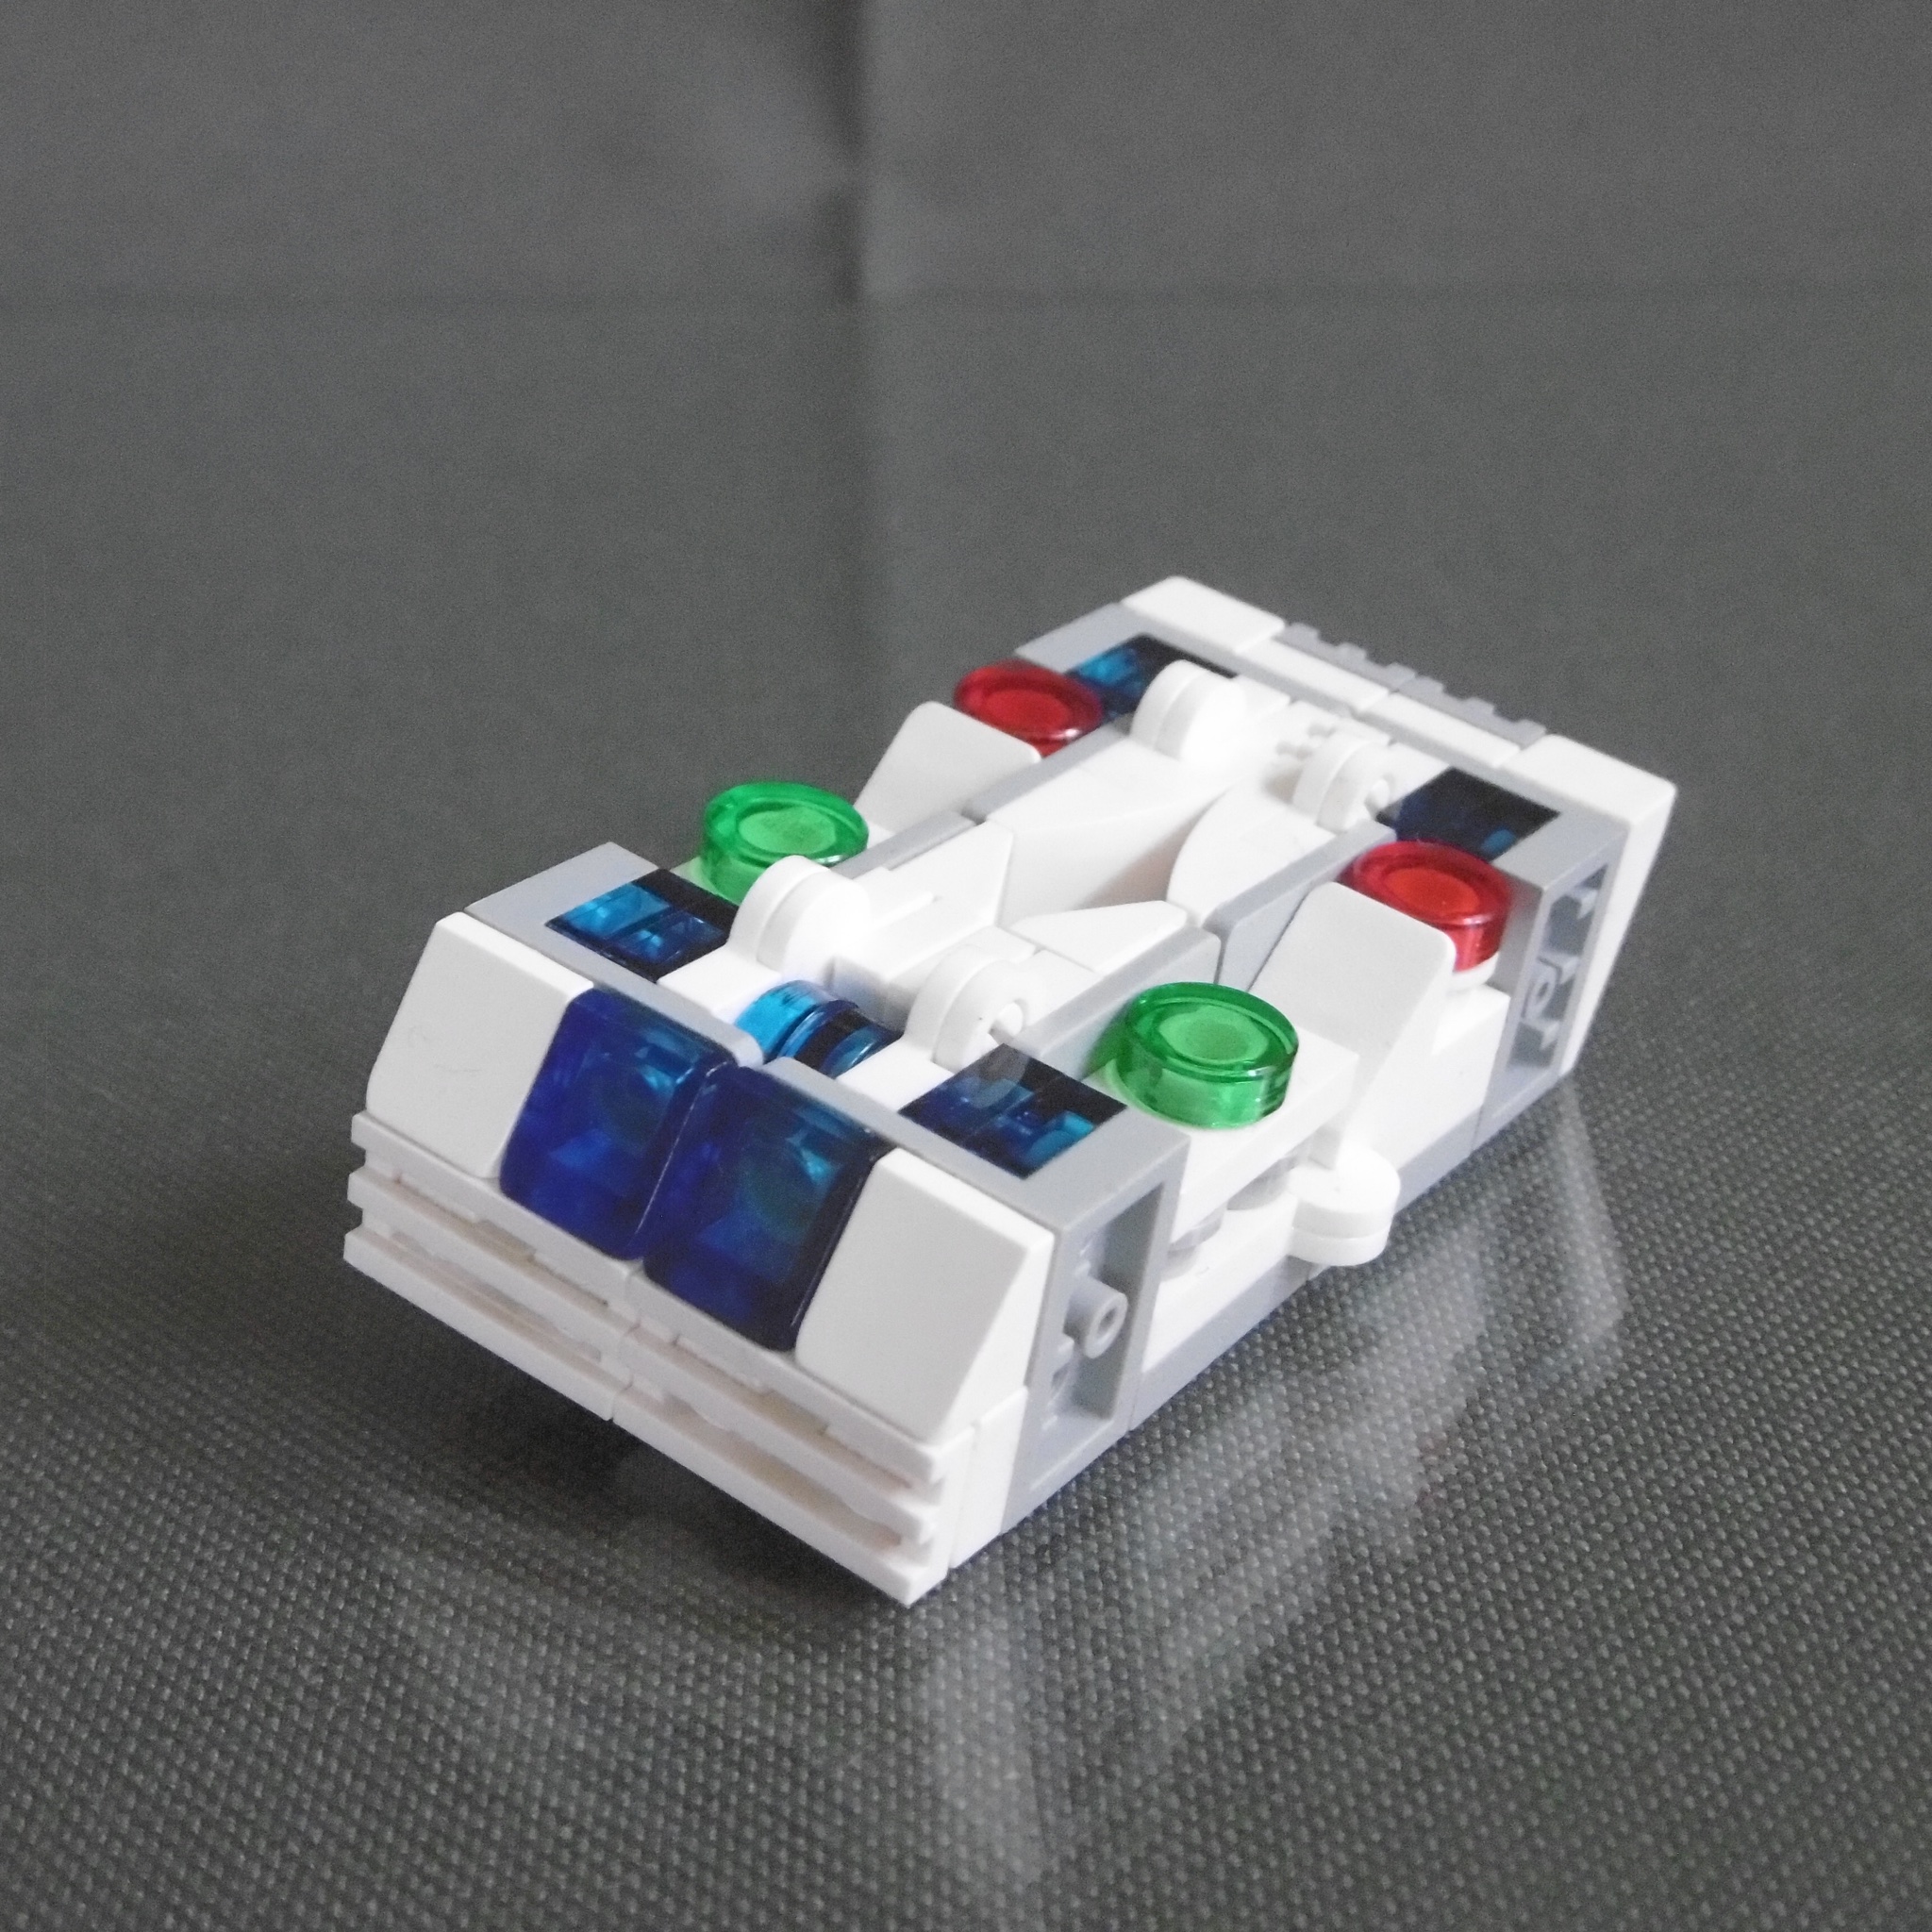
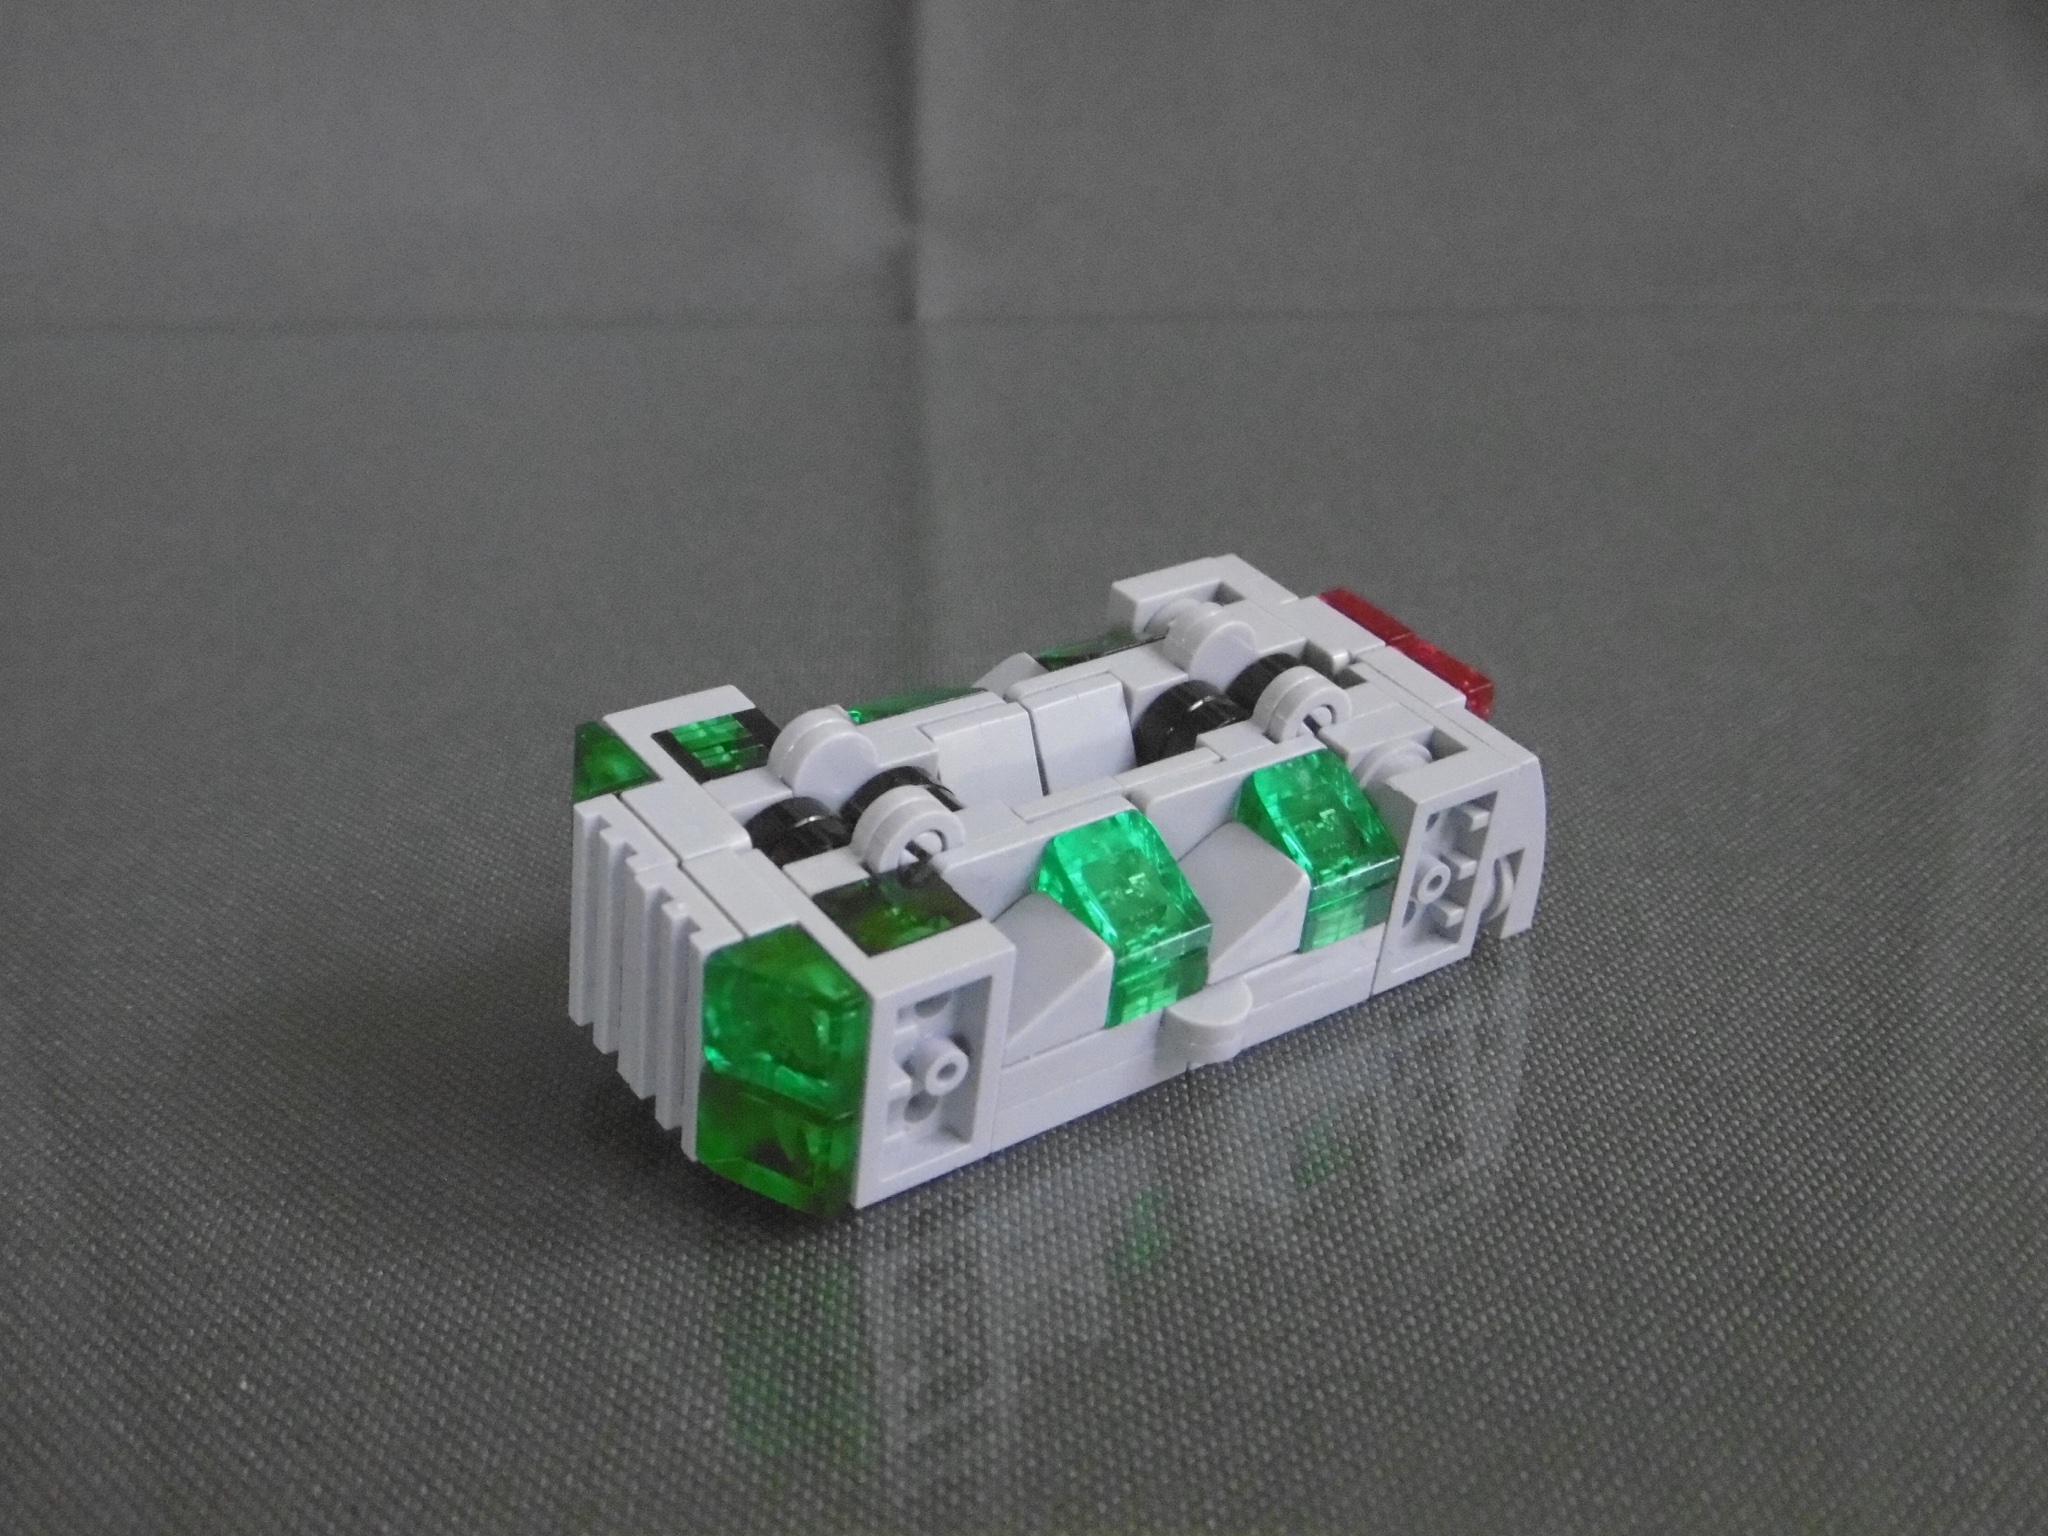
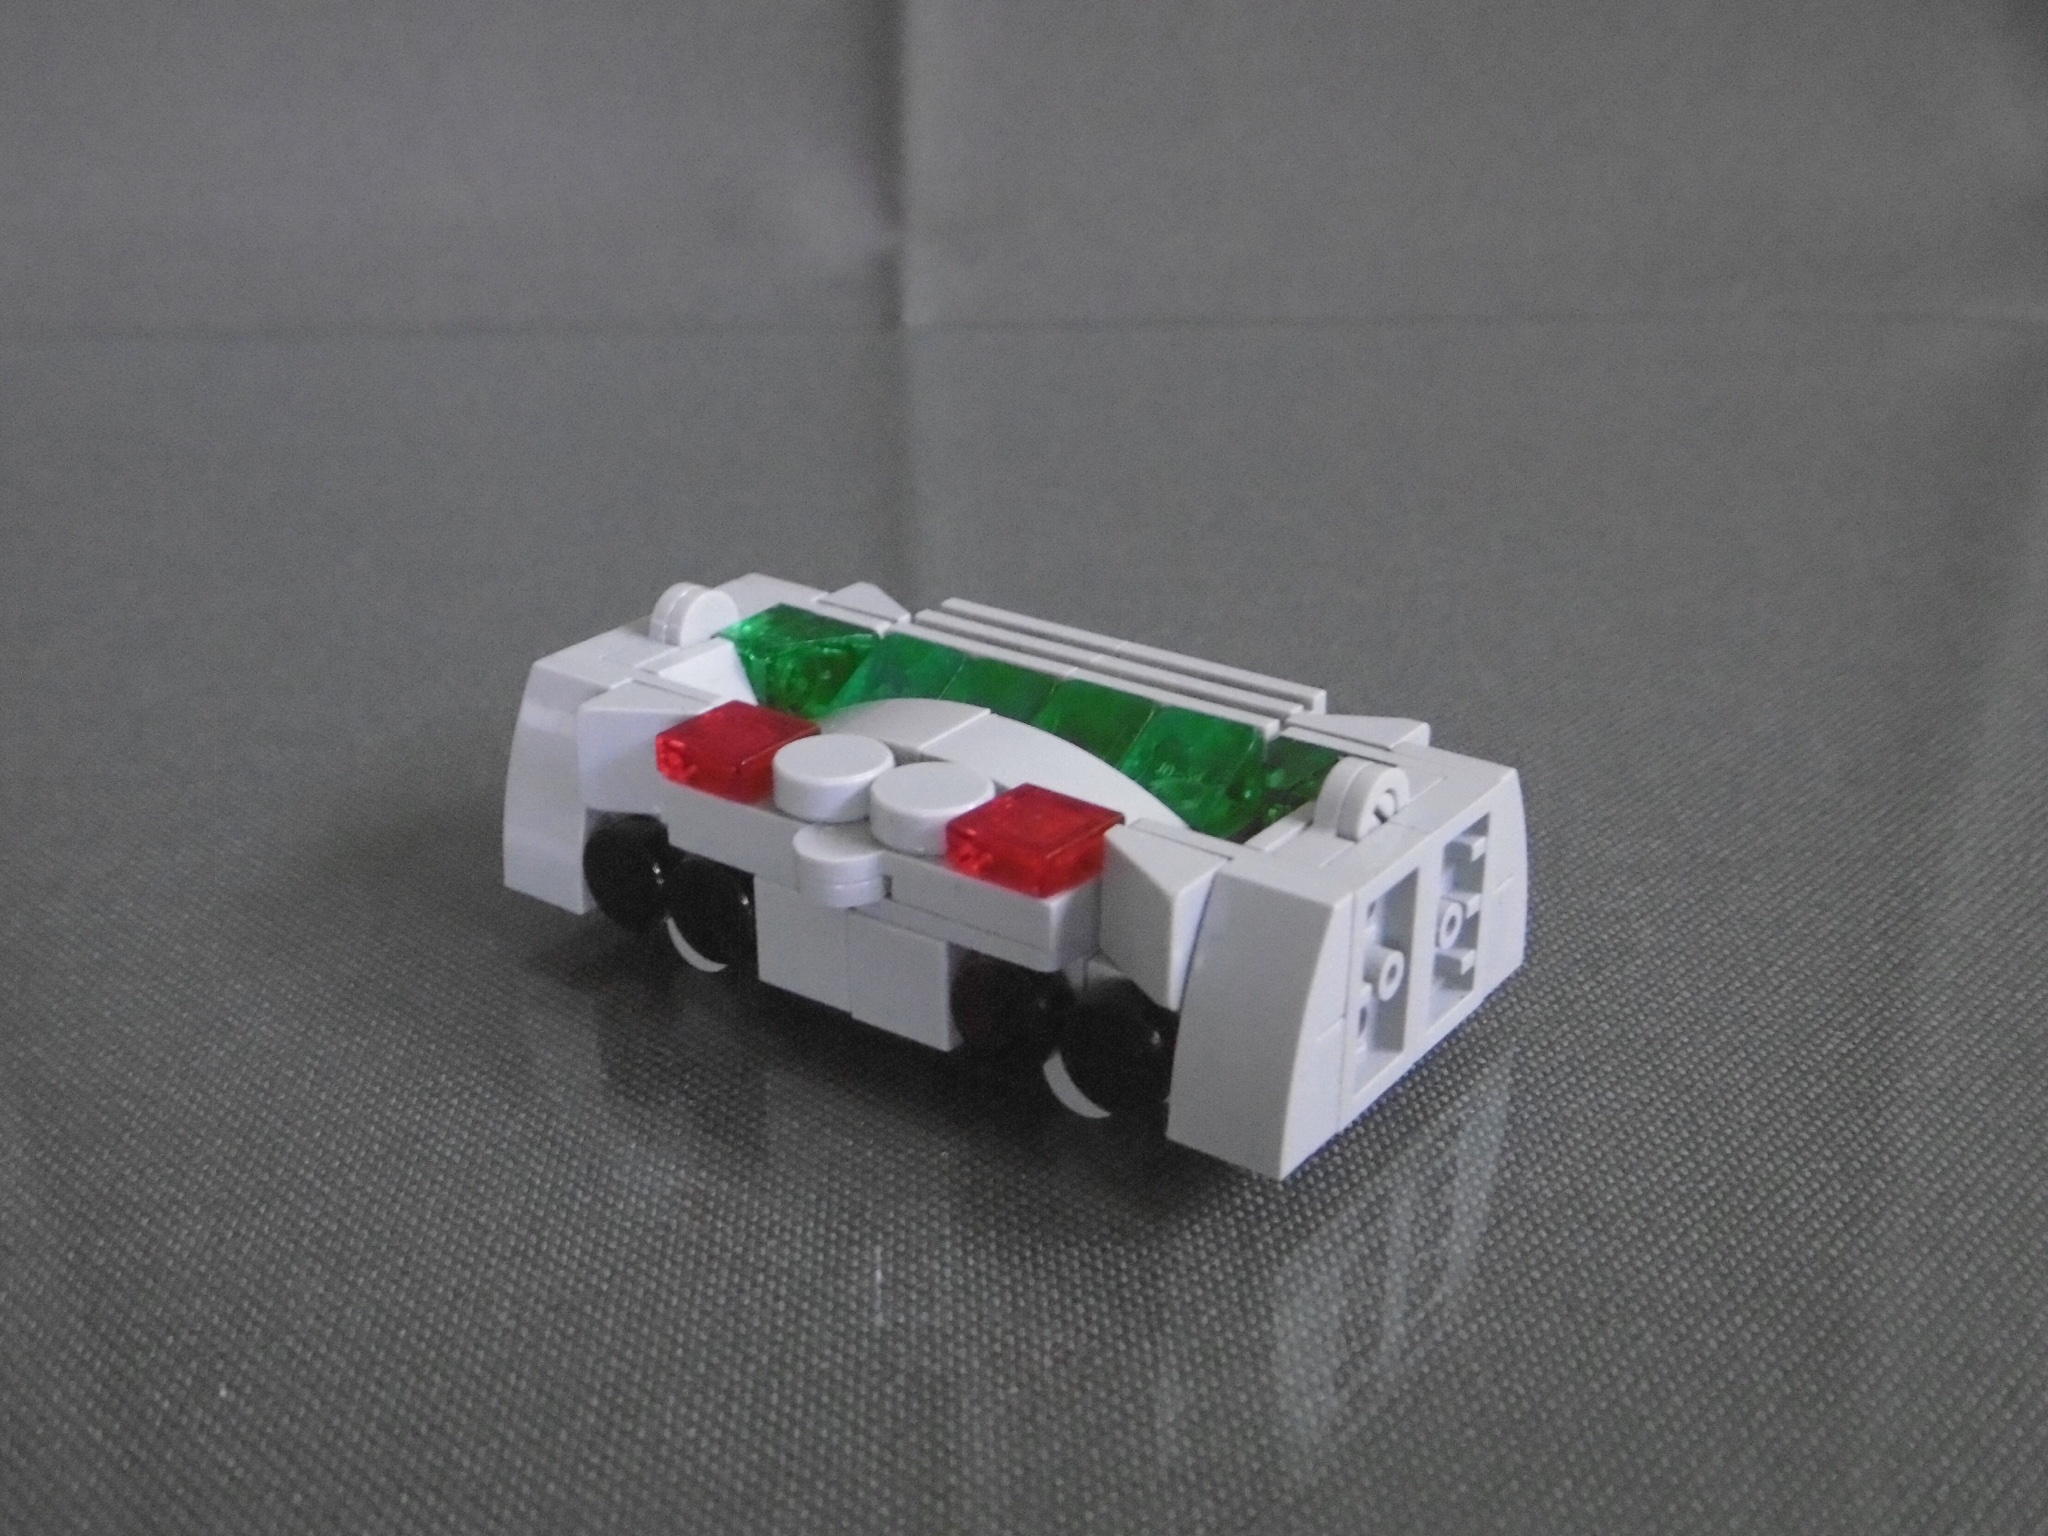
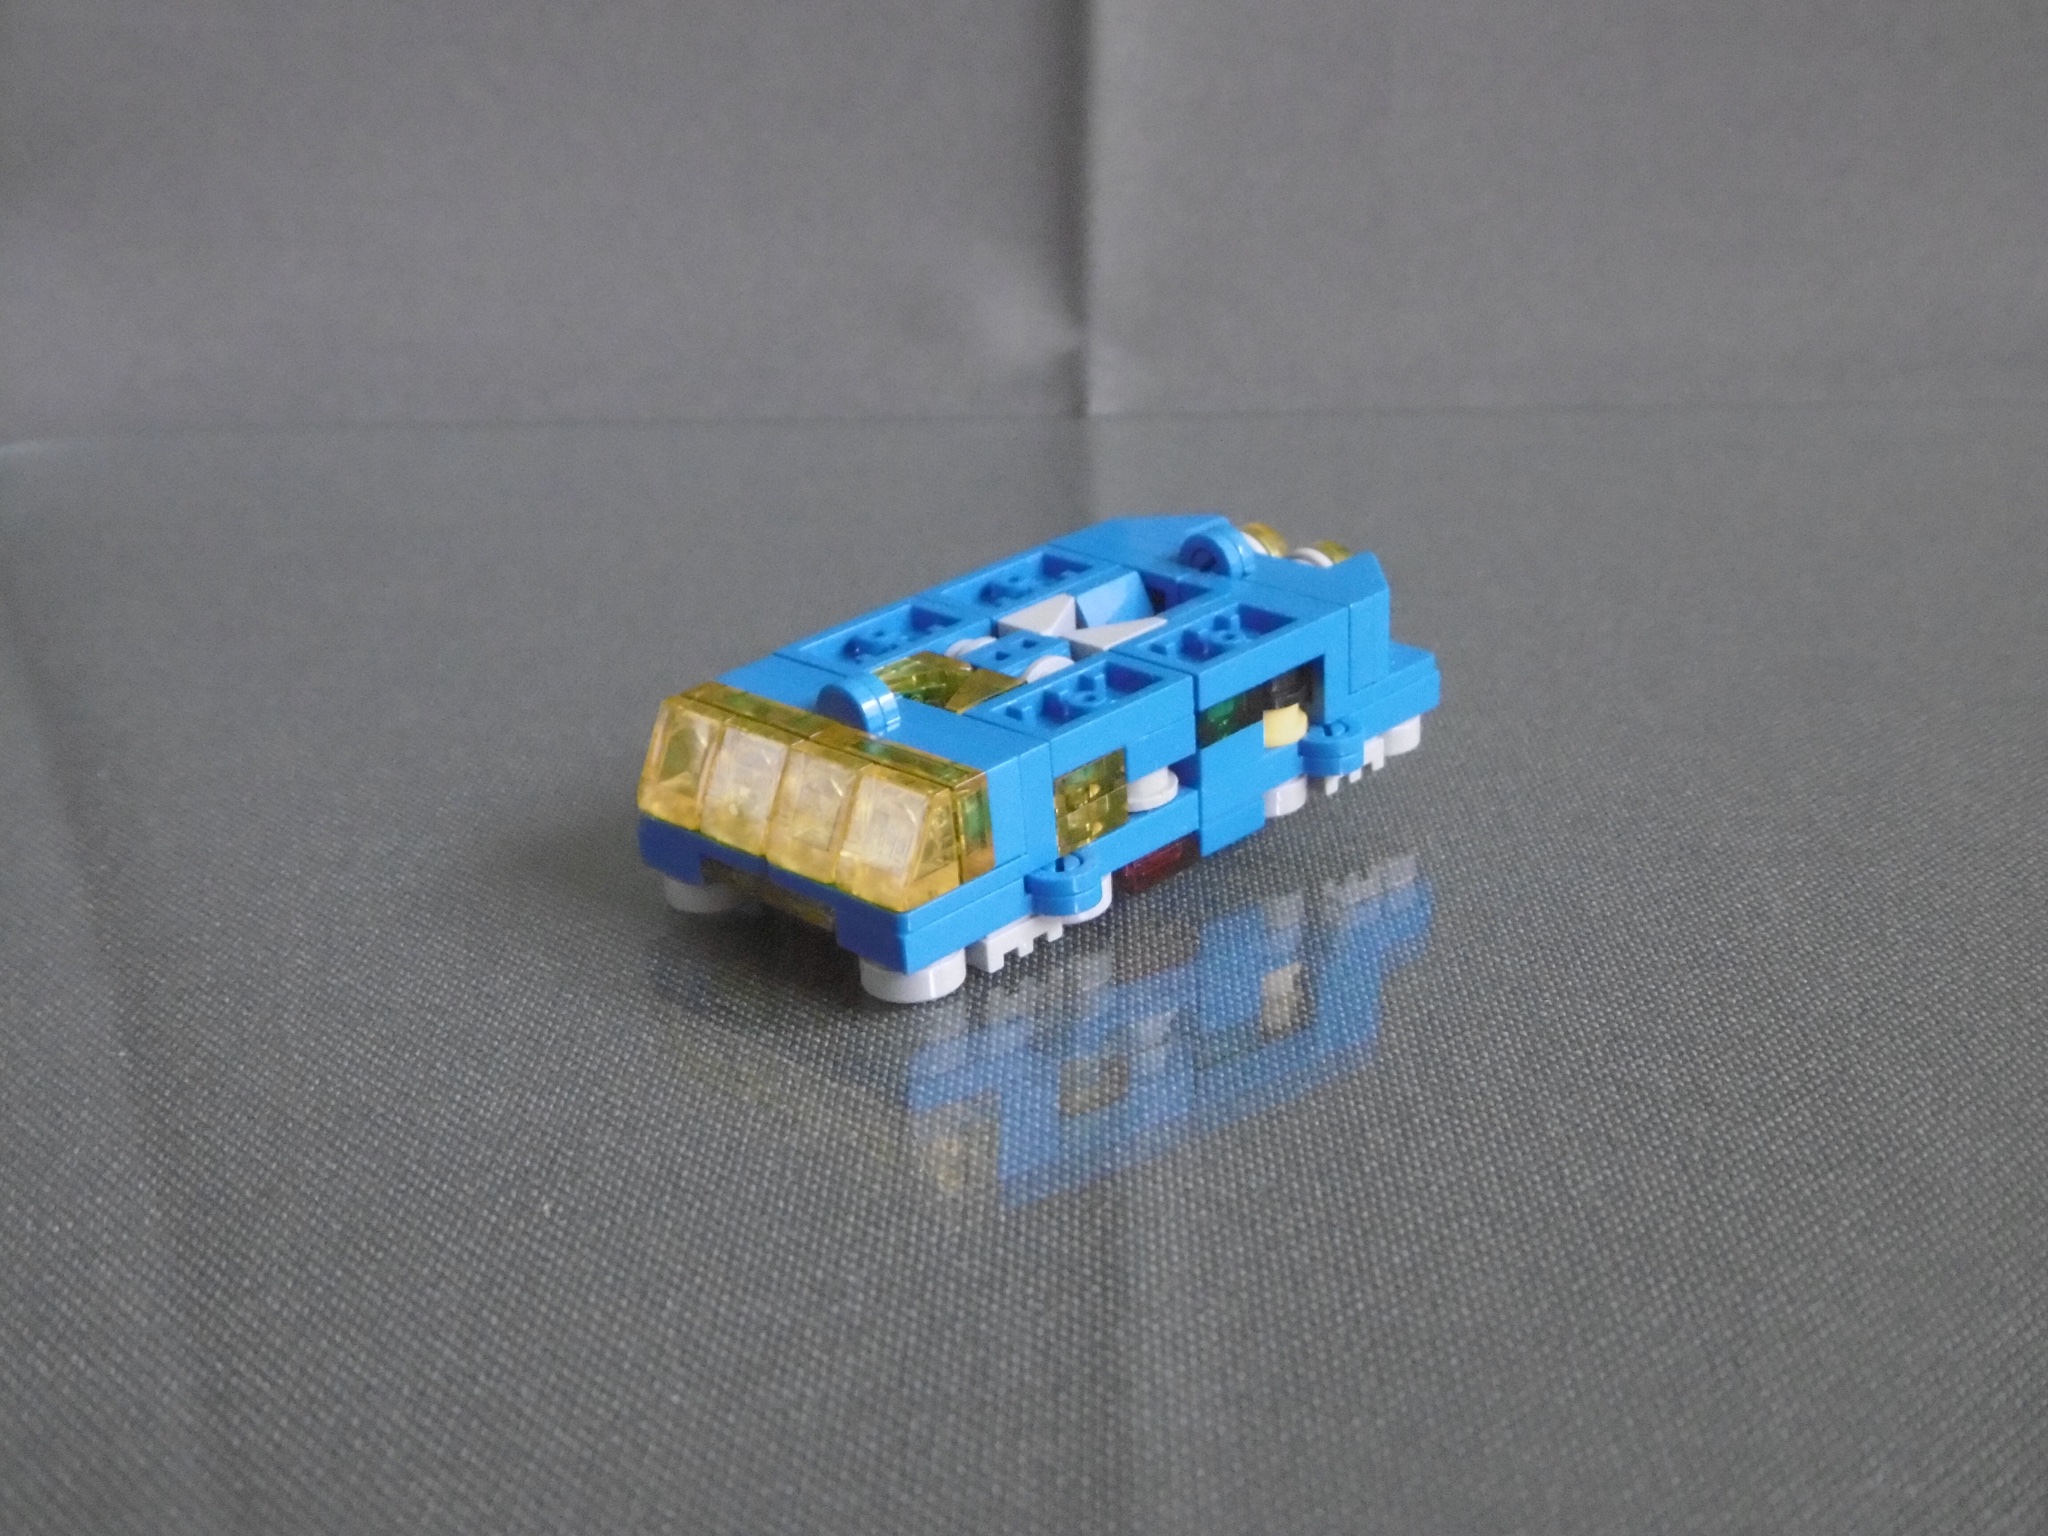
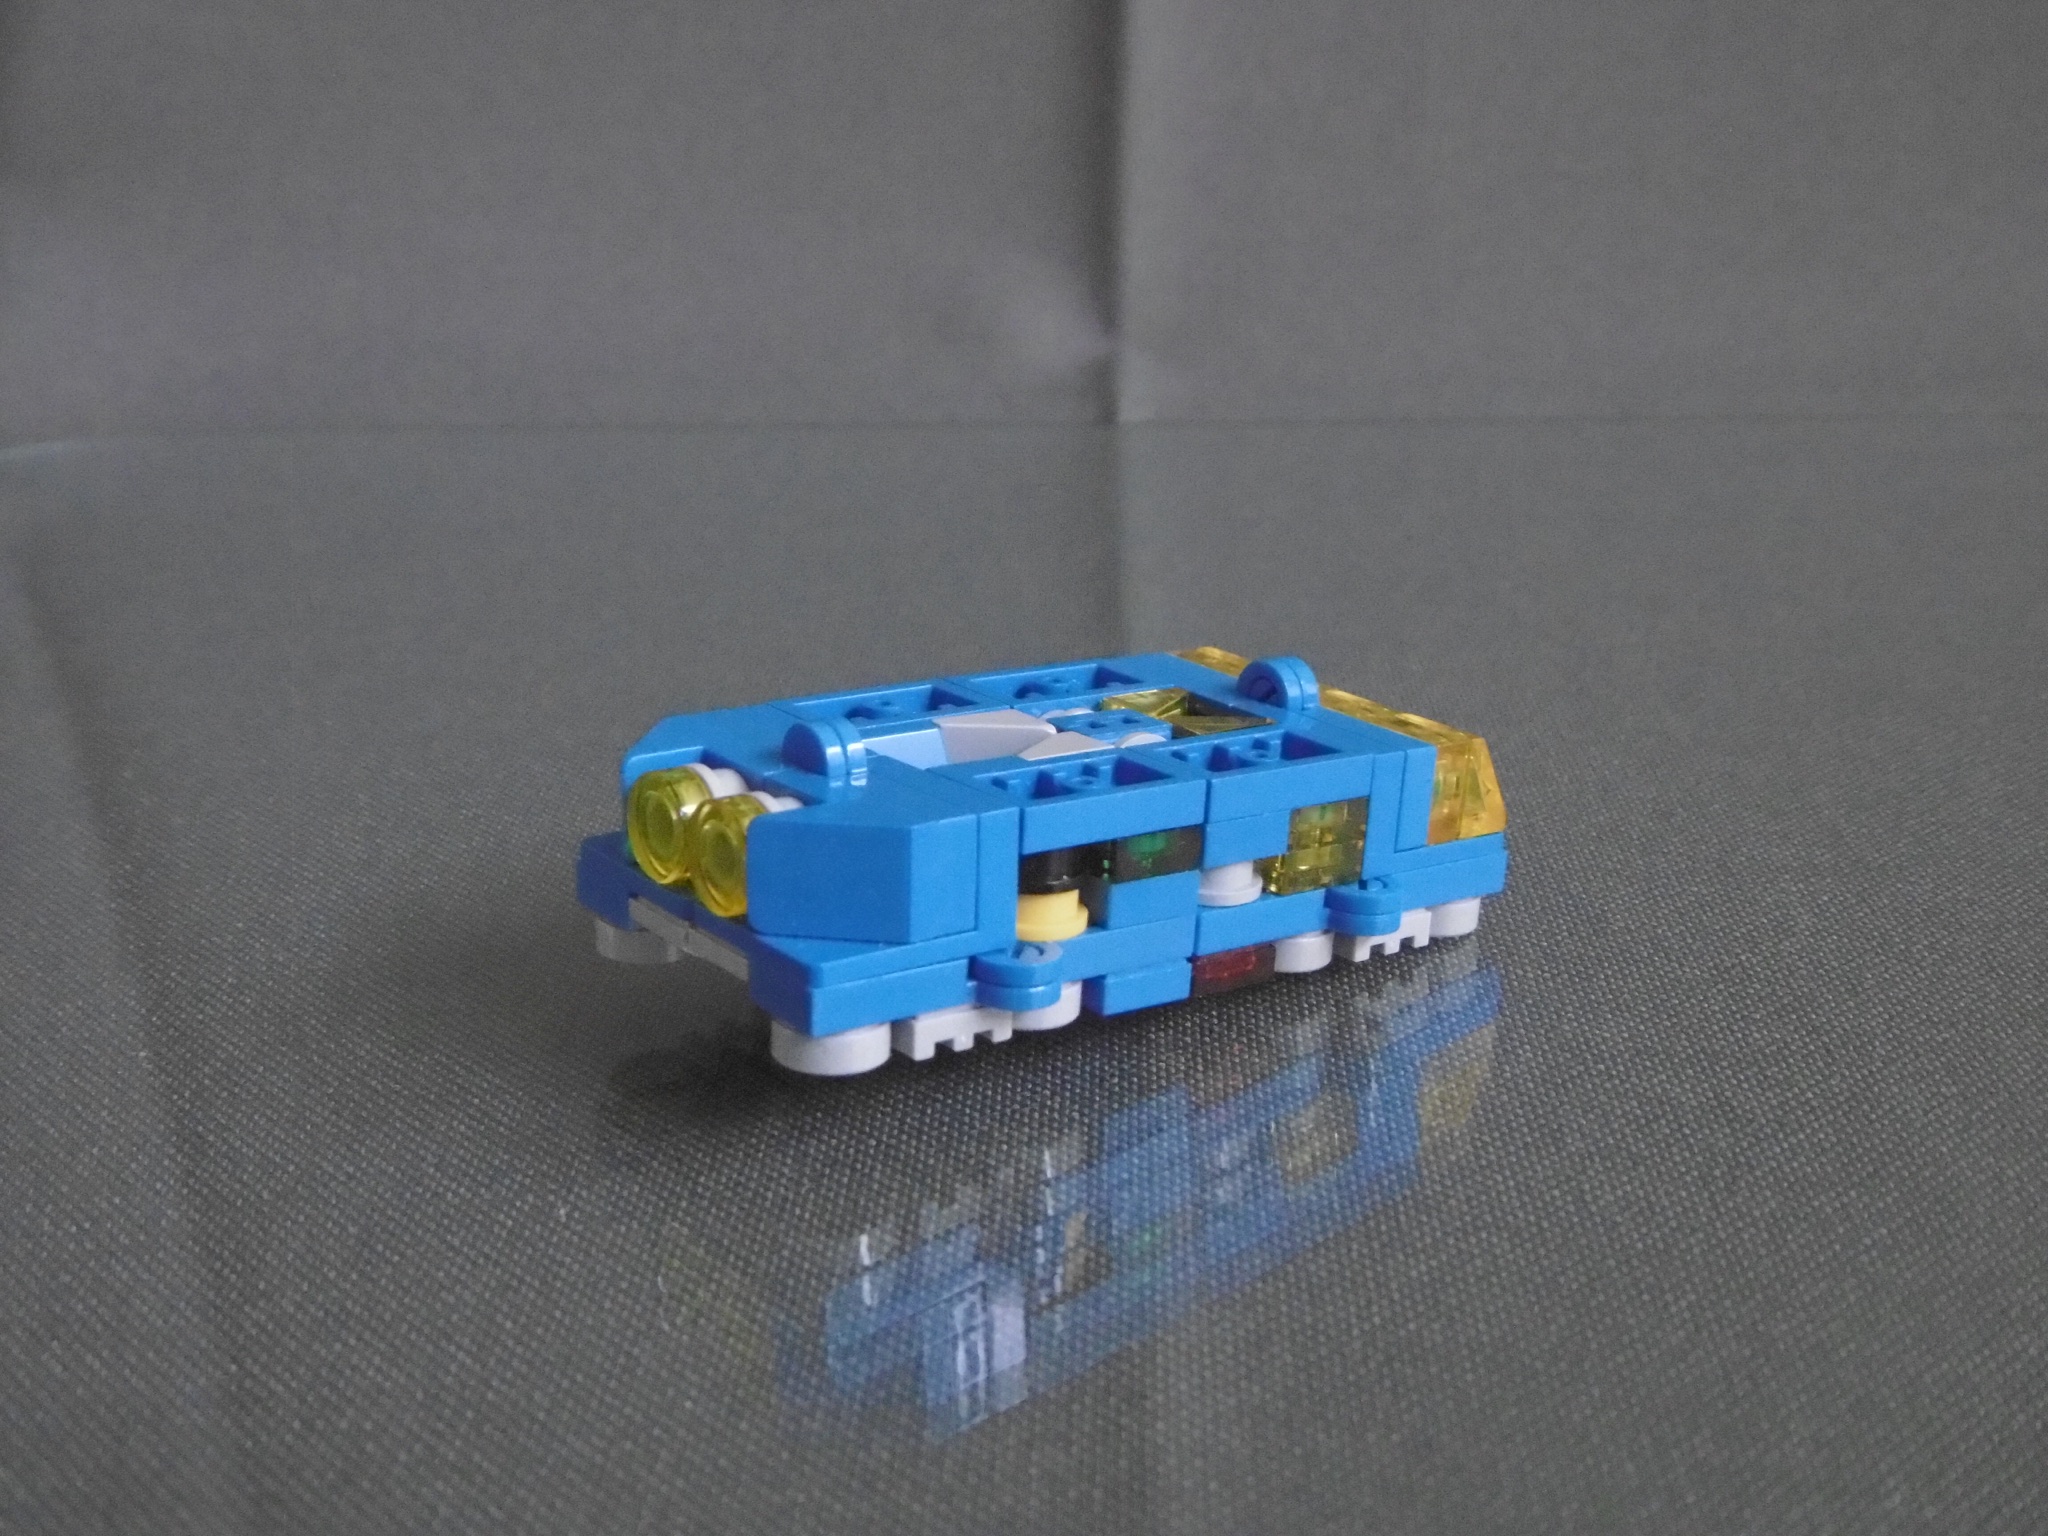
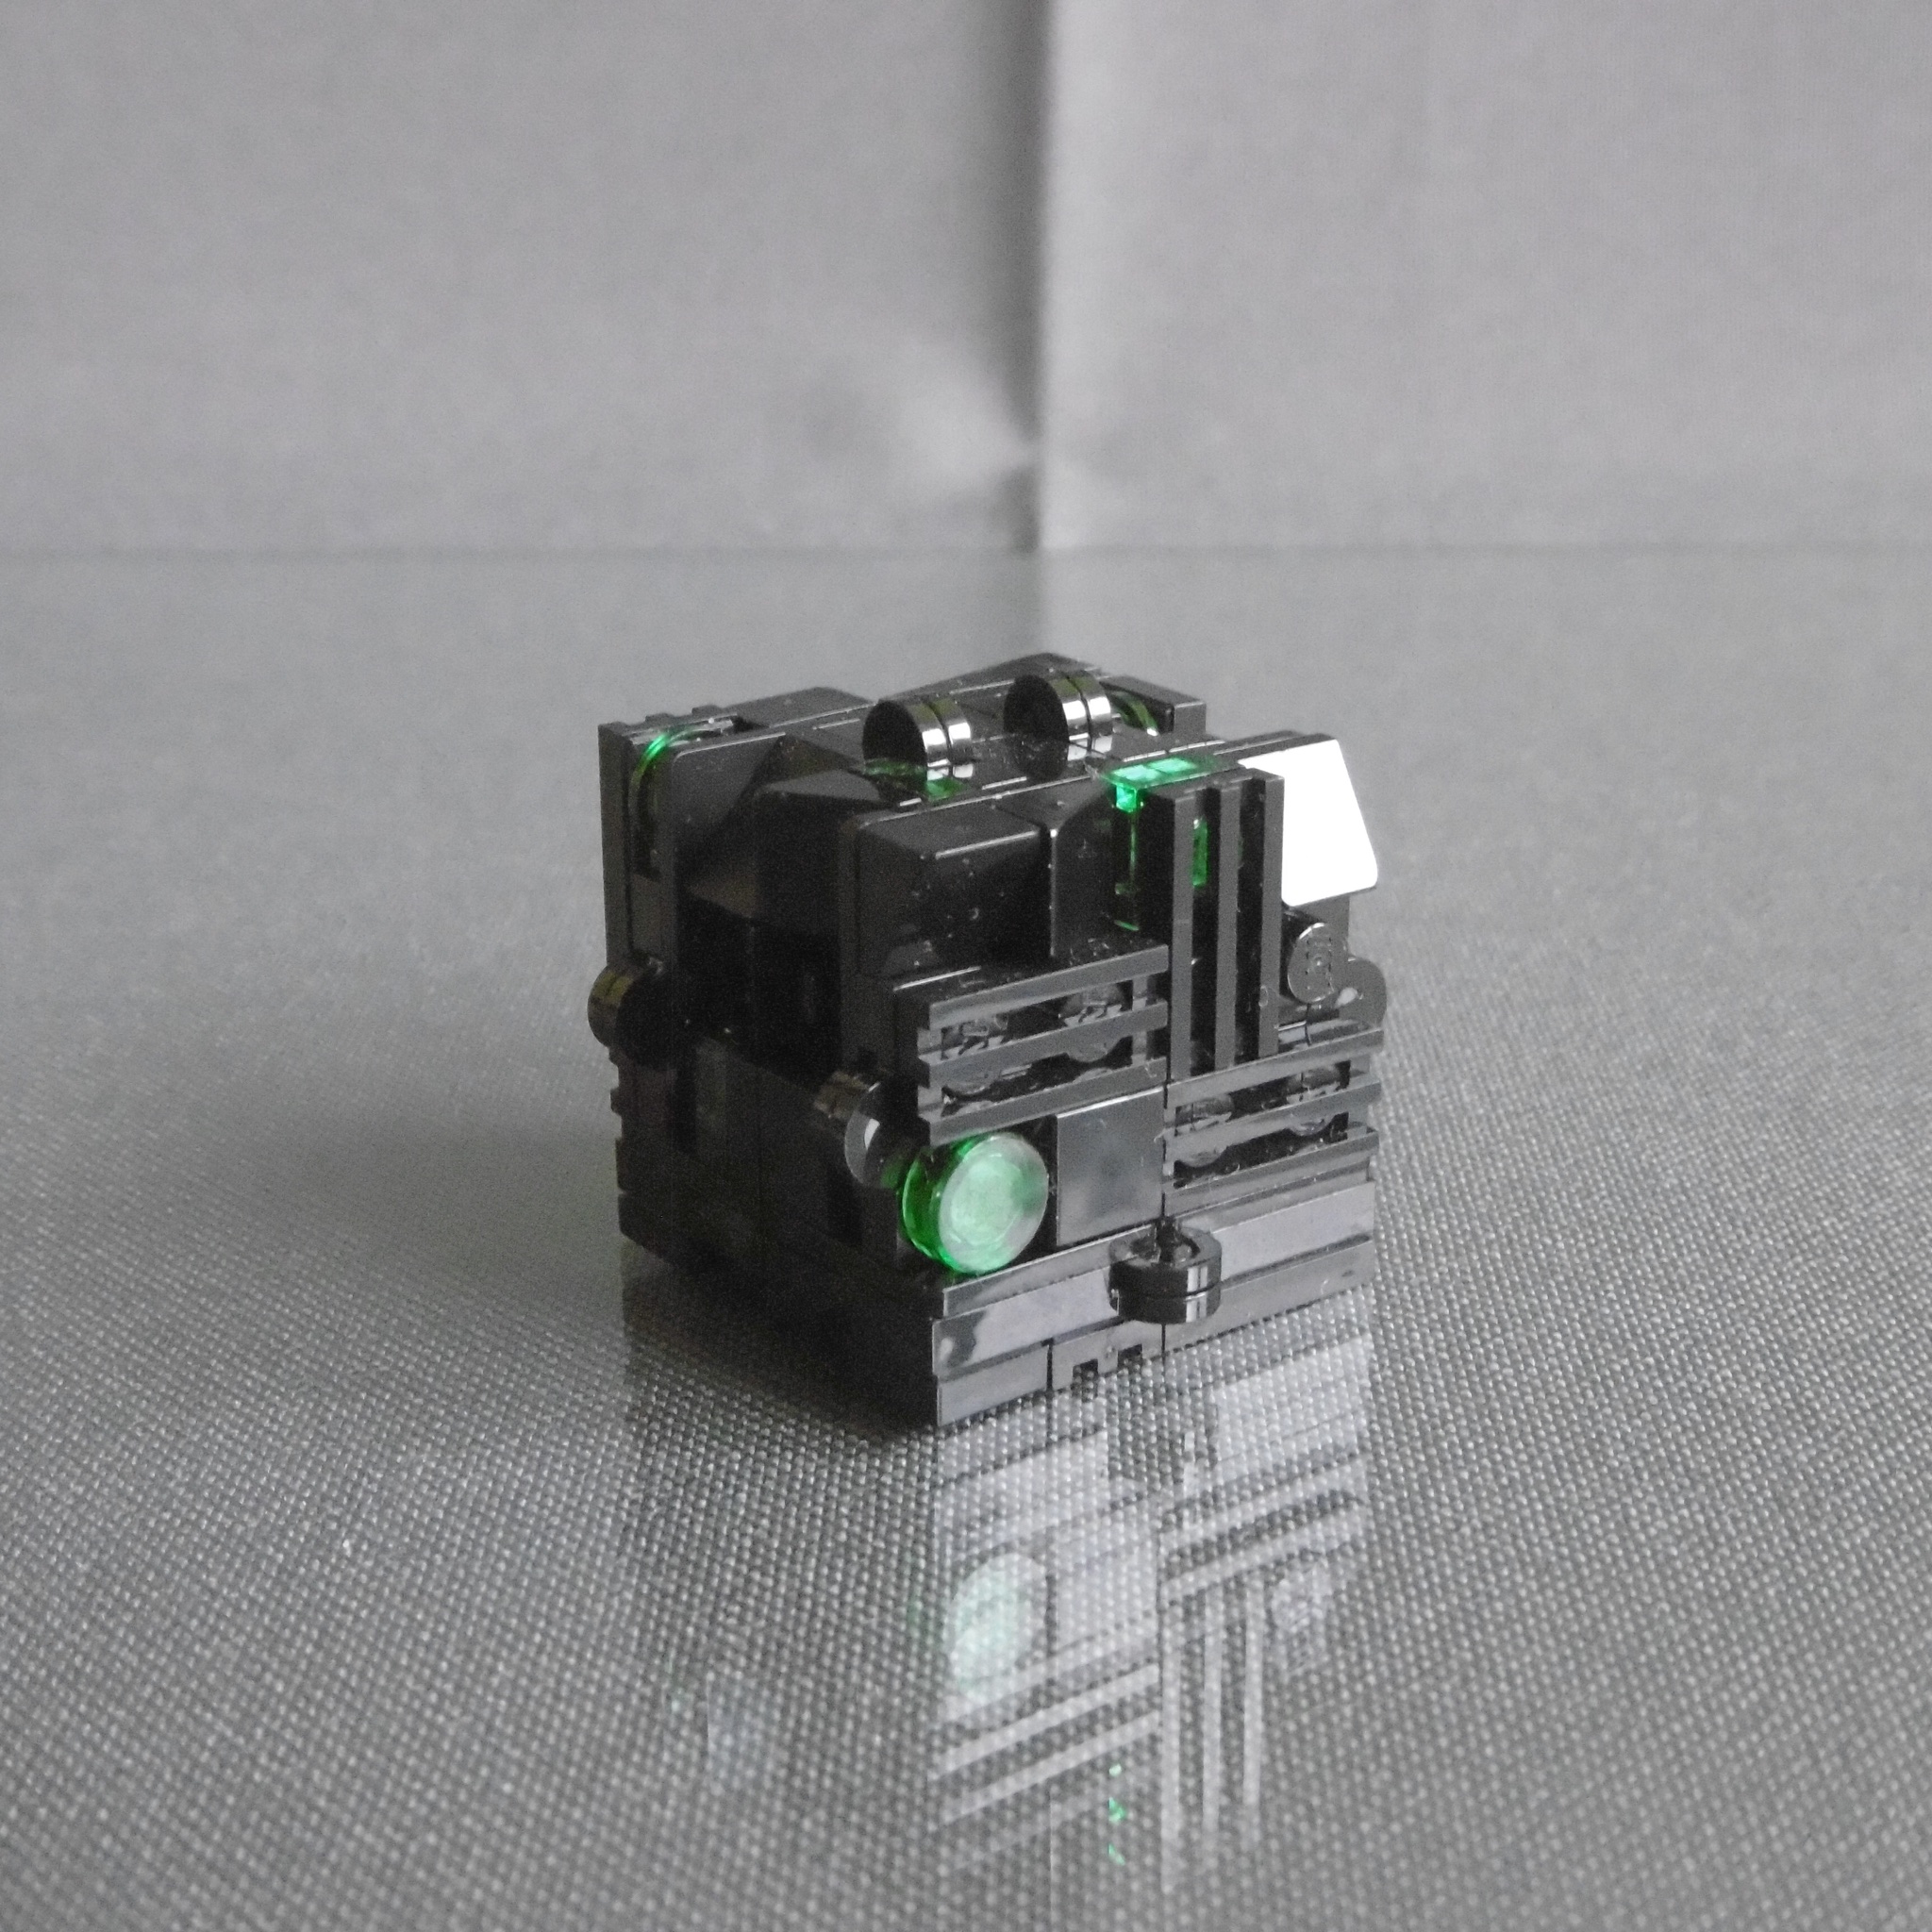
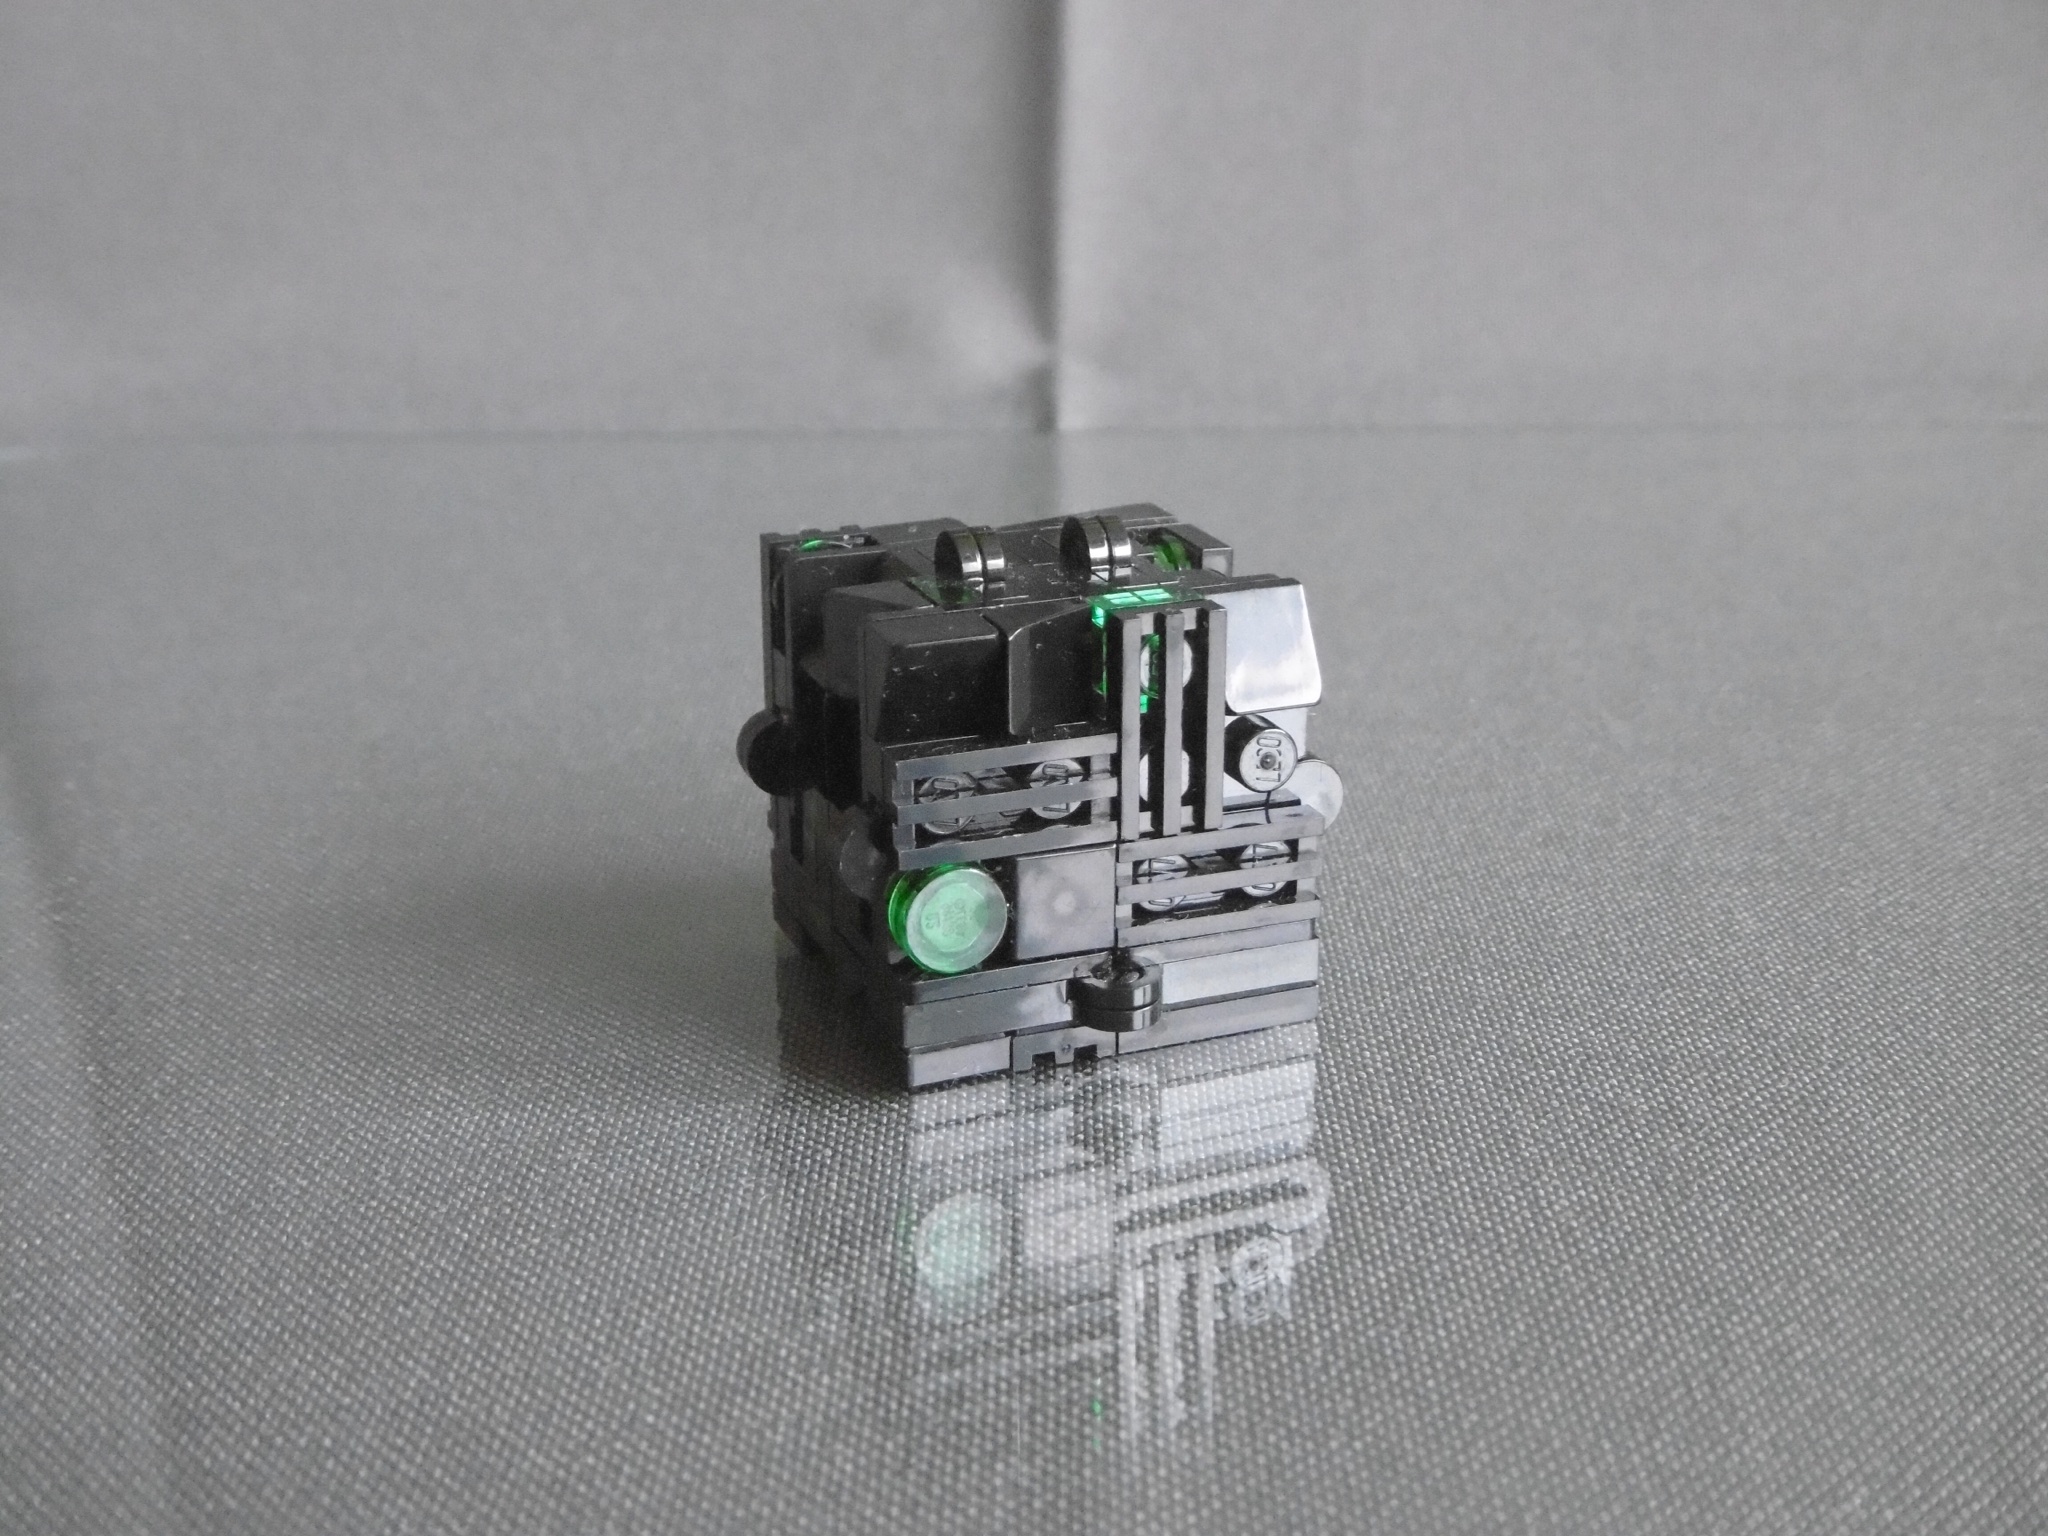
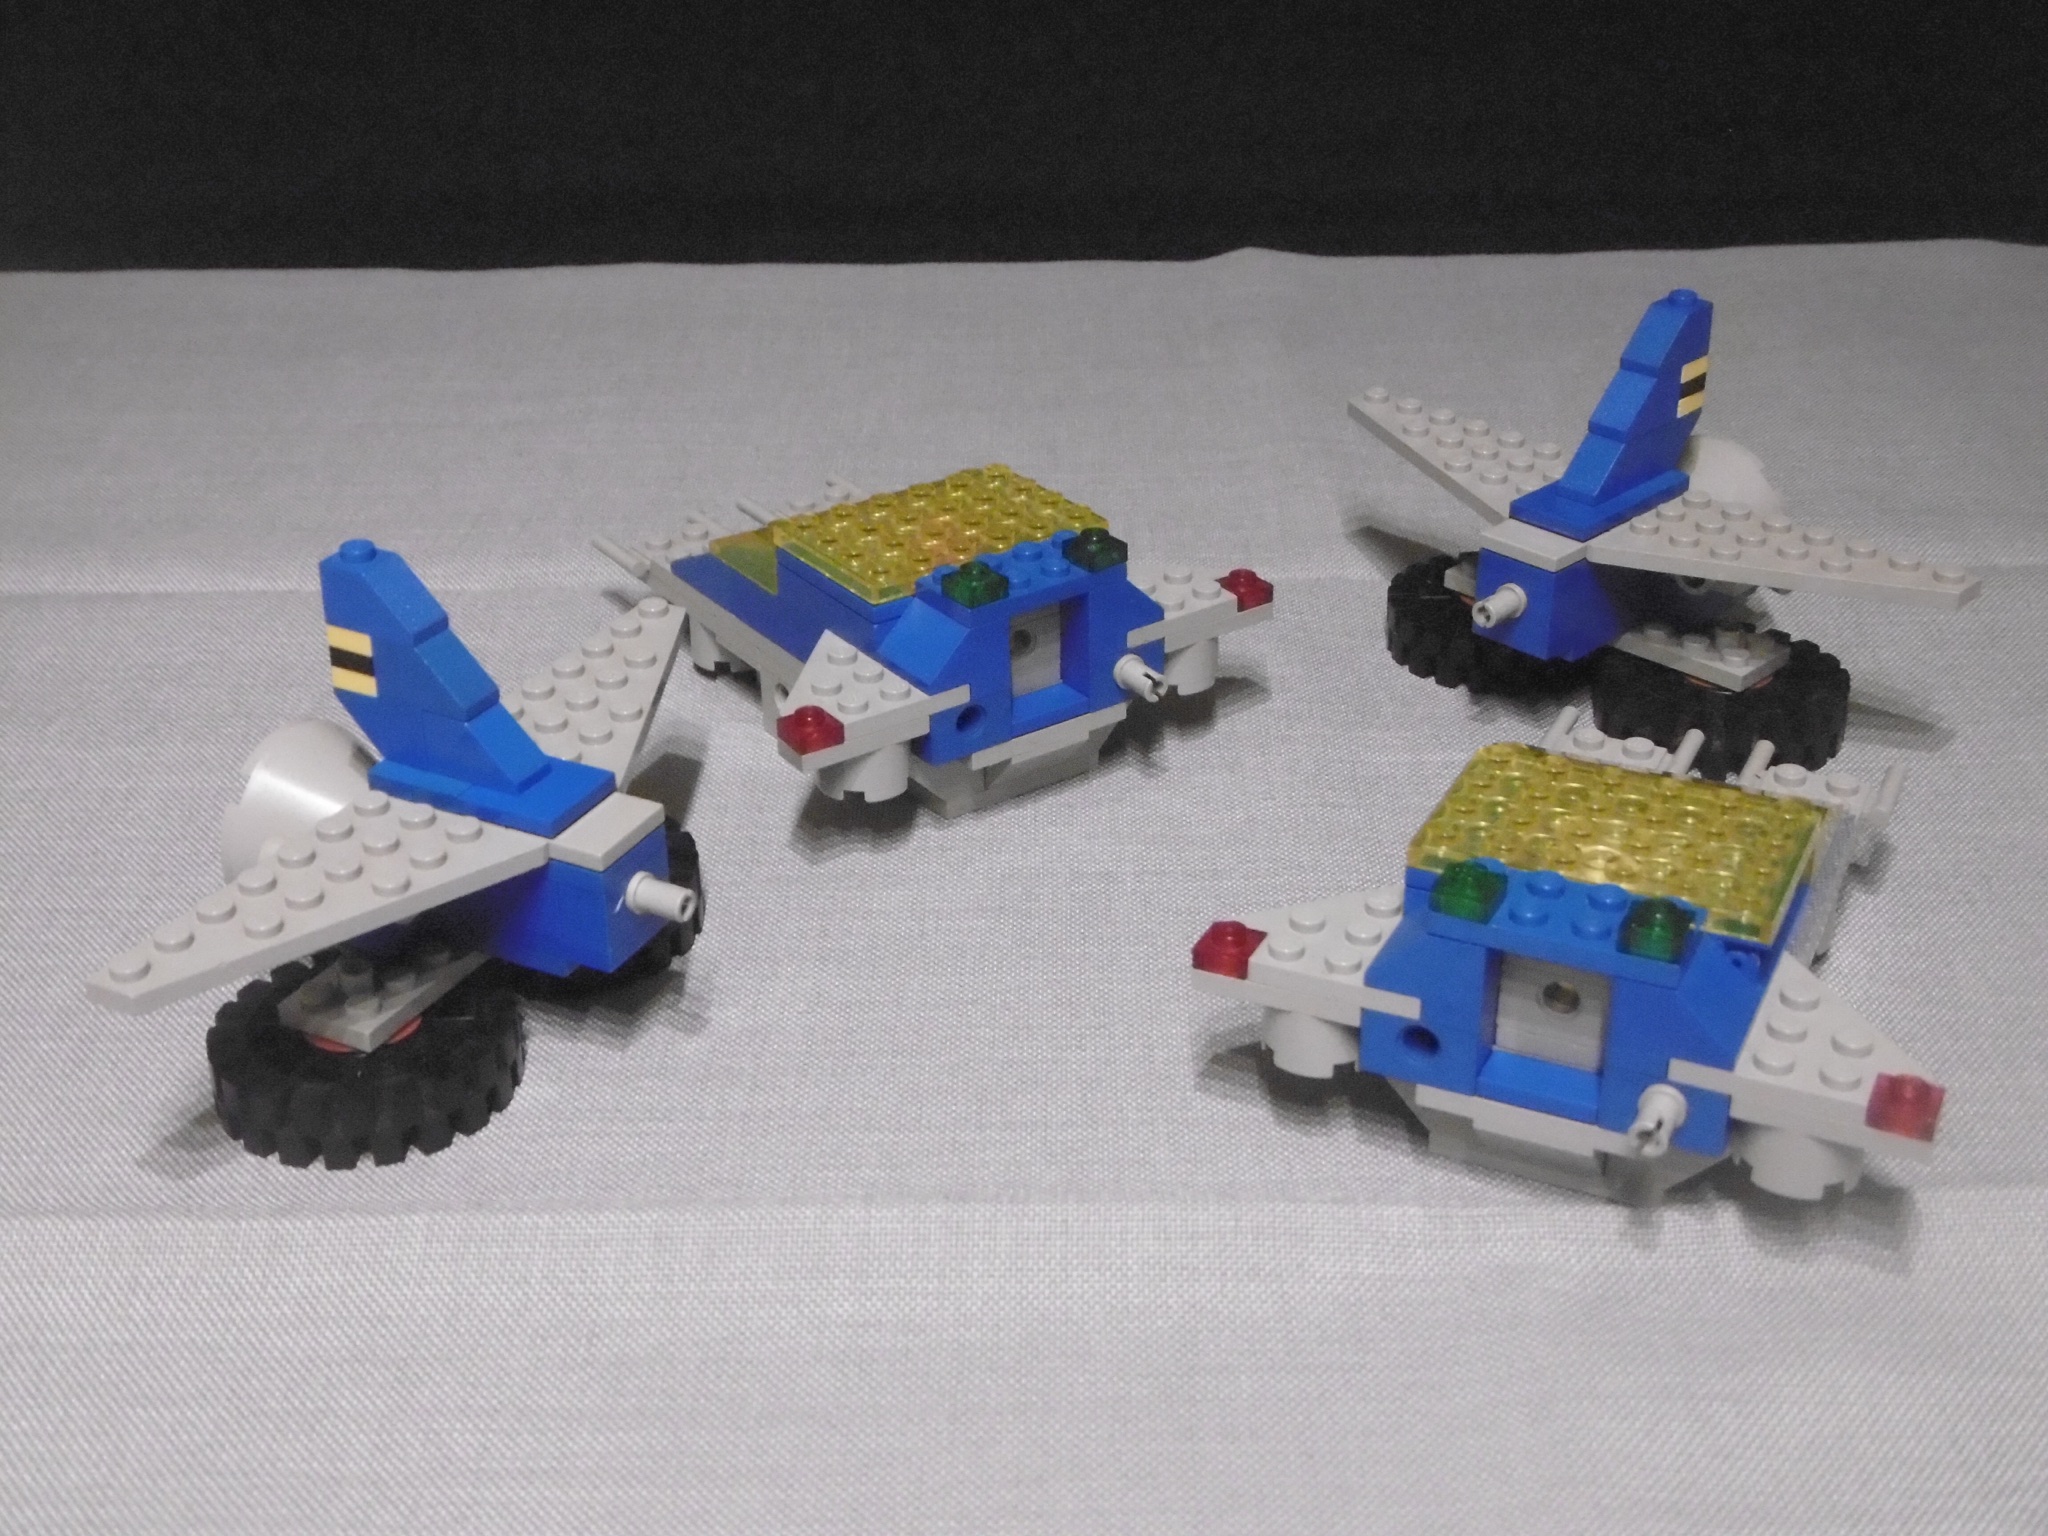
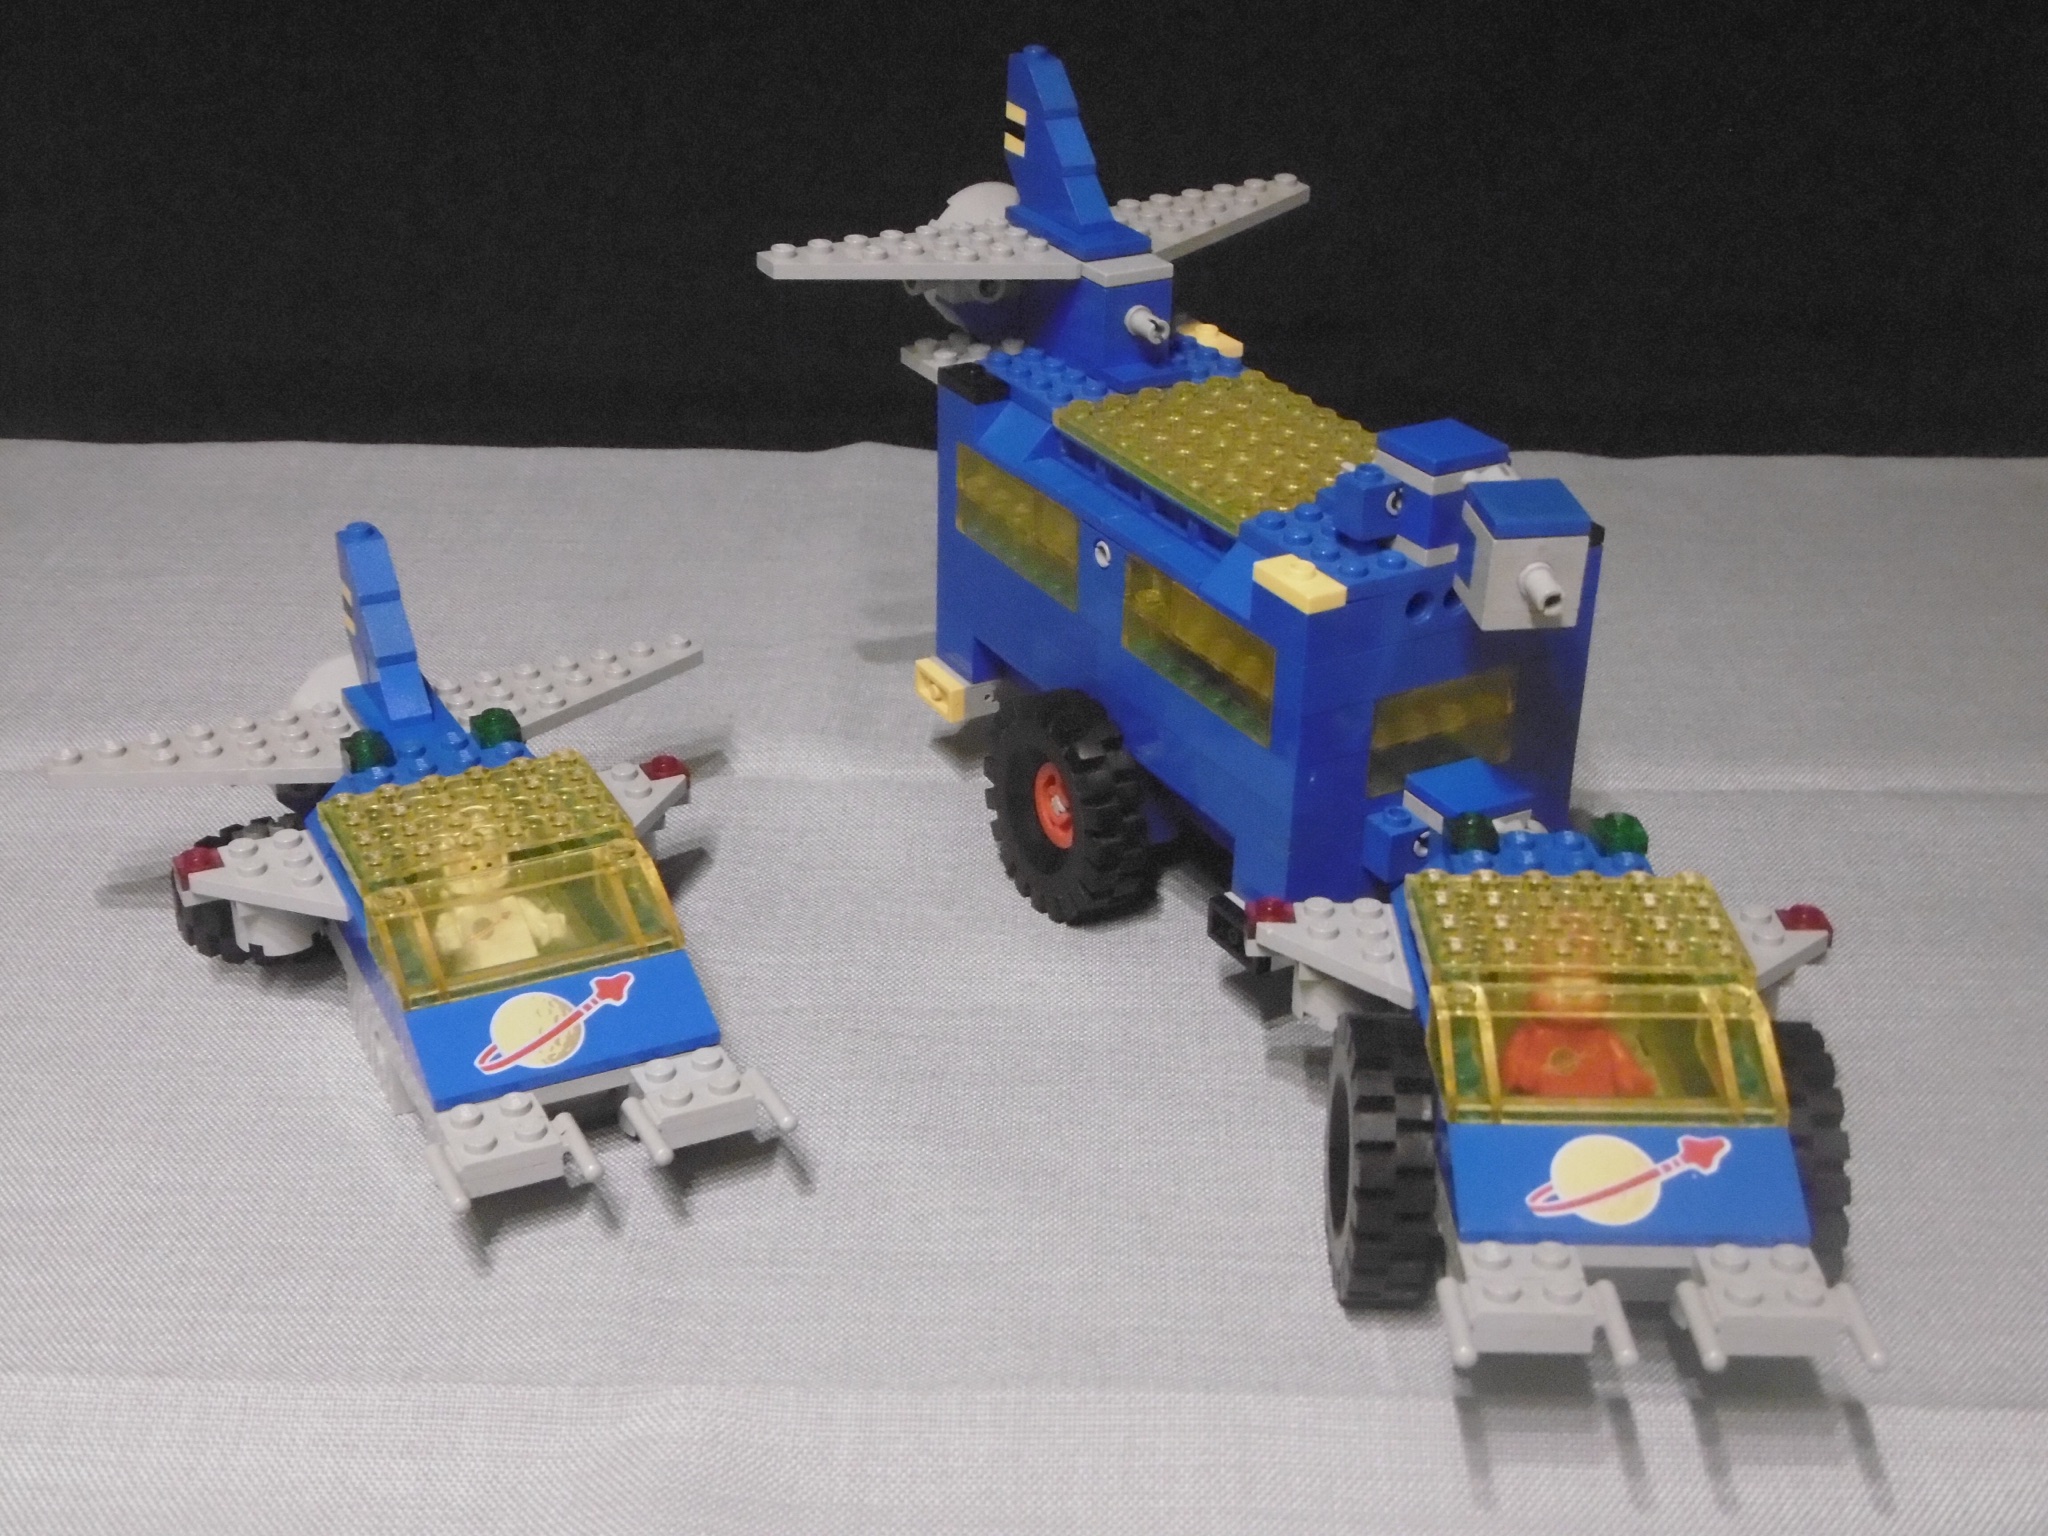
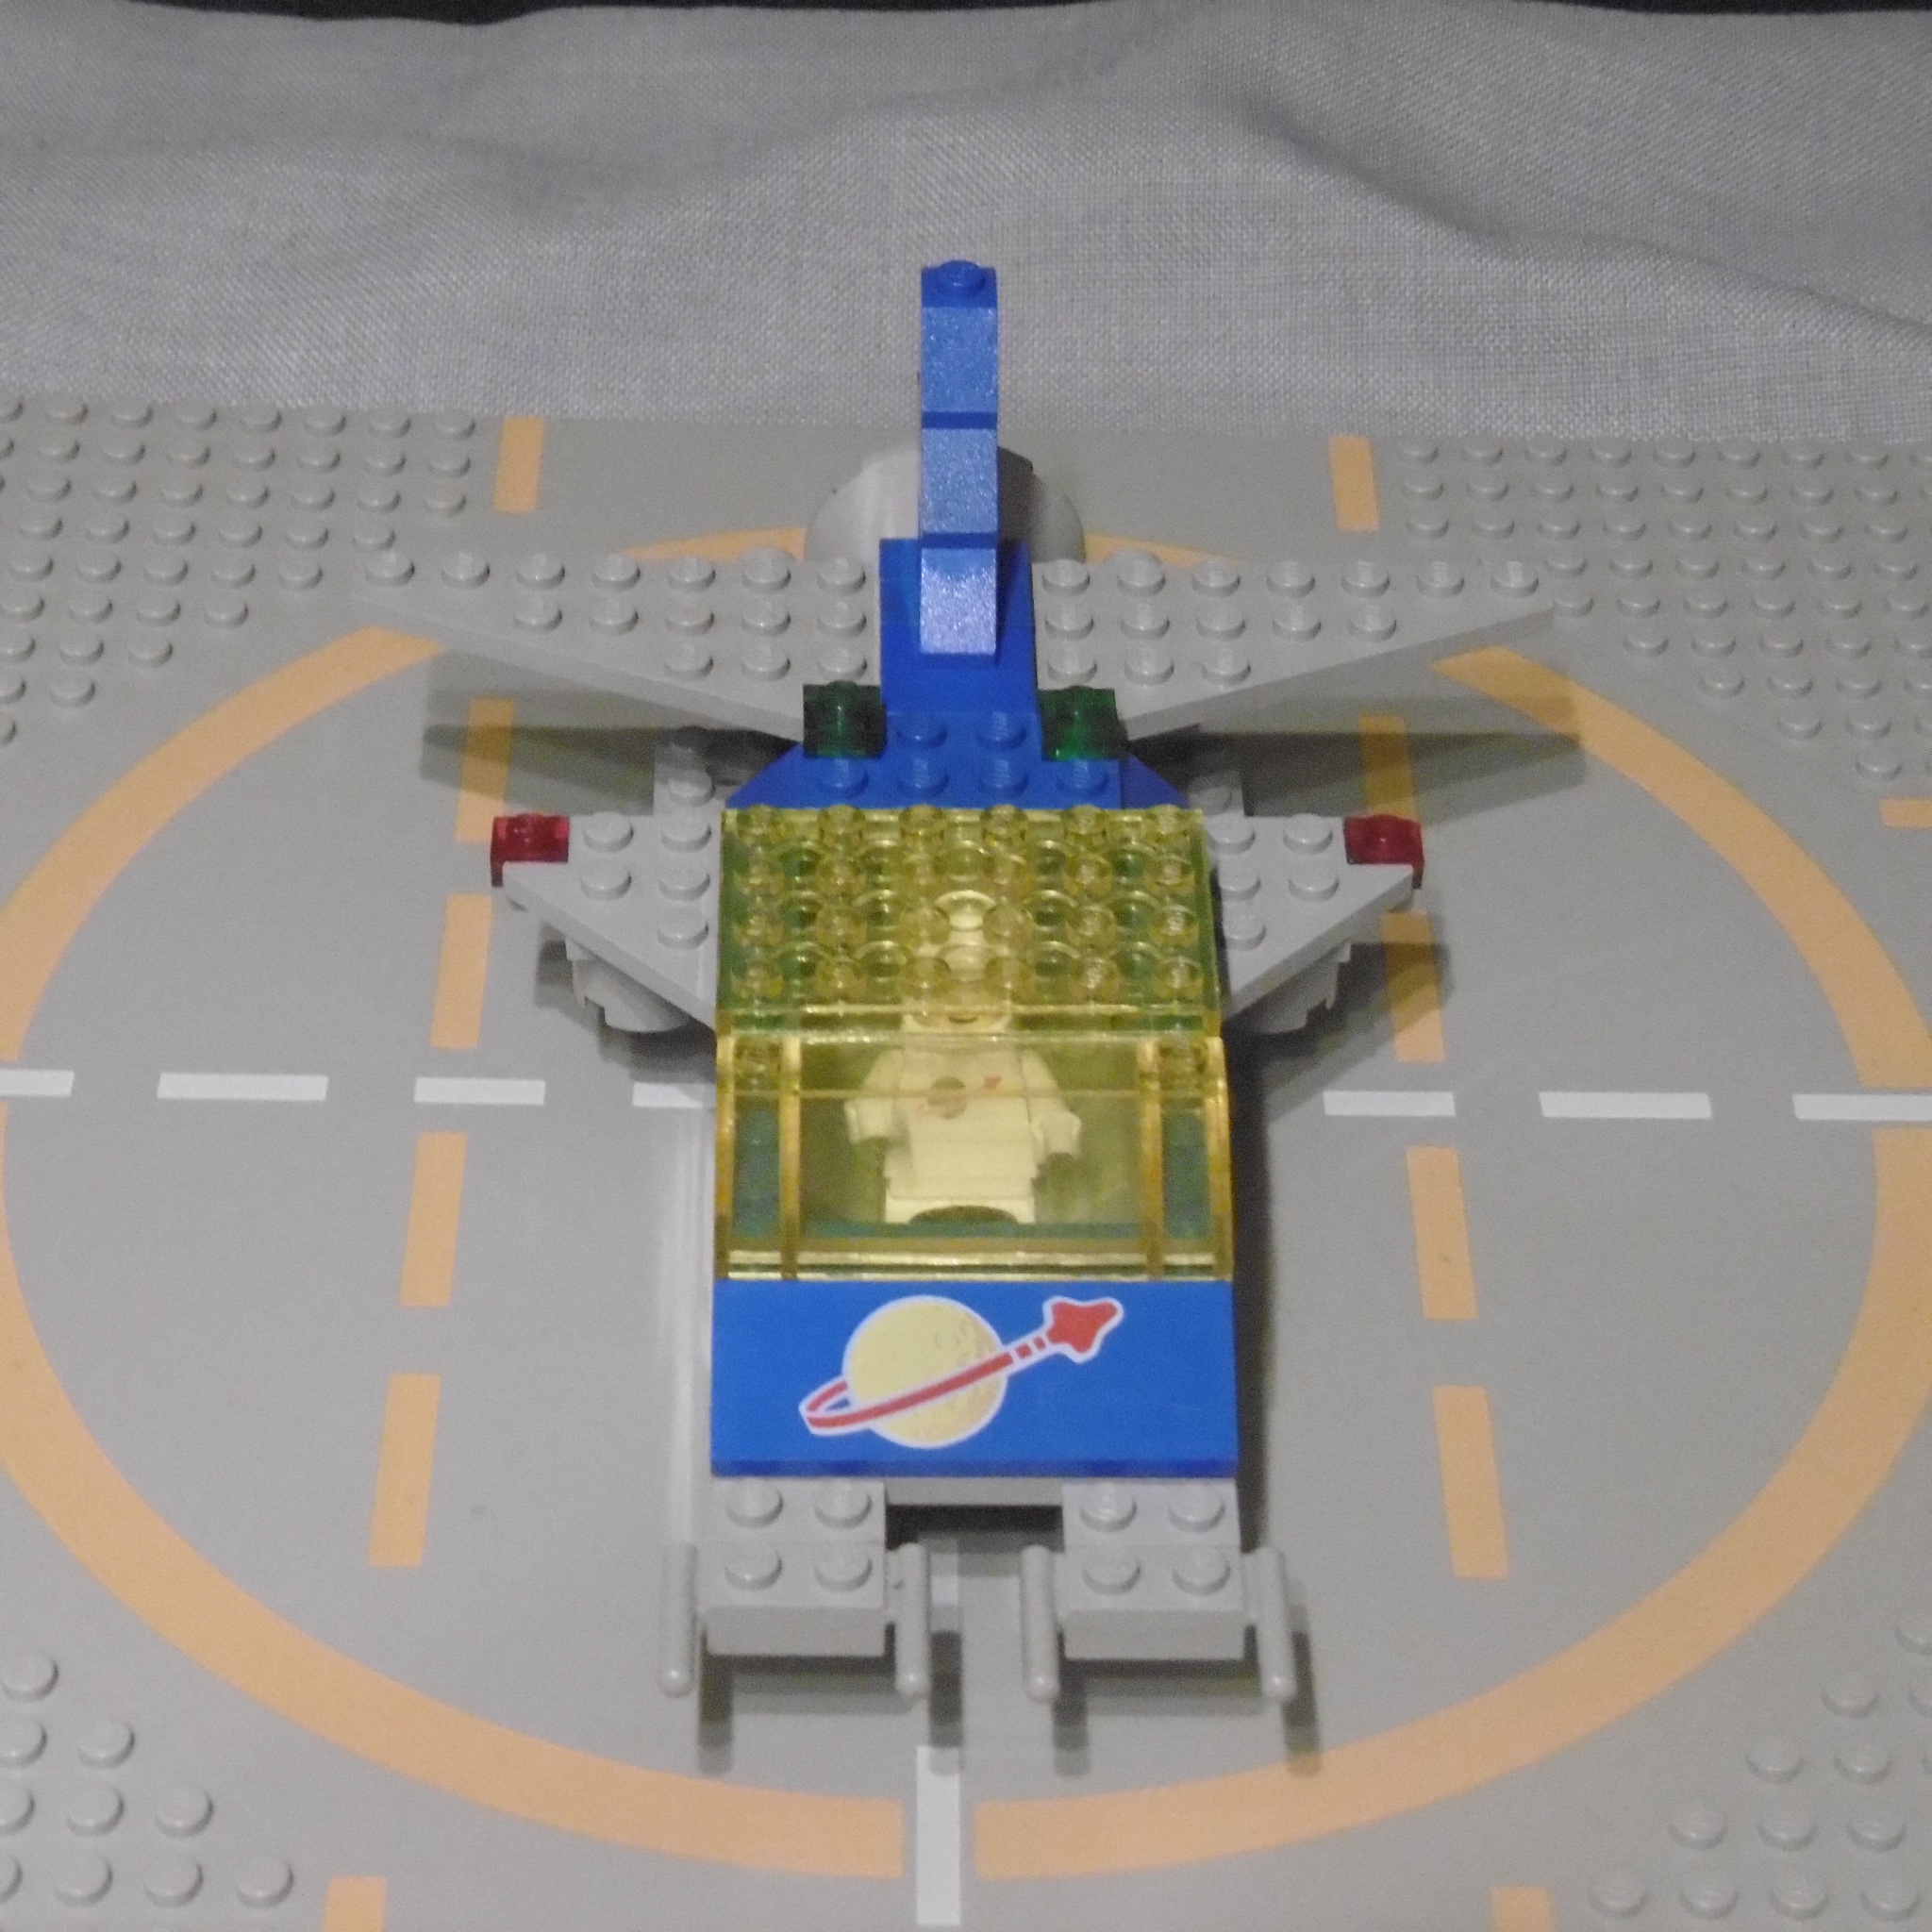
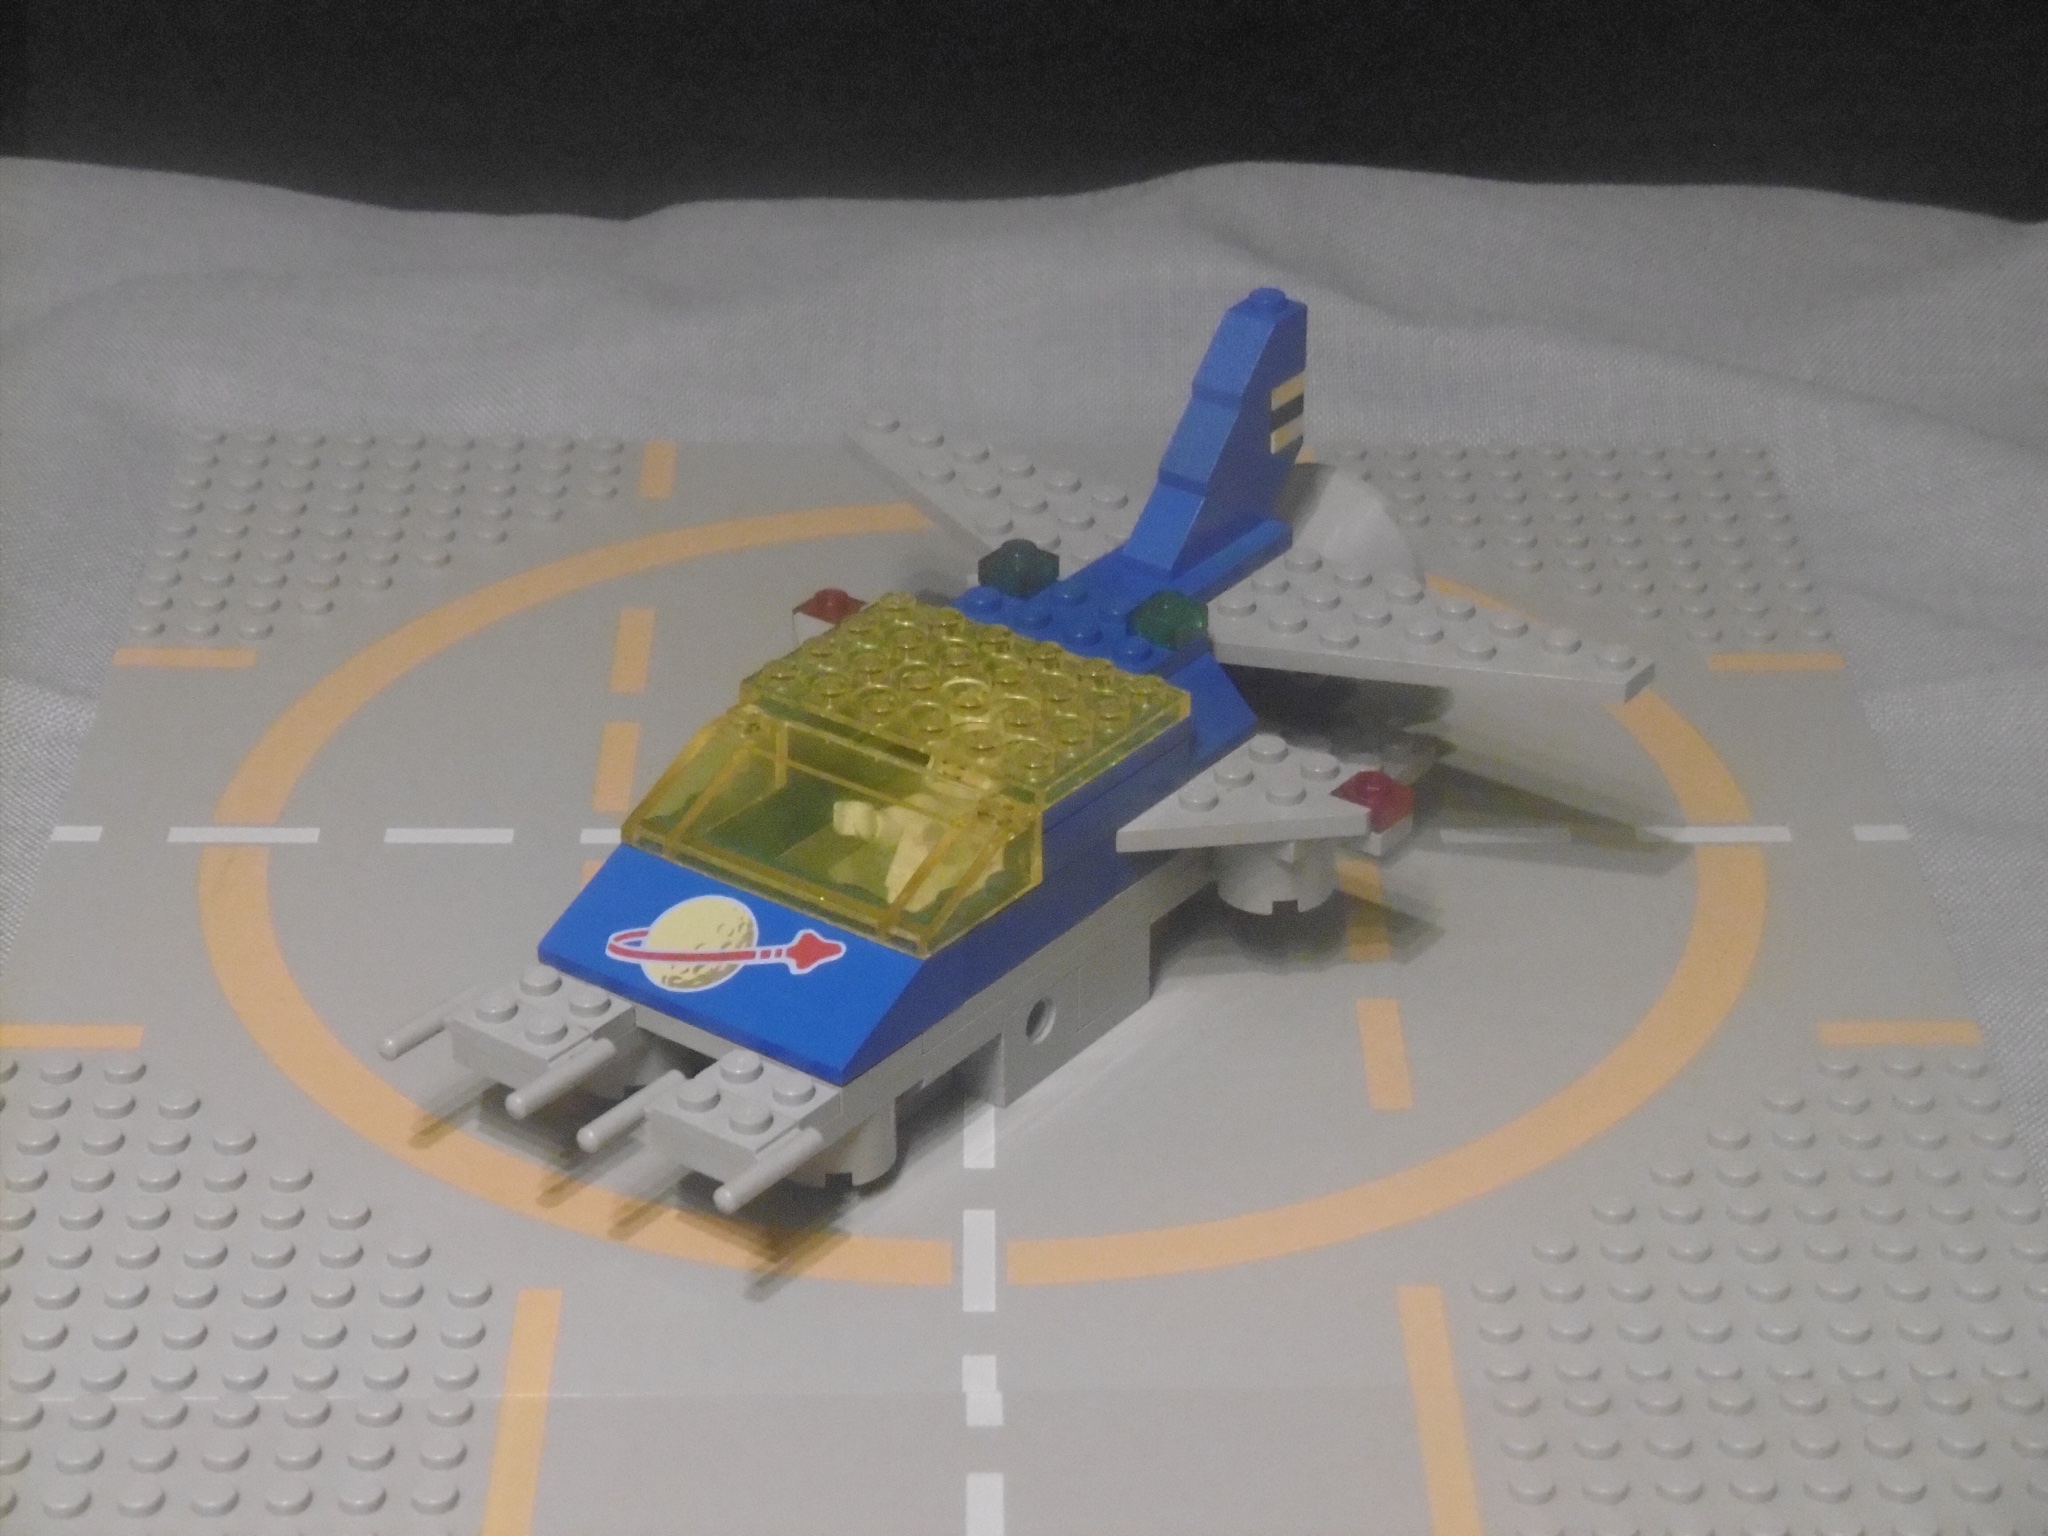
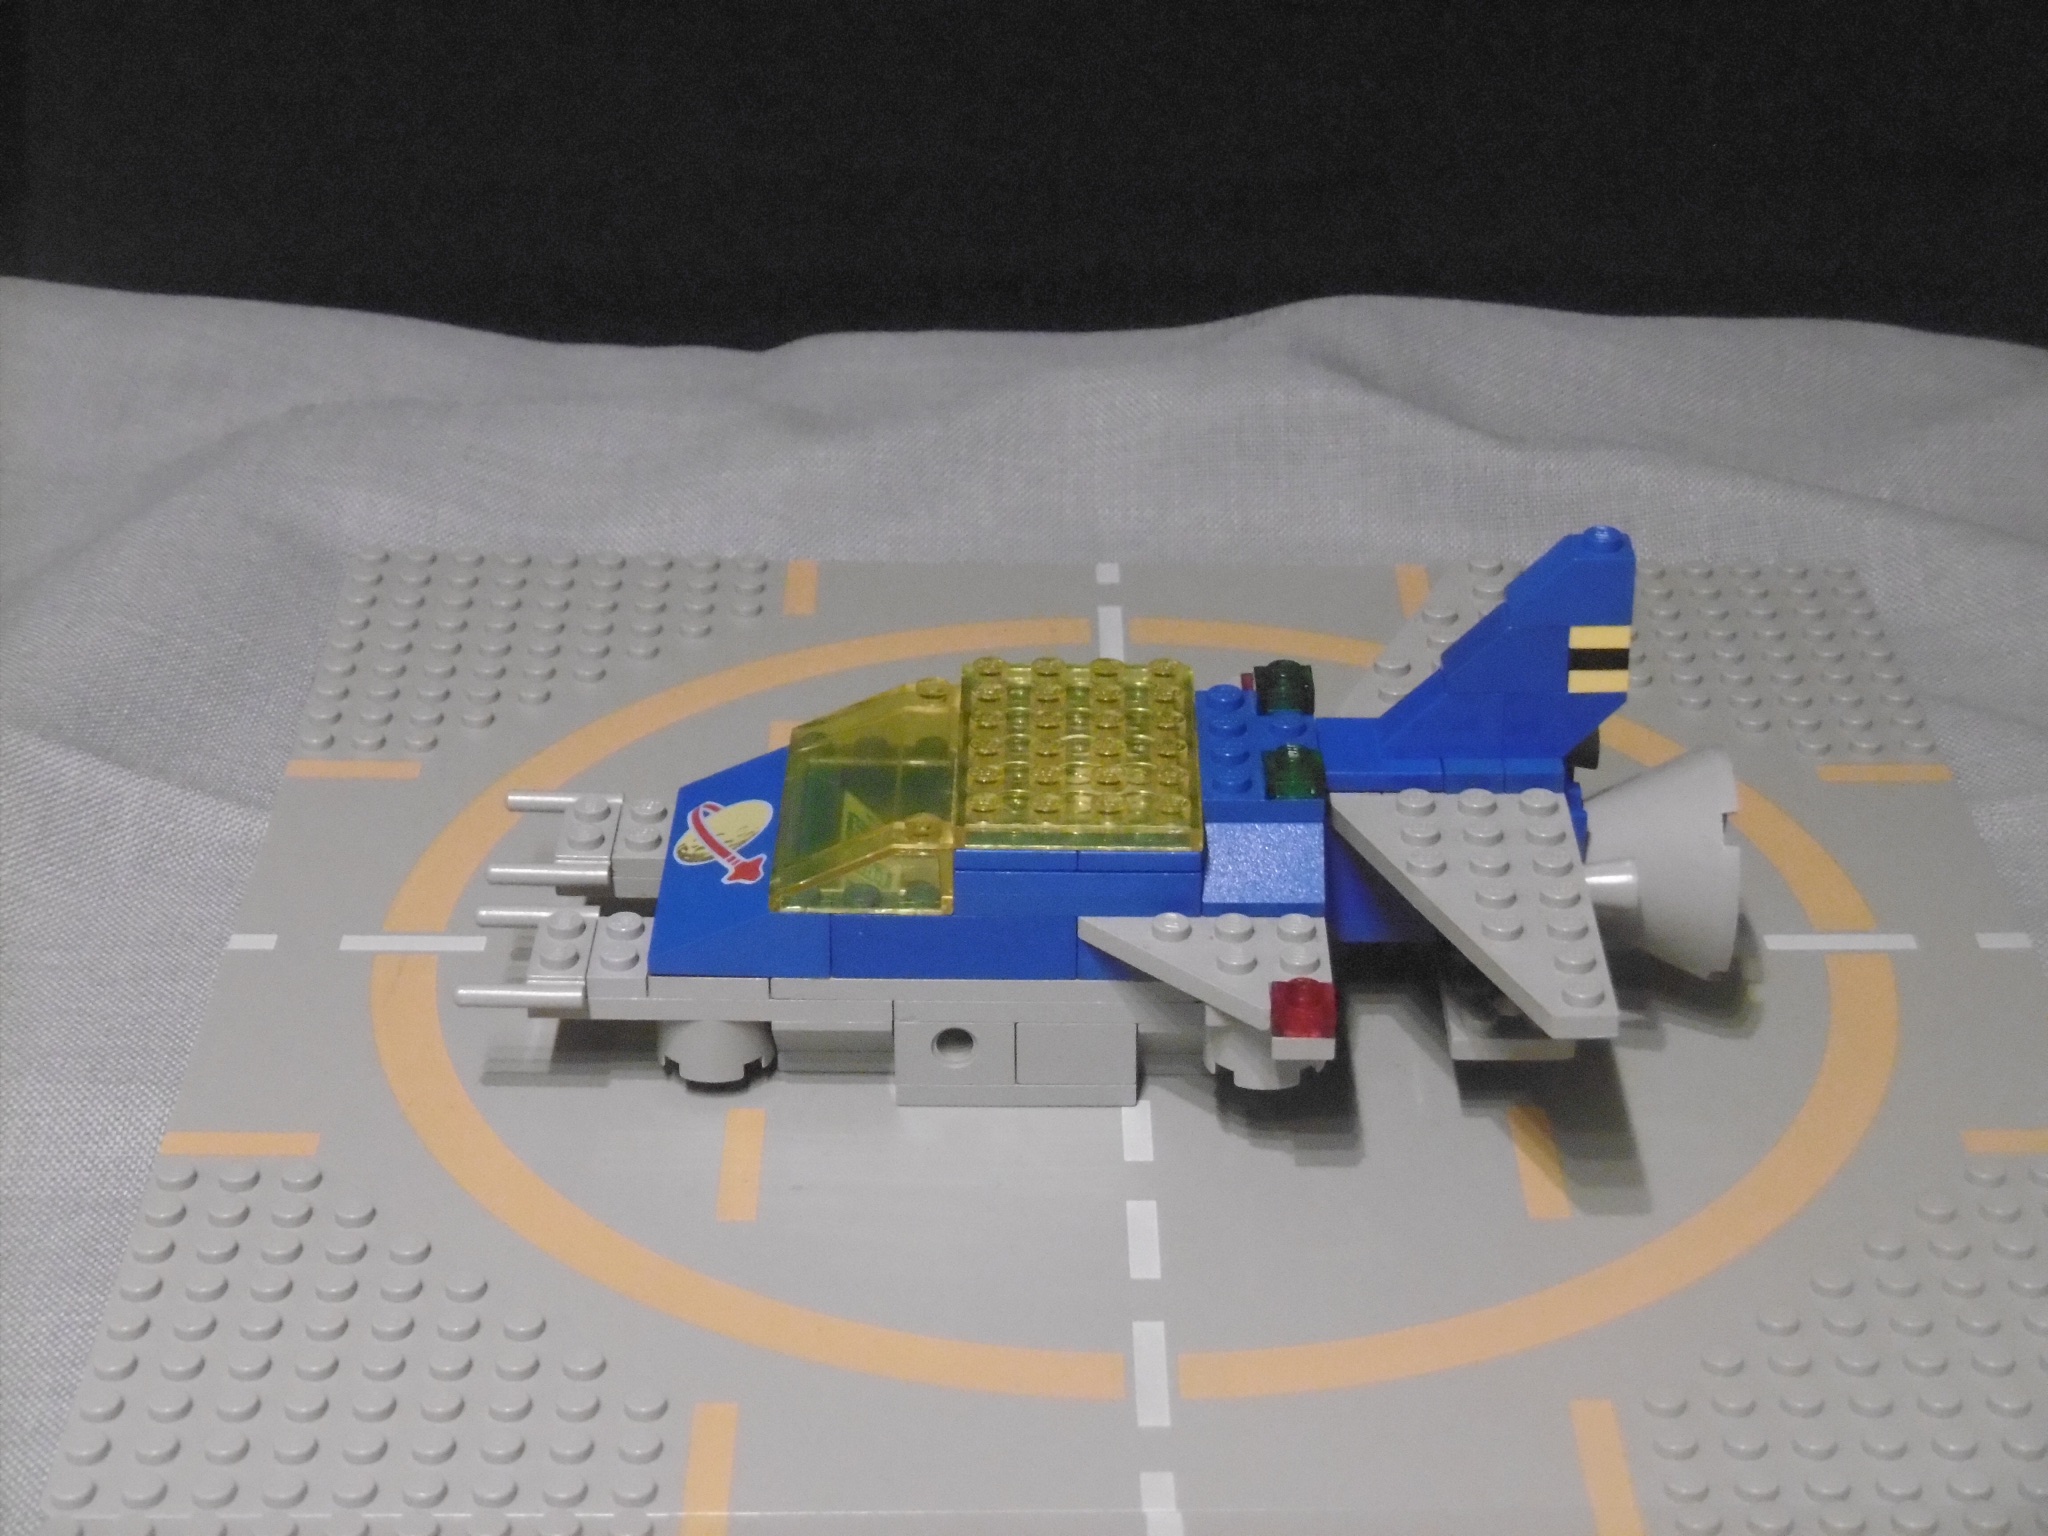
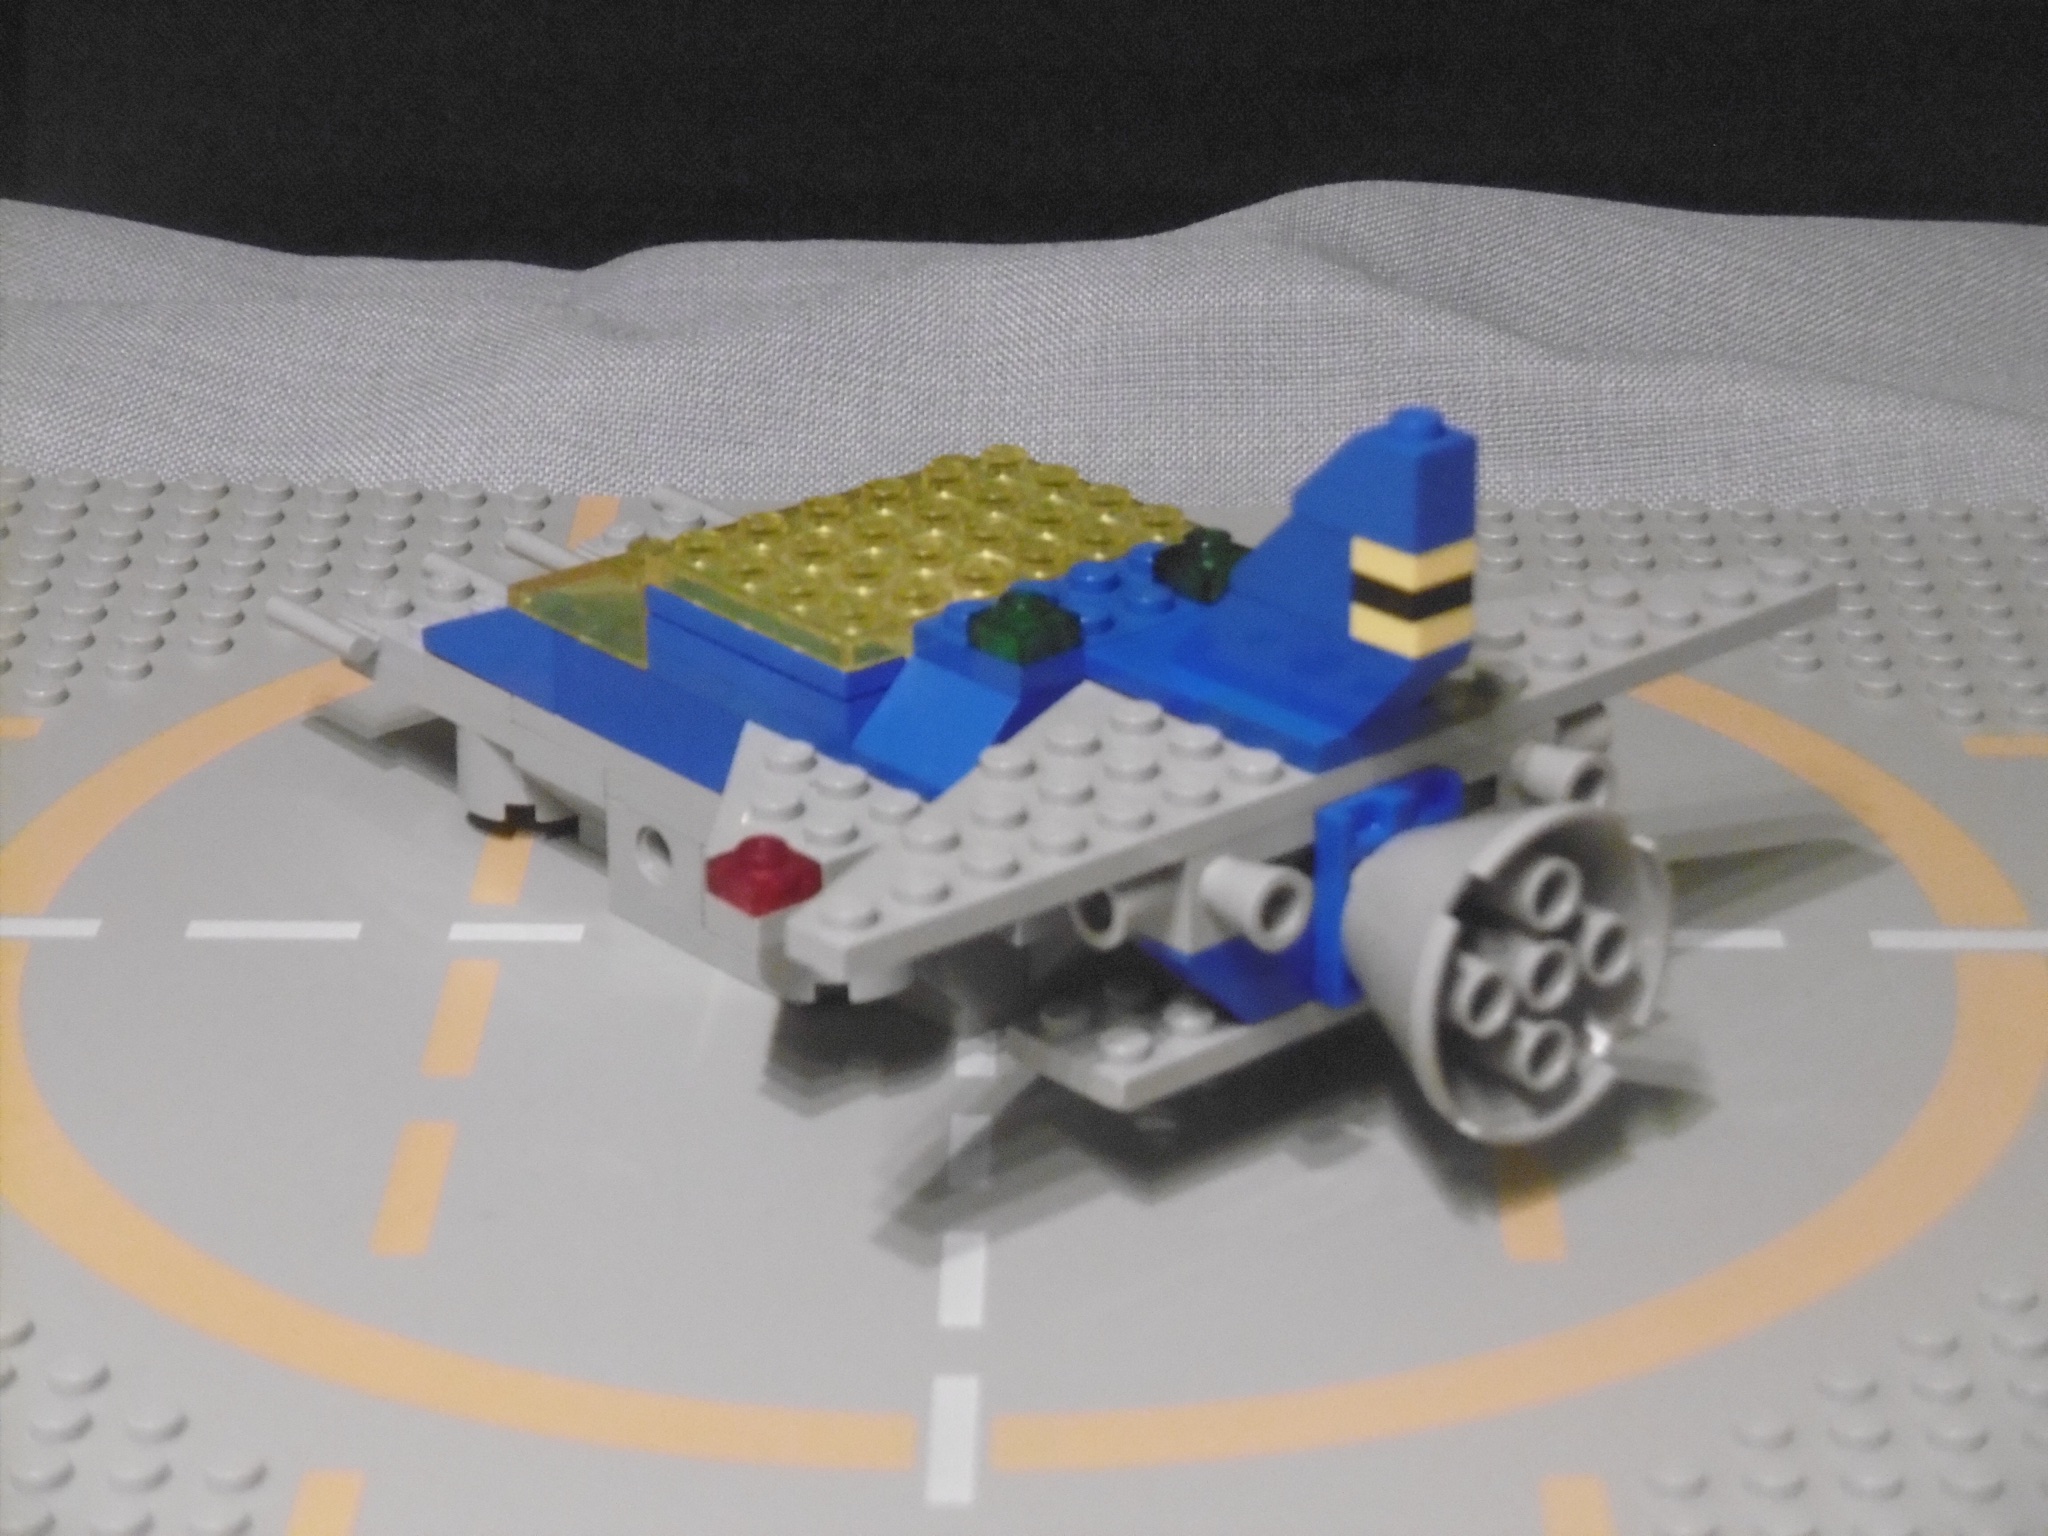
The cockpit section is new, with one more brick in height above the wings and one less below.

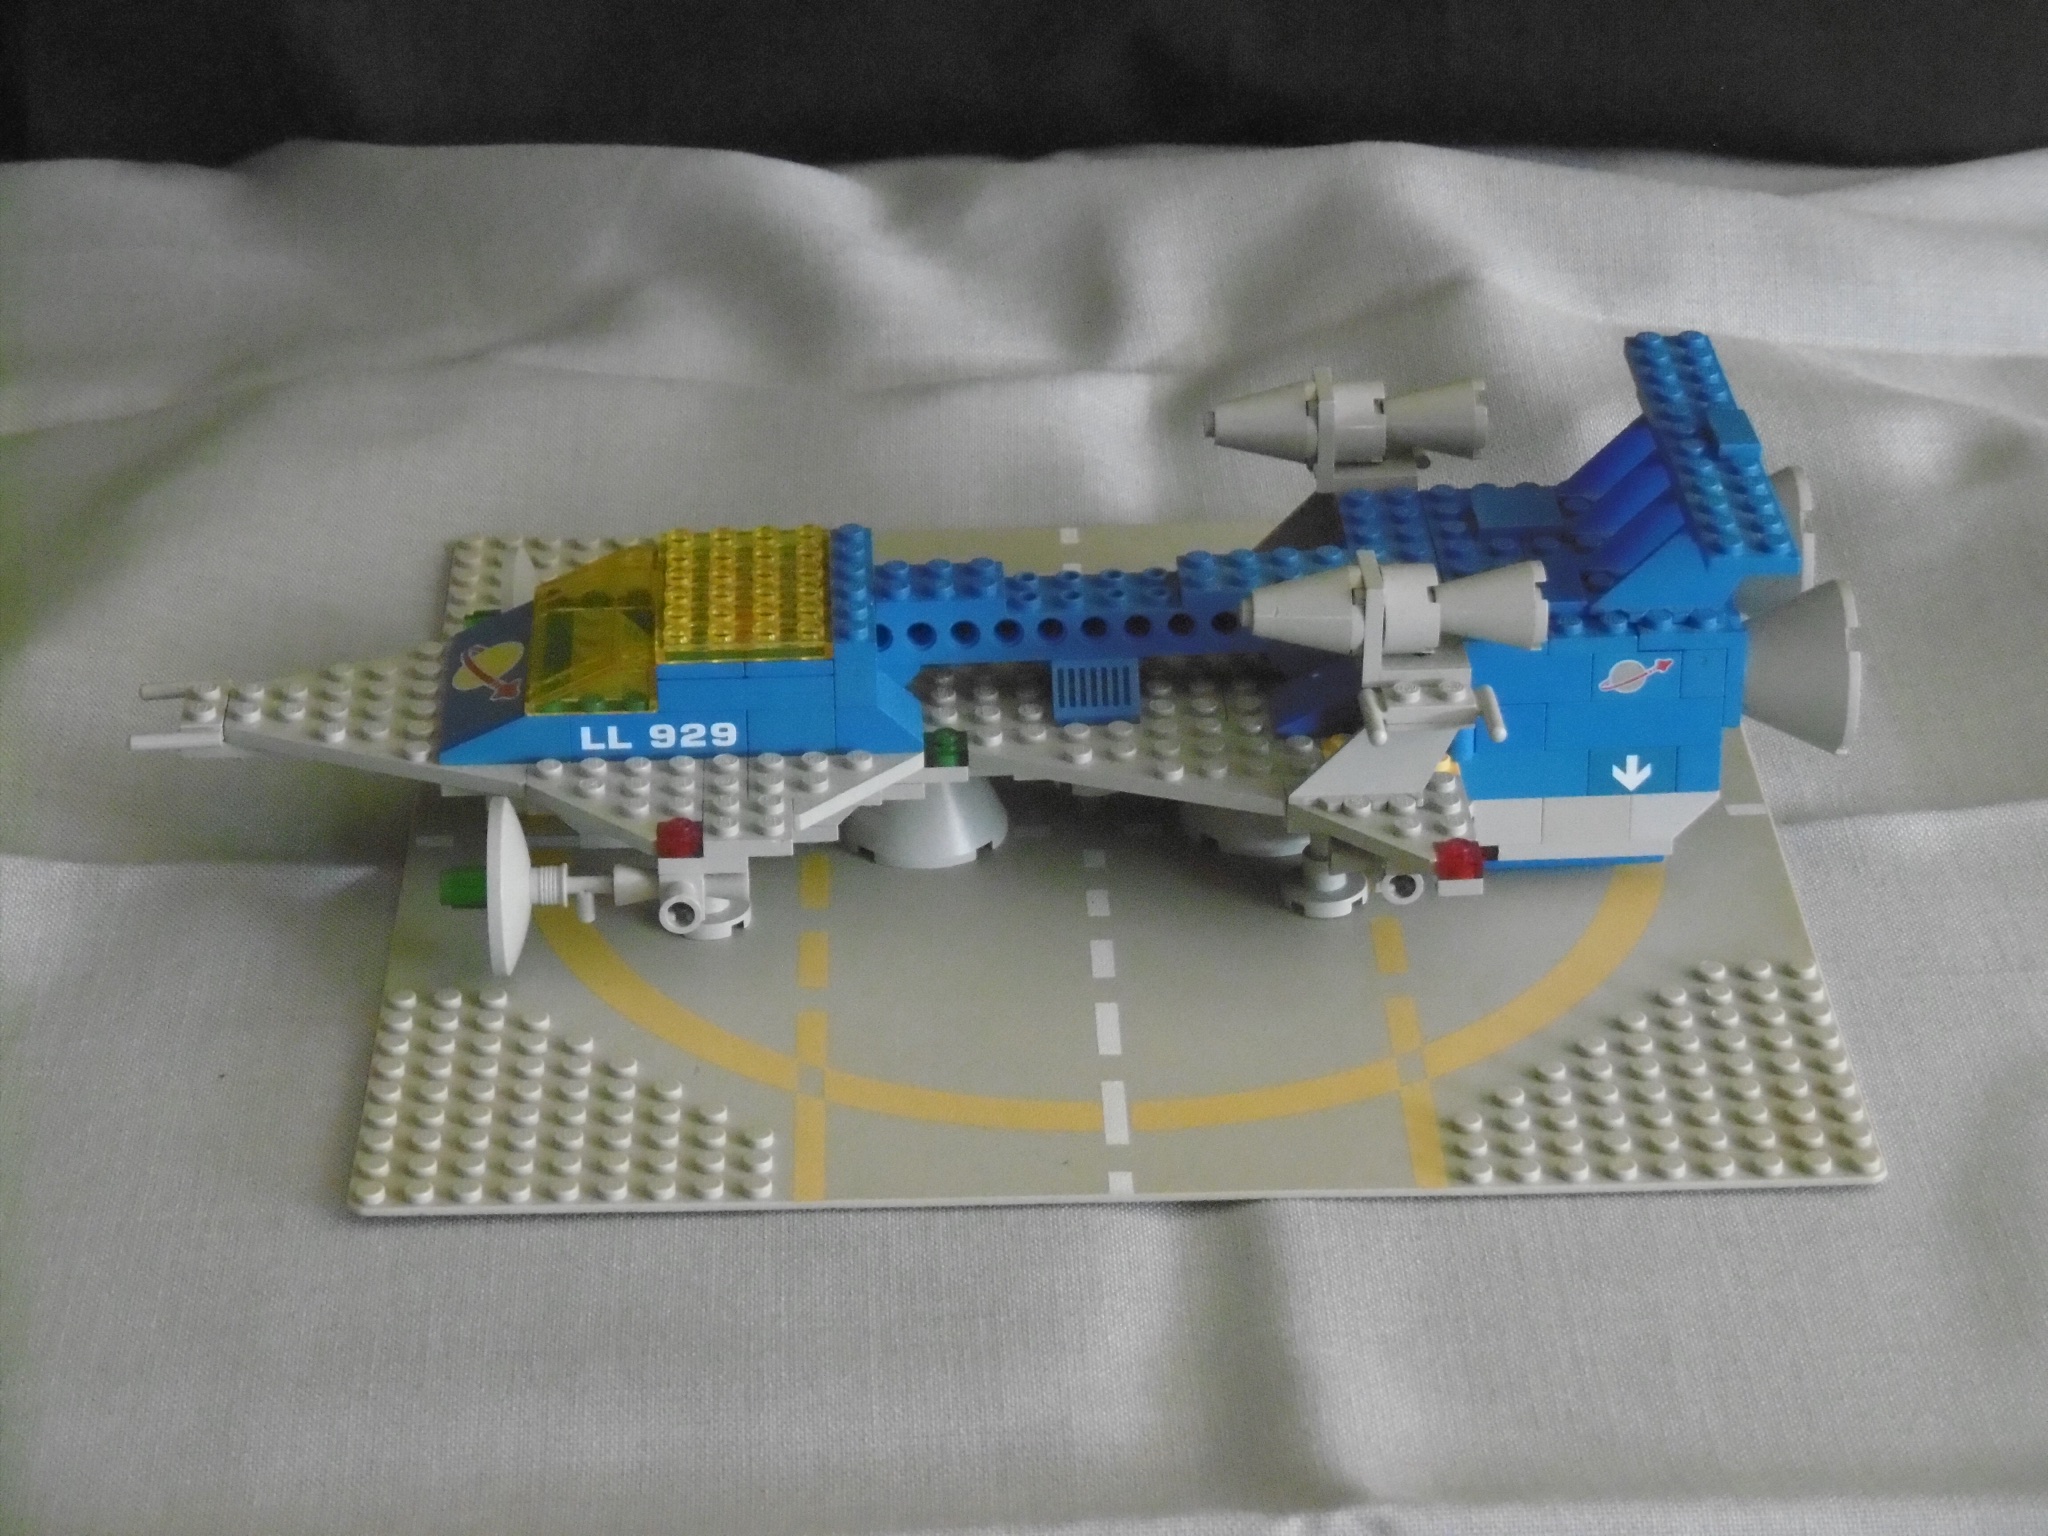
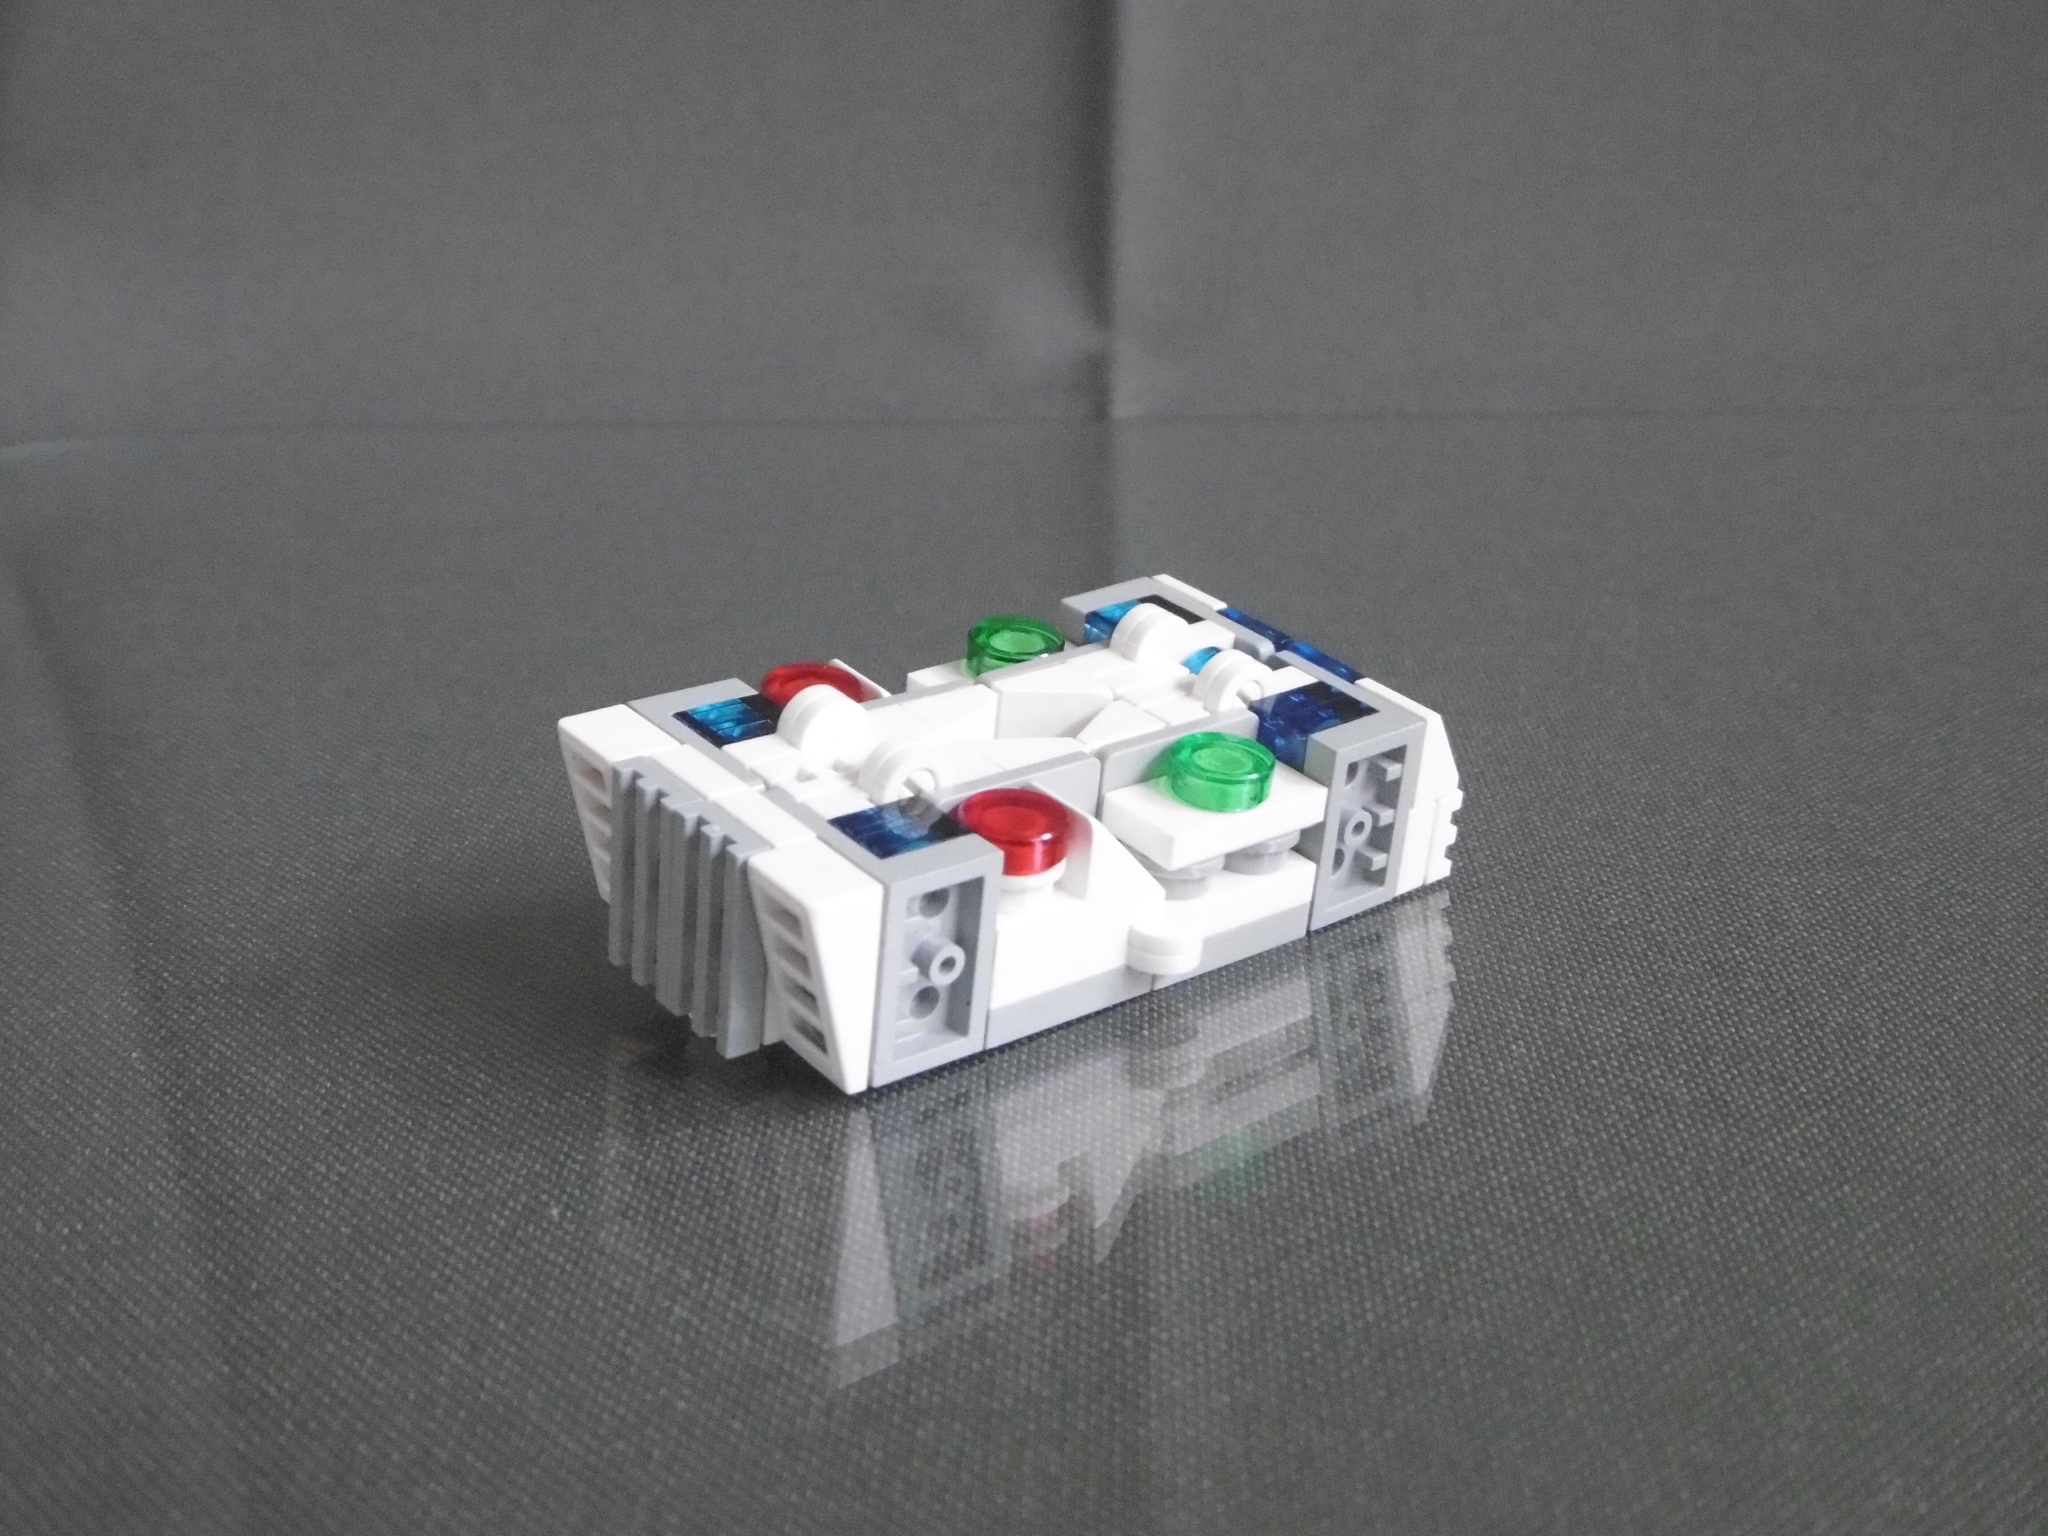
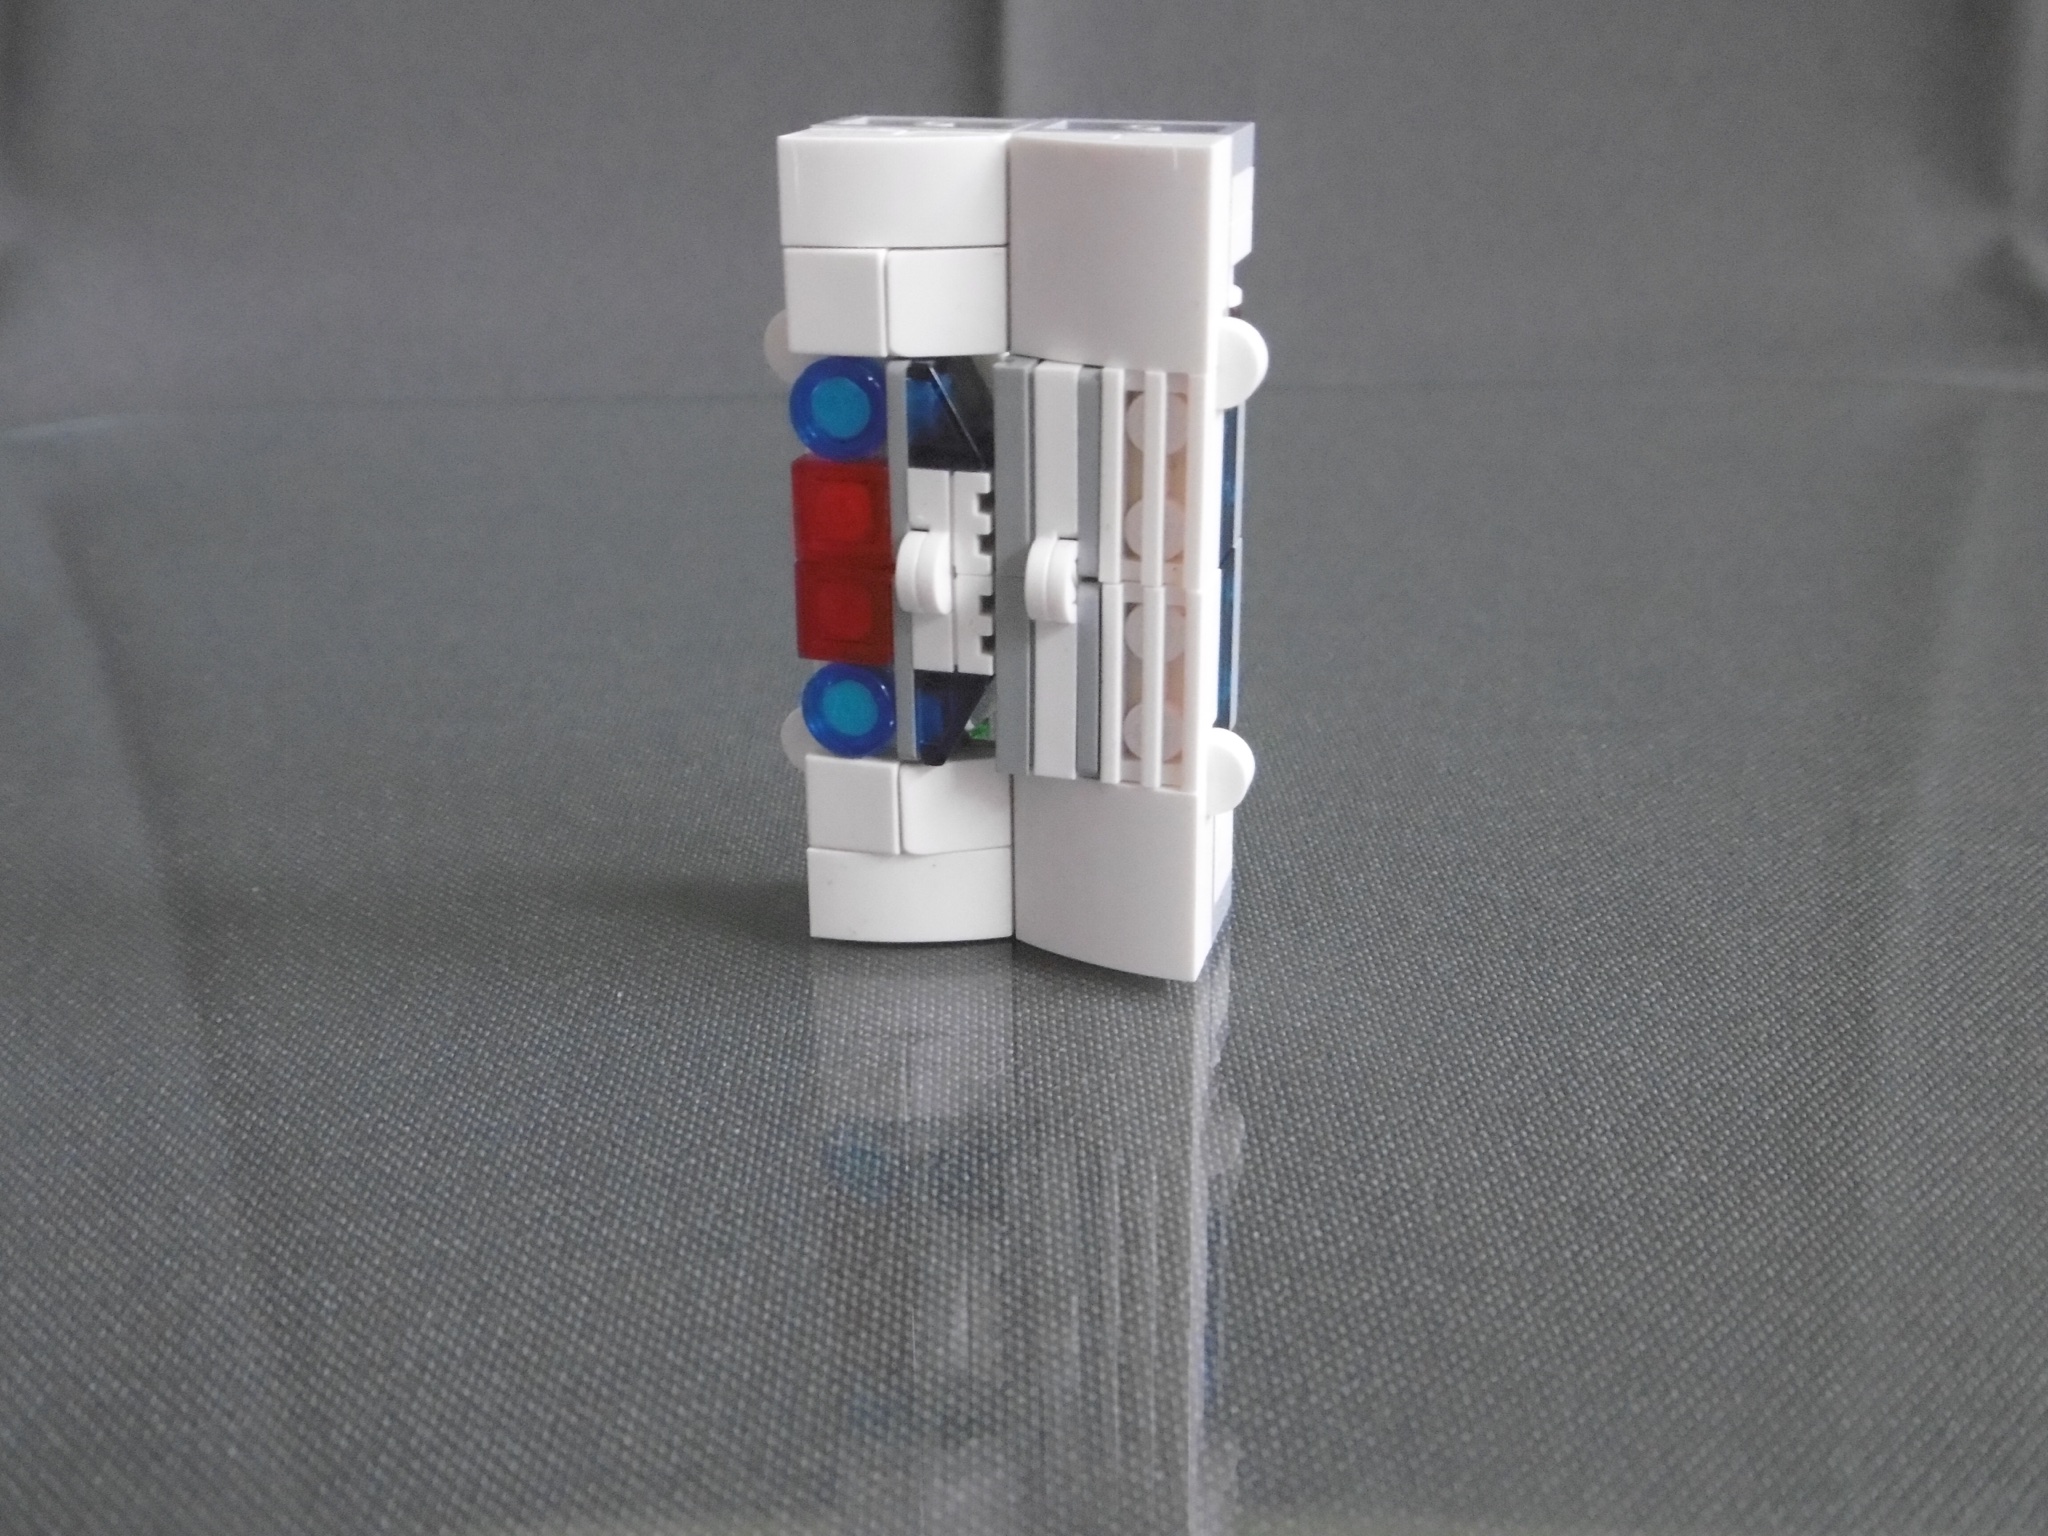
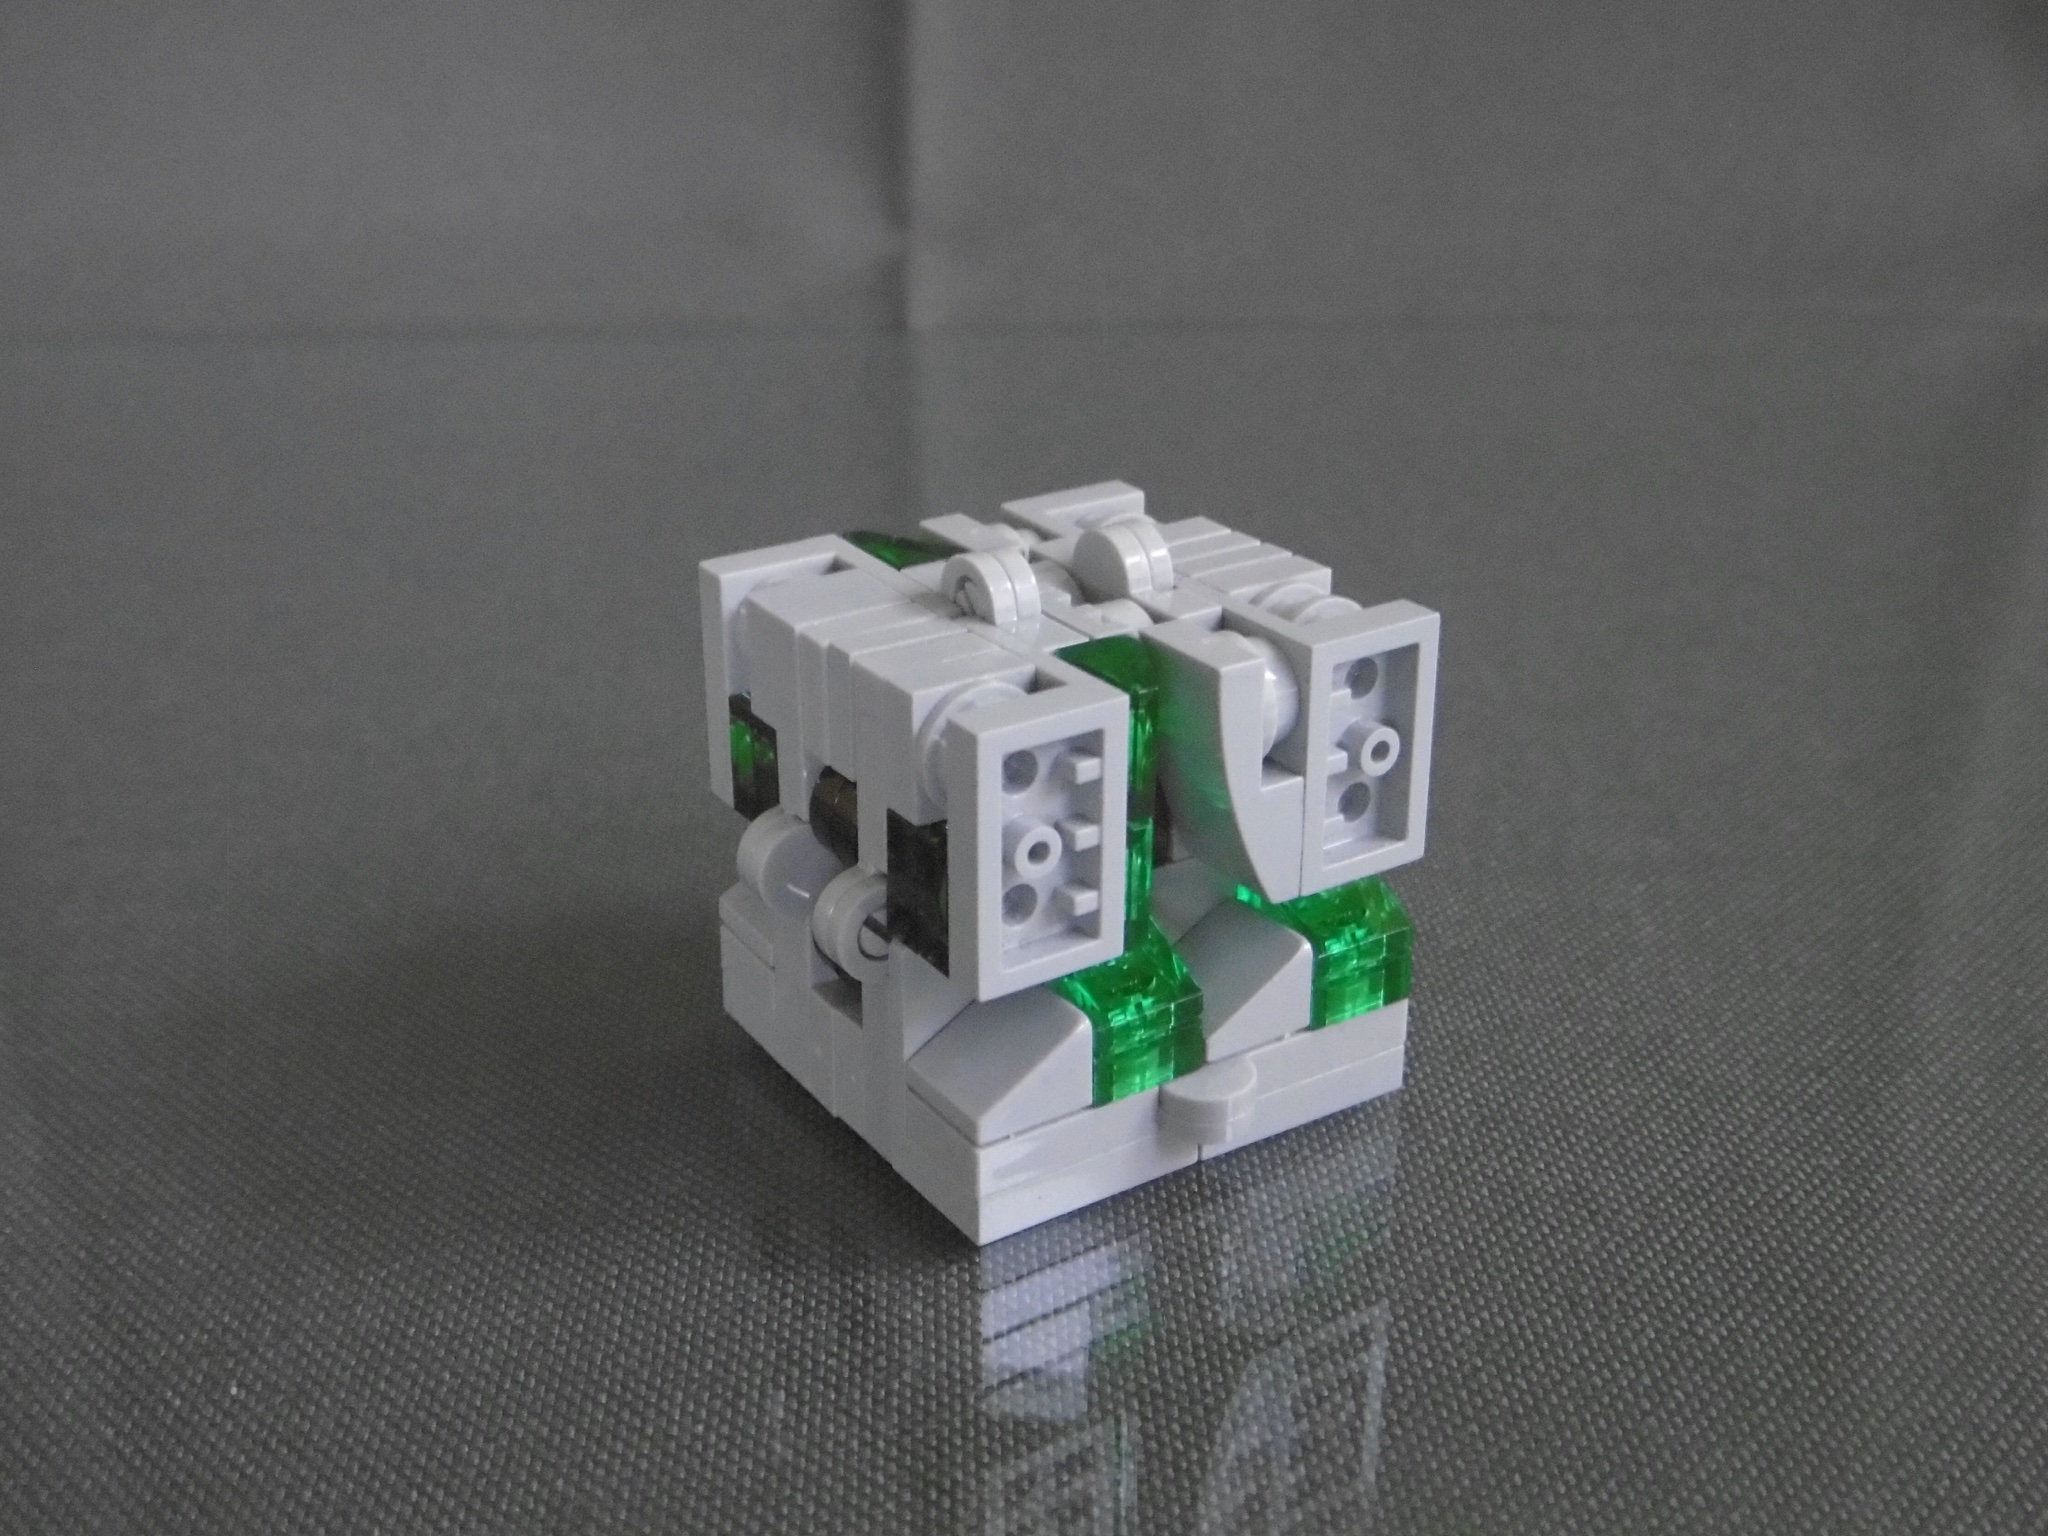
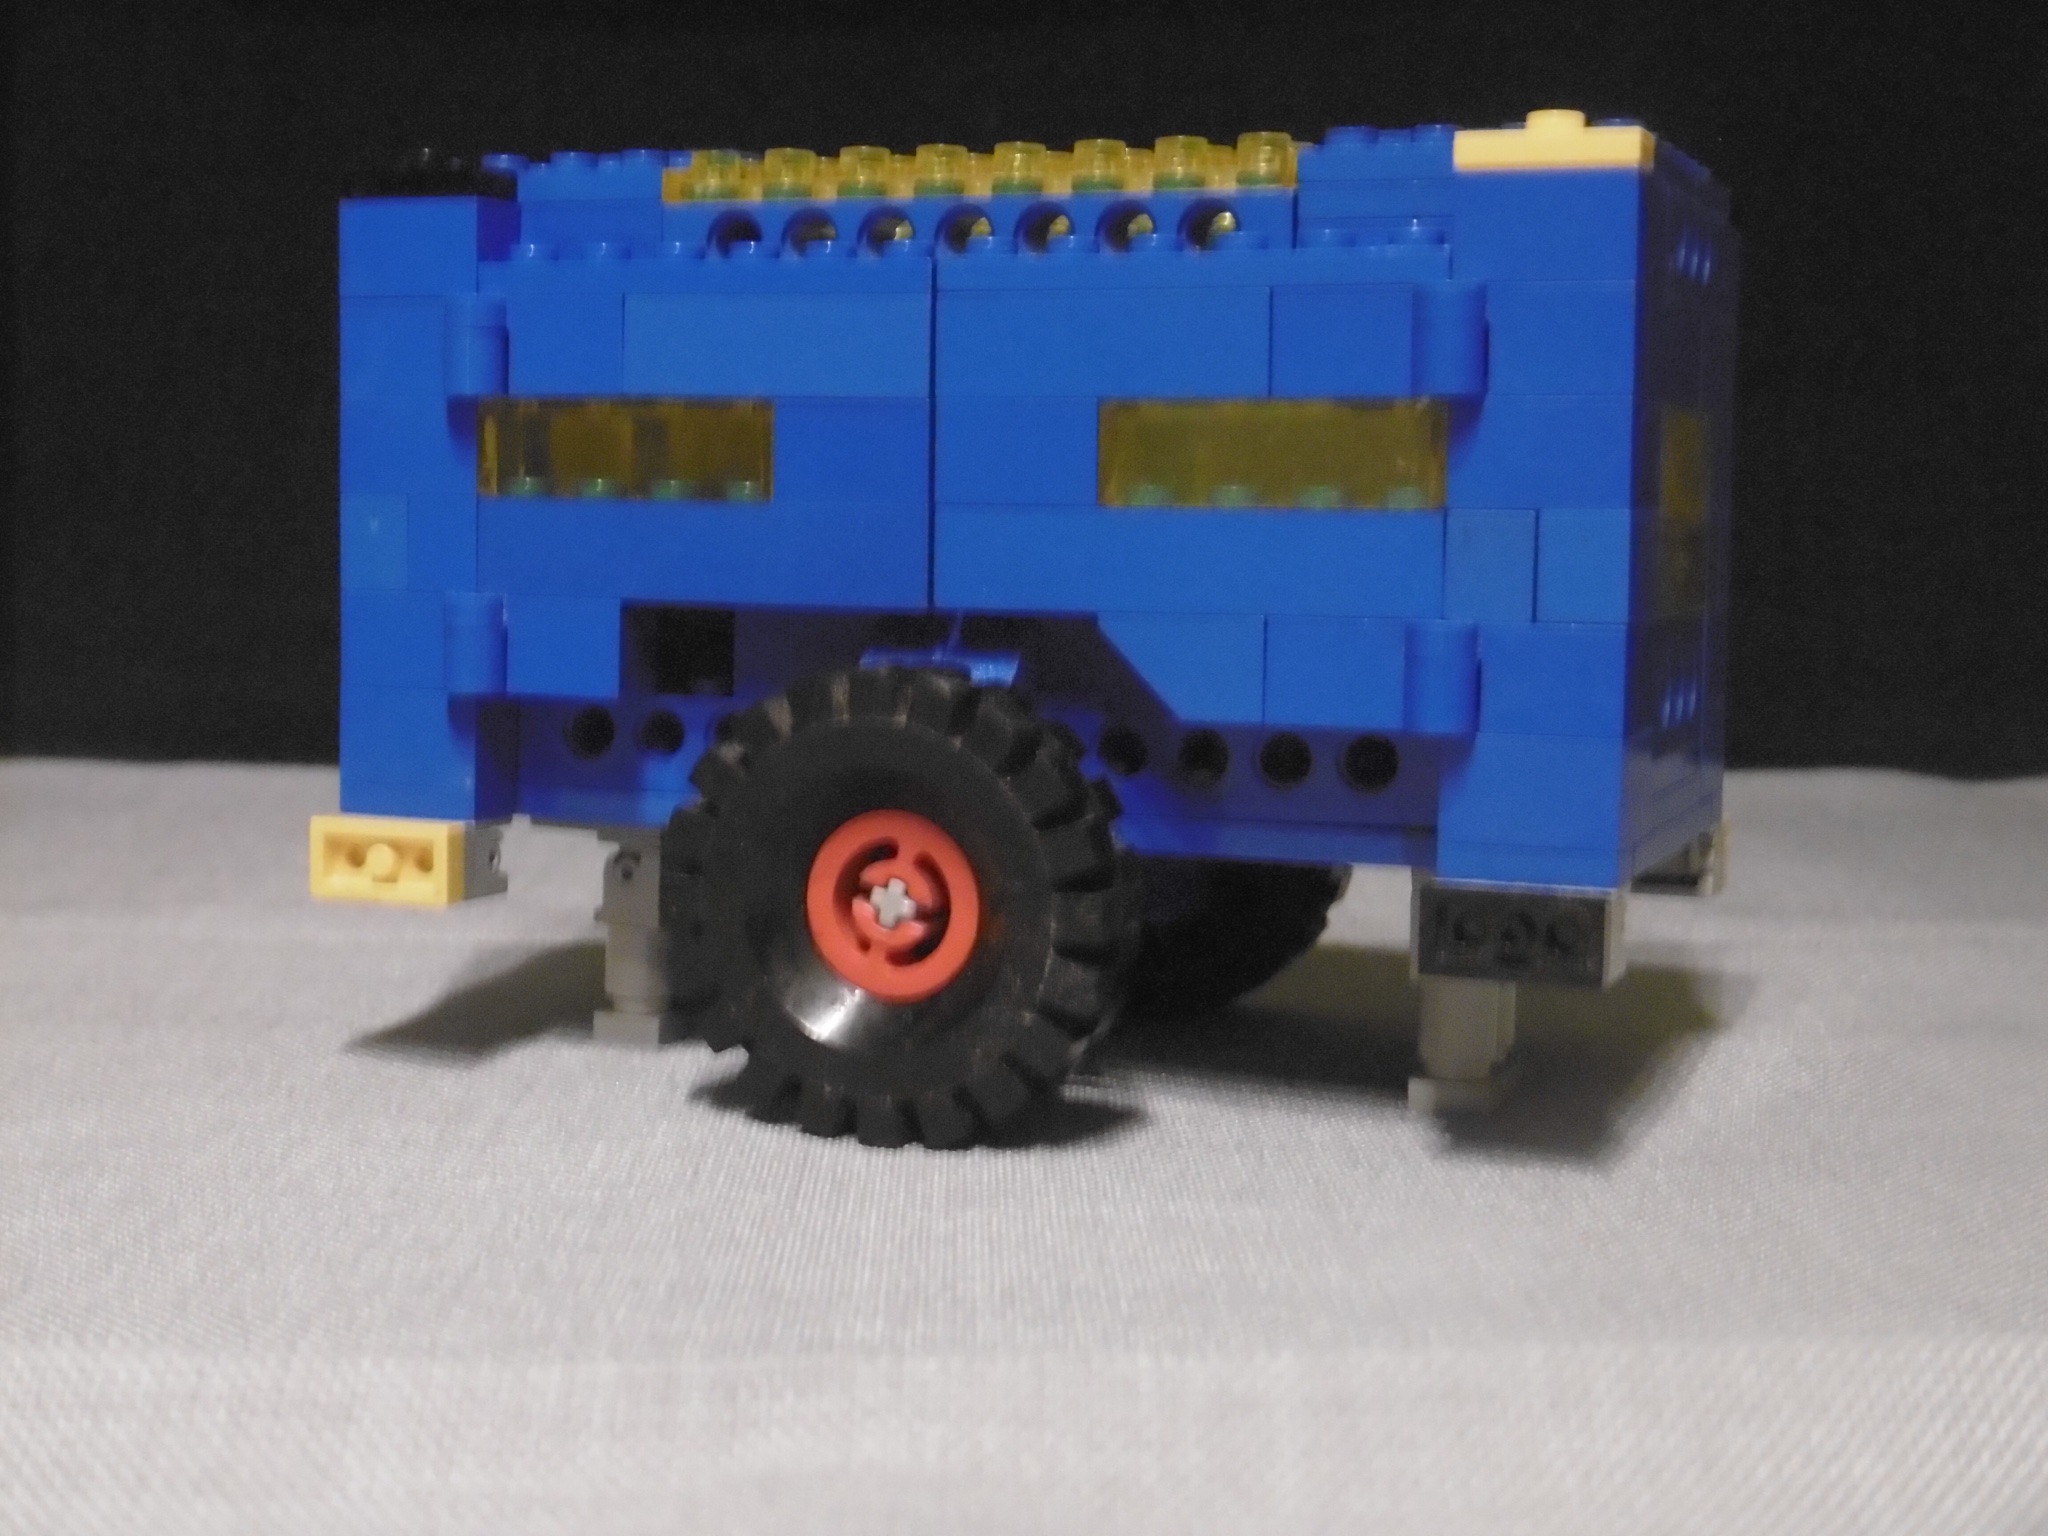
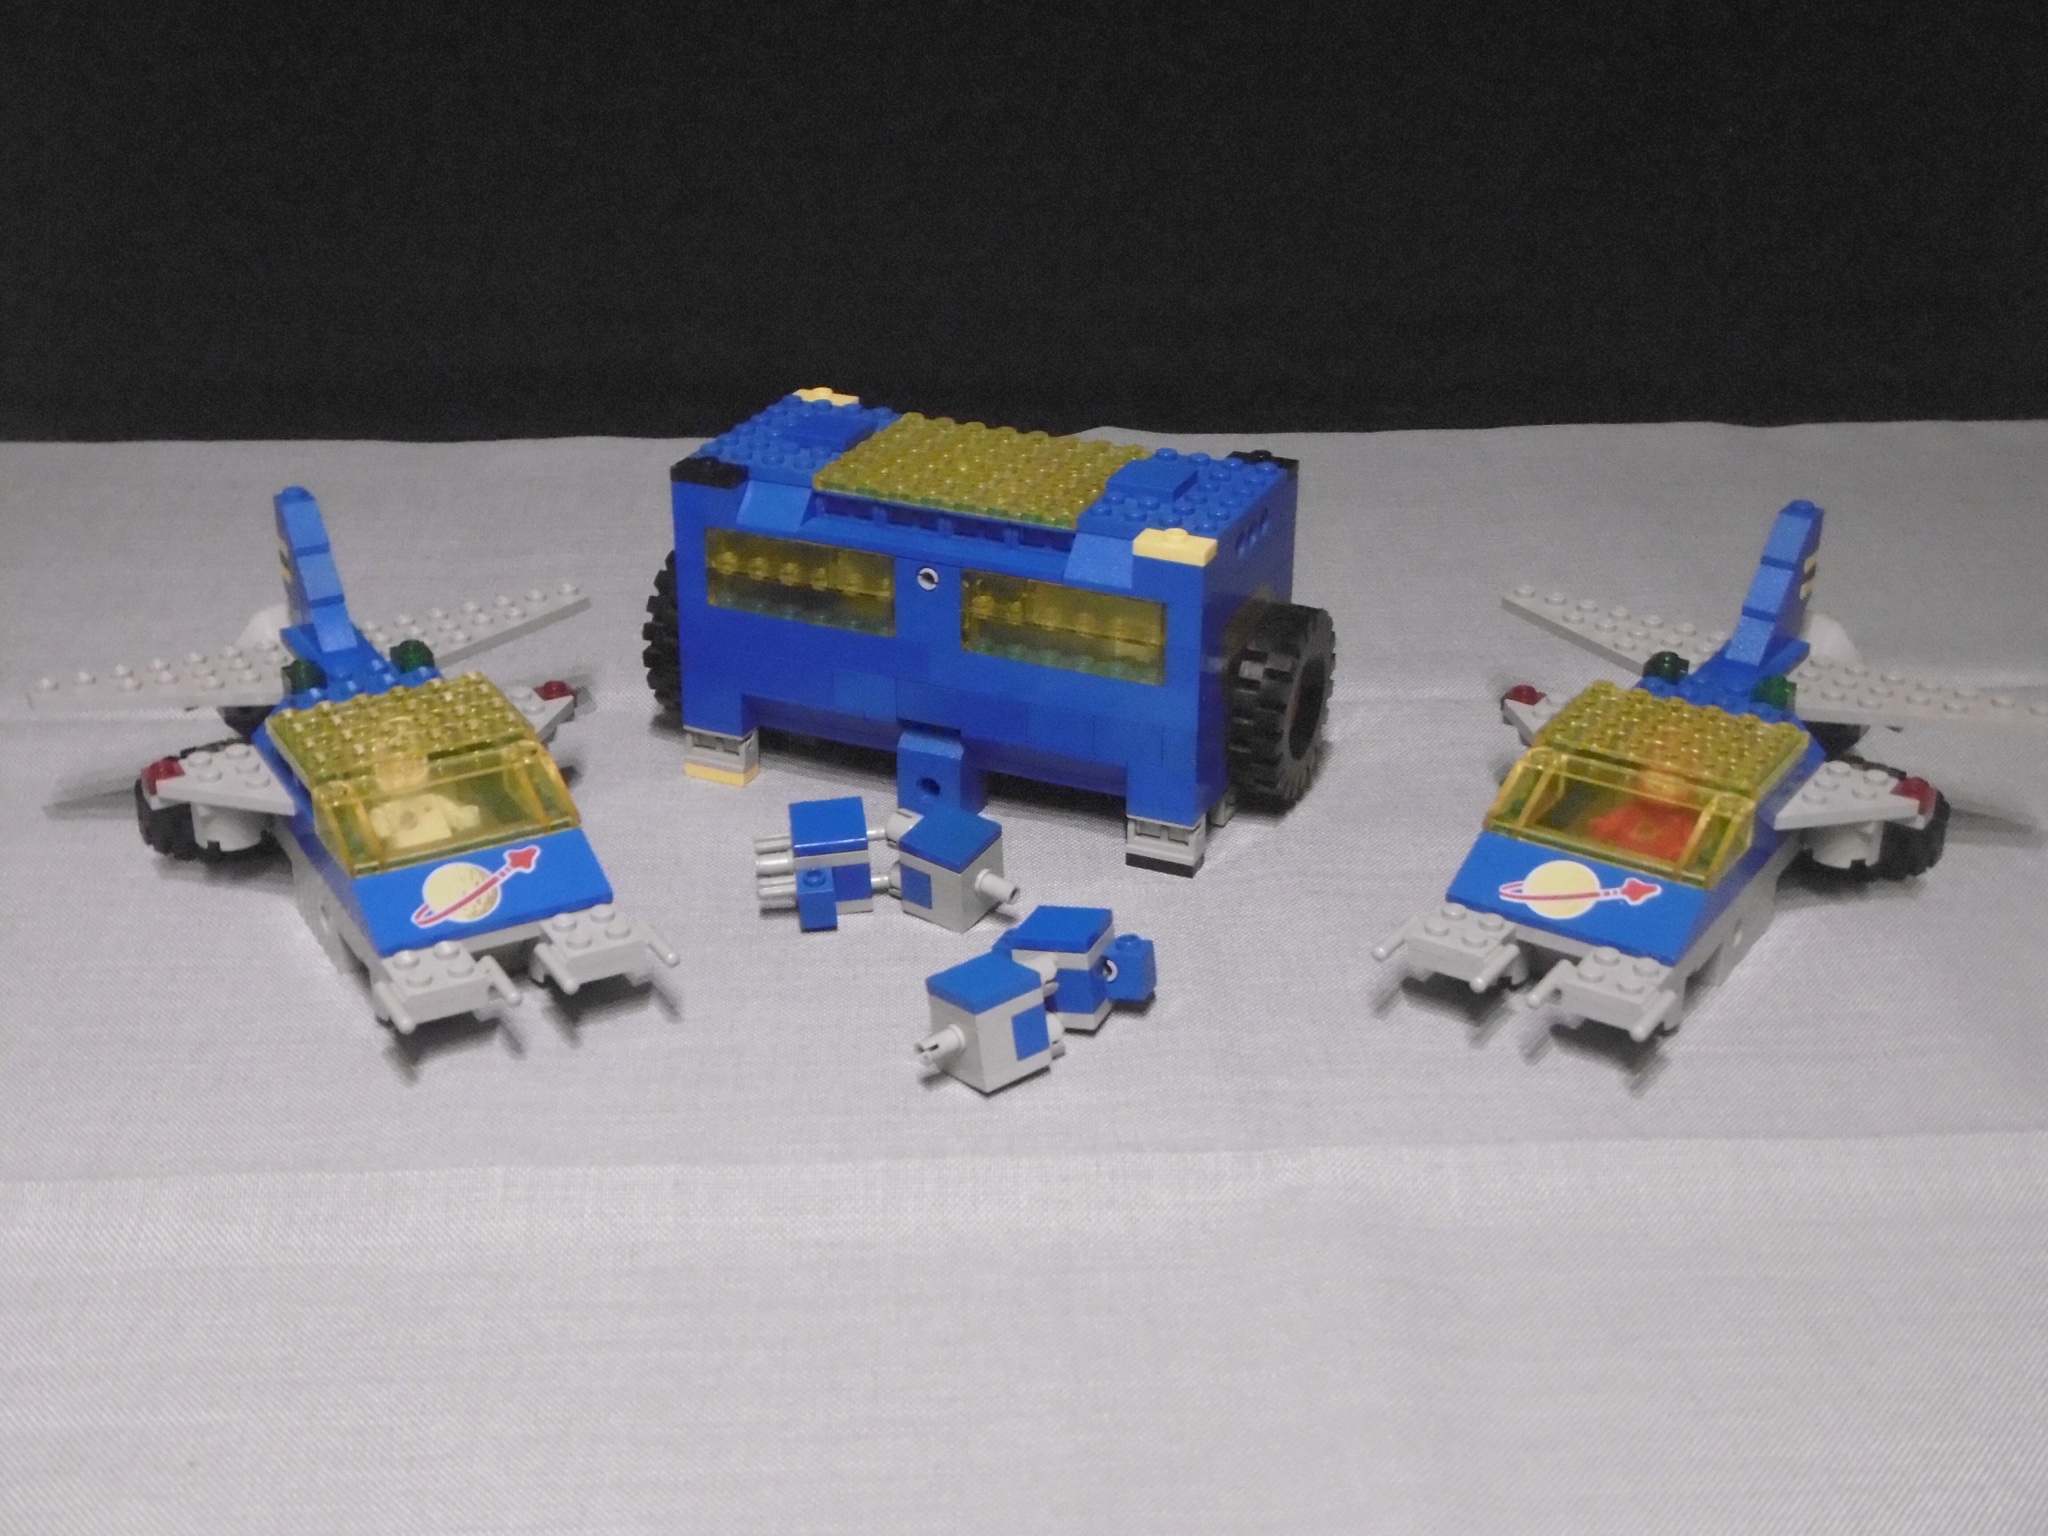
The “backbone” is new, too. I chose to use Technic beams to create a more rigid structure. I also changed the wing shape of the rear part replacing a pair of 4×4 wedge plates with a pair of 4×8 ones.

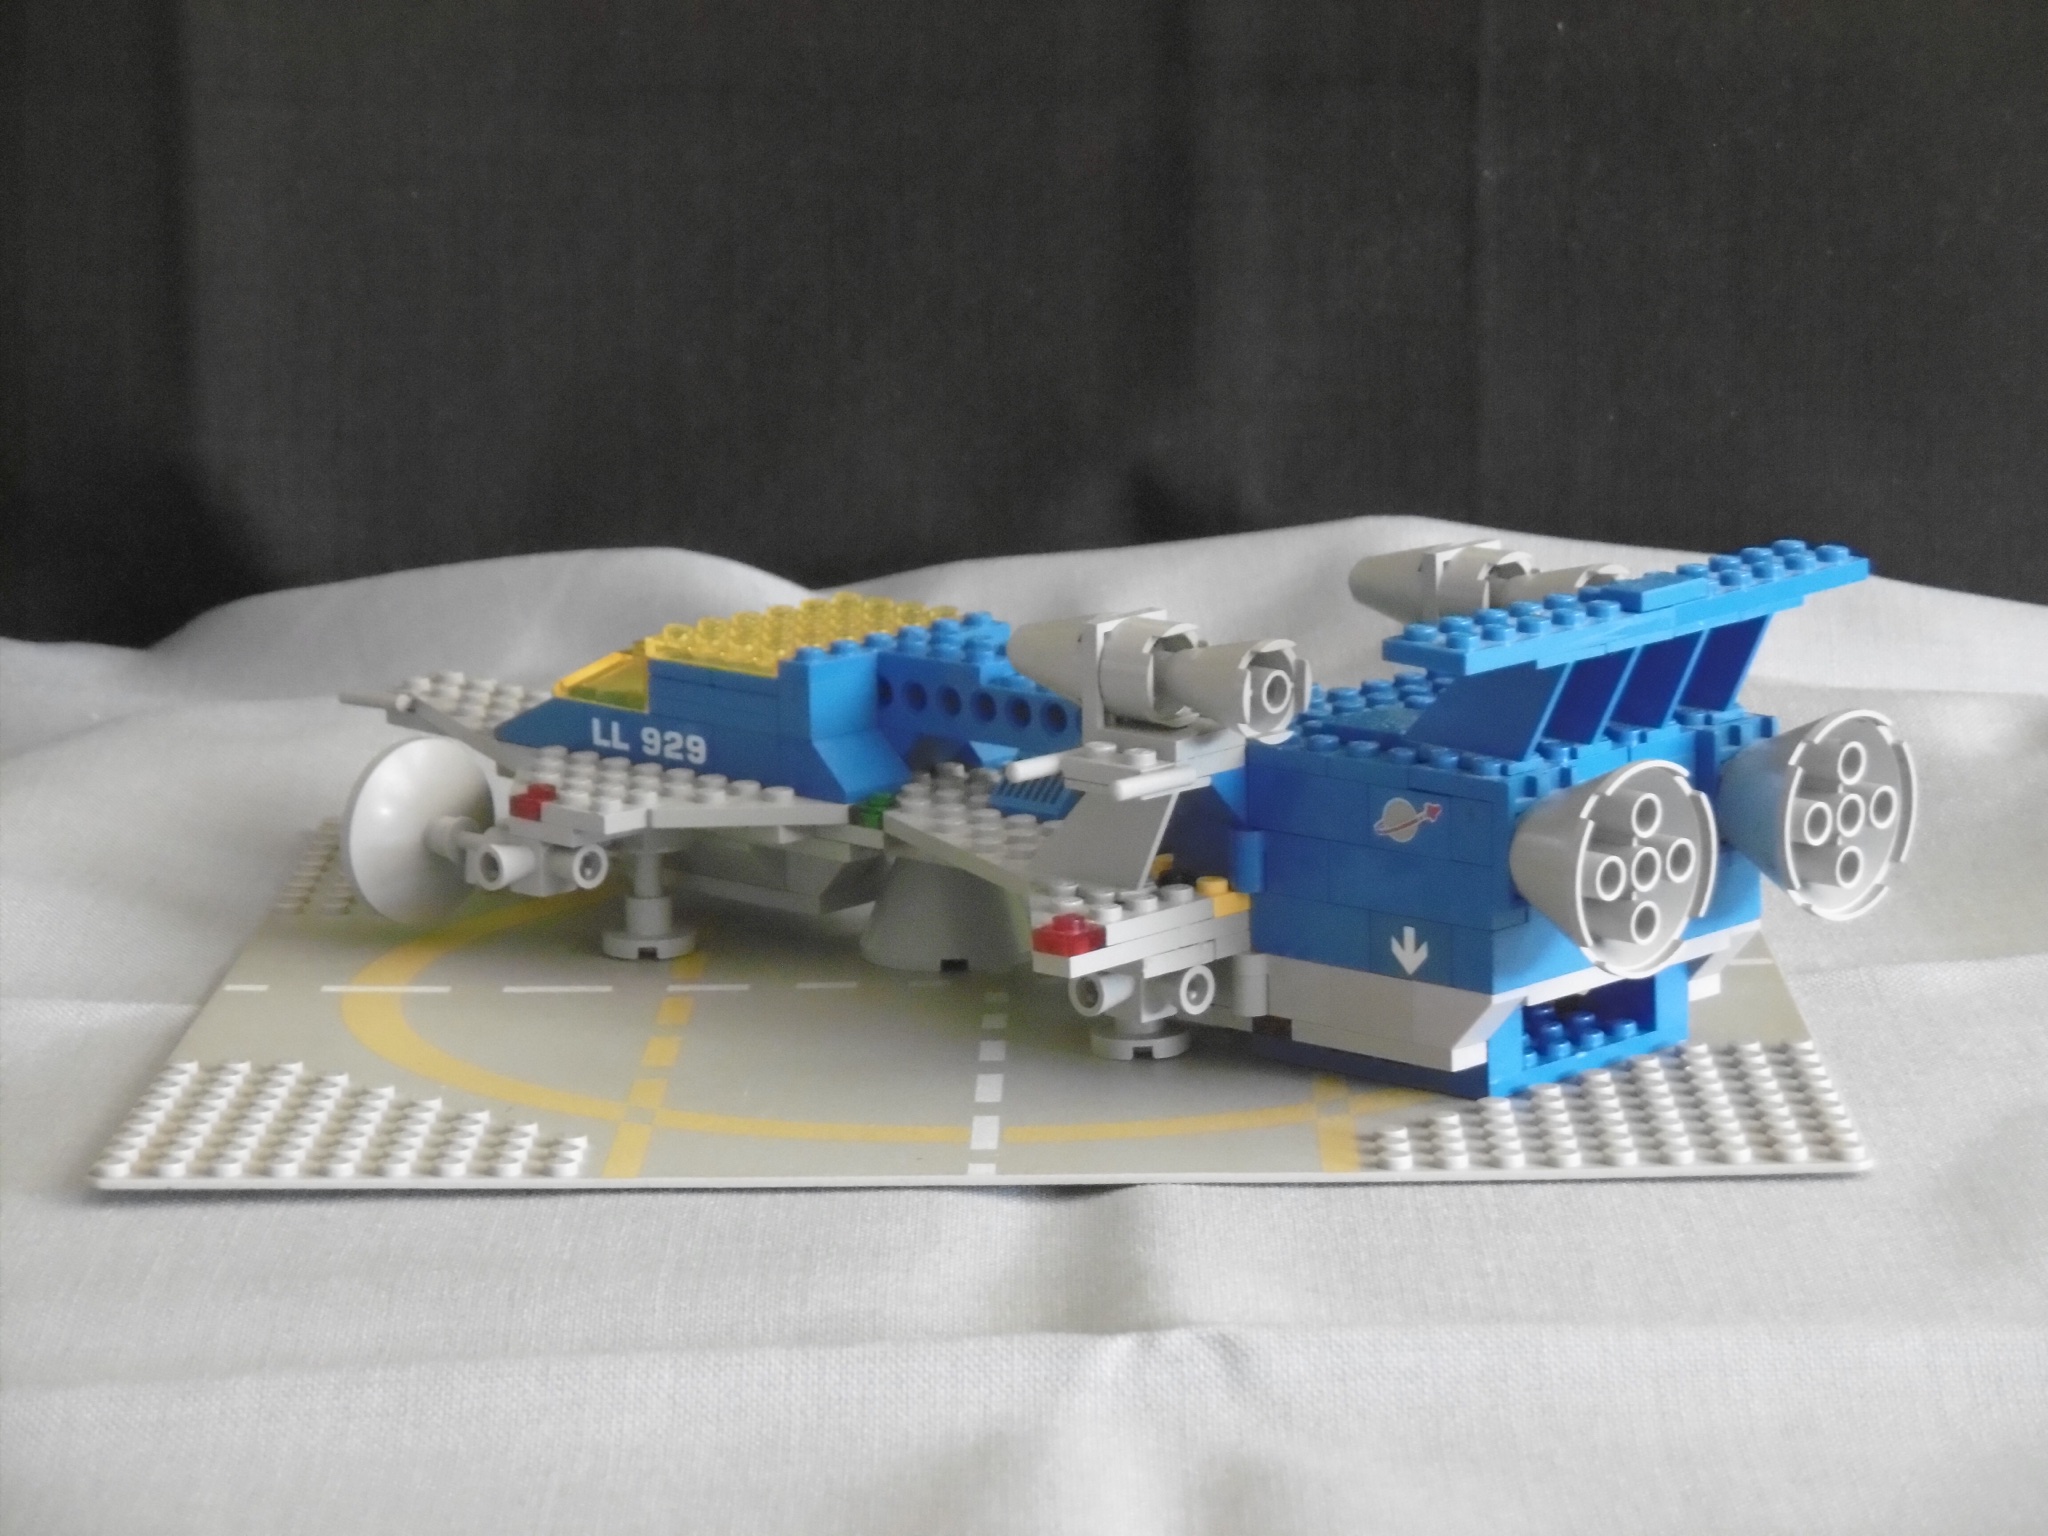
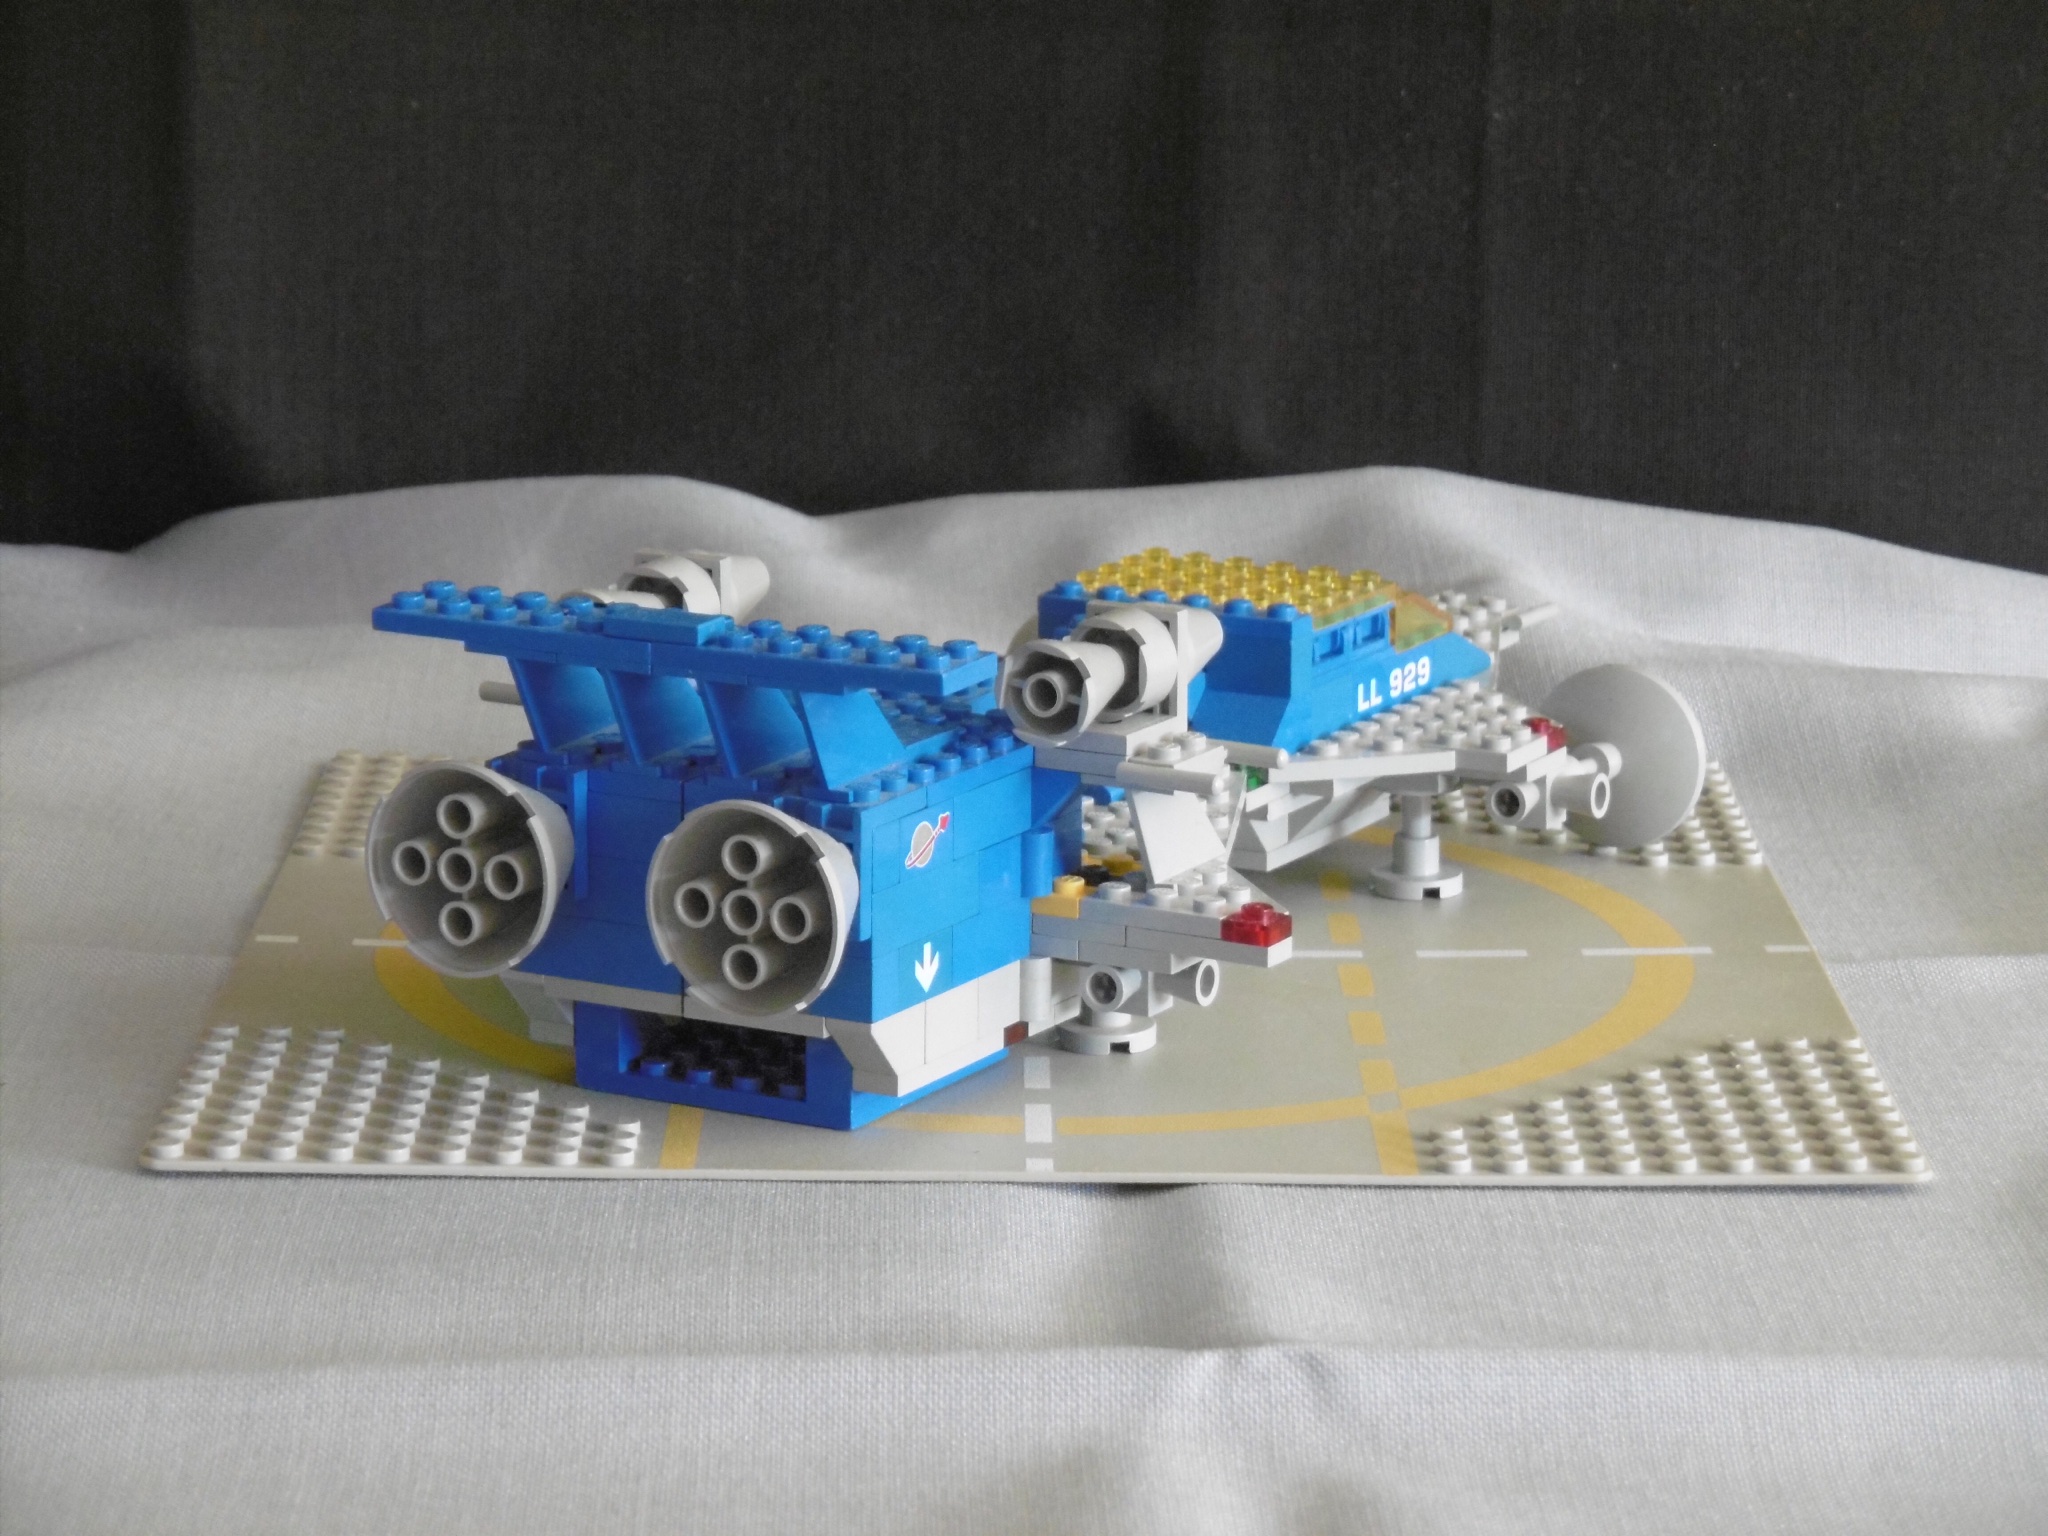
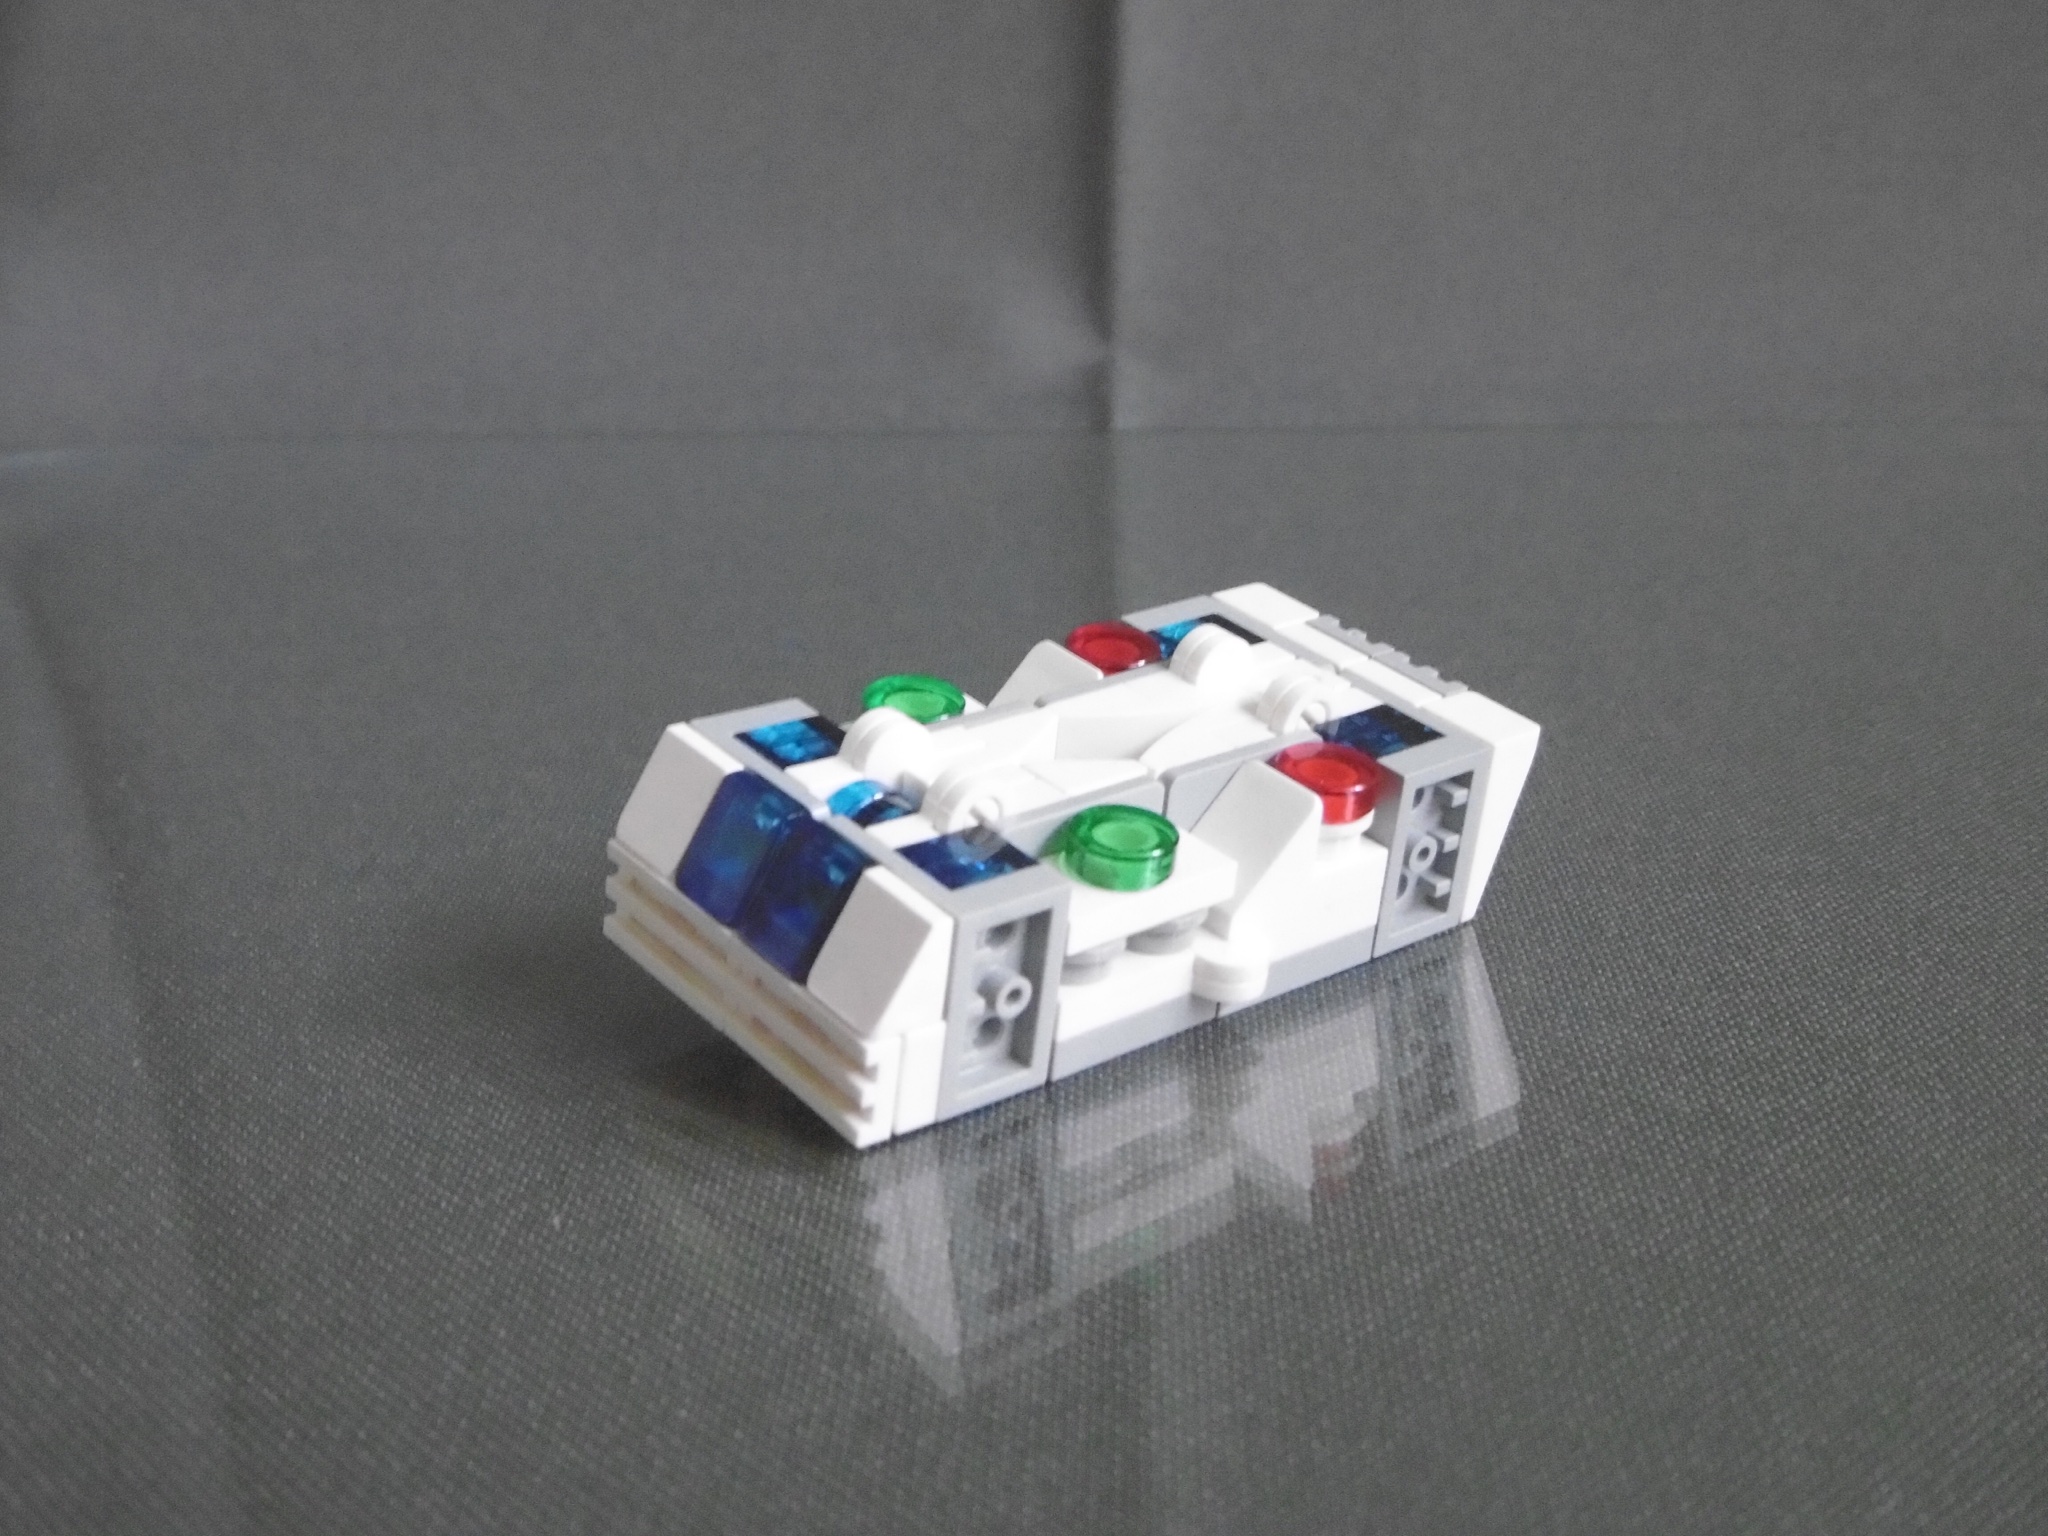
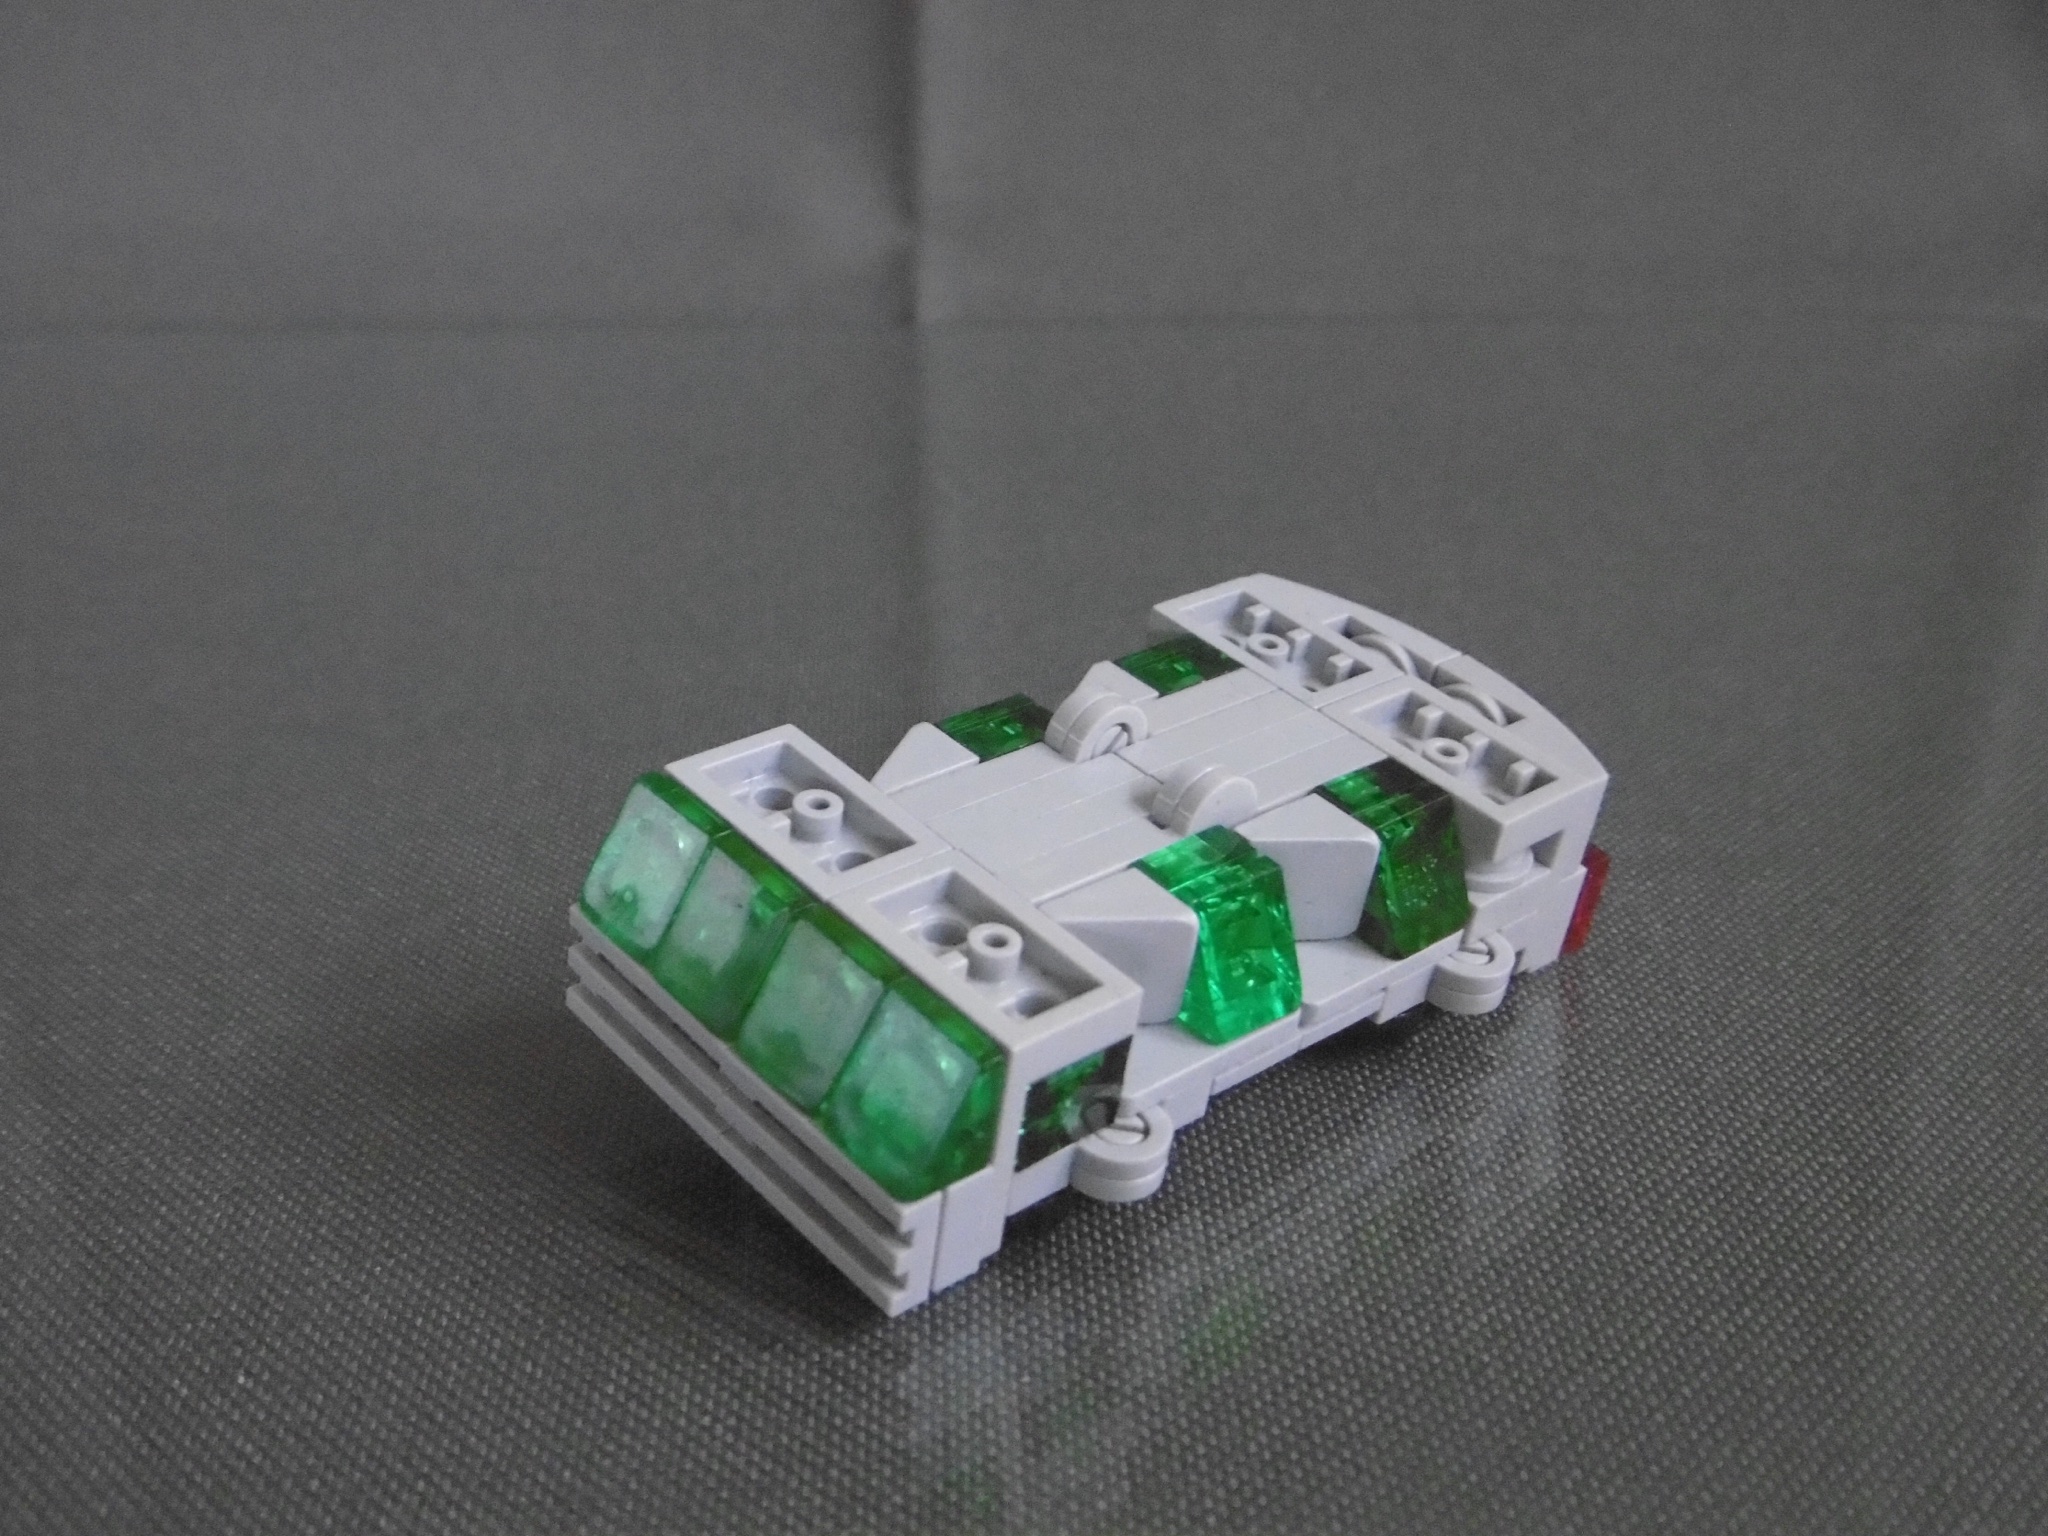
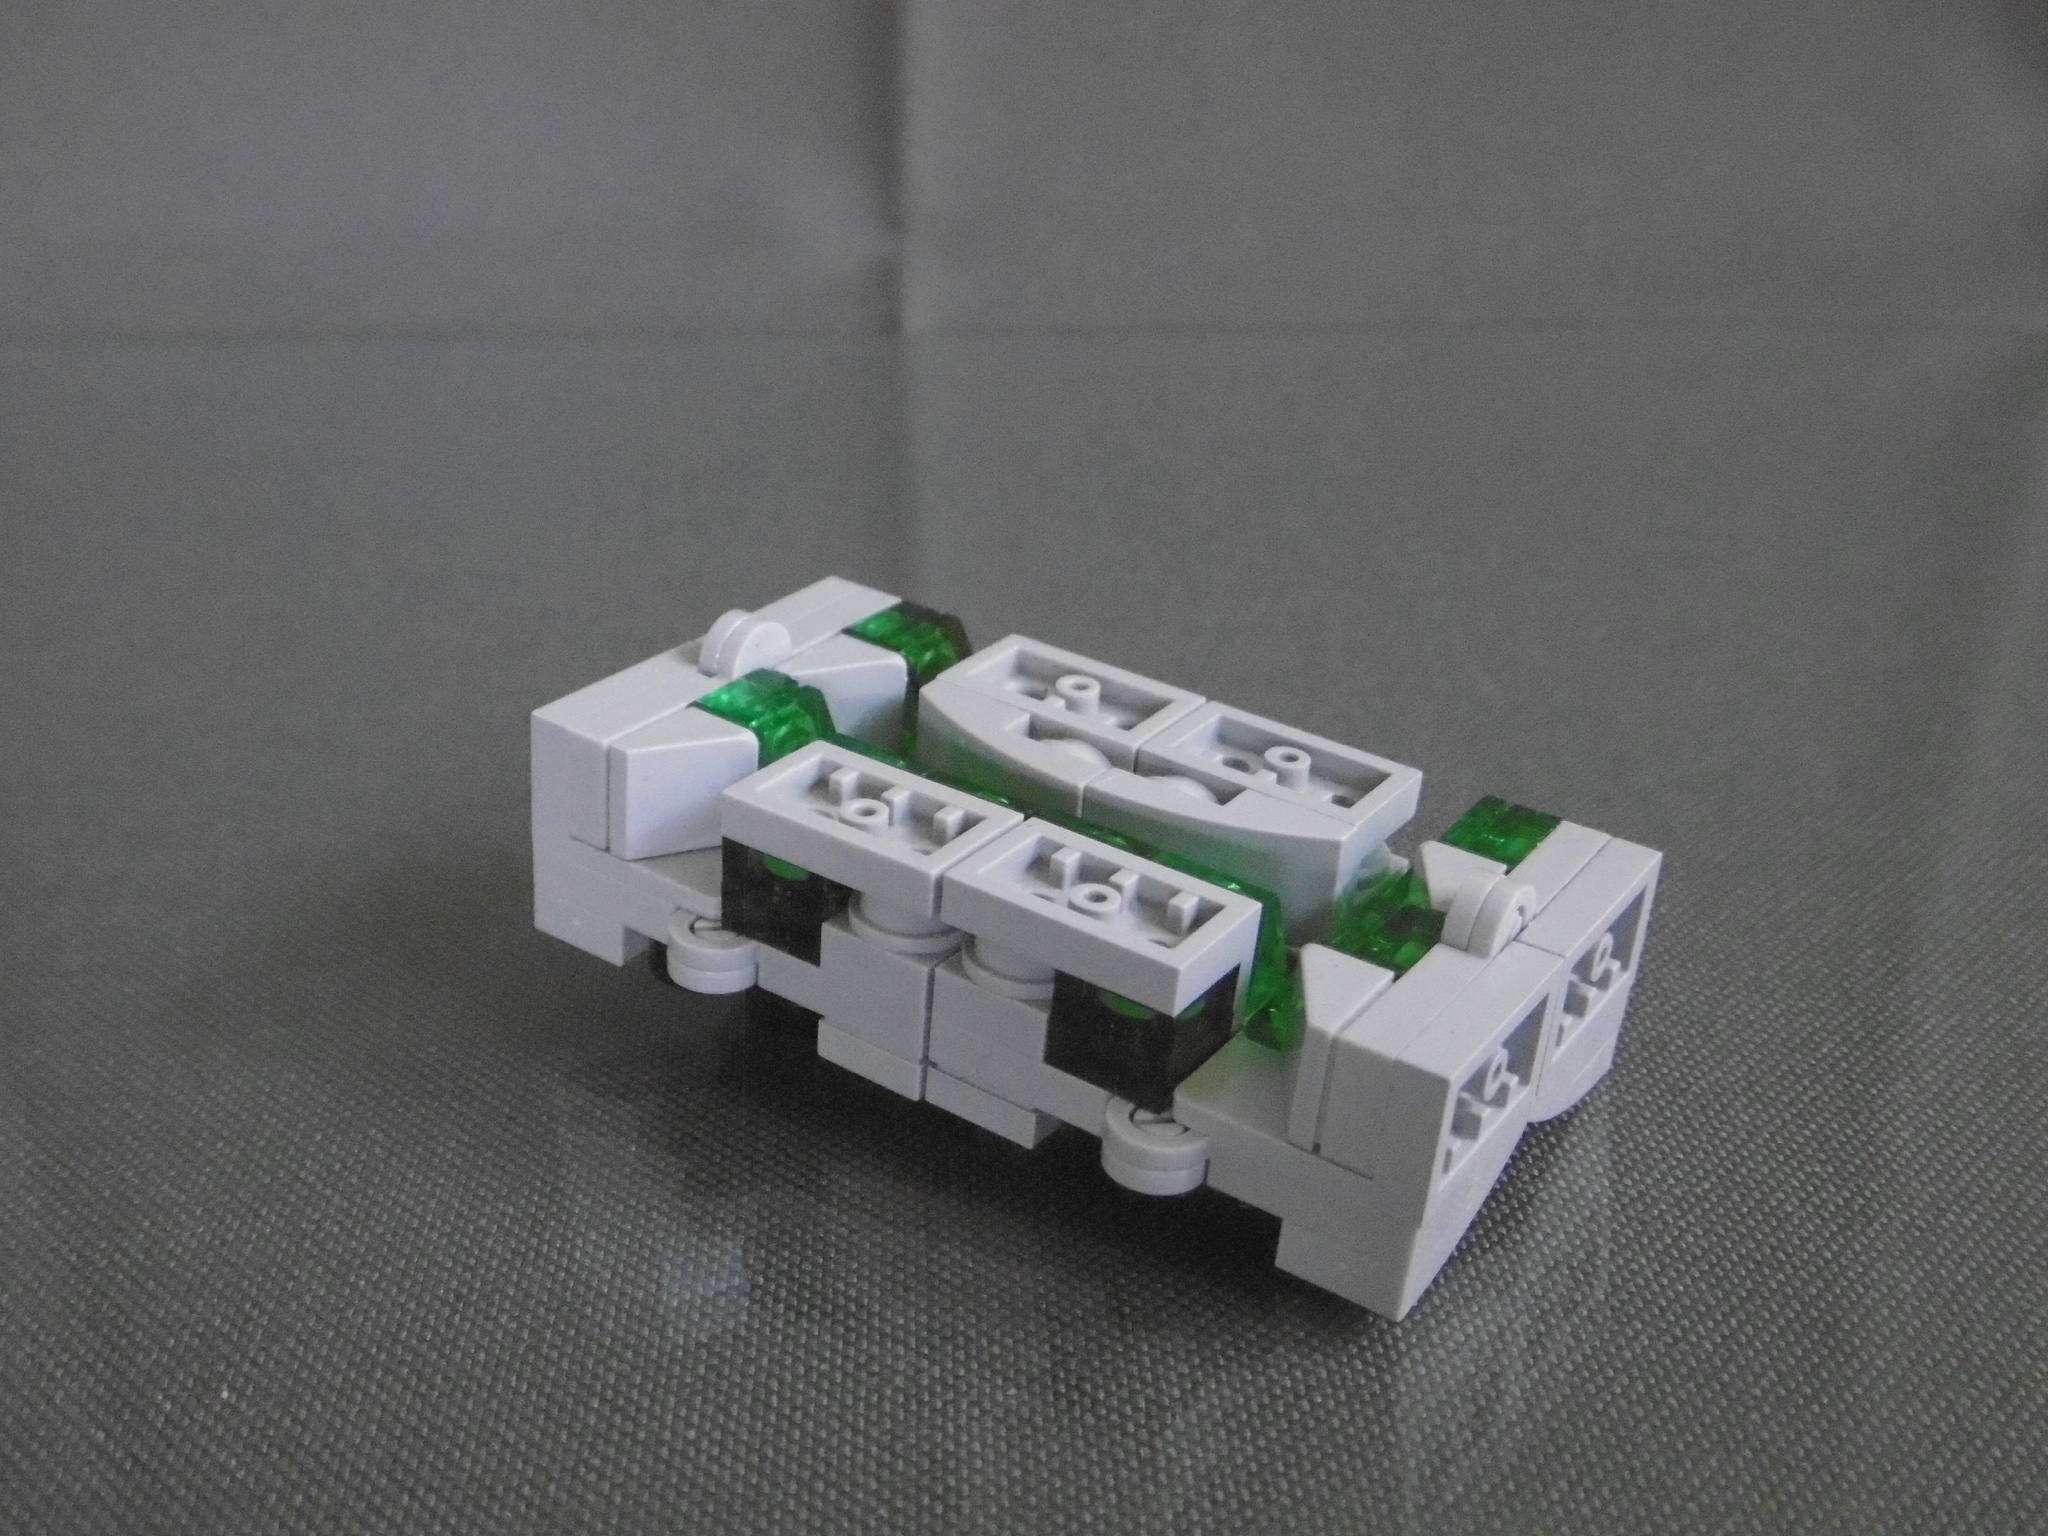
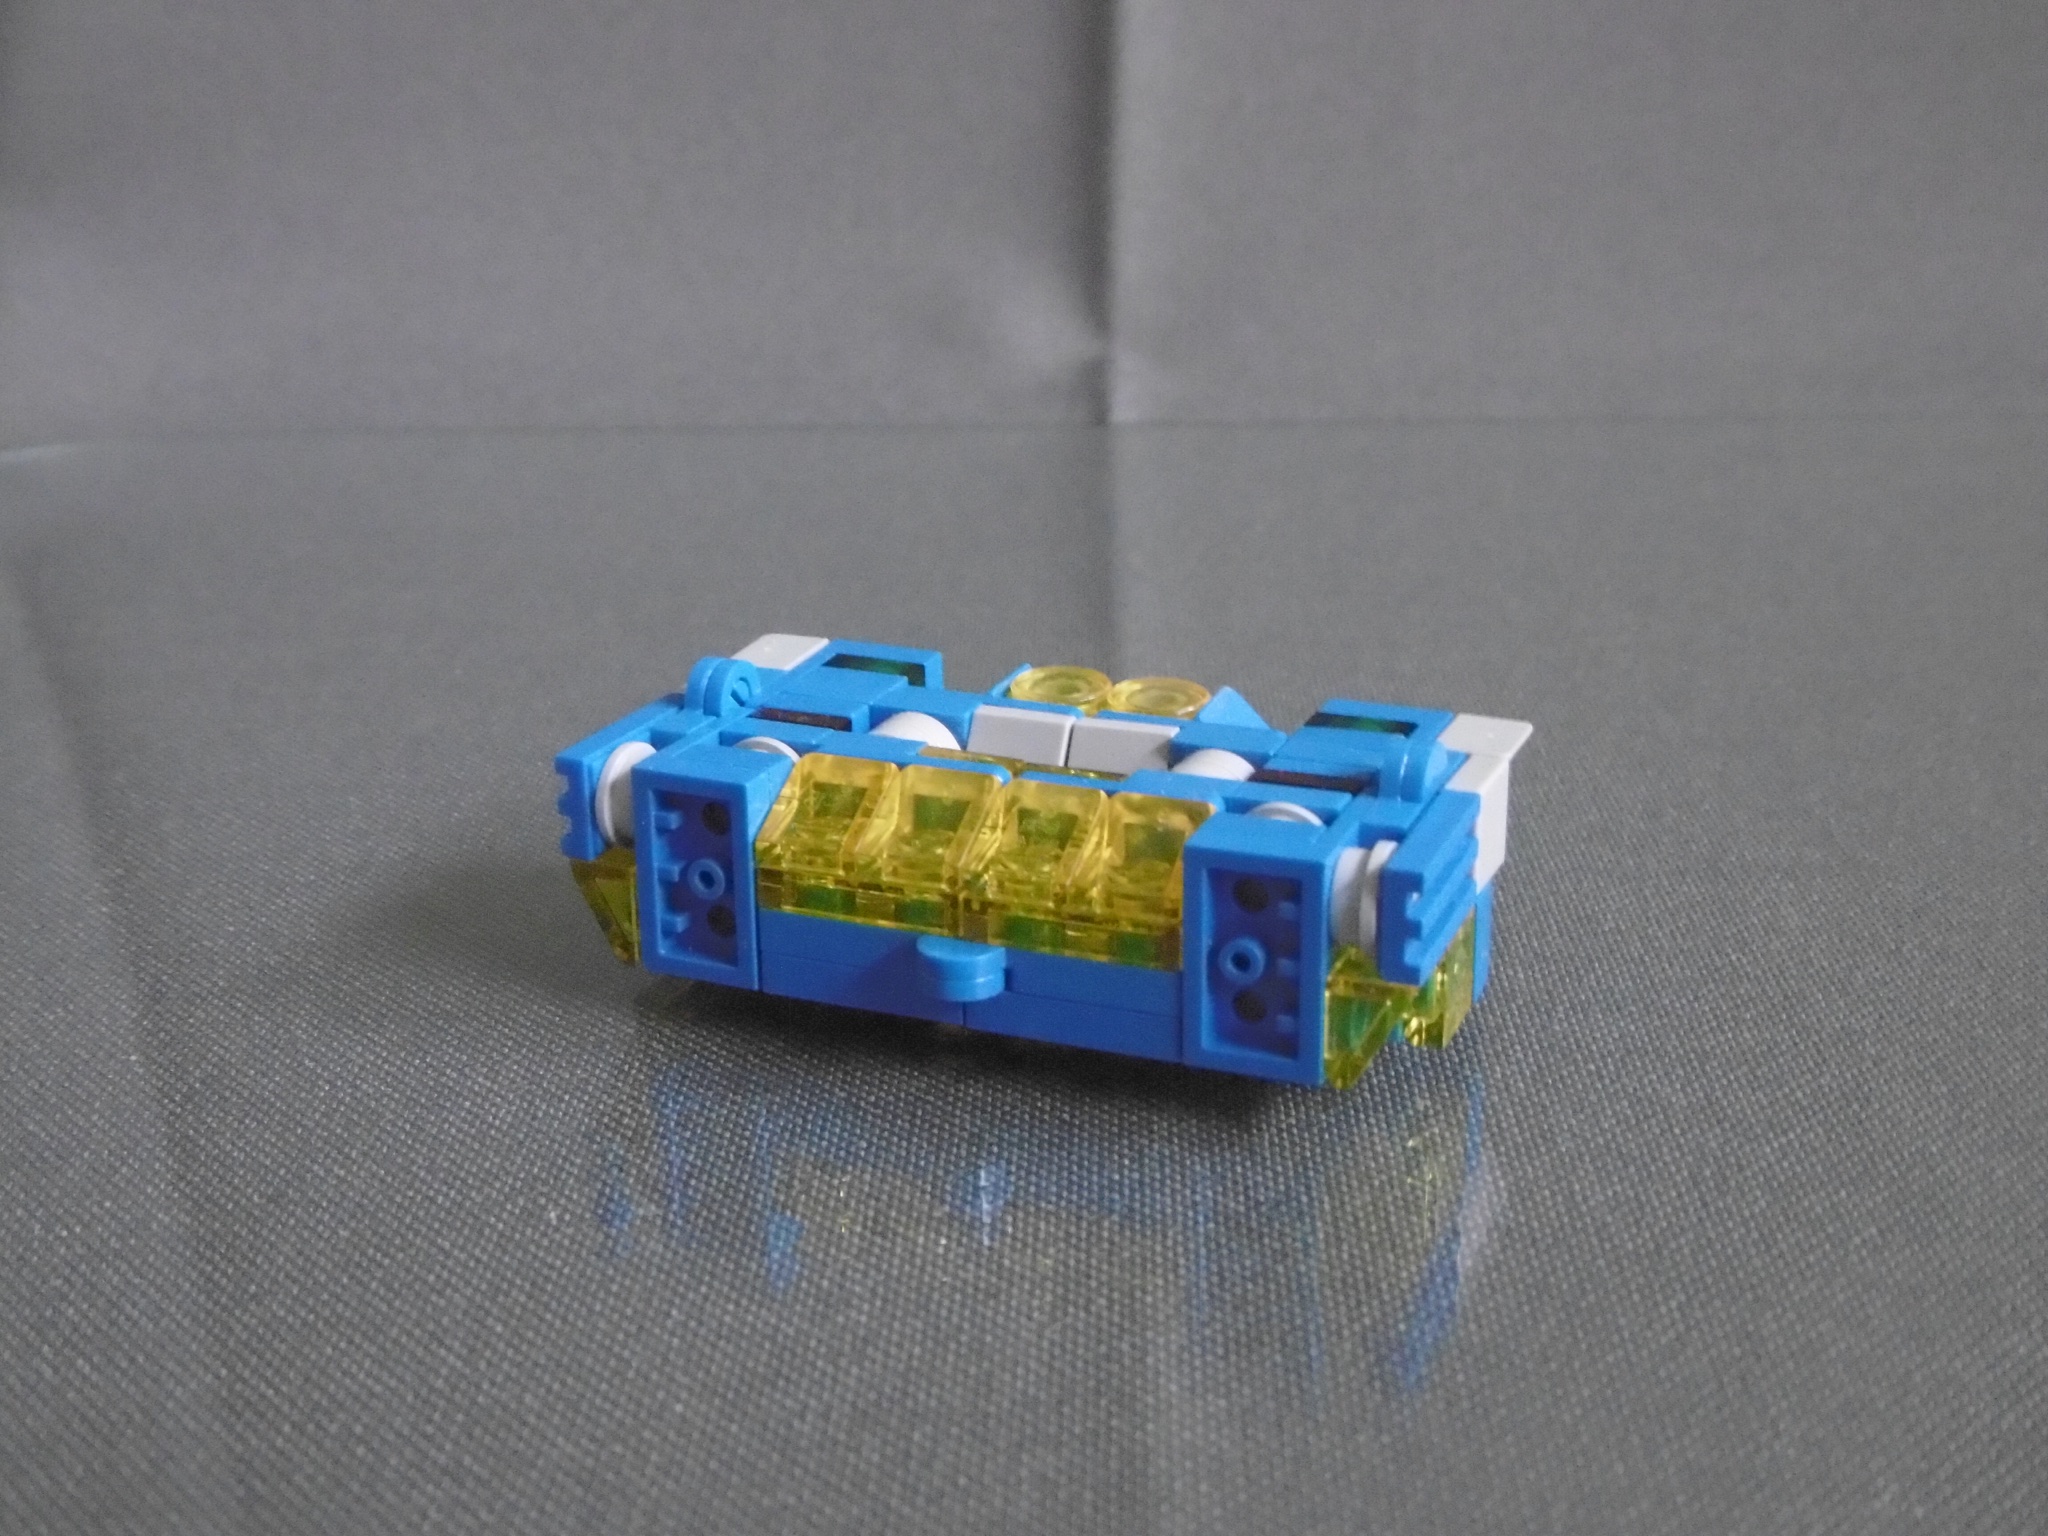
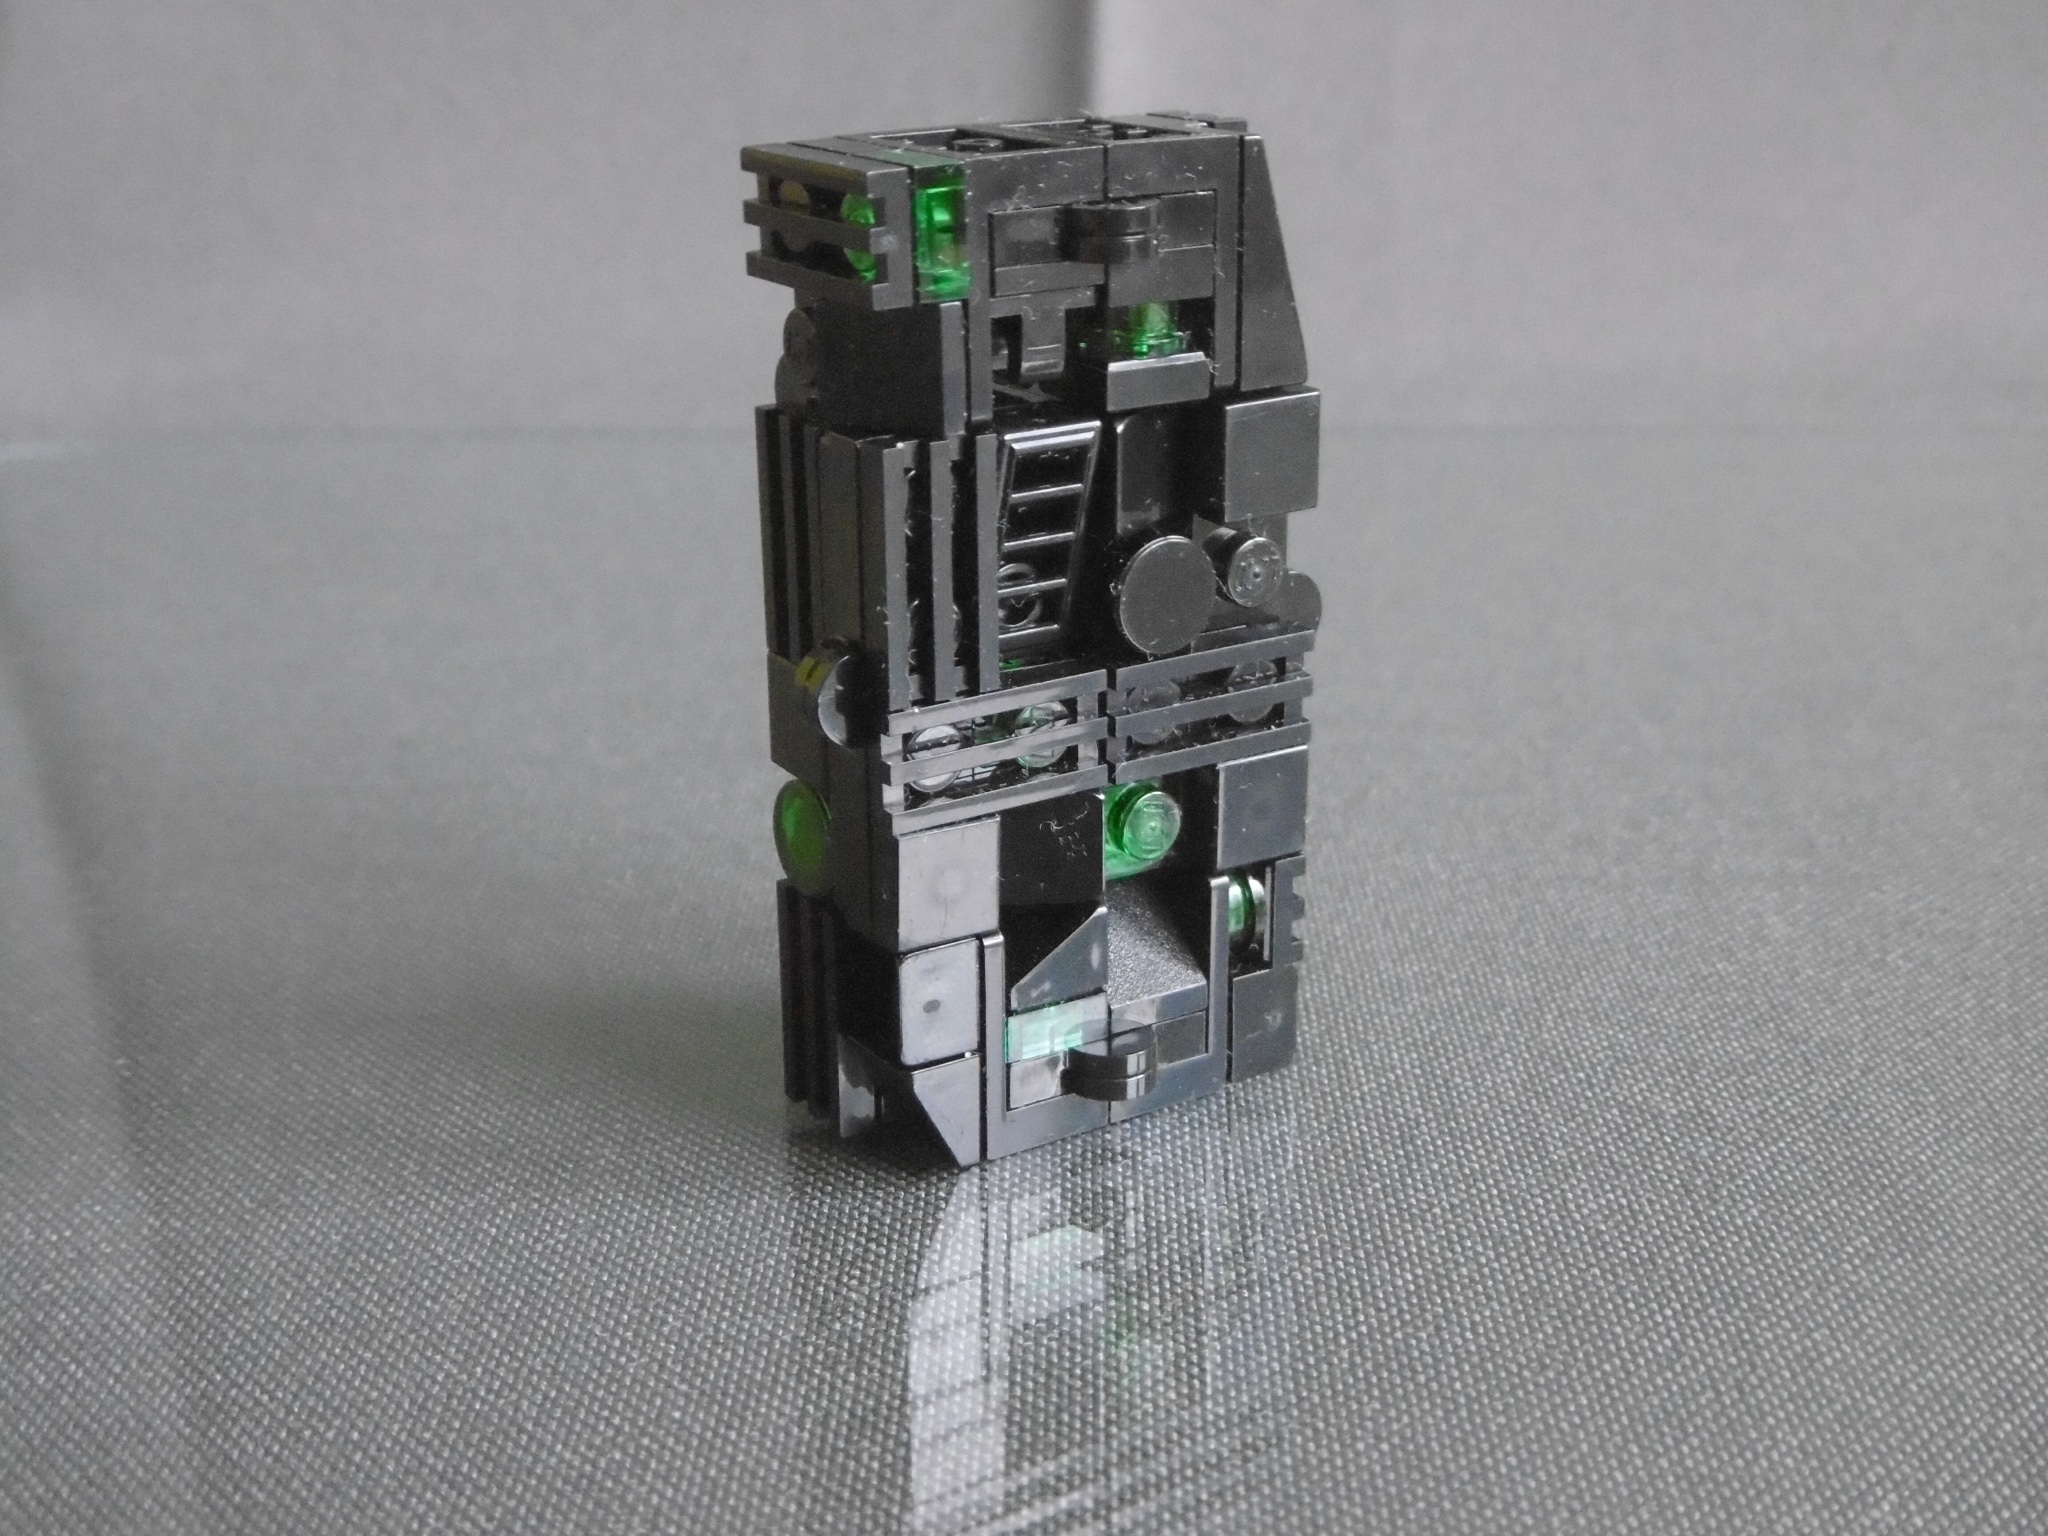
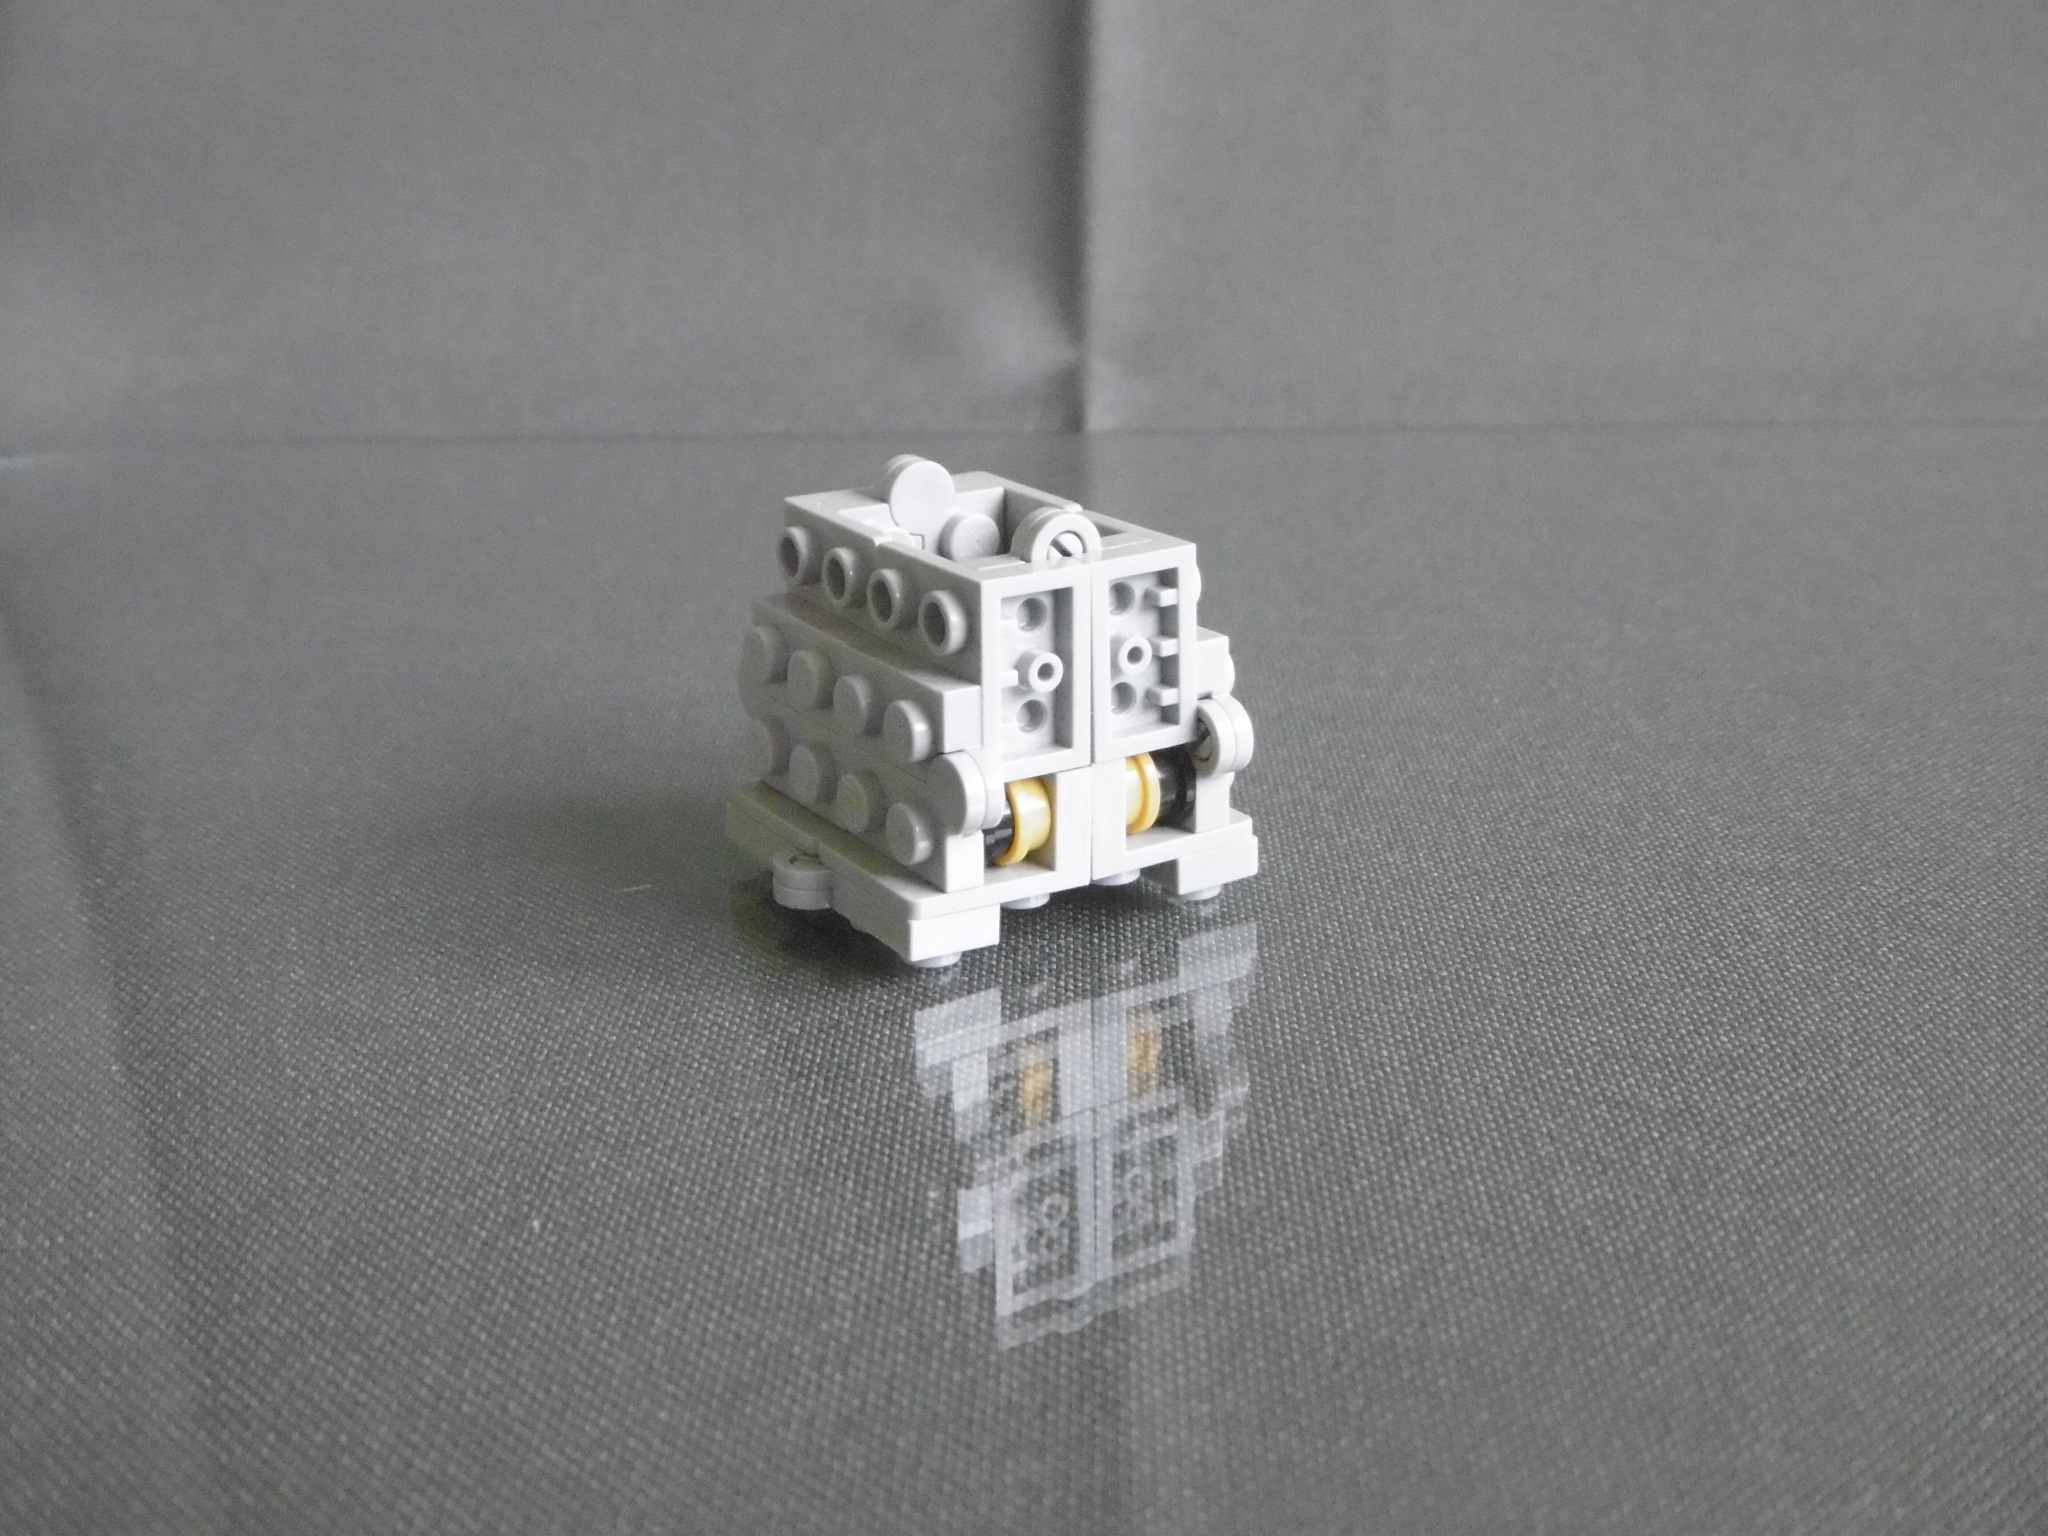
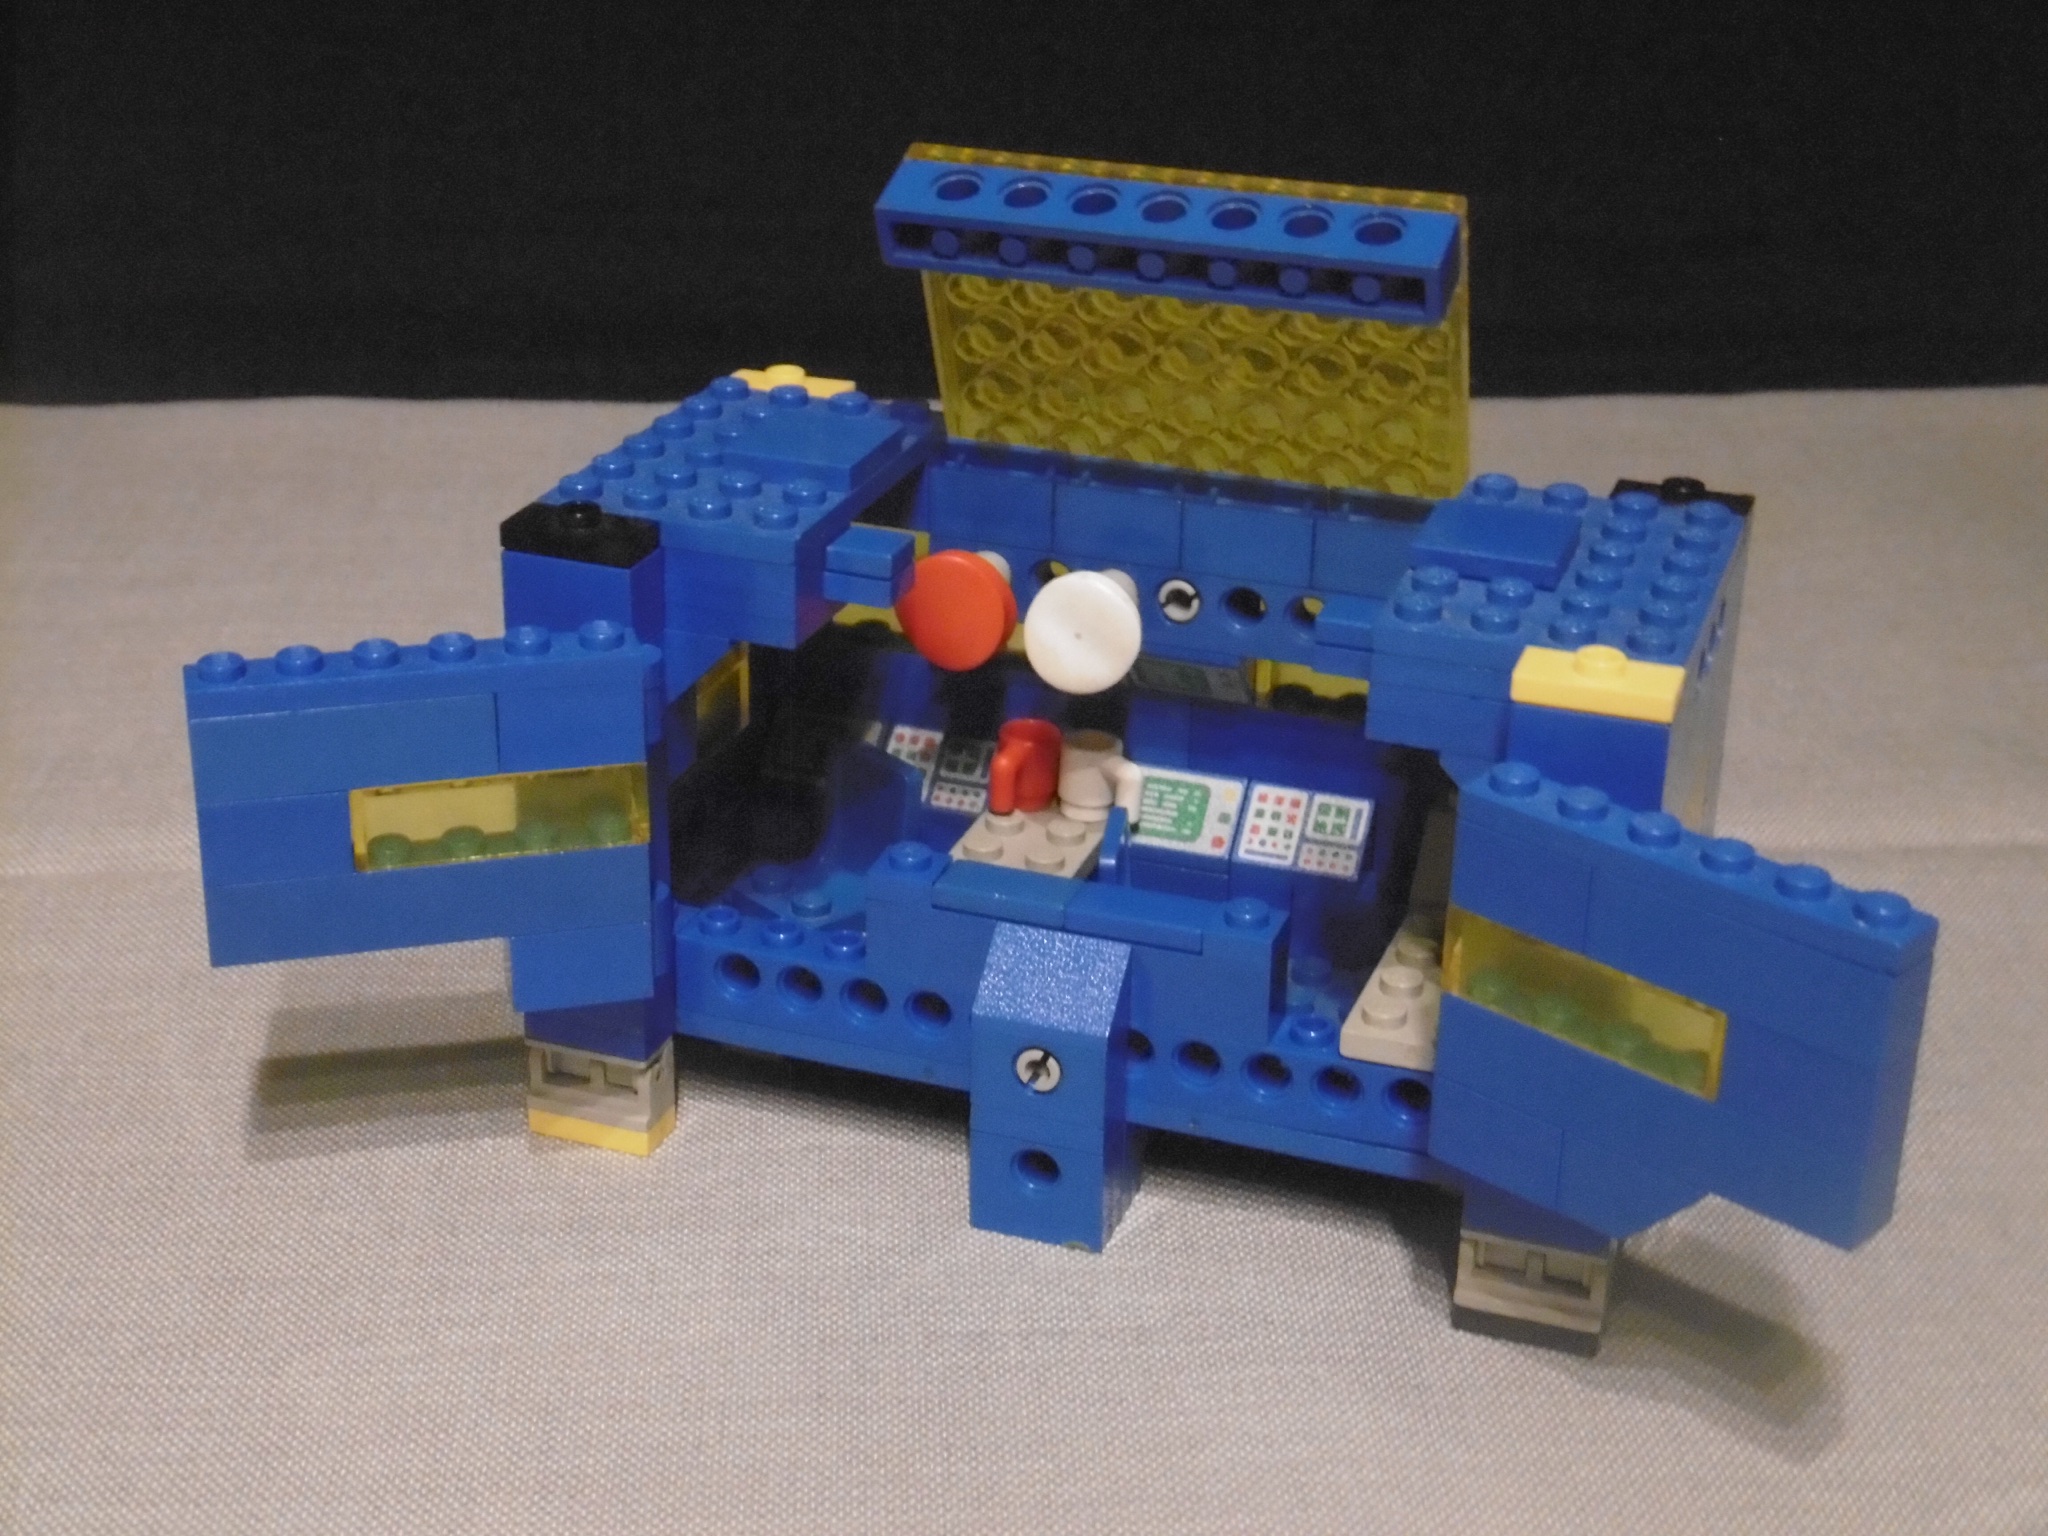
The cargo area looks quite the same as on the original model. I only changed the inner supports for the cargo box to create room for bigger boxes. Instead of a 4x6x3 box the ship can now carry a 6x6x4 box without changing the exterior shape.

So this is my “LL 929” version of the “Starfleet Voyager” in 1979 design. I hope you like it :-)).

CSCS (Classic Space Cargo System): The Space Cargo Unit “SCU”


A Cargo System for (Classic) Space Minifig scale models based on standard cargo units (similar to ISO Containers).

ISO Containers are a great idea and nowadays they can be found anywhere. Even break rooms on construction sites and office buildings are built with units based on ISO Transport Containers.

I wanted to have a similar system for my Classic Space models: a cargo unit with the right size to be transported with cargo ships and big enough to carry everything you need in space and even to build a room inside – just like ISO Containers in our world.

My favourite dimensions for a “Space Cargo Unit” (SCU) were: a footprint of 8×16 studs and 8 bricks of height – No longer than the longest Technic beam, wide enough for a 6-wide interior of a room and high enough for a Minifig to stand inside with comfortable headroom.

I’ve already used the SCU for some models in the last few months:

  • A cargo Unit for my LL 926 Space Crane
  • The Transportable Base
  • An SCU transport box/cage as a garage for the Transportable Rover

A simple transport cage can carry 6-wide vehicles as a roll-on-roll-off carrier and 8-wide scooters. Transport boxes and other Space Cargo Units are easy to build in endless variations – Expect to see more, soon ;-))

Magic Folding CS Cube #3: White/Tr.-Blue

A Magic Folding “Fidget” cube with the design of a micro scale space ship in a Classic Space white/grey/trans-blue colour scheme.

So, what next? The third Classic Space colour scheme, of course: white/grey/trans-blue. Once more the micro model is a spaceship.

The “spaceship mode”:

Rear view:

The Folding steps:

2.)*

*… Oops, 1.) is missing (I forgot to take this photo – Imagine the cuboid in spaceship mode being folded by 90 deg around the hinges on the “belly” of the spacehip. The cockpit winds are folded to the outer corners and the white grills)

3.)

4.)

5.)

… and back to ship mode …

Here it is, the third and last one (for now) of my Lego Magic Folding Classic Space Cubes.

I hope you like it! :-))


Magic Folding CS Cube #2: Grey/Tr.-Green

A Magic Folding “Fidget” cube with the design of a micro scale space vehicle in a Classic Space grey/trans-green colour scheme.

The next colour scheme for a folding cube with a Classic Space design is grey/trans-green. The basic idea is a hovering ground vehicle used as a mobile planetary station.

The “vehicle mode”: A planetary hovering vehicle with a big cockpit, some windows, lights and greebles.

Rear view: Tail lights, two propulsion engines and the black “hover pods” on the “belly” of the ship.

The folding steps:

1.)

2.)

3.)

4.)

5.)

… and back to vehicle mode …This is #2 (of 3) of my Lego Magic Folding Classic Space Cubes.

I hope you like it! :-))


Magic Folding CS Cube #1: Blue/Tr.-Yellow

A Magic Folding “Fidget” cube with the design of a micro scale space ship in a Classic Space blue/grey/trans-yellow colour scheme.

The Borg Cube was my first idea for a magic folding “model” cube, a CS space ship was the next one. Being a fan of the first generation as I am, the colour scheme had to be blue/grey/trans-yellow.

The “ship mode”: A space ship with a big cockpit, a few windows, lights and some greebles.

Rear view: Two engines on the rear end, some landing pods and grills on the “belly” of the ship.

The folding steps:

1.)

2.)

3.)

4.)

5.)

… and back to ship mode …This is #1 (of 3) of my Lego Magic Folding Classic Space Cubes.

I hope you like it! :-))


Magic Folding “Borg” Cube

RESISTANCE IS FUTILE – THIS CUBE HAS BEEN ASSIMILATED…  A Magic Folding “Fidget” Cube inspired by a Star Trek Borg cube.

As a Star Trek geek as I am, one of the first ideas for a new and more interesting design for a folding cube was, of course, a Borg cube.

So I started with a black “skeleton” of my folding cube (version A5) and added black and trans-green details that looked as “Borg” as possible. This is the result:

This is my new Lego fidget toy, the Magic Folding “Borg” Cube.
I hope you like it :-))

Magic Folding Cube Basic “Skeleton”

A basic “skeleton” for new design variations based on my Magic Folding “Fidget” Cube.

“Fidget Toys” have become quite popular ultimately and with all those spinners and tiny cubes on the market Lego fidget toys did get some attention, too. One of those Lego toys is a folding cube based on promotion picture cubes.

My Lego version is from 2014 and you can find quite a few of similar (or even identical) cubes sold as fidget toys in online “brick” shops.  I don’t know if they are copies, built by “reverse engineering” based on my cube or simply parallel developments based on the same ideas I had. But they exist and look just like my one.

Anyway, I thought I could go a step further with the design of the cube. A comment on my original cube on flickr inspired me to make a more interesting version that didn’t look just like “a cube”.

First of all I analyzed the design of the cube looking for the parts that were really needed to make it work. The result was a working “skeleton” of the cube which wasn’t more than the hinge plates, the SNOT brackets and a few plates as “connectors” between them:

Based on this skeleton cube I found four variations of the basic design (A … D) with the pivot points at the same positions but with some different details (changes marked with orange parts). Each of the designs has six folding steps (1 … 6) so you get 24 different versions of a symmetrical cube or cuboid that you can use as a base for a foldable micro scale Lego model:

Each of these “skeletons” has a lot of free space for new folding cube designs. The 1×1 round plates (black and yellow in the “skeleton” model) can also be replaced by any parts that can fill a 1x2x2/3 gap.

And there will be even more possible variations if you apply the “orange” changes only on one side of the cube/cuboid creating a non symmetrical “skeleton”.

After all you have a lot of possibilities to build some cool stuff around it.

So this is the basic skeleton for my Lego Magic Folding “Fidget” Cube. I hope you like it! :-))

Feel free to use it for your own folding cubes.
Credits would be appreciated if you did so ;-)).

1979 Classic Space Solar Power Transporter

A 1979 version of the Classic Space 6952 Solar Power Transporter from 1985, including a middle section with a small transportable base.

This was my “bigger” space project I have been working on the last few months. 6952 has always been one of my favorite Classic Space sets of all time. I always wanted one (my cousin had one), but have never bought one (Hey that’s a good idea for Christmas…). So I thought about it and how it might have looked as a 1979 set (still my favourite CS era).

The design process (with LDD as usual) already took it’s time until I had the final idea for the middle section. The building process instead didn’t take much time, as I already had most of the needed parts in my CS parts collection.

First thing first – These are my two little Vic Vipers that I’ve already posted for NNoVVember 2017:
The Vipers remain unchanged. They only wear two additional truck wheels underneath their rear wings. The first designs of the scout ships had a single “nose” and no single tail fin. But when I thought about a Vic Viper for NnoVVember 2017 I thought that they would look really cool with these two design elements.

You can have a better look on the wheels on this picture:
You can also see the holes on the side needed to fix them in rover mode.

The rear wing sections can be disconnected to build the rover:

Add the wheels, connect the cabin sections and there you go, just like the original model:

And now it’s time for the middle section:
This is only a small modification of my Transportable Base posted in January this year. I’ve added four foldable “feet” in the corners, two foldable supports underneath and two centre “feet” to fix two wheels.

A little modification of the doors*, two extra 1×4 Technic bricks on the side, and that’s it…

* Oops, there is a 1×2 inverted slope missing on the left side (must have been my son). I didn’t notice that when I took the pictures – Too late now! ;-))

The interior still is quite the same:
There is only a little change for the wheel holder. The corners can be used as a holder for the Astronauts’ oxigen cylinders.

Just add two wheels, fold down the grey side supports, fold up the corner “feet” and you get a nice little “Space Caravan”:

Add two couplings …


… and you are ready for the big expedition vehicle:

The complete vehicle:

The rear wing sections of the scout ships can be attached on the top of the middle section, just like on the original model. The roof can still be opened.


A single cabin section can be seperated and operate as a scout ship while the rest of the vehicle moves on:


The middle section in “Transport Mode” with the two Vic Viper scout ships is ready to be picked up …

… by the the  LL926 Space Crane Transporter:With a little modification on top of the wing section LL926 can carry the middle section and the couplings.

Ready to go…


So this is my 1979 Lego Classic Space Solar Power Transporter.

I hope you like it :-))

1979 Classic Space Solar Power Transporter
BrixBlog | flickr | MOCpages

Classic Space Vic Viper

A Vic Viper vor NnoVVember 2017 in 1979 Classic Space design.

This is a little spaceship I’ve built for a bigger project. I’ve had it finished for a while when I realized that with a few small modifications it could become a cool little Vic Viper. This is it:

Another bird’s eye front view (“Vic Viper Shot”)

What’s better than a Classic Space Vic Viper?
A pair of them! ;-))


So this is my Lego Classic Space Vic Viper in 1979 design.
I hope you like it… :-))

Classic Space Vic Viper:
BrixBlog | flickr | MOCpages

21303 Wall-E with Power Functions RC

A mod of the 21303 Lego Ideas “Wall-E” set adding Power Functions motors and remote control.

When I saw the official Lego Ideas Wall-E set I knew I had to have one. But with 50,- € it wasn’t cheap at all, especially considering the extra 60+ € that I would need for the Power Functions elements to motorize the set.

When I decided to go for it anyway, it was almost too late for that. I was lucky to get a set without box or instructions at the original price. That was OK for me, but not my original plan ;-)).

The plan was: “No Wall-E without Radio Control!”. So I started looking for possible solutions other fans had found.

The most popular conversion is the one built by Youtube user PPung Daddy, but I wasn’t really satisfied with it. The cables of the motors were positioned too close to the ground, the battery box wasn’t really fixed and the IR receiver looked almost like a backpack.

So these were my main tasks when I tried to build my own version of an RC Wall-E.

I looked for better positions for the M Motors, but the best thing was just turning them by 90 deg to position the “cable exits” on the rear side. The motors are fixed by two Technic pins, the driving axles and 10 SNOT 1×2 Technic bricks with cross axle holes.file-d68dd6e4-684b-4e0d-92c2-e175cf0b421c-13893-00000dfc3d5d8d36

There isn’t much space inside Wall-E’s “belly” so I looked for the lowest possible position to locate the battery box. I built a new ground plate with a 4×8 cut out, so the ground plate of the box is now part of it. For this solution I had to get rid of the hinges of the front plate, but that was OK for me. Now the plate is just fixed by four SNOT studs.

The front of the box rests on two 1×2 Technic bricks with cross axle holes, which are fixed by an 8L axle running through them. To change the batteries you just remove the axle, then you can flip down the box.file-1ce1fd37-e838-409d-b23c-072820c24e7e-13893-00000dfc3f807535

file-fed0048e-0dd9-43d4-8a03-2daad443ebe0-13893-00000dfc422e93a5

You can switch the battery on and off by pressing the lime green lever. The hole in front of the neck part is big enough to do that without removing any parts. Looking inside you can even see the green LED of the battery.

file-2271bcd3-cb64-429b-9c2c-69404f9c239e-13893-00000dfc40c87a9c

The neck of the robot is fixed in a higher position, so the lower neck piece is one stud shorter to keep the original look.

With the lower position of the battery box it was possible to locate the IR receiver on top and more “integrated” into the design of the robot.file-d4c8e8d9-315c-49c4-b6e1-a6cf2e72e3a9-13893-00000dfc3e887f1b

With the rear panel fixed by one of the original 1×4 SNOT bricks and a modified plate with hinges on top Wall-E’s rear side looks almost like the original model. And I think even the motors look OK where they are.

I’m really satisfied with the result. The only thing I’d still like to improve is the fixation of the motors. Even 10 studs for each motor aren’t strong enough to keep the motors in position for a very long time. The torque is just too high for that. But that’s OK for me (for now).file-7def1f8d-a72e-4fa2-be42-88d358567d57-13893-00000dfc3c4975d9


So, this is my Lego Ideas 21303 Lego Wall-E with Power Functions motors and remote control (RC).

I hope you like it. My son does ;-))

NILSOBRIX: 21303 Wall-E with Power Functions RC
BrixBlog | flickr | MOCpages | Youtube