Category Archives: 1. MOCs – My Own Creations

1976 Chevrolet Corvette C3 “Stingray” (6-Wide)

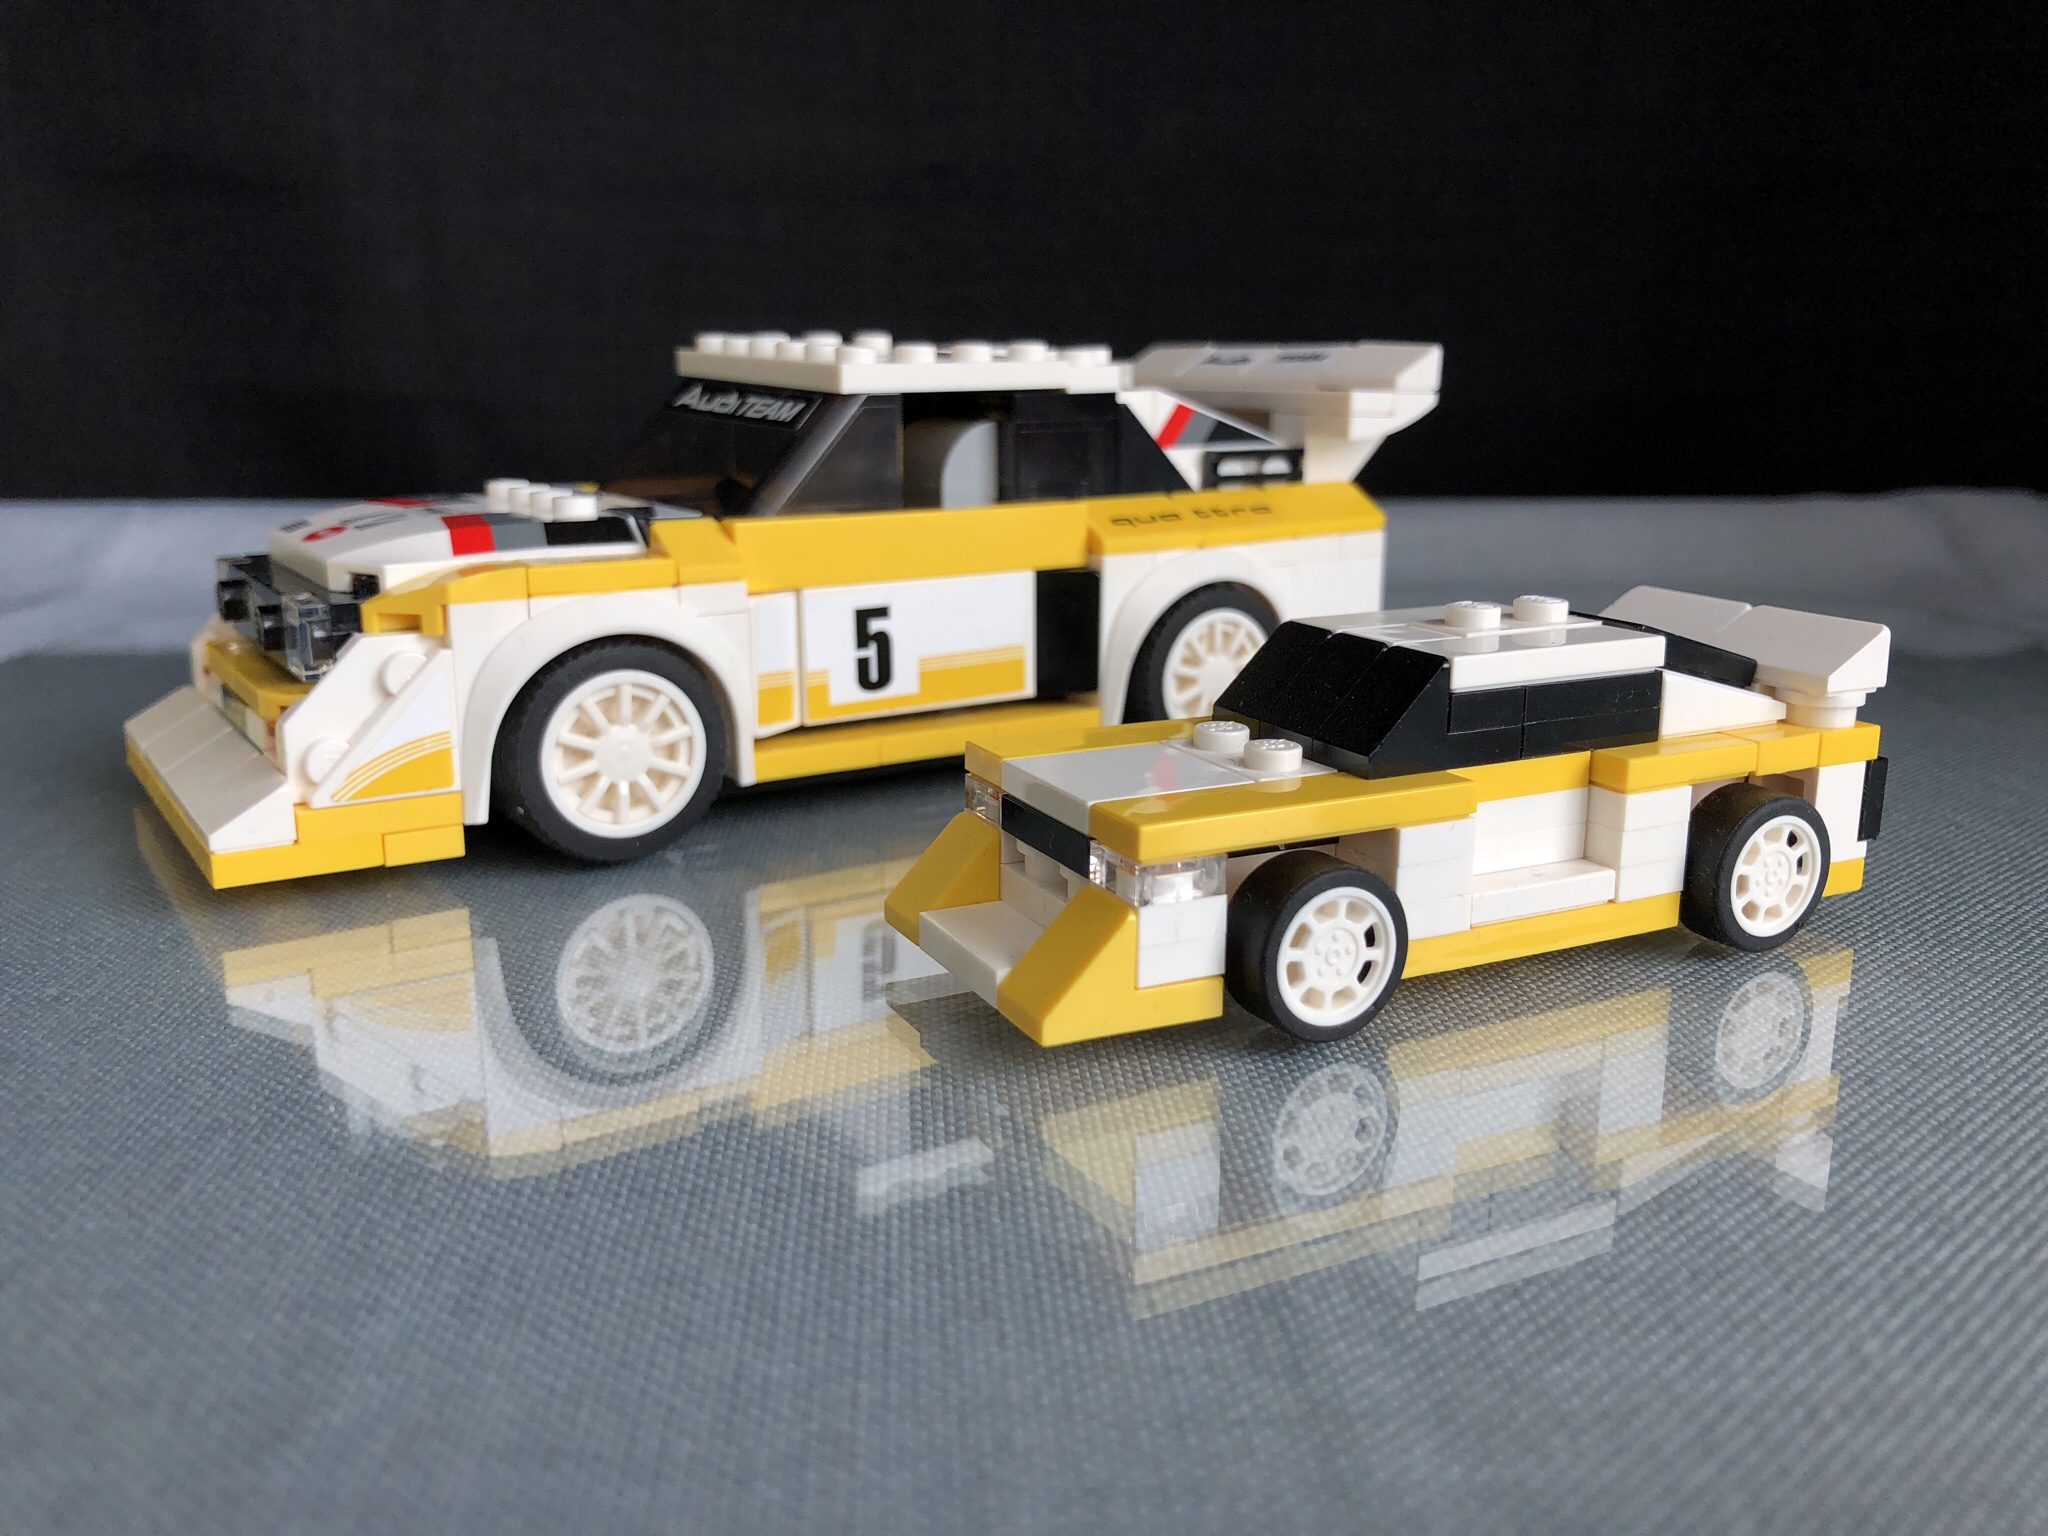
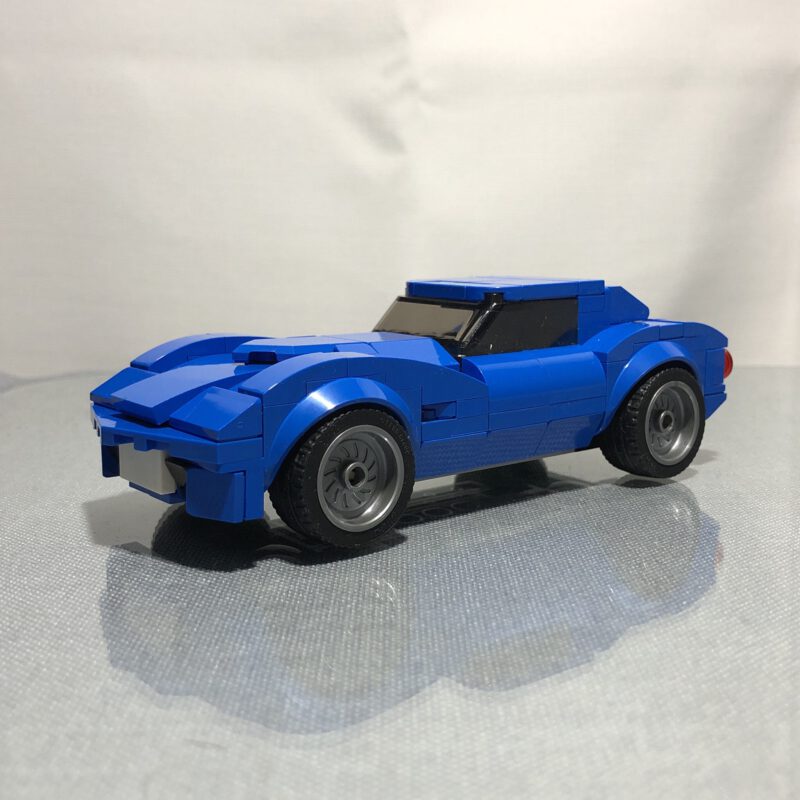
My first commissioned model: A 6-wide Chevrolet Corvette C3 “Stingray”, based on Zeto Vince’s model.

I built this one for a colleague who wanted to have it as a gift for a her husband. They have one of these beauties in their garage, so it’s a very special model for them.

When I saw the C3 in George Pantaleon’s (AKA Zeto Vince) and Mattia Zamboni’s book “How to Build Dream Cars with Lego Bricks” I knew that one day I would build one myself. I also remembered the Corvette from one of our department’s summer parties. So why not build one for them? My colleague loved the idea and gave me a go for it.

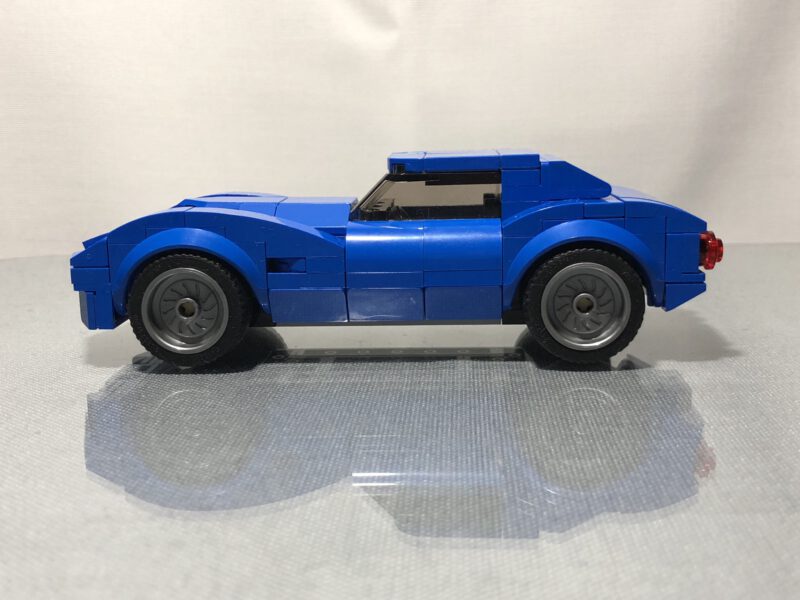
So a couple of weeks ago I started to rebuild the C3 from the book with LDD. But I wasn’t satisfied with the typical “holes” in the corners of the City mudguards. So I started to modify the models by using Speed Champions mudguards and wheels instead.

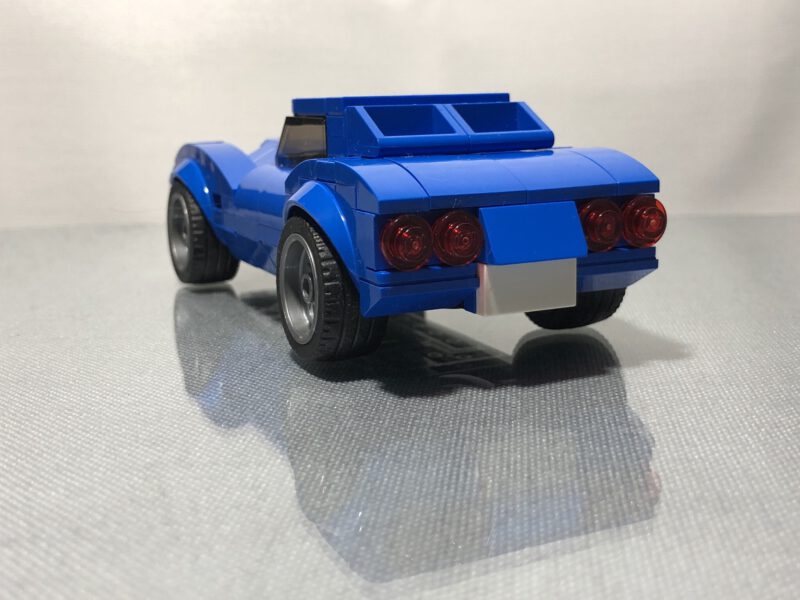
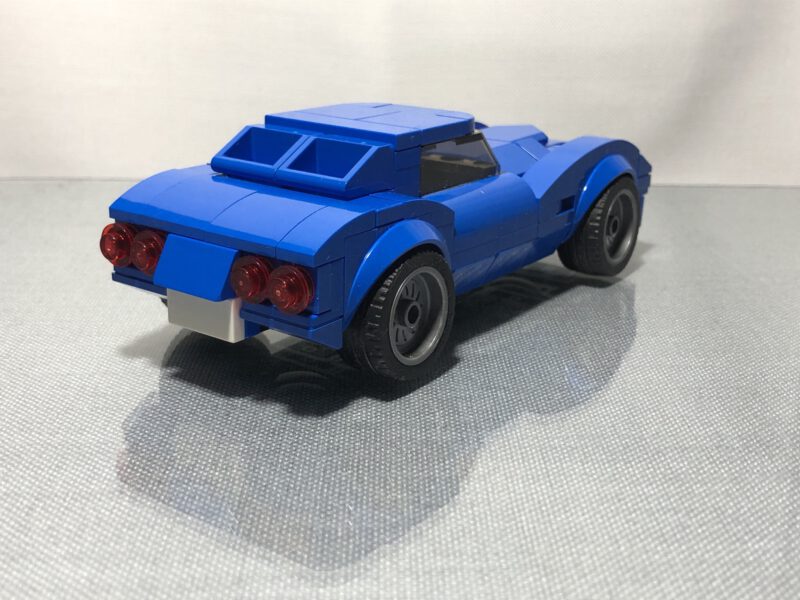
The rear mudguards made it necessary to modify the rear end of the model replacing the inclined rear end by a more conventional SNOT design. The roof had also to be mounted in a “Studs Up” position to work with the mudguards.

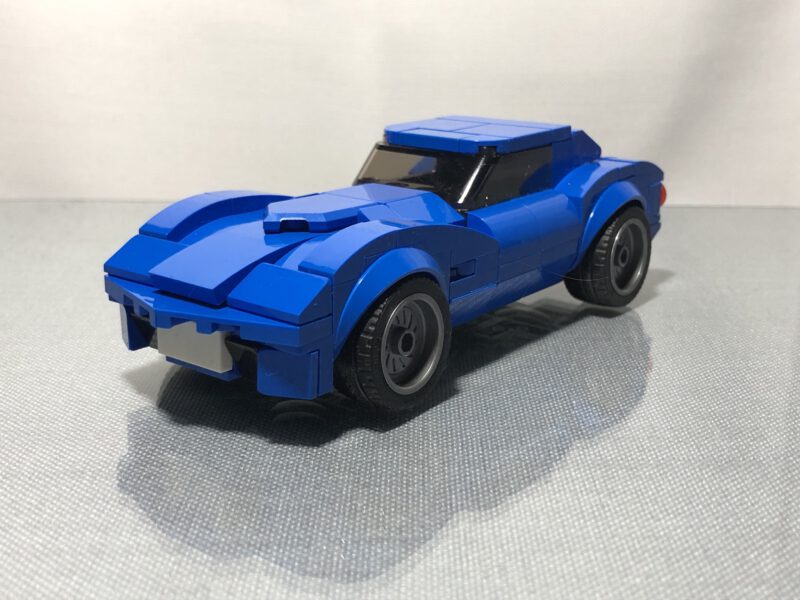
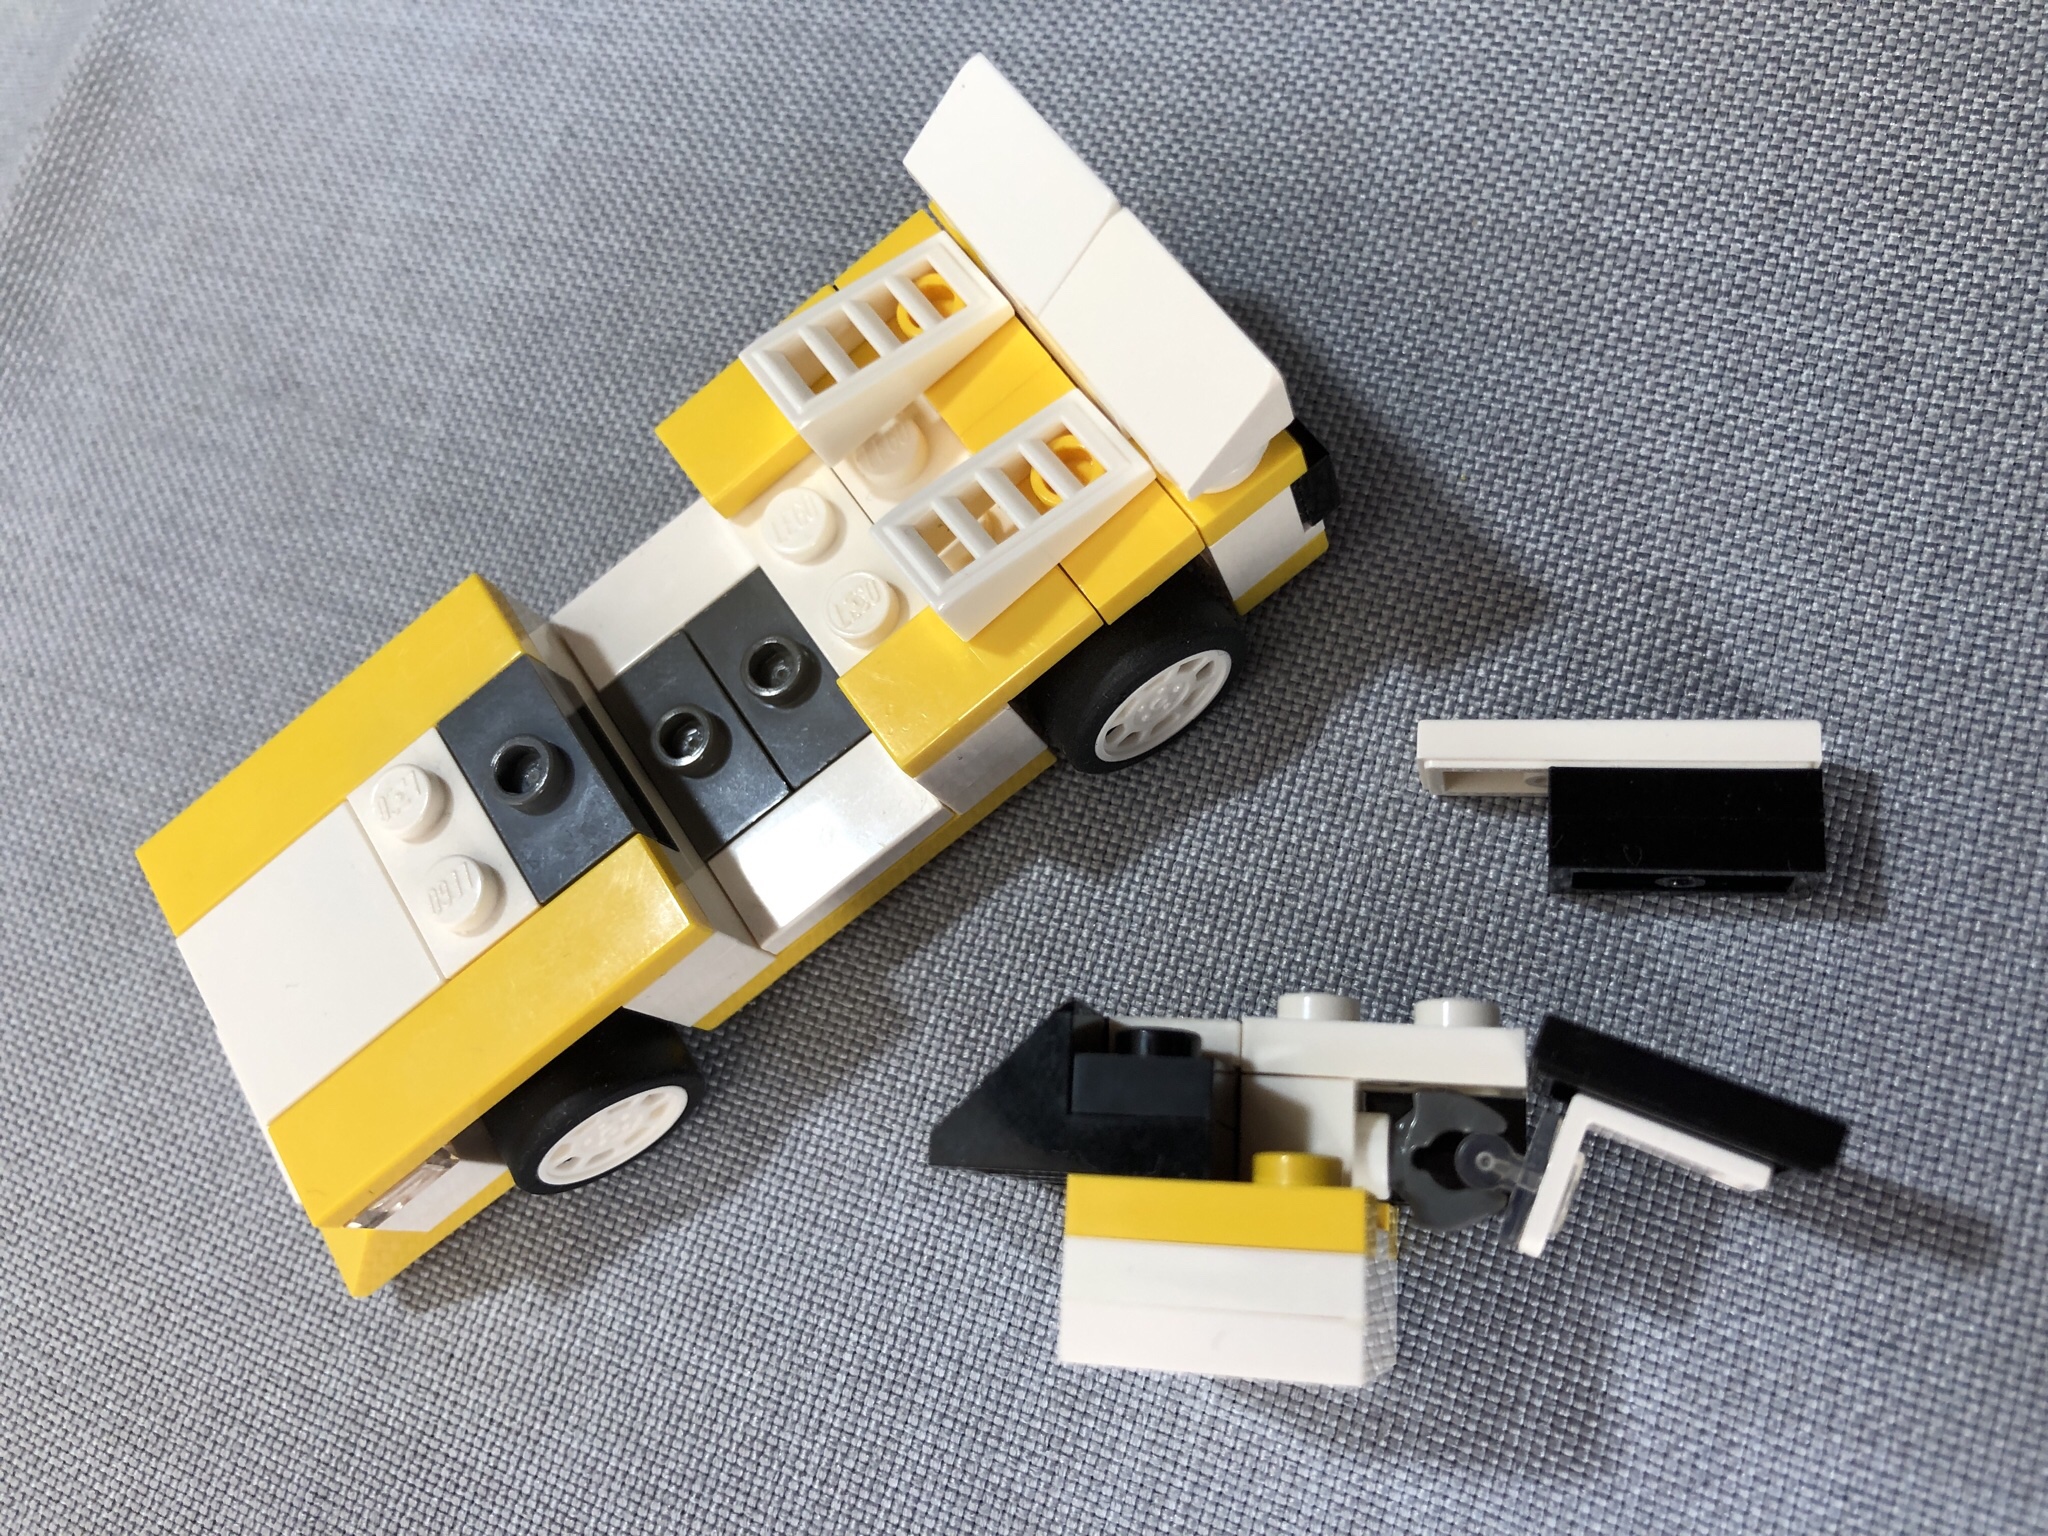
The original model represents an earlier version (ca. 1967) of the C3, but I wanted to built a later (ca. 1976) model to represent the real car. So I changed some more details on the front end and the sides to get closer to that version. I also modified the roof to have detachable “T-Top” elements.

After the start with LDD I continued the work with Studio for renderings and instructions with a complete set of the used elements. These were my first instructions made with Studio and I really like the “manual” approach of Studio compared to the much more “automatic” way of LDD. The export function of Studio for instructions is great to get a PDF for a printed booklet.

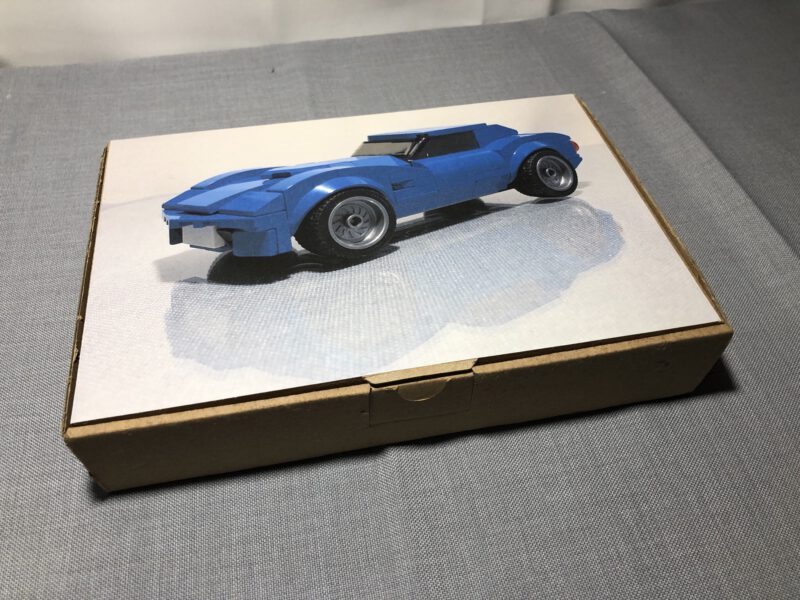
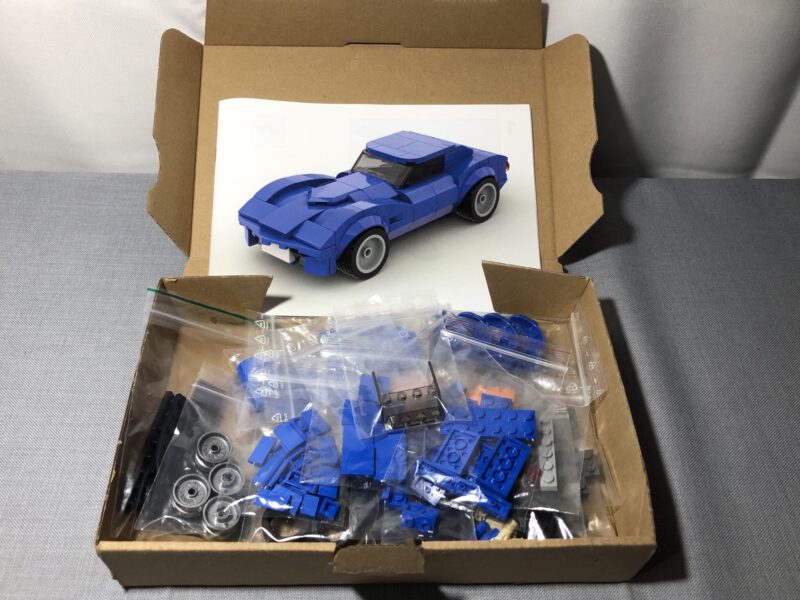
With Bricklink’s upload function it was also easy to upload the parts list and order the parts. Three orders later I was able to built the real model. After taking a set of pictures I disassembled it and packed the bricks in plastic bags. One of the card boxes from the Bricklink orders had the perfect size for this custom “set”.

There are still a lot of similarities to the original model from the book, especially on the front end and the hood, so thanks to Zeto Vince for his inspirational work. If you are a fan of cars built with Lego bricks I can strongly recommend the book.

I’m really satisfied with the result. I hope you like it, too :-))


Fire Brigade Dice Tower (MOC)

A dice tower built in the typical red an white fire brigade colour scheme.

Playing board games with a seven year old boy can be a real challenge with the dice rolling everywhere where it should not. So I decided to build a dice tower to solve that problem as good as possible.

There can be found a lot of similar designs anywhere in the net, so the basic design of a such a tower was easy. I just wanted to add two functions: A detachable lower deck for compact storage and kind of a door to get the dice from the platform in an easy way.

I wanted to build two for Christmas – one for my son and one for my mother – and the total cost of the bricks shouldn’t be a big investment. So I chose to use mostly common parts and colours to keep the cost lower. Red and white were a good choice, so the idea of a fire brigade theme for the tower was born.

A few hours with LDD and three Bricklink Orders later everything was on the way. This is the result. You can see the left tower with the detached platform mounted on the rear side of the tower for compact storage. The right one is ready to play.

This is how it works: Throw the dice into the opening on the top, the two small ramps inside make it bounce from one side to the other and back, and finally the “Quarter Pipe” on the bottom will make it roll onto the platform. Then you can just pick the dice or open the front door to get them. No more dice “flying around” on the board or the floor… :-))

Fire Brigade Dice Tower (MOC)

The detachable platform: The platform is fixed to the tower with a pair of long Technic pins with friction and additionally guide by two axle pins on the other side.

On the rear end of the tower there are two of my new favourite SNOT bricks (1 x 2 x 1 2/3 brick with studs on one side) to attach the platform. This way you need less space to store the tower next to your board games.

LL 918m2 One Man Space Explorer (918 MOD2)

“Honey, I shrunk the Galaxy Explorer.” LL 918 rebuilt as a half scale interpretation of its bigger brother LL 928.

My first mod of LL 918 was pretty much based on the original model, just with the new half scale wings section of LL 928. A few days ago I was playing around with some down scaled versions of LL 928 when I had the idea of a modified LL 918 with the look of LL 928. I tried a few different designs and came up with a mix of LL 918, LL924 and LL 928.

Rear left view:
The most important change is an extra rocket engine and a bigger cargo area. It now has big cargo doors, just like LL 924 and LL 928 have. The cargo area is more than original 2x2x1 box with doors now. There is space for a 2x4x2 box inside.

Top view:
You can see the half scale wing shape of LL 928 with 1×1 plates in black and yellow. I’ve added the posts for extra rockets on the sides of the wings. Due to the limited space I used the small thrusters from LL 924. And, last but not least, the hinge for the roof is now on the rear end, combined with blue plates on the side of the roof panel.

So here it is: My second mod of the Lego Classic Space LL 918 One Man Space Ship with a design similar to the LL 918 Galaxy Explorer. I call it the One Man Space Explorer.

Bonus picture:
A preliminary rendering I made with Mecabricks.
… Hmm, I might go back to those shorter rear wings…

Classic Space G1 Moon Base (27 Baseplates)

A childhood dream come true: This is the Moon Base I would have loved to have when I was a kid: 9×3 baseplates filled with stations, vehicles and spaceships.

It was 1979 when I saw the first pictures of the new Lego Space sets. Everything was so new, so cool and so different from what Lego had been before. Lego Town (now City) had just started with the new minifigures and sets where those could live and work and move with. The only space set available before was the “bricky” Lunar Lander 367 from 1975.

And then came Lego Space, the first generation (G1) with the iconic blue/grey/trans-yellow colour scheme. We all wanted to have the three space ships (LL 918, LL924 and the epic LL 928), the space station, the rocket base and everything else from that catalogue.

I was lucky to get about half of the sets, but after a few years the G1 sets disappeared from the shelves without a real chance to get the missing sets. There was no Internet, no Lego shops and the kids who had the sets wouldn’t give them away. So when the first sets started to appear on local flea markets I was already spending my money on Lego Technic or games for the Commodore 64.

After my dark ages, the discovery of bricklink and with more money that I ever had as a child, the old dream of a really big G1 space base came back.

My first CS model after my dark ages was built for the first MOCpages Classic Space Pocket money contest. With 100 parts or less the goal was to build a model that could have been a real affordable set in the Classic Space years. The result was my 892 Surface Explorer. It was a lot of fun to build that and it’s still on the moon base today. This one really restarted my enthusiasm for Classic Space.

The model was followed by a small space ship, a mod of the 6890 Cosmic Cruiser in G1 design with “Vic Viper” applications and a G1 version of the 6876 Alienator.

That was more or less when the idea of the big base really took form.
My original plan included the most iconic G1 sets:

  • LL 918 One Man Space Ship
  • LL924 Space Cruiser
  • LL 928 Galaxy Explorer
  • 920 (Alpha-I) Rocket Launch Pad
  • 926 Command Centre

I also wanted to build some of my all-time favourite newer Classic Space sets with a realistic G1 look, including:

  • 6929 Starfleet Voyager
  • 6927 All-Terrain Vehicle
  • 6890 Cosmic Cruiser
  • 6980 Galaxy Commander
  • 6952 Solar Power transporter

And the centre of the base should be a modular, big station with detailed interiors and as many functions as possible.

The most important part of that is the word “modular”. I wanted to have a module unit similar to a standard (ISO) shipping container for cargo units. station modules and more. I decided to use a box with a size of of 8x16x8 (WxLxH) bricks as a “Space Container Unit” (SCU) for that. The rest of the base started evolving around that idea.

Instead of buying or rebuilding 926 Command Centre and 920 (Alpha I) Rocket Launch Pad I decided to build my own versions of them based on SCUs. I call them SC 926 and SC 920. I also adapted my new versions of 6927 All-Terrain Vehicle, 6952 Solar Power Transporter and 6980 Galaxy Commander to carry an SCU. And finally I built my big “Gamma I” station based on 6 SCU modules.

My first layout had 18 (3×6 baseplates) and was already too small when I assembled it the first time:

The next step was a 8×3 layout with more space for space ships, vehicles and cargo.

After that I was lucky to get the Classic Space collection from one of my oldest friends for a price that satisfied both of us. It included a 926 Command Centre and a 6970 Beta I Command Base, adding 3 more crater plates to the layout, now with 27 (9×3) baseplates. This is now the maximum size for a long-time display in our quite spacious corridor.

So let’s take a closer look…


A walk around (1/6)


A walk around (2/6)


A walk around (3/6)


A walk around (4/6)


A walk around (5/6)


A walk around (6/6)


Top view (left side)


Top view (right side)


Details (1/9)


Details (2/9)


Details (3/9)


Details (4/9)


Details (5/9)


Details (6/9)


Details (7/9)


Details (8/9)


Details (9/9)

That’s it, my Lego Classic Space Generation 1 Moon Base  with 27 baseplates. It’s my biggest Lego project so far and really a childhood dream come true :-))


CStronauts 2020

More colours! :-))

I was inspired by Pat-Ard and his picture, so I just had to take one with my bunch of CStronauts. It’s great to see new colours coming and I’m still thrilled by the new retro helmet mold from the Lego Movie 2 set “Benny’s Space Squad” (70841).

The first five of the guys in basic “Mondrian” Lego colours are original CS minifigs. The green one is from the Ideas “Exo Suit” set (21109), modified with a classic head and without a helmet visor. The grey one is a combination of the CMF “Rocket Boy” and light bluish grey parts combined with classic light grey helmet and air tank. The pink one is “Lenny” from “Benny’s Space Squad” and the orange one came with DK’s “Visual History” book.

So let’s wait and see which colour will be next… Lime would be awesome! :-))

Here they are with some of their classic and newer space colleagues. I have to get another box… ;-))

8846 Tow Truck Reloaded (Studless Technic)

My studless version of the classic Technic 8846 Tow Truck from 1982

As a kid I was a big fan of the 8845 Dune Buggy. I also liked the matching 8846 Tow Truck on the cover of the Technic catalogue but unfortunately never got one as a kid.

There was no Internet, no Bricklink and the sets only remained in the stores for a year or so. So if you spent your pocket money on other things that year and didn’t get a set for Christmas or your birthday, you didn’t get it at all.

Well, times are changing and a few years ago I found a set at a fair price on Bricklink and finally, finally got this set. Back then I had already built a studless version of my beloved Dune Buggy, so the idea for a studless Tow Truck was there immediately. There were other projects in the making, so it took its time.

Now with some finished projects and Corona lockdown I’ve found some time to dedicate to this project. I wanted to get shape and dimensions as close as possible to the original, so I started to build the original model with LDD and the studless version right next to it.

I know I’m not the first one to do this. There is a digital model built by Arne Didrik on Rebrickable and a cool movie of another model built by PG Play on Youtube. Both models were inspirational, but I decided to built my own one from scratch with the original 8846 as my only reference.

The model is quite complex for its size with some pretty functions packed into a rather small space. So it got a little tricky here and there but I was finally able to build a model with the right shape and all functions.

This is it.

The original model didn’t have headlights or taillights, probably to reduce costs. But I didn’t want to leave it that way. As 8846 has always looked like a Land Rover Defender I added headlights similar to a Series III model.

Side view: As usual on the classic Technic models the bodywork looks more like a frame than sheet metal parts. All lift arms have the same dimension as the beams on the original model

Rear end: There is just minimal bodywork with a visible frame and axle. Like on the original model I’ve kept the differential without connections to a power train. I’ve also added some simple classic truck tail lights. I didn’t find many pictures of Land Rover tow trucks and they all had different tail lights, so I had a free choice.

Another view from the front. I really like the look of the head lights. I decided to add a more modern set of emergency lights on the roof. The original had red ones, but for me orange ones look a lot better.

I was able to include all functions of the original model. Here you can see the steering system with steering wheel and HOG steering connected with a chain instead of a rubber band. It works a lot better this way.

Unlike the original model the new one can open the bonnet. The winch can be driven by the spare wheel when the bonnet is closed.

The “fork” mechanism works just like on the original model. I only added an additional lever on the blocking mechanism.

The rear winch is very similar to the original model. I’ve just added a pair of gears because I needed the space in the middle of the lower axle for a connector. As usual on newer models, most of the functions are operated by the small black double bevel gears.

You can easily take off the body work.

Just add two simple supports and you get a working rolling chassis.

Side view comparison: The silhouettes match exactly.

Front view comparison: Just like my 8845 Dune Buggy before the new one is one stud (or hole) wider than the original to get the typical “odd width” of new Technic models. Head lights have been added, emergency lights, spare wheel and HOG steering have been replaced by newer versions.

Rear view comparison: Everything is one stud wider, tail lights are new. With all the new parts and details the new one has 561 parts instead of 379.

So this is my new studless Lego Technic version of the classic Tow Truck from 1982 with the image that started the whole thing.

I hope you like it! :-))

Bonus picture:

Family meeting – 8845 and 8846, old and new (father, son, uncle and cousin) ;-))


Classic Space Gamma I Modular Station (6SCU)


A Classic Space Station in 1979 design built with six 16x8x7 Space Container Units (SCUs) on two 32×32 base plates.

I always wanted a big station on my moon base. Like a modern space station it should have a modular design. I wanted to use no more than two 32×32 base plates, a flat one and a crater plate. I chose a design with six SCU based 16x8x7 modules with each of them accessible from one side, preferably from the front.

I had two connection nodes with a “half module” on one side and four station modules with 14x6x6 bricks of room to fill. So I designed the interior module by module with LDD. When I was satisfied with the design I placed some BL orders for used bricks and started the “real” building. This is the result.

Here you can see everything open, ready to play. There is room for four CS-Tronauts to live and work.

Top view with the six modules on two base plates.

Another top view with everything open:

  • Module #1 (bottom left): Crew Quarters
  • Module #2 (bottom center): Crew Mess with Shower Room
  • Module #3 (bottom right): Connection Node with Air Lock
  • Module #4 (middle): Command Center
  • Module #5 (top left): Connection Node with Storage Unit
  • Module #6 (top right): Science Lab

Module #1:
Crew Quarters with four bunks and a private storage with two doors for each crew member.

Module #2:
Crew Mess with up to four seats plus Shower Room with toilet. The white doors can be locked in open position for some extra space in the shower.

Module #3:
Connection Node with Air Lock

Module #4 (side view):
Command Center with custom printed screens

Module #5 (rear view):
Connection Node with Storage Unit

Module #6:
Science Lab

Overview:
All six modules open

Gamma I ready for transport

So this is my Lego Classic Space Gamma I Modular Station built with six 16x8x7 Space Container Units (SCUs) on two 32×32 baseplates, the main structure of my big moon base.

I hope you like it :-))

Audi sport quattro S1 Evo2 V2.0 (4-Wide)

An update for one of my all-time favourite 4-wide Lego models, the Audi sport quattro S1 Evo2.

I absolutely love the new 8-wide SC set of this iconic Group B monster. When I helped my son to build his set (we only got one, so far), I was really inspired to take a second look on my 4-wide and improve it here and there.

I started with the front end. The new 2×2 tiles with two studs seemed to be perfect for the front wing. This way there was some space to reinforce the front section and add some extra air intakes between grill and spoiler.

Looking at photos of the original model I decided to rebuild the rear wing. I also replaced the 1×1 black plates and tiles with 1×1 round plates for the air outlets.

Then it was time to find a solution for the rear window and “C pillars”. I was never satisfied with the collection of “cheese wedges” and the small window. After trying a lot of different parts I chose a combination of 1x2x2/3 slopes and a 2×2 tile.

The most tricky part was fixing the 2×2 tile. I had to rebuild the whole 3-wide middle section to find place for a holder that wouldn’t fall apart at the first touch.

Finally I found a combination of a 1×1 “light brick”, a robot hand, a transparent holder with a stud and a “neck bracket”. It might not be a 100% “legal” connection, but it works well.

So this is V2.0 of my 4-wide Lego Audi sport quattro S1 Evo2. I hope you like it! :-))

Bonus picture #1: Brothers

Bonus picture #2: Rivals


Classic Space/Technic Rover

Febrovery 2020: A Classic Space Rover with Classic Technic Rocker-Bogie suspension.

Last minute entry for Febrovery 2020: The missing parts for this one arrived just in time today.

I wanted to combine the 1979 Classic Space look with a Rocker-Bogie suspension built with Classic Technic parts from the same era. I started the design with LDD, but I really wanted to build it with real used bricks for the special look.

I didn’t find time to finish the project earlier, so I was lucky to have the extra day for that. This is the result.


Canopy open:
There is a toilet behind the drivers’ seat, covered by a 2×2 tile.


Roof open: A small bunk just under the roof.


Rear end: A seat, a desk and a computer workstation are placed under the bunk.


The suspension in action: 1, …


… 2, …


… 3 …


… and 4.


So this is my  Classic Space/Technic Rover with Rocker-Bogie suspension. I hope you like it :-))

Bonus pictures:
The Technic suspension

You can see the “heart” of the suspension system in the middle: The differential connects the two Rocker arms on the sides. So when one arm moves up, the other one moves down and vice-versa. This suspension worked well on the NASA Mars rovers, so why shouldn’t it on a Lego Moon rover?

You can also see good old Pythagoras at work on the angled Technic beams. Each of them forms a virtual triangle with edges that are 3, 4 and 5 studs long.

6927 Mod: Light Grey All-Terrain Vehicle

Febrovery 2020: What if the 6927 All-Terrain Vehicle would have been released one year earlier? How would it have looked like? Maybe this way: Light grey with green windows and red rims.

I always wanted to have the 6927 set and now I was lucky to get one when I bought the whole Classic Space collection from one of my earliest and best friends. It should become part of my CS Moonbase, but the white/blue colour scheme didn’t really fit into the look of the base. I had  to change the look a bit to get it right.

I still wanted to have a contrast between the vehicle and the small control station, so I chose the light grey/trans-green colour scheme from other sets from 1979/1980. The green windscreens are quite rare. I decided to order three of them in the US via BL instead of placing two or three orders in the EU.

I wanted to have a real 1980 look. With a few modifications I was able to replace the new parts from 1981. And this is it:


Front left view: Six 2×3 inverted slopes to replace the big inverted window.


Rear left view:  The control station fixed to the vehicle.


Unloading: The control station is unchanged. All parts should already have been available in 1980.


Mod vs. original: I think it looks cool both ways. The ladders were available in light grey in some train sets in 1980, but I preferred the CS logo instead.


So this is my Mod of 6927 All-Terrain Vehicle in light grey and trans-green for Febrovery 2020.
I hope you like it! :-))