
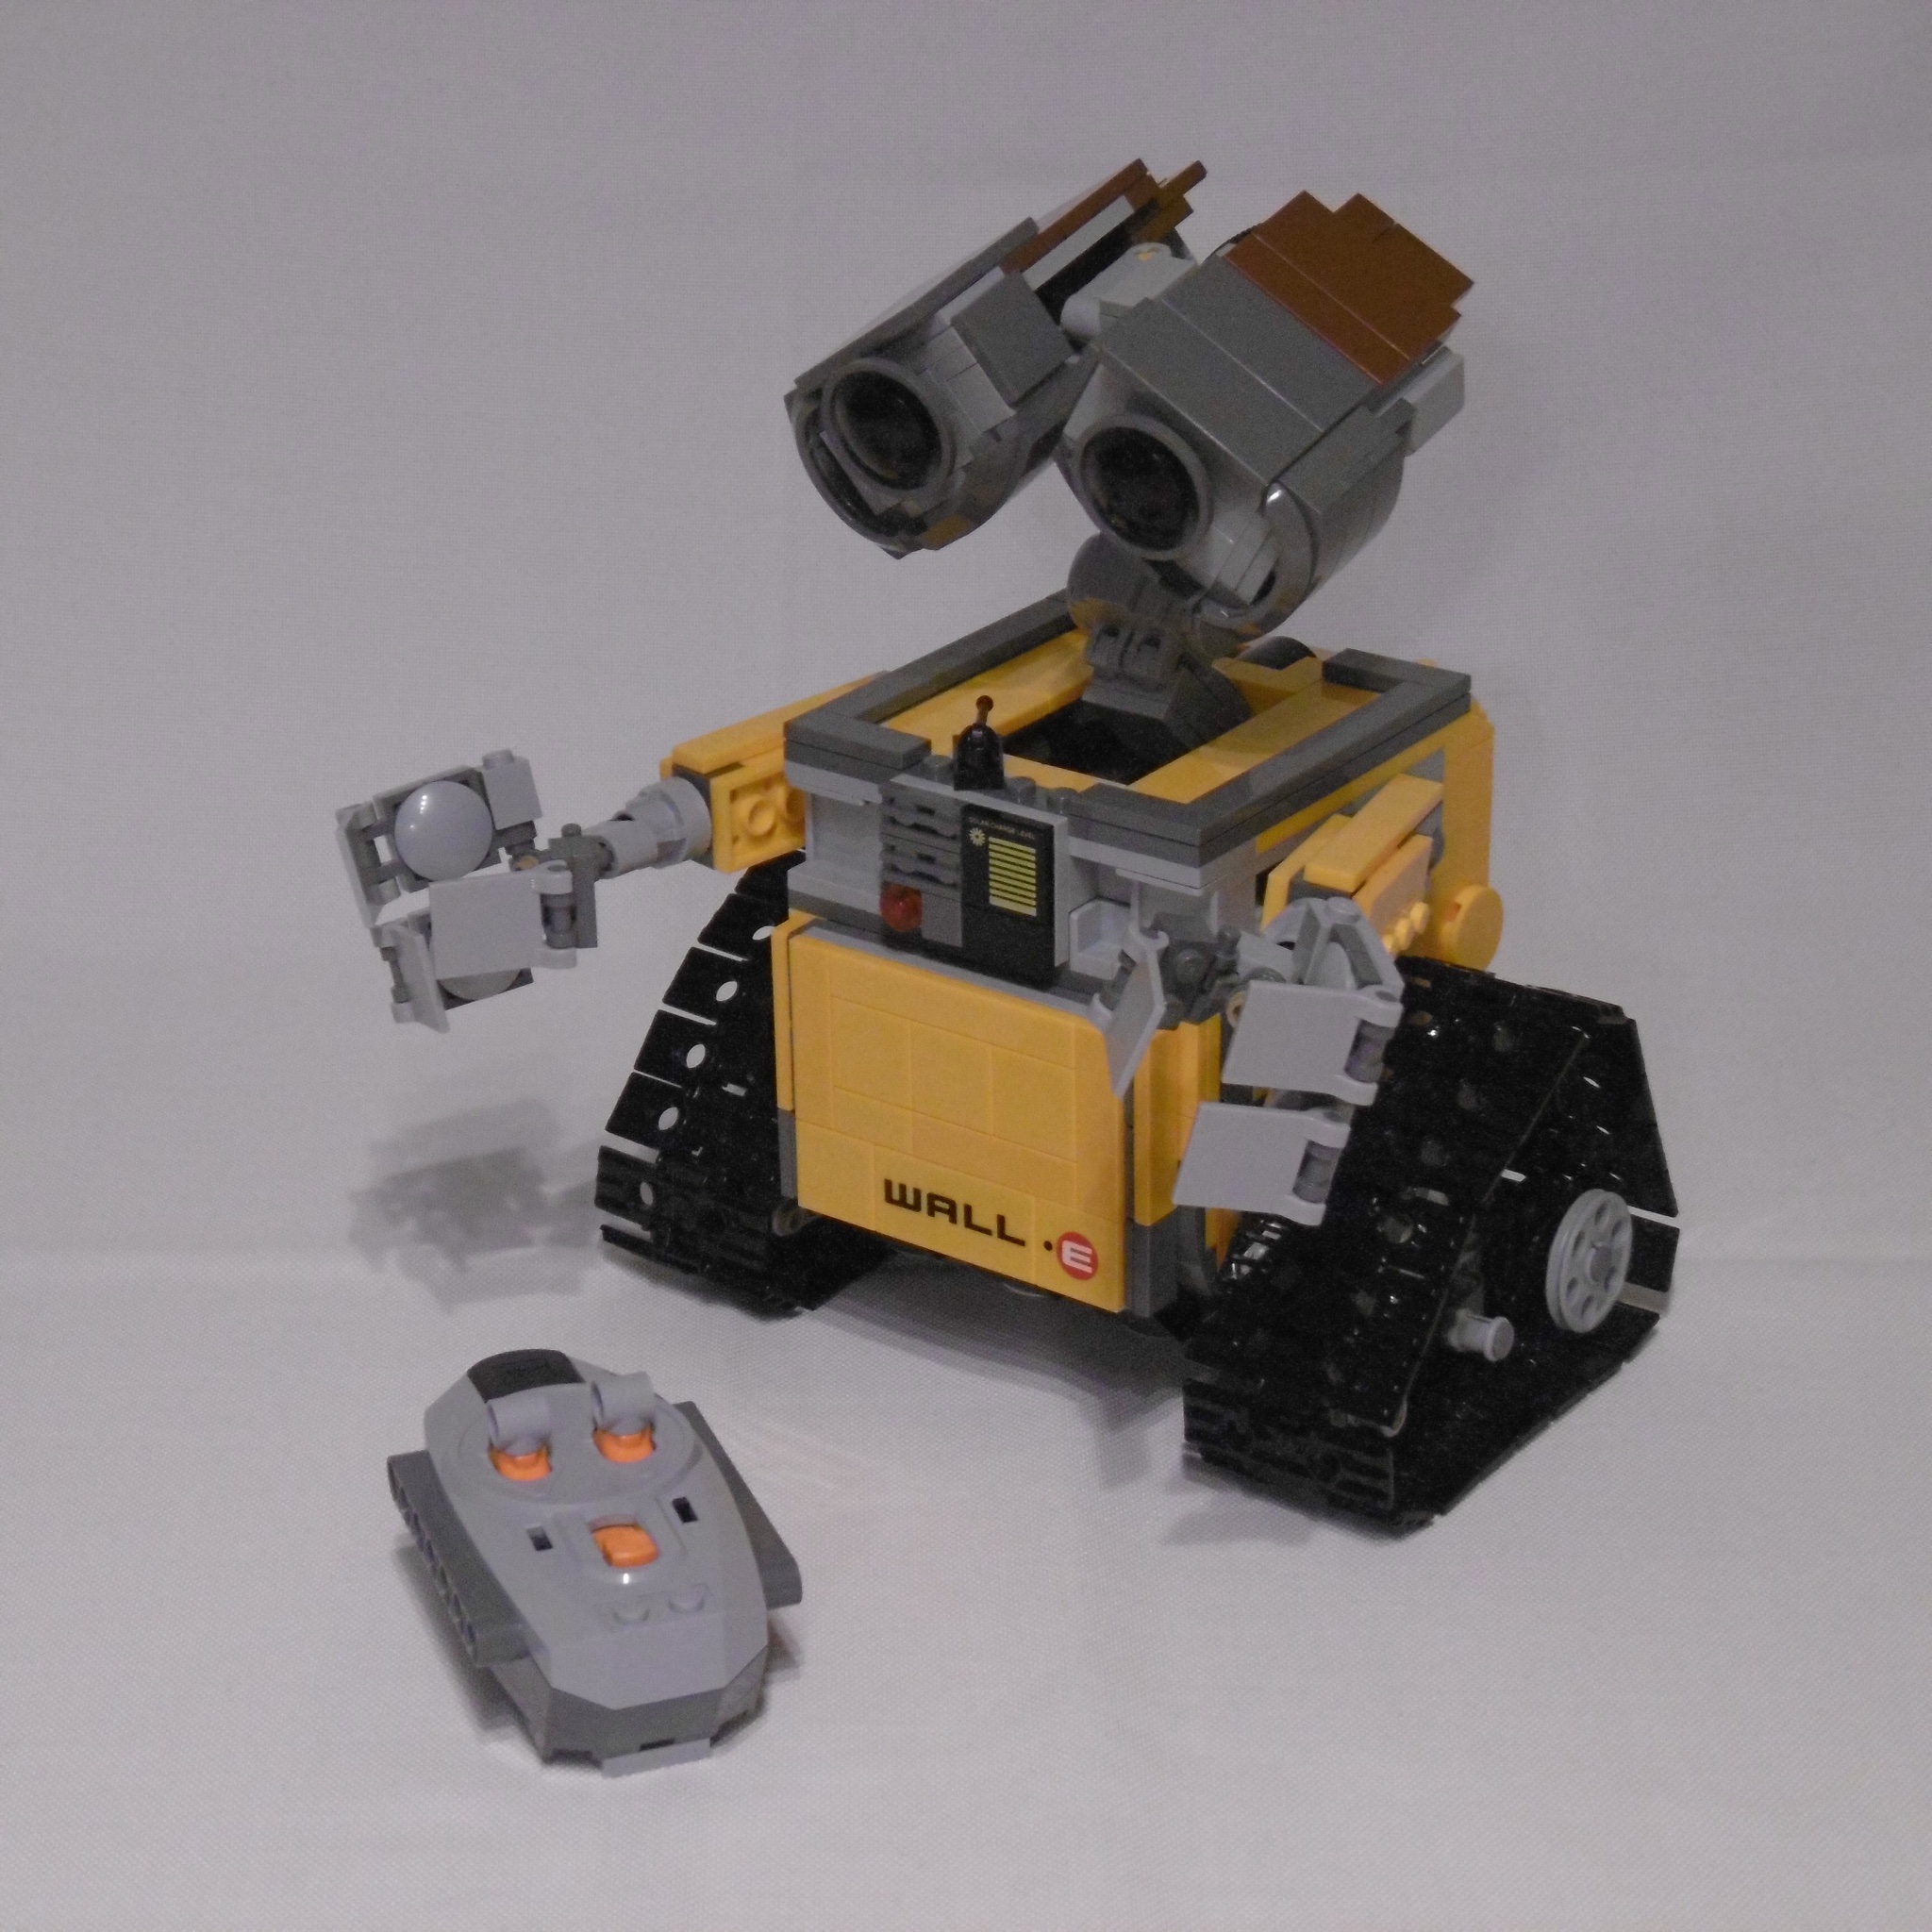
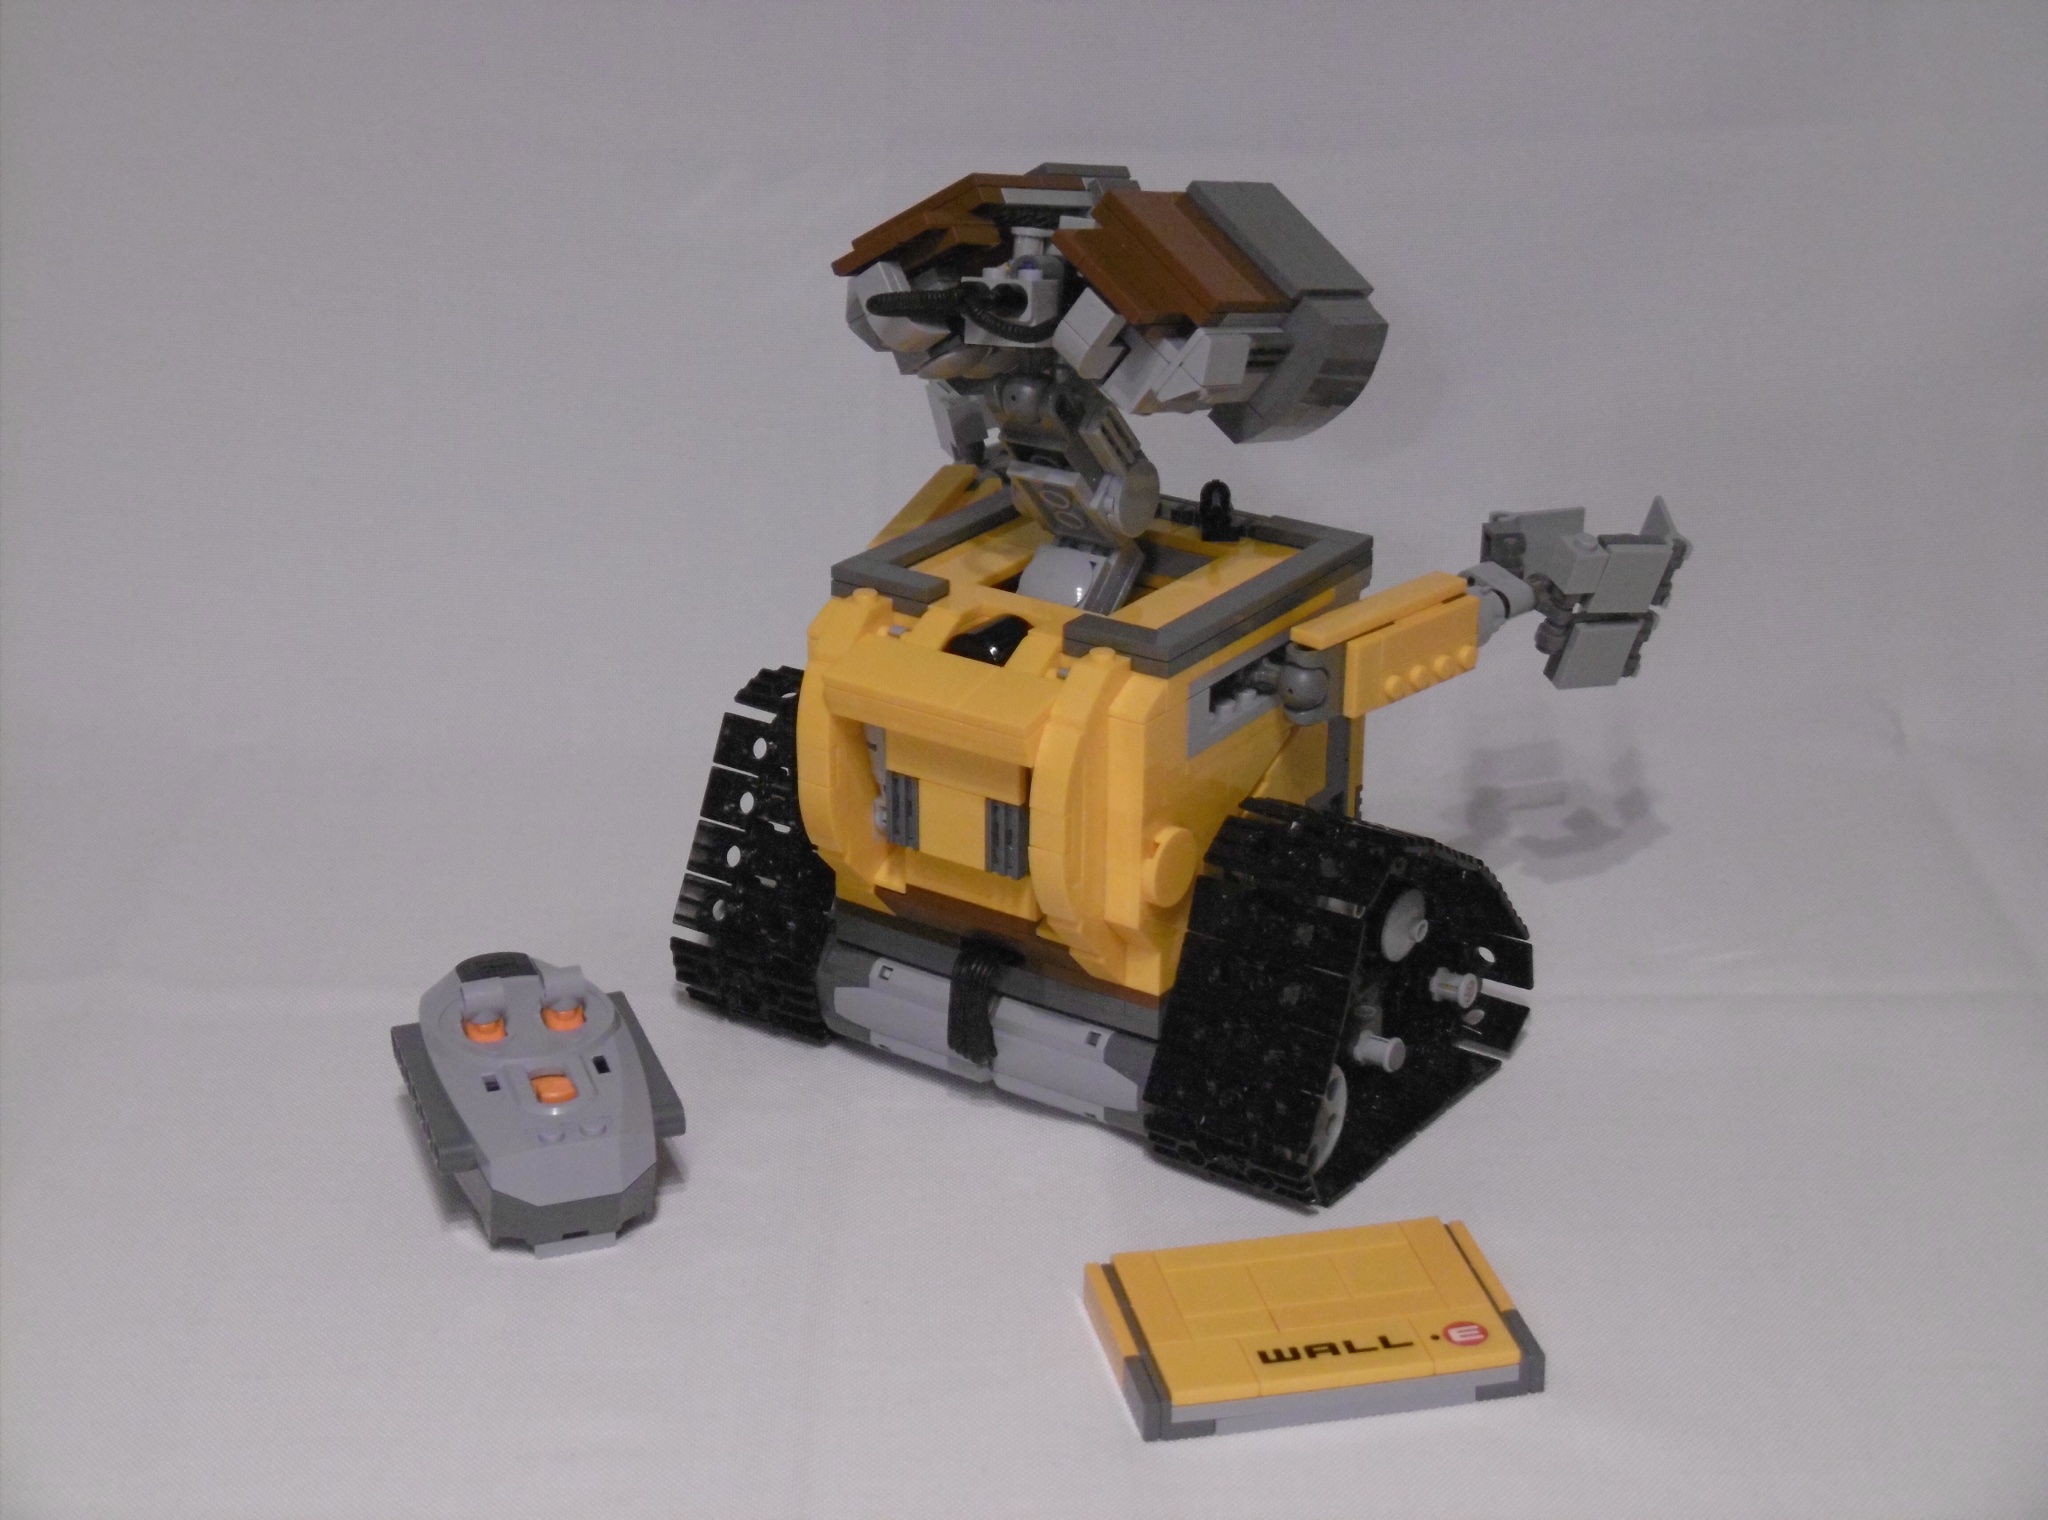
 A mod of the 21303 Lego Ideas “Wall-E” set adding Power Functions motors and remote control.
When I saw the official Lego Ideas Wall-E set I knew I had to have one. But with 50,- € it wasn’t cheap at all, especially considering the extra 60+ € that I would need for the Power Functions elements to motorize the set.
When I decided to go for it anyway, it was almost too late for that. I was lucky to get a set without box or instructions at the original price. That was OK for me, but not my original plan ;-)).
The plan was: “No Wall-E without Radio Control!”. So I started looking for possible solutions other fans had found.
The most popular conversion is the one built by Youtube user PPung Daddy, but I wasn’t really satisfied with it. The cables of the motors were positioned too close to the ground, the battery box wasn’t really fixed and the IR receiver looked almost like a backpack.
So these were my main tasks when I tried to build my own version of an RC Wall-E.
I looked for better positions for the M Motors, but the best thing was just turning them by 90 deg to position the “cable exits” on the rear side. The motors are fixed by two Technic pins, the driving axles and 10 SNOT 1×2 Technic bricks with cross axle holes.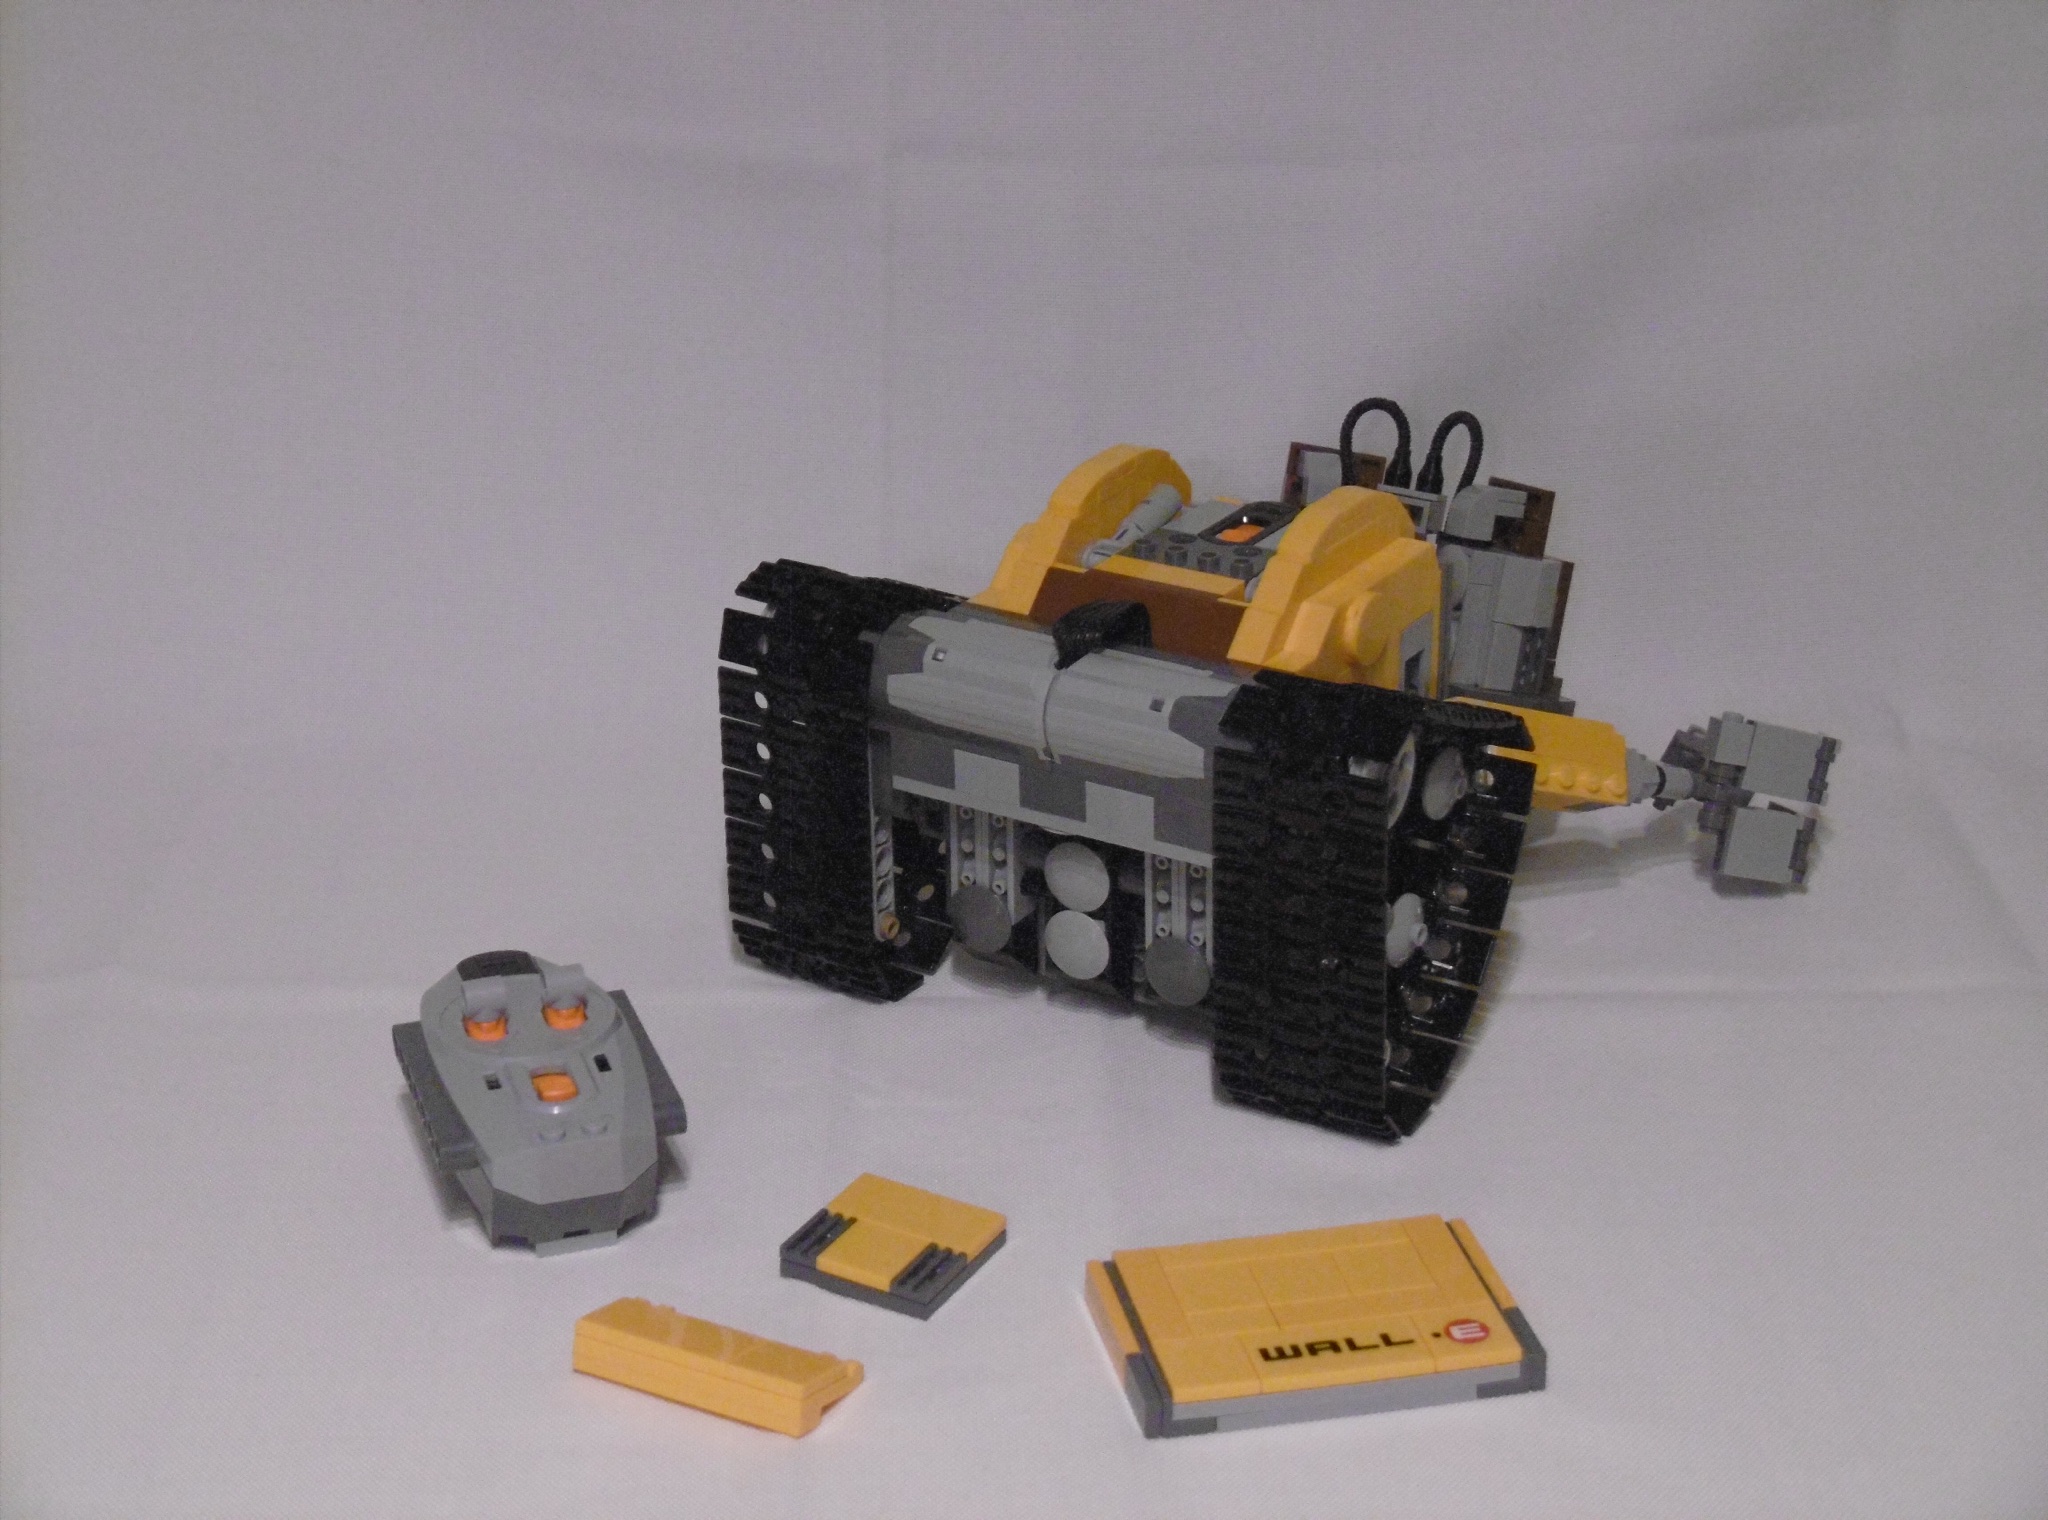
There isn’t much space inside Wall-E’s “belly” so I looked for the lowest possible position to locate the battery box. I built a new ground plate with a 4×8 cut out, so the ground plate of the box is now part of it. For this solution I had to get rid of the hinges of the front plate, but that was OK for me. Now the plate is just fixed by four SNOT studs.
 The front of the box rests on two 1×2 Technic bricks with cross axle holes, which are fixed by an 8L axle running through them. To change the batteries you just remove the axle, then you can flip down the box.
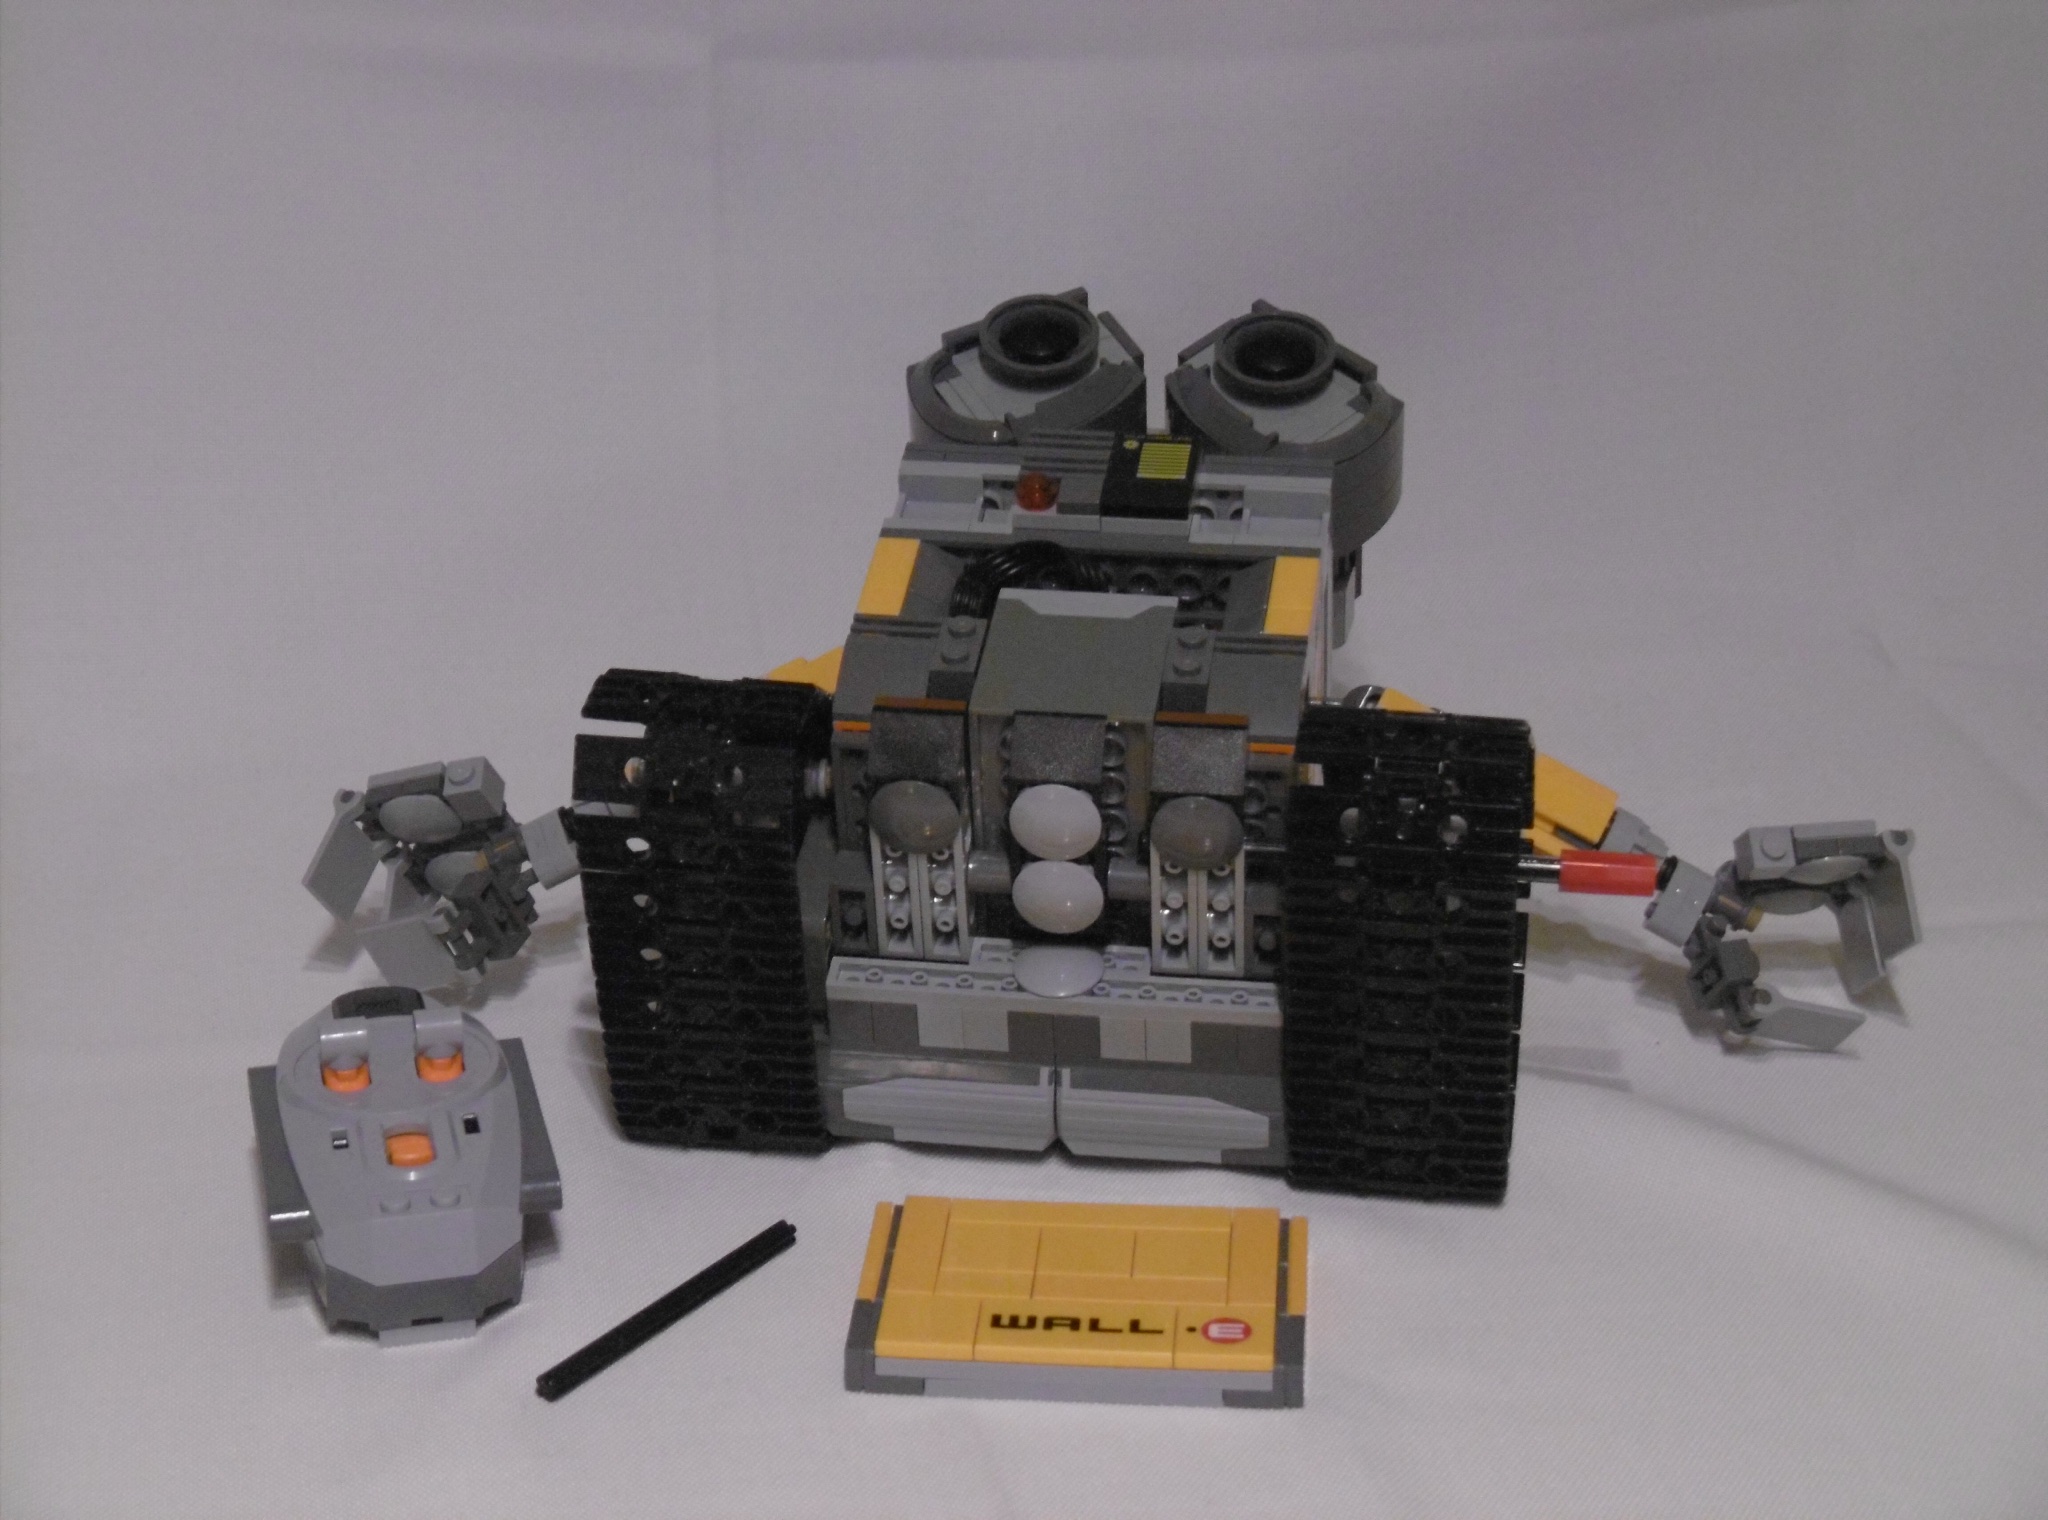

You can switch the battery on and off by pressing the lime green lever. The hole in front of the neck part is big enough to do that without removing any parts. Looking inside you can even see the green LED of the battery.

The neck of the robot is fixed in a higher position, so the lower neck piece is one stud shorter to keep the original look.
With the lower position of the battery box it was possible to locate the IR receiver on top and more “integrated” into the design of the robot.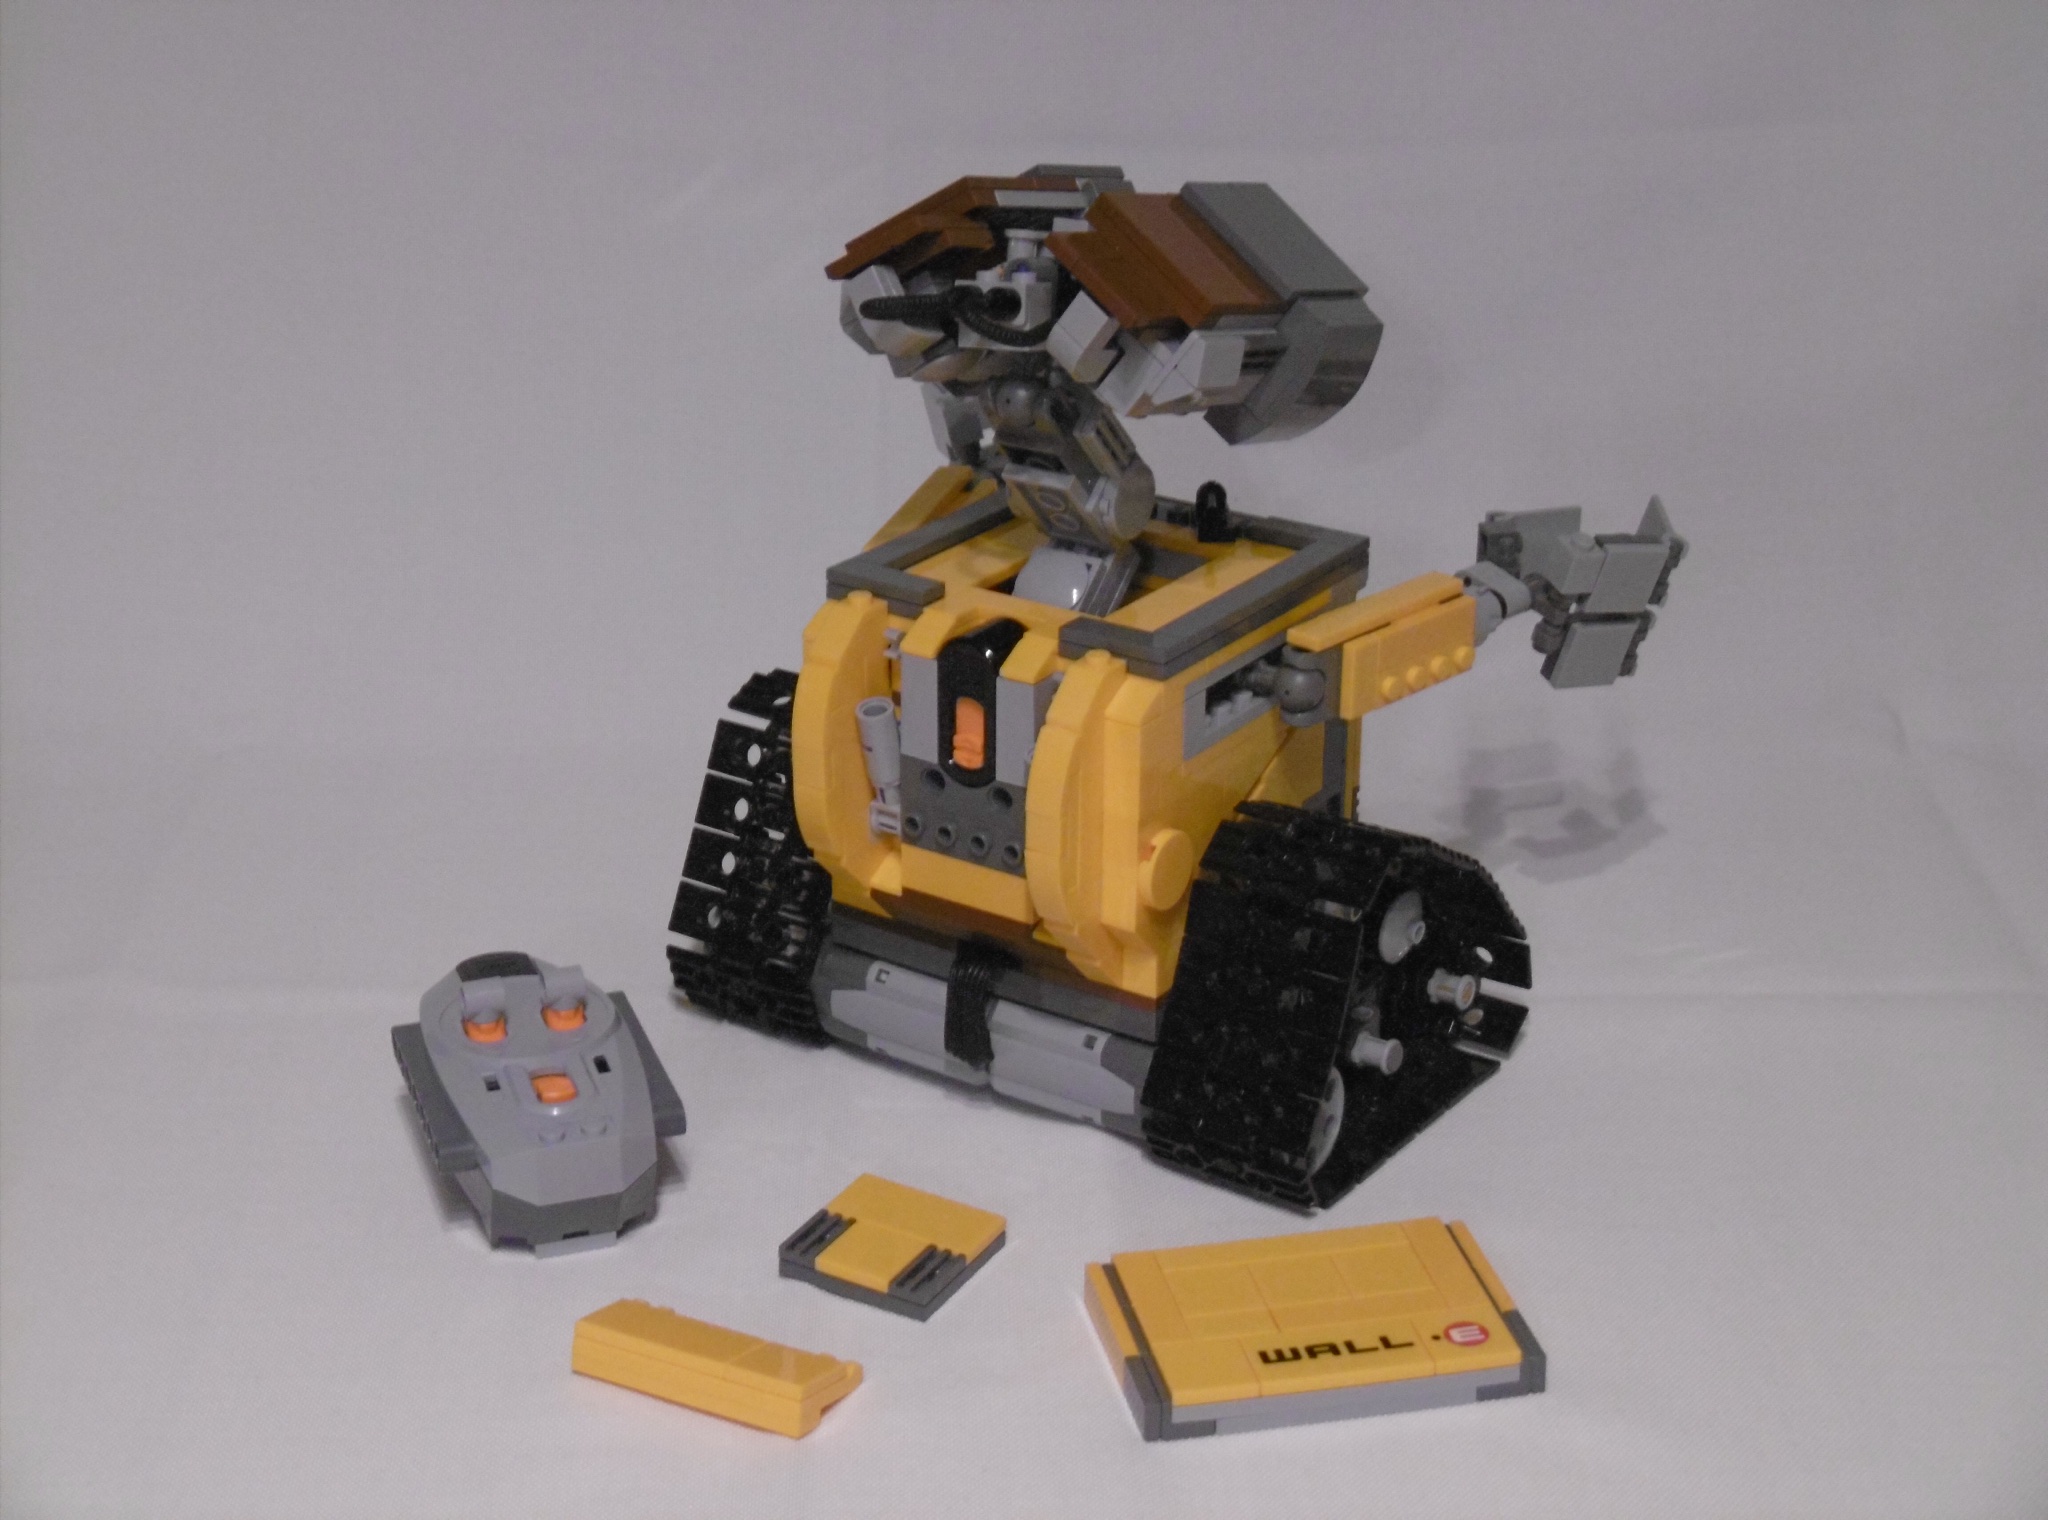
With the rear panel fixed by one of the original 1×4 SNOT bricks and a modified plate with hinges on top Wall-E’s rear side looks almost like the original model. And I think even the motors look OK where they are.
I’m really satisfied with the result. The only thing I’d still like to improve is the fixation of the motors. Even 10 studs for each motor aren’t strong enough to keep the motors in position for a very long time. The torque is just too high for that. But that’s OK for me (for now).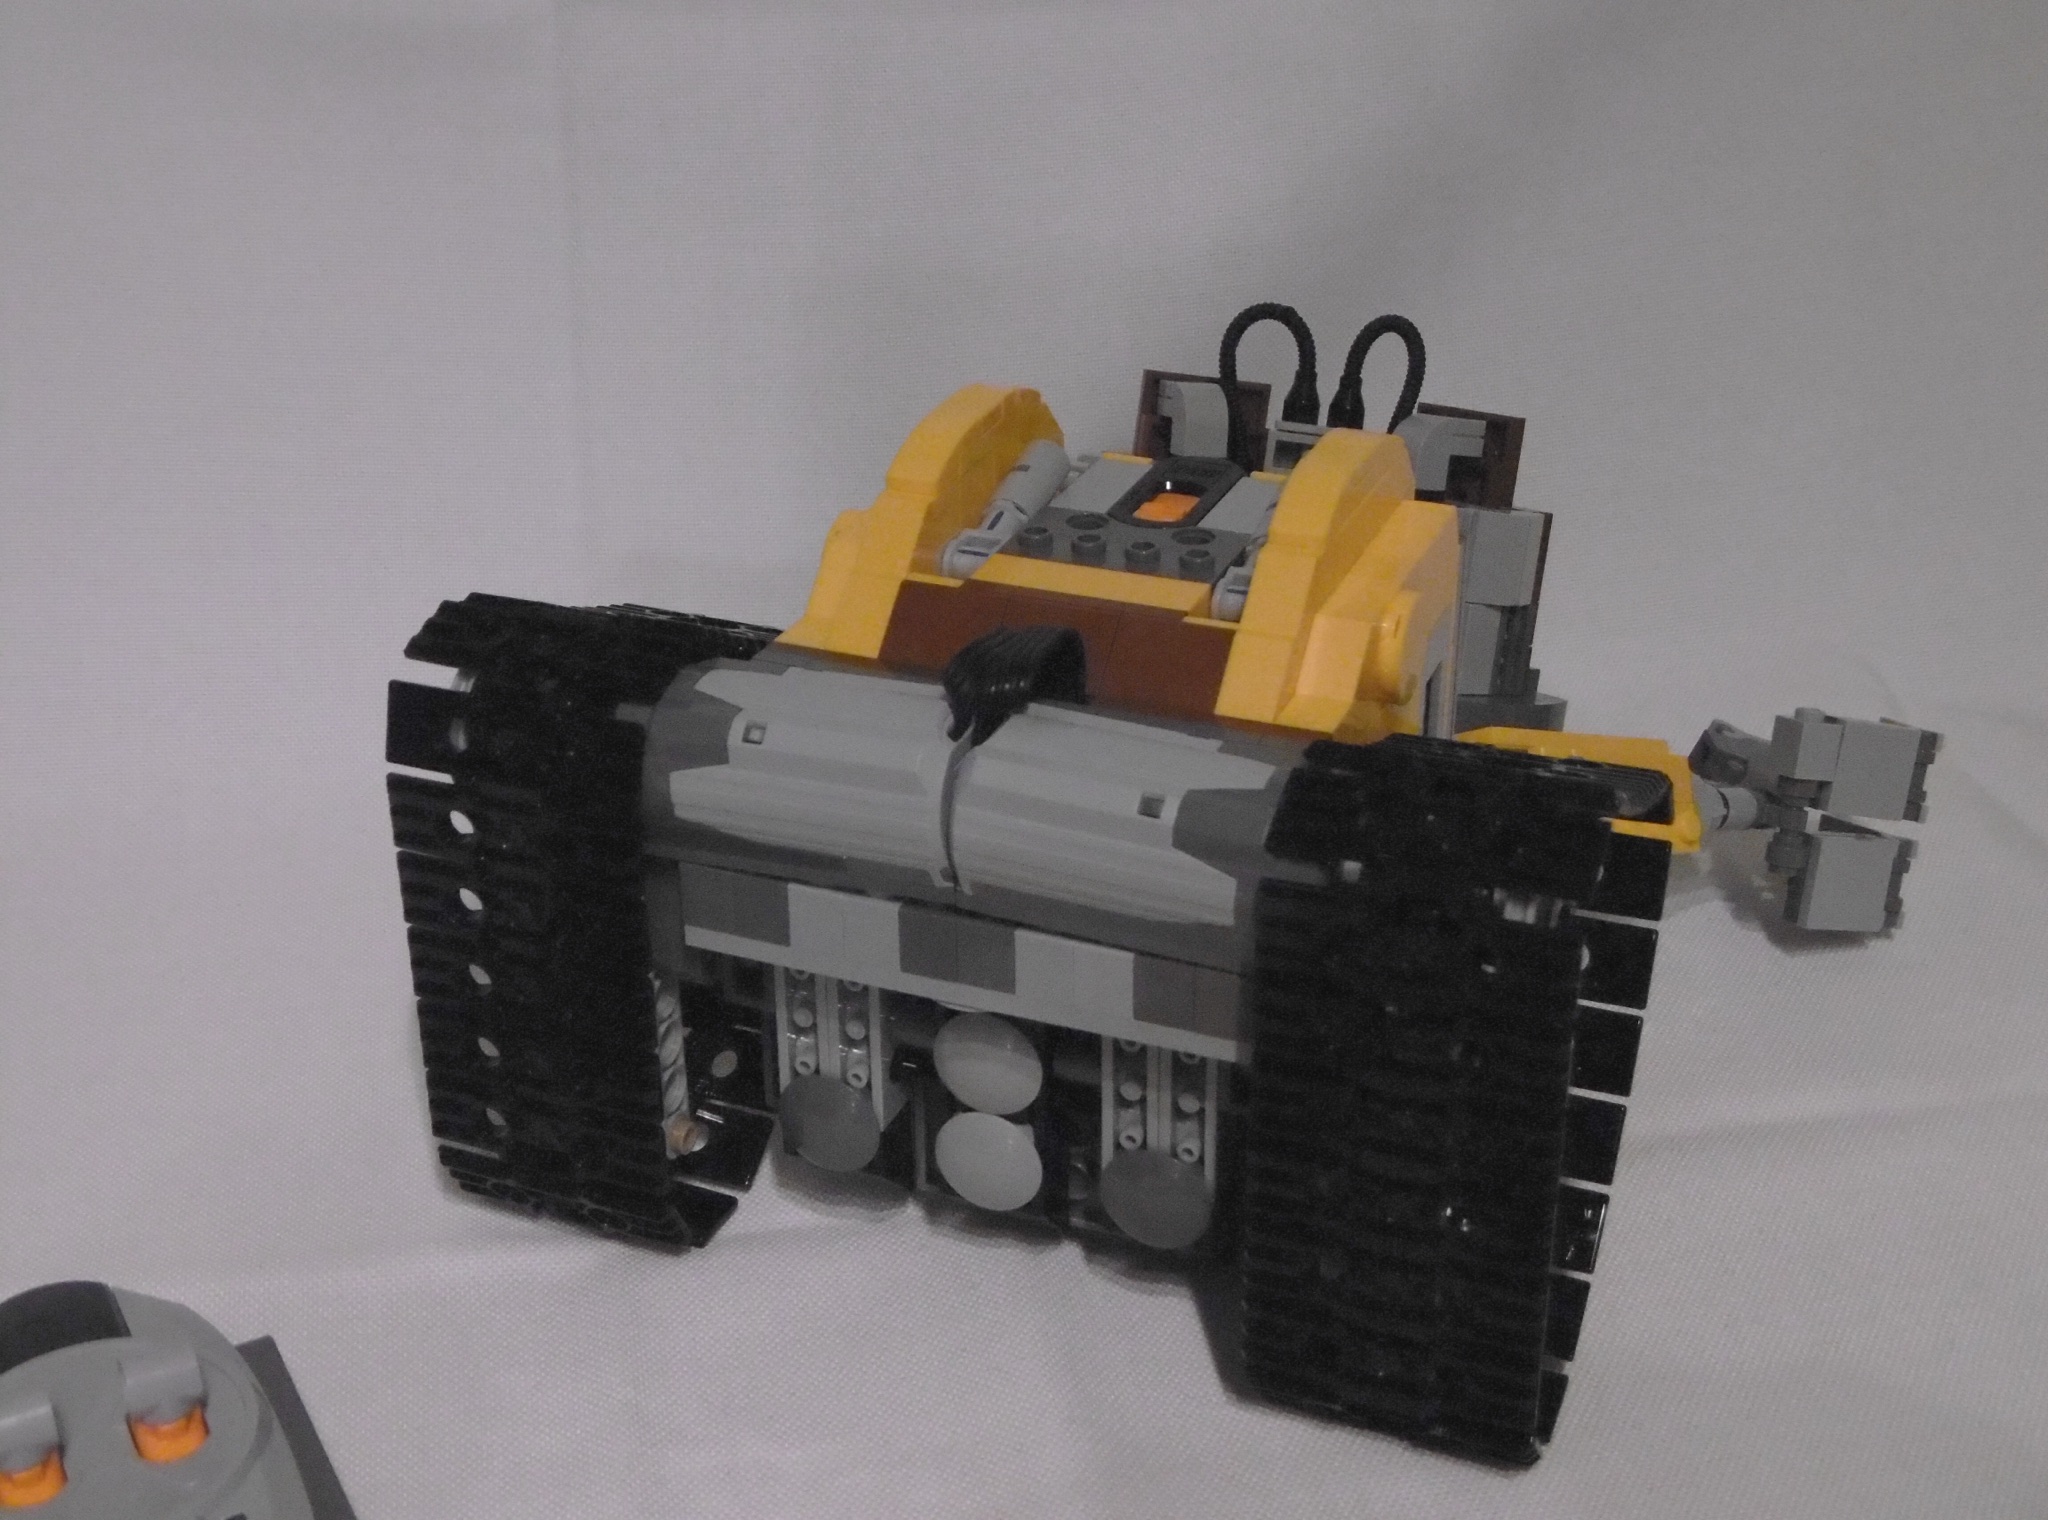
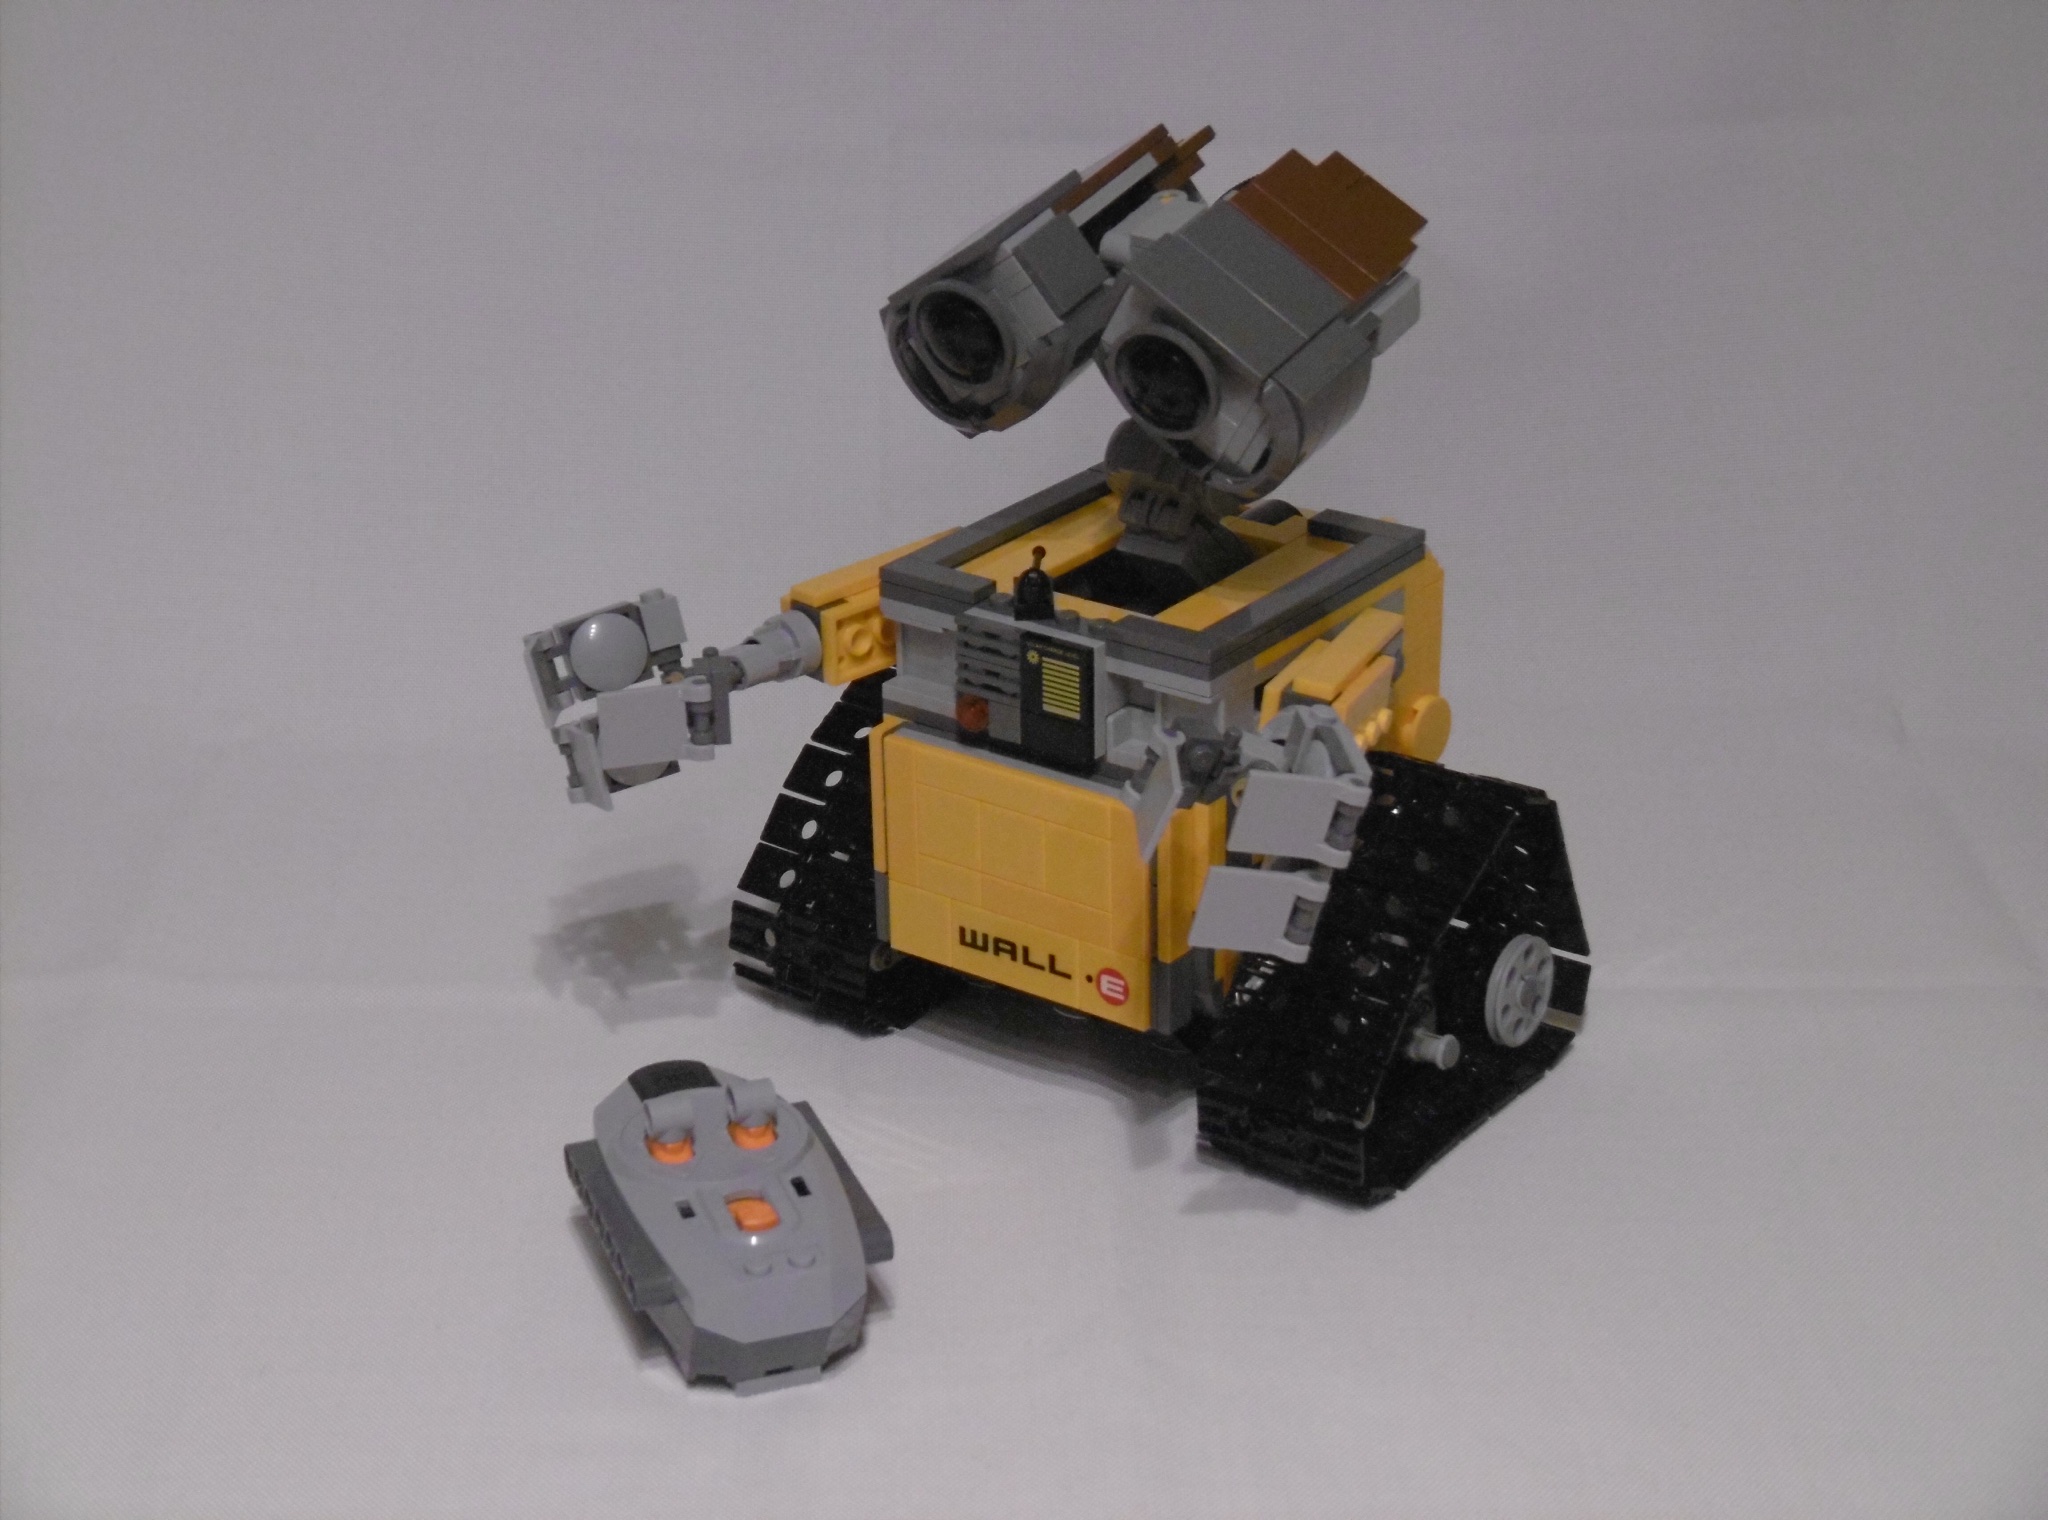
So, this is my Lego Ideas 21303 Lego Wall-E with Power Functions motors and remote control (RC).
I hope you like it. My son does ;-))
NILSOBRIX: 21303 Wall-E with Power Functions RC
BrixBlog | flickr | MOCpages | Youtube