Category Archives: 1. MOCs – My Own Creations

Micro Explorers: 928 (497) Galaxy Explorer

img_0559

Micro Explorer instead of Microfighter: My micro scale Minifig compatible version of the Classic Space 928 (497) Galaxy Explorer 

No SHIP but a tiny little ship for SHIPtember…

There already exist quite a few micro scale models of the Classic Space Galaxy Explorer, even an official polybag model (11910)

I wanted to build my own one, too. Inspired by the Star Wars Microfighters I had the idea of building a Minifig compatible version of a micro scale LL928, a “Micro Explorer”.

This is the result:img_0562

Come fly with me…img_0564

A side/rear viewimg_0561

img_0560
So, here it is: My minifig compatible “Micro Explorer” LL928 Galaxy Explorer. I hope you like it :-))

8845 Dune Buggy Reloaded (Studless Technic)

img_0510

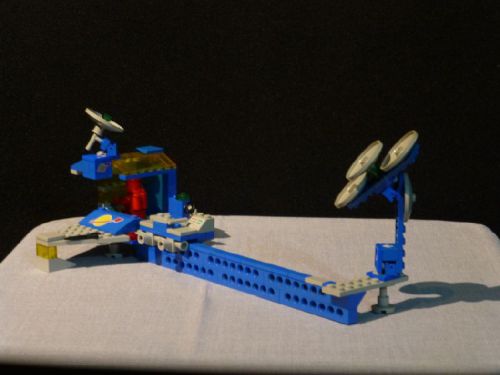
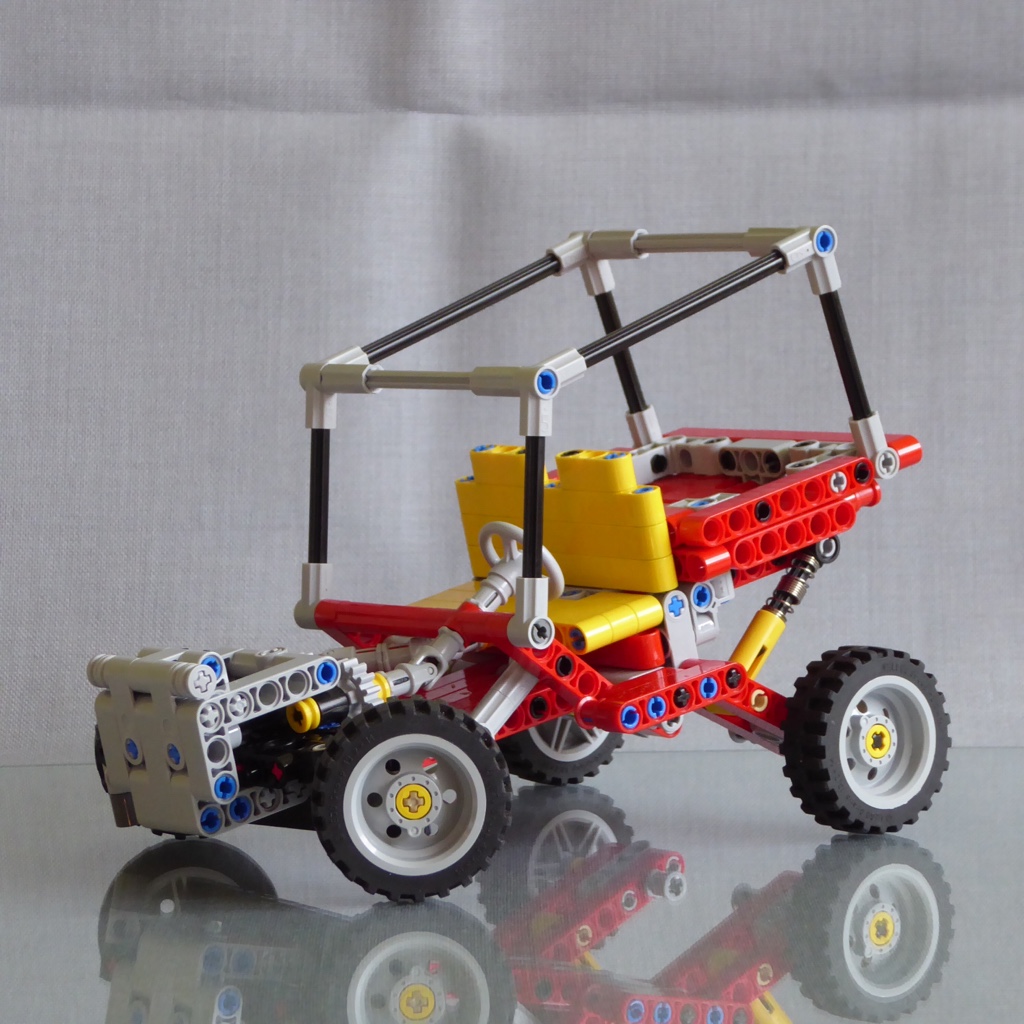
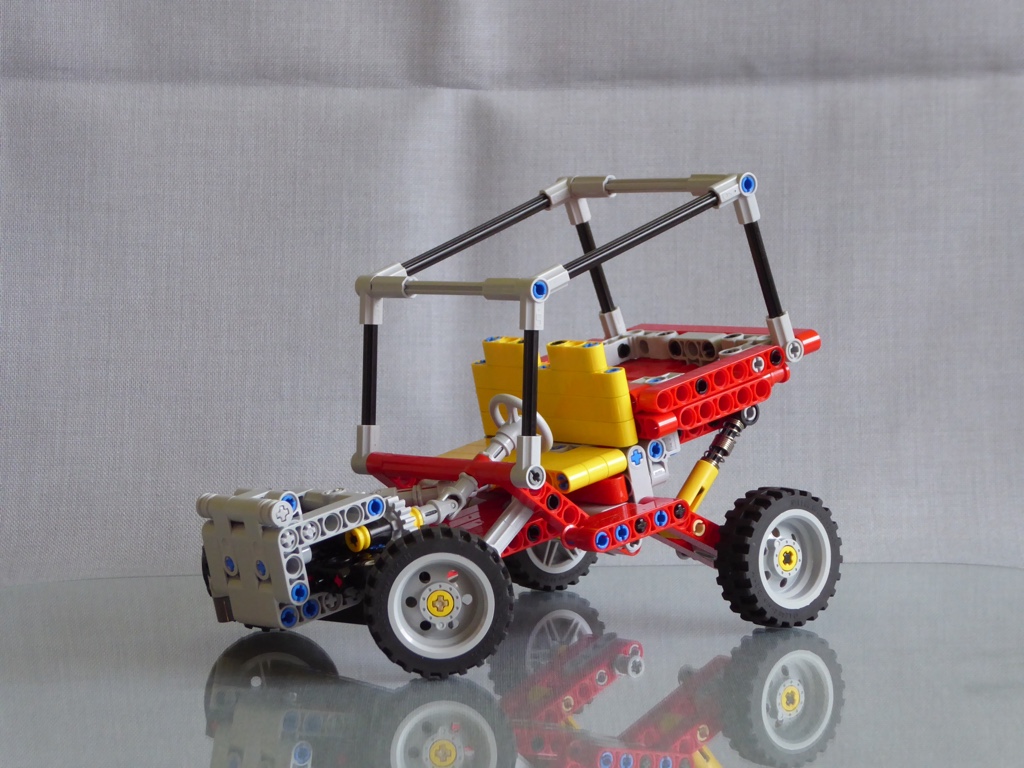
A new (studless) version of the classic Technic 8845 Dune Buggy from 1981.

Yes, I’m a big fan of the 8845 Dune Buggy, I still am. I’ve already had the idea for this classic model built with new Technic elements a few years ago. I started building an LDD model and then I kept “in the drawer” until it was time to build it “for real”.

I remembered my “old love” a few weeks ago when I wrote a review for the original model for The Lego Car Blog and I thought: “That’s so cool, maybe now it’s time to order some bricks for it”. But when I looked at the LDD model the first time after all that time I wasn’t a 100% satisfied with it, anymore.

So I started optimizing the design a little until I was. Then I uploaded it to Bricklink into a new Wanted List and used the new “Buy All” function for the first time. The experience was just “Wow, it has become so easy to get all bricks!”

After a few days I had all the bricks and got started immediately when the last of the three envelopes arrived. This was the result a few hours later:

img_0513

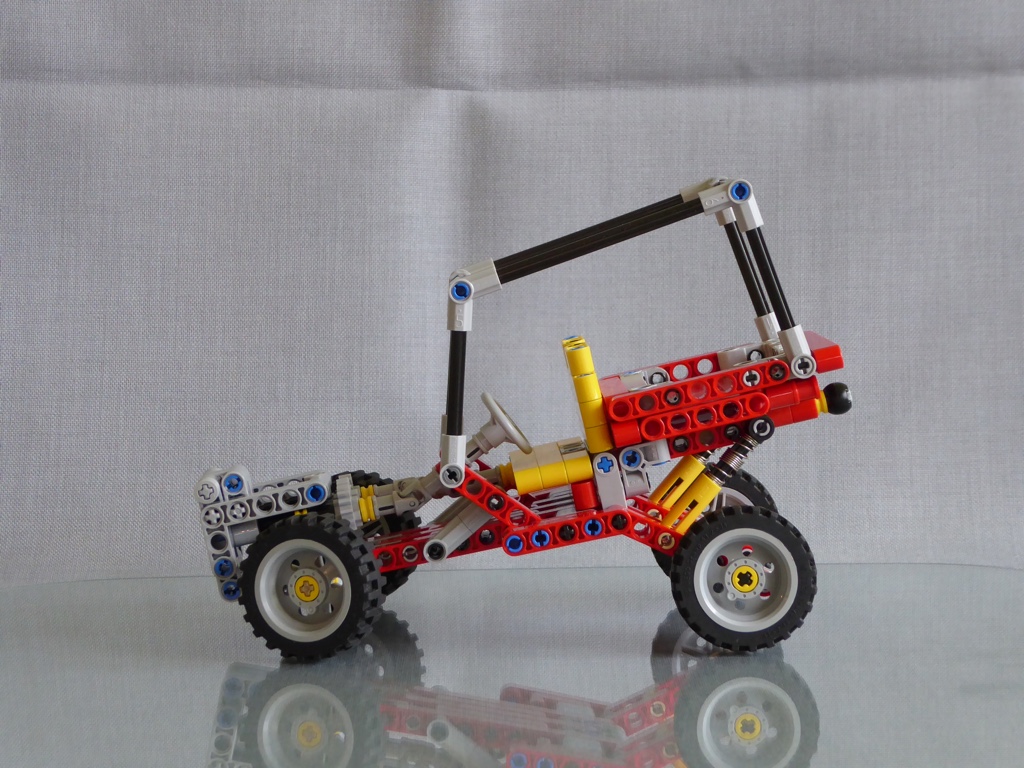
The basic design is as close to the original as possible. Most “old” 8L bricks are now 7L beams, 8L bricks are 5L beams, and so on. The roll cage has the same dimensions (in the side view) as 8845 and the angles between the axles are the same, too.

img_0514

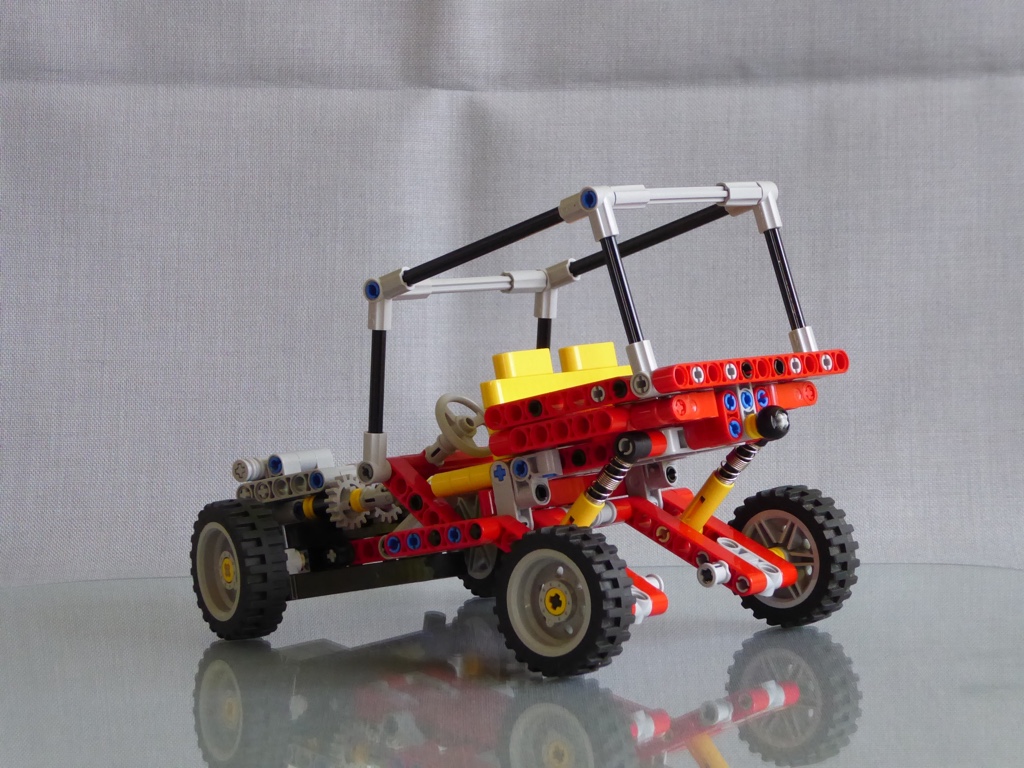
The main differences are: The new one is one “stud” wider, the wheelbase is half a “stud” longer and I’ve added a second beam on each “lever” of the rear suspension to add some rigidity.

I’ve also added a HOG steering, something I had done on my old model when I was a kid (As I didn’t have an extra gear for the “right side” I used a longer axle going through the steering wheel, a second cardan joint and another axle plus a “spare tire” for the steering).

Here I used an additional gear on the front, a complete second steering column and a small black ball as “steering wheel” for the HOG steering (I tried out quite a few elements, even a spare wheel – but I think the ball looks best and it really works fine).

img_0515
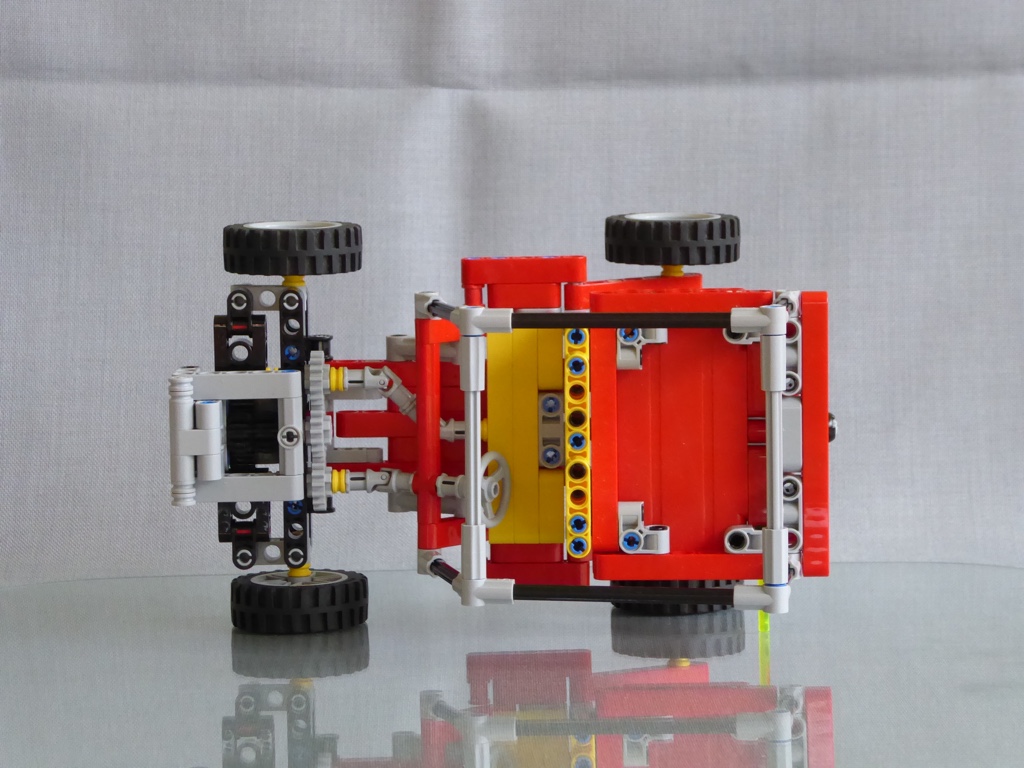
Top view: You can see the front part of the HOG steering.

img_0516
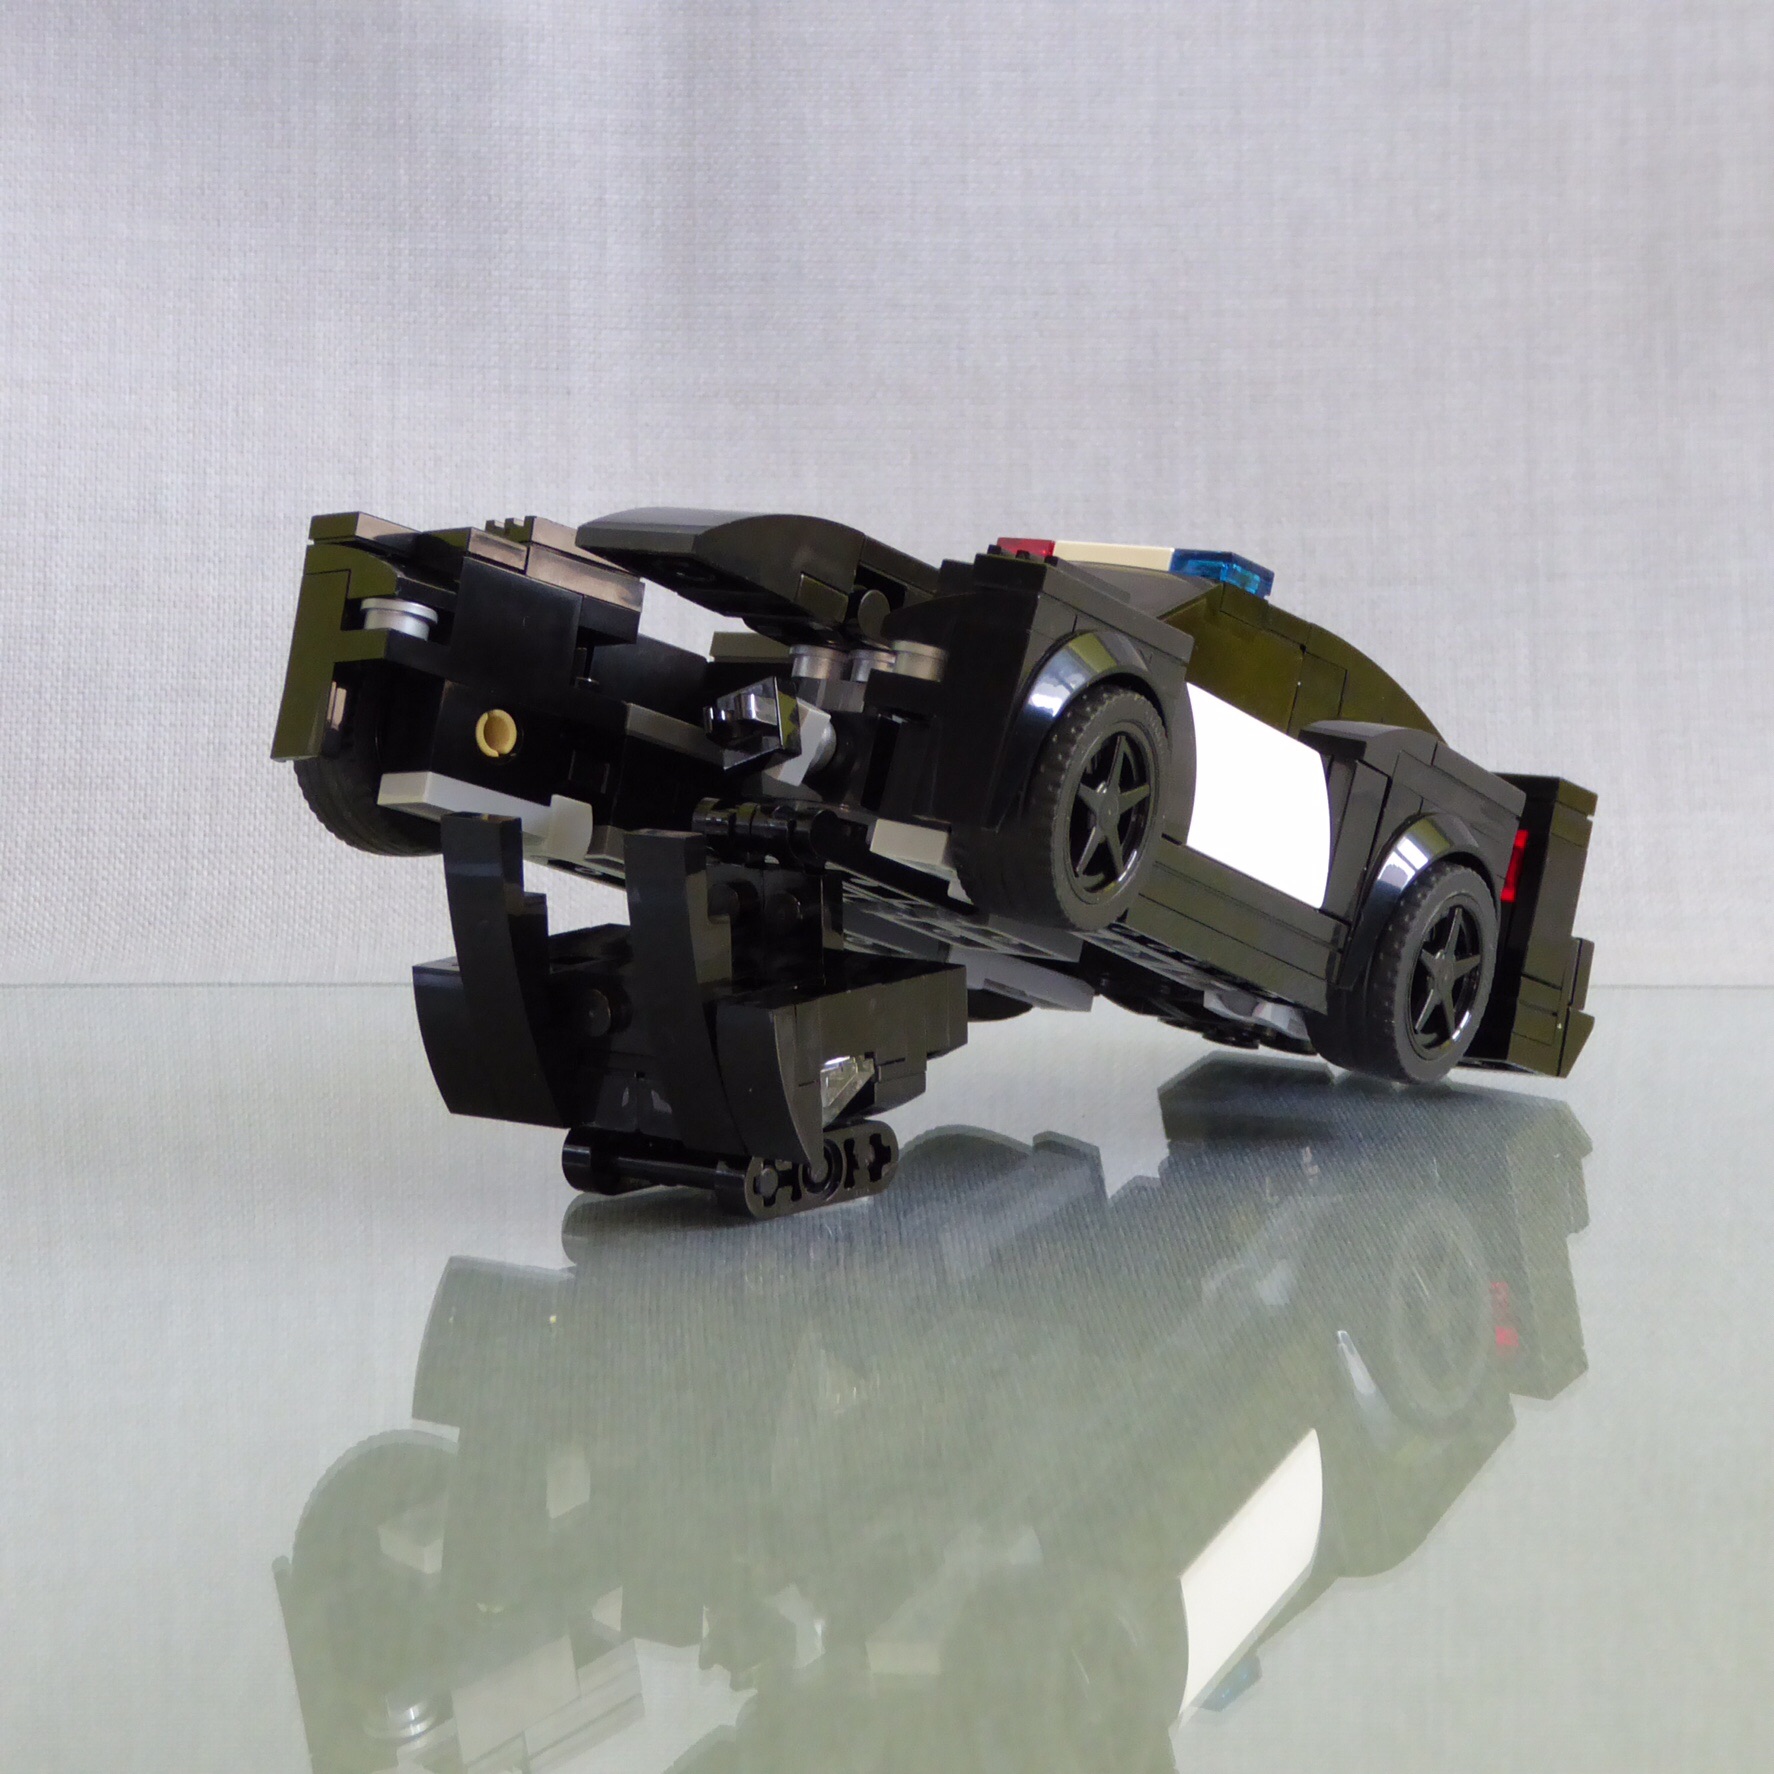
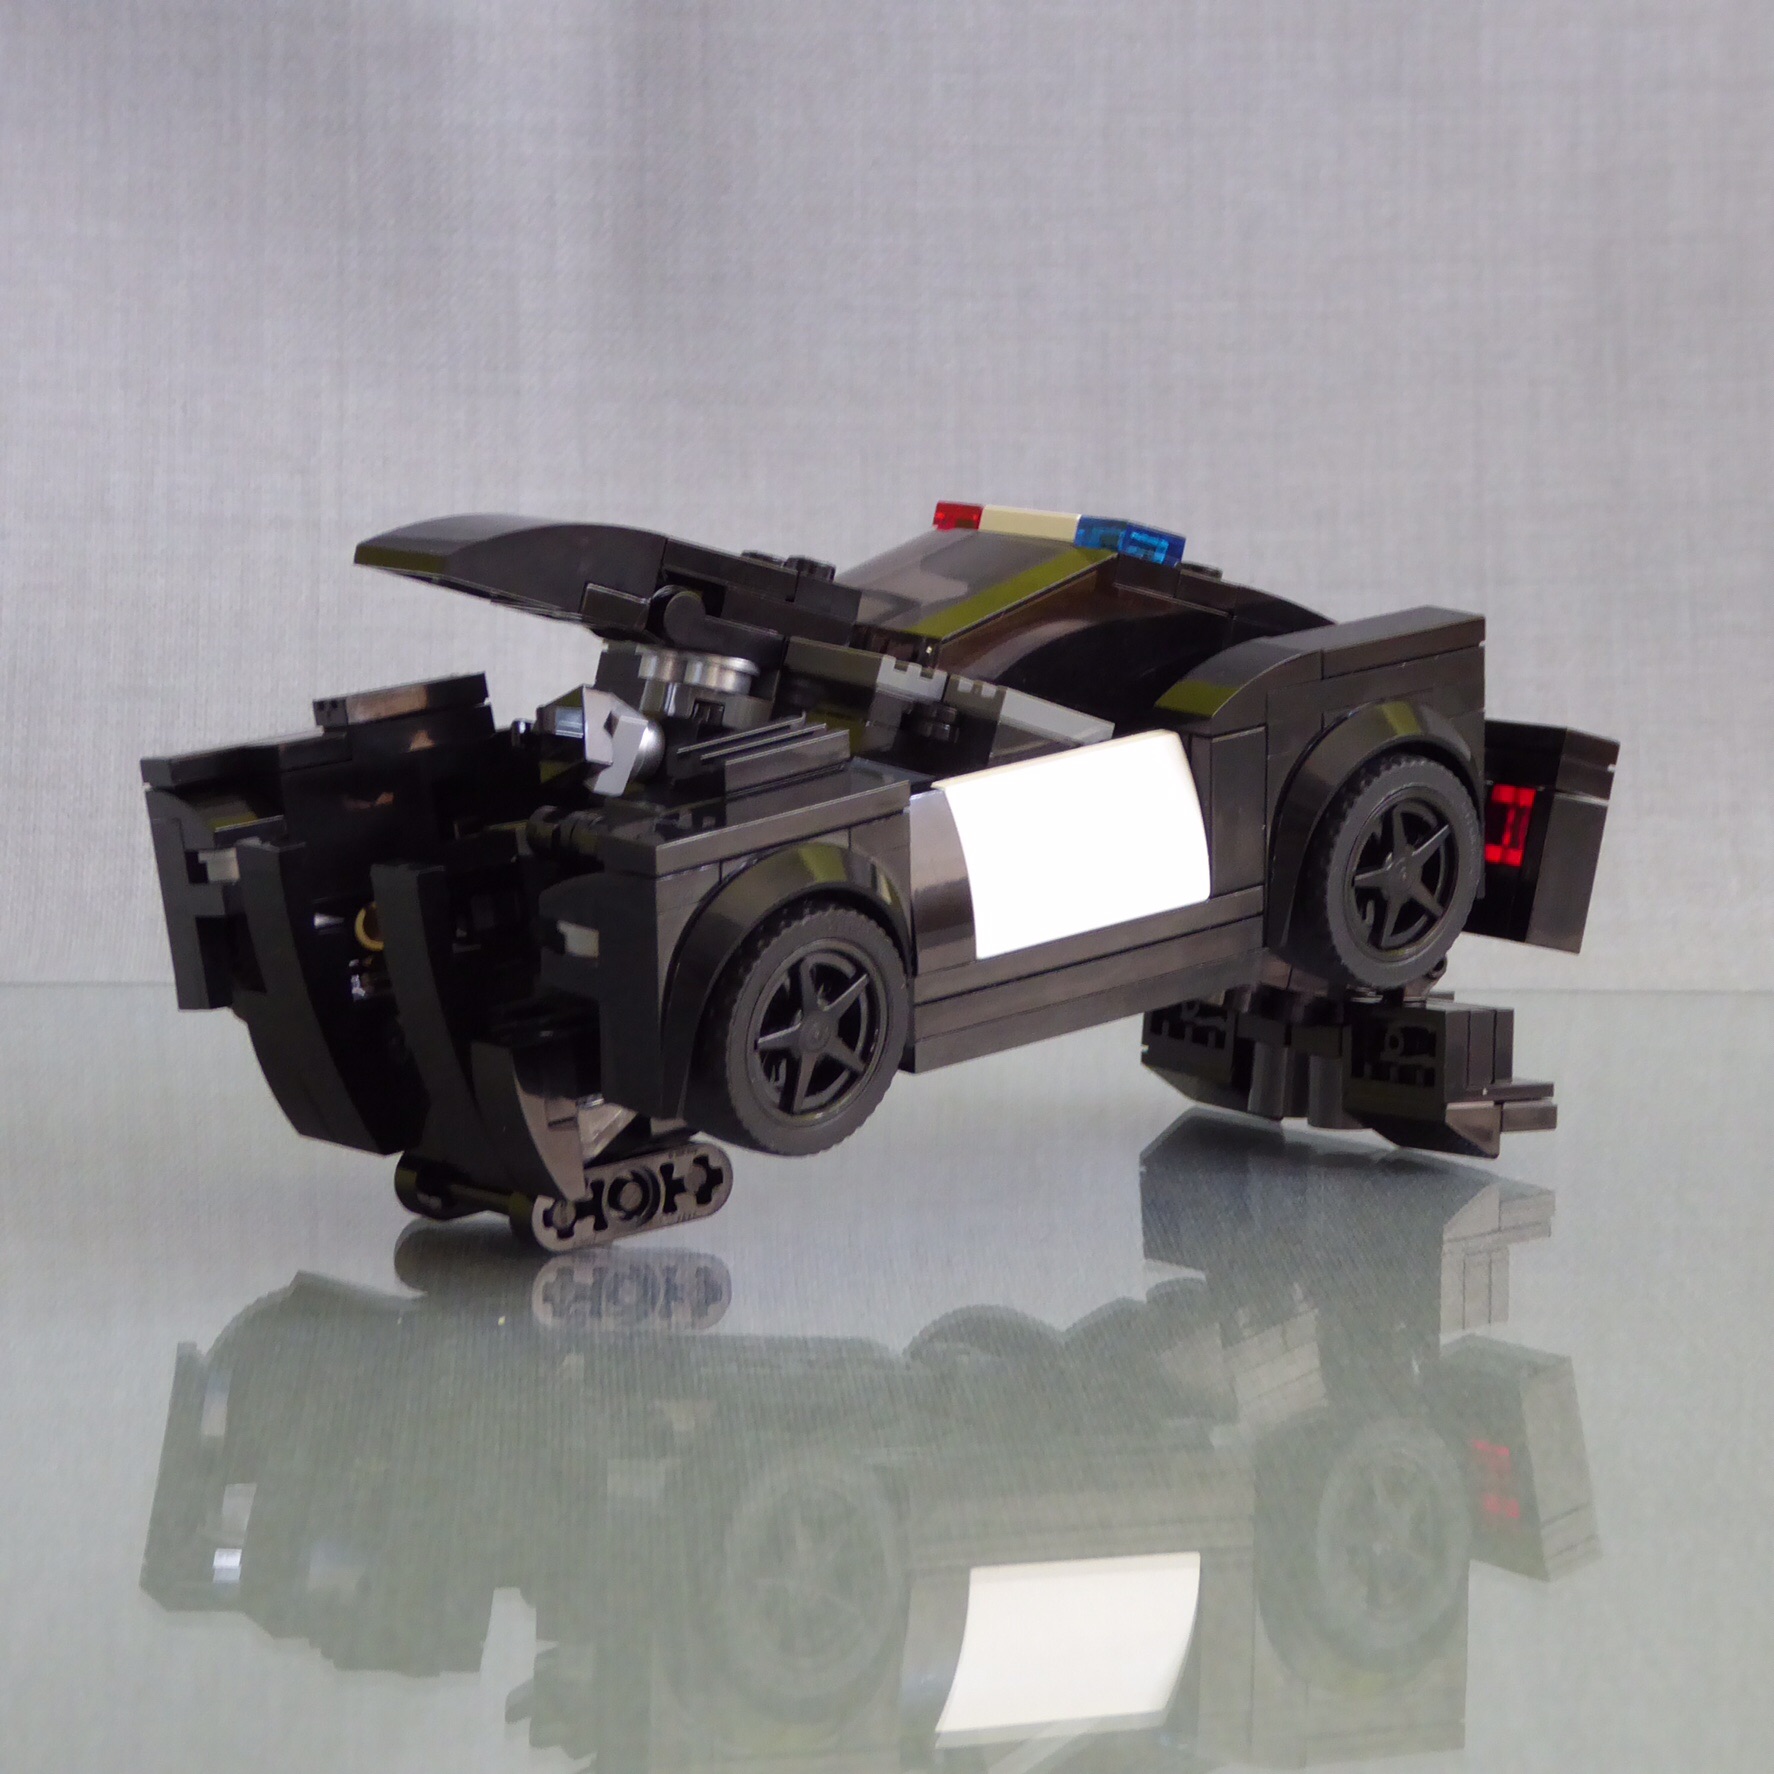
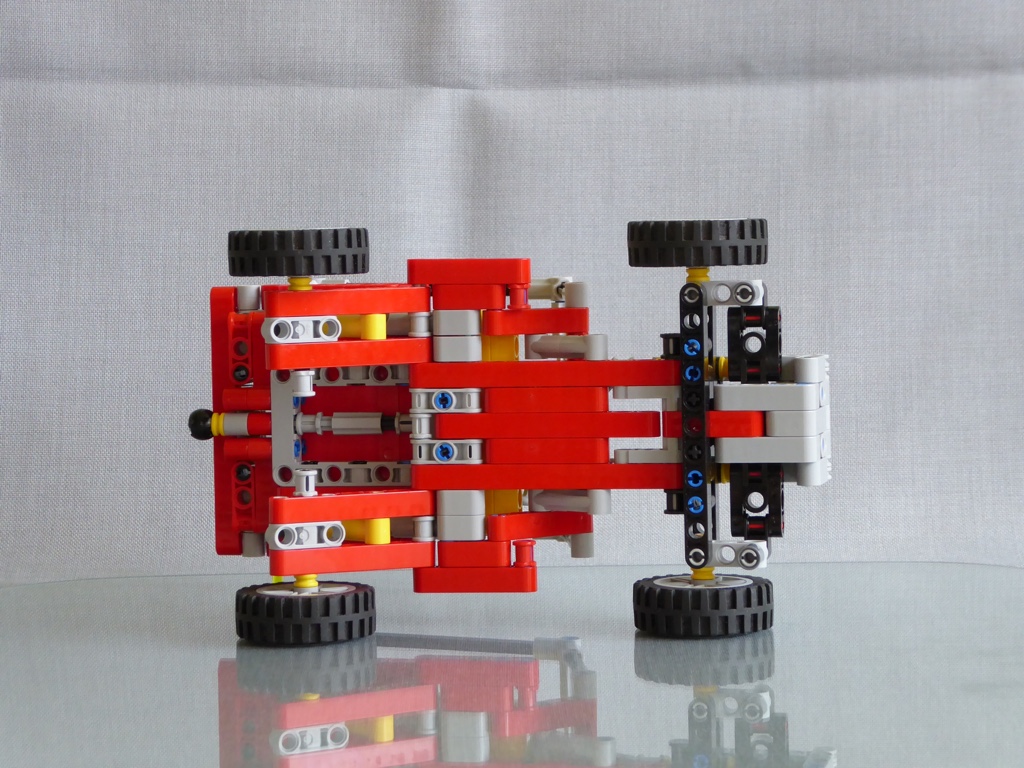
Bottom view: And here is the rest of it.

img_0518
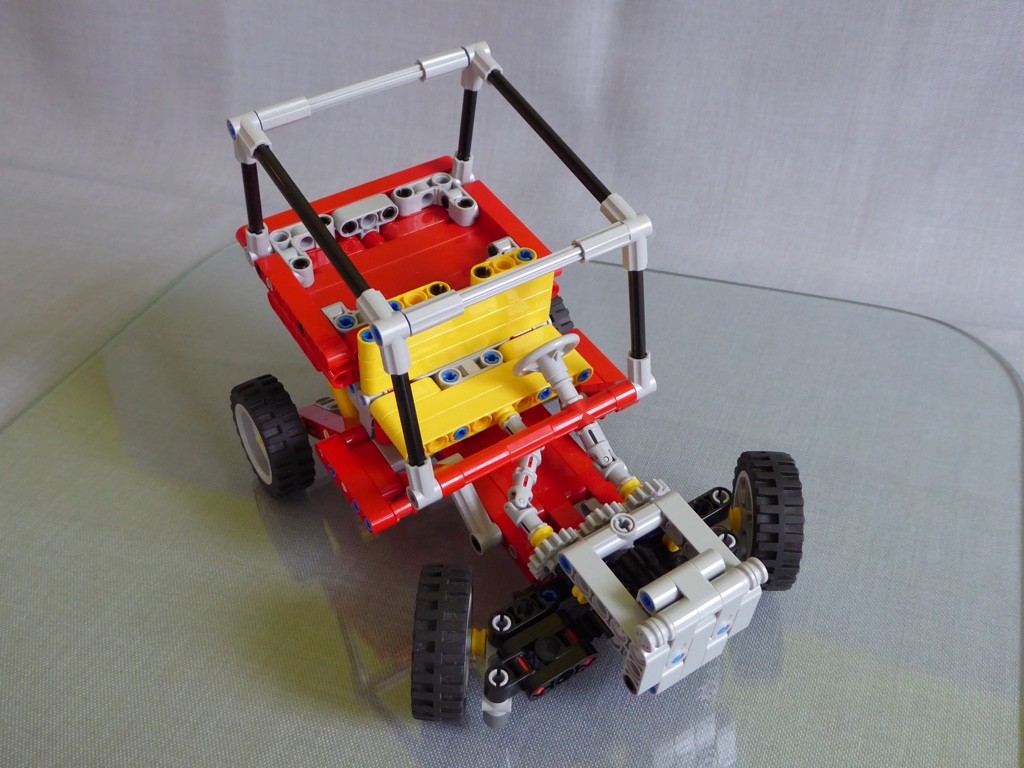
Bird’s view: Looks cool for me…
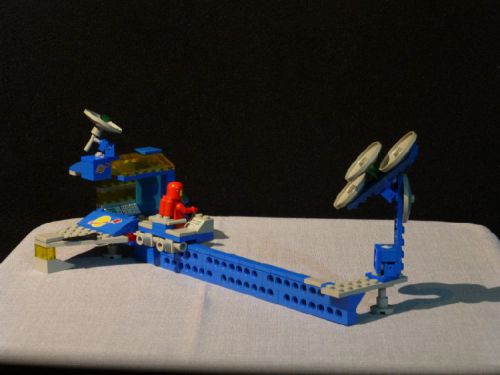
And it’s so much fun to play with it, especially for my 3-year-old son.

img_0519
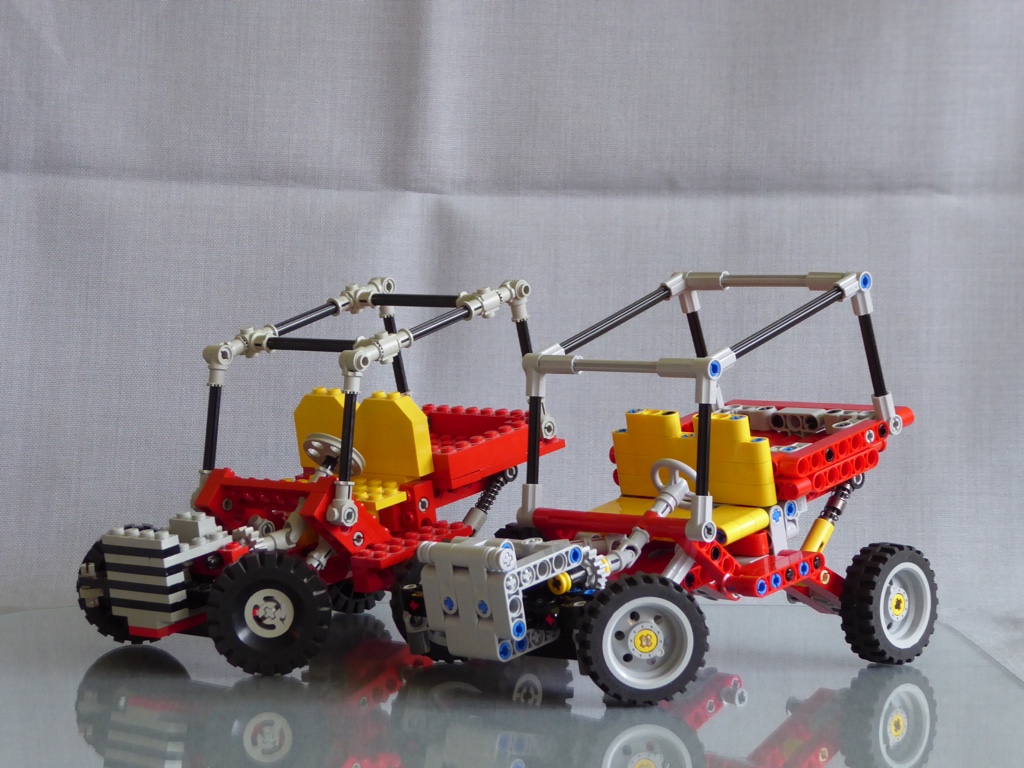
The Next Generation: 8845 and his studless new friend.

With the studless model finished I also got my smaller versions of 8845 out of the glass cabinet and reworked the roll cages with new holders and rigid tubes.

img_0526
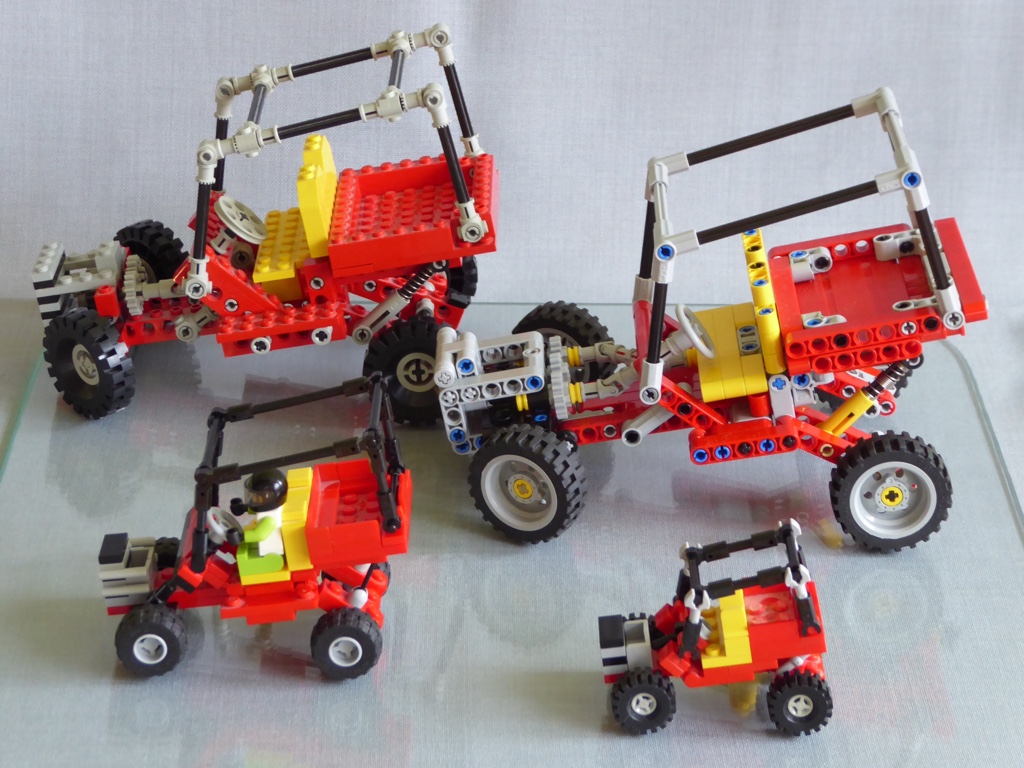
Family picture: The classic 8845, the new studless model, the 6-wide Minifig model (with BrixoNils at the wheel) and the 4-wide model.

img_0511So, that’s my new studless version of the classic Lego Technic 8845 Dune Buggy. I hope you like it :-)) – Maybe not as much as I do, but who could expect that? ;-))

“Barricade” ’05 Police Mustang (6-Wide SC Minifig Scale)

image

A pair of 6-wide ’05 Saleen Ford Mustangs – a “Speed Champion” and a “Legoformer”.

When I started working on my 6-wide Bumblebee I already had a Barricade in mind for the next model. I’m not really a fan of the Michael Bay movies, but I really like the vehicles he used in his films, especially Bumblebee, Barricade and Optimus.

Just like I had done with Bumblebee I first built a “Speed Champion” for my little son. There is no SC model with four of the new mudguards in black, yet. So I had to use parts from four sets to build two Barricades. My son already had an Audi R8 LMS, so I bought three more Audis at a local toy store. The rather new parts are still quite expensive at BL, so this was the most efficient way to get the parts.

I first built both models in LDD and then rebuilt them with plastic bricks. This is the result:

image

SC model (left) and Legoformer (right)


Some pictures of the SC model:

image

Side view


image

3/4 rear view


image

3/4 front view


And now the Legoformer:

image

(Add transforming sound here…)

image

image

image

image

image

image

image

Barricade ready for action.

image

“Oh, no, I think I know this one…”


image

“I hate Autobots!”


image

The rivals


image

So, this is my 6-wide “Speed Champions” ’05 Saleen Police Ford Mustang “Barricade” Legoformer. I hope you like it :-))

Bonus picture#1:

image

Decepticon Customs presents: The “Ford Mustang Ultra Wide Body”

Bonus picture #2:

image

The SCLF – Speed Champions Legoformers

Bonus picture #3:
1468446568m_ff_transformation_800x800
(Add transforming sound here…)

“Bumblebee” Camaro (6-Wide SC Minifig Scale)

img_0502

A pair of  Camaros in “Bumblebee” design, based on the Speed Champions model. – Autobots, Roll Out…

My little son is a big fan of the “Speed Champions” cars and also of the “Bumblebee” Camaro. So I started building a yellow Camaro based on the parts from a 75870 Corvette and the design of the red Camaro from set 75874.

As I’m not a fan of stickers on my models I had to find a new design for the head- and taillights. Once started I reworked the whole design of the Camaro here and there to make it look more like the Bumblebee model from “Revenge of the Fallen”.
img_0506 img_0507 img_0509

After building one for my son, I wanted one for myself, too. So I bought another Corvette and built a second one ;-))
This is the result:
img_0512 img_0513

Almost equal twins, but if you take a look closer look, …
img_0515 img_0516 img_0517 img_0518 img_0519 img_0520 img_0521 img_0523

Autobots, Roll Out! :-))

You saw that coming, didn’t you? ;-))

My top design priority for the robot was a mostly unchanged look in car mode. I especially wanted to use the SC wheelhouses and wheels, which occupy a rather big space of the model (especially compared to “Deluxe” figures of the movie Bumblebee). So there wasn’t much space left between outer shell and wheels for the folding mechanism.

img_0524

I’m  really satisfied with the look of the robot, even if it looks a little like a “Hulkbuster” ;-))

img_0525

The folding mechanism was first based on the smaller “Movie Legend” figures and then became a little more complex during the design process. I also tried to include a folding mechanism for the rear roof section similar to the “Deluxe” figures, but it was too fragile. So I left the roof in it’s place and used it as a “turtle shell” for the back of the robot.

img_0527

So this is my transformable LEGO “Bumblebee” Camaro in “Speed Champions” scale and look.
img_0523
I hope you like it :-))

Bonus picture #1:
img_0502_ff_transformation(Add transforming sound here…)

Bonus picture #2:MOCpages_2016-06-30_Seite1_Bumblebee_Across_MP
June 30, 2016: My first MOC in the TOP4 of “Across MOCpages” 🙂


MOCpages Backup: Lamborghini Countach LP400 V2.0 (4-Wide)

A MOCpages Backup

3,118 visitors
33 comments
Added May 3, 2015

Lamborghini Countach LP400 V2.0 (4-Wide)

Almost completely new: The 4-wide version of my favourite super car, the Lamborghini Countach LP400

I’ve built the Coutach quite some time ago. Last week I was looking at photos of a real Countach and comparing it to my Lego version I realized that the proportions didn’t really match. The Countach was recognizable, but looked a little strange. So I started to redesign it with LDD. This is the result:

The new side view. The complete roof section is 1 plate flatter and 1 stud shorter, now. I also came back to the rims with smaller diameter and thicker tyres which are closer to the original. Credits again to Rhys for the air intakes on the side panel.

The new front: A slope for the front hood, new wheel arches and a more pointed “nose”. A 2x4x1 slope has replaced the two 1x4x1 slopes after taking the pictures (I just couldn’t wait longer for the Bricklink order…)

The new rear end: Everything one plate flatter.

Some more pictures…

And a look around on the platform:


Bonus photos:

Compared to the old version in the bottle. There’s quite a difference.

And compared to the “original”, a 1/43 scale model.

So this is my new 4-wide Lego Lamborghini Countach LP400. I hope you like it as much as I do :-))

MOCpages Backup: Ferrari 365 GTS/4 Daytona Spyder (4-Wide)

A MOCpages Backup

Rated 5 out of 5 (42 ratings)
3,519 visitors
24 comments
Added February 3, 2015

My 4-wide version of the iconic Ferrari 365 GTS/4 “Daytona Spyder” in “Miami Vice Black”

Inspired by my “brick buddy” Marcus (aka ER0L) and his wonderful 6-wide Daytona Spyder on Flickr I decided to build my own 4-wide 365 GTS/4.

I had a good base to start with, my 365 GTB/4 from last year. In LDD I “cut off” the roof section and added an interior, side panels and a 3-wide window frame.

As I still wasn’t 100% satisfied with the rear end I tried some different designs and ended up with an upside down version. There are already quite a few cars with upside down rear ends, so the idea isn’t new. I’m not even sure if this combination of parts has already been used on a 4-wide… Anyway, I’m quite satisfied with the result :-))

OK, time for some photos:

Credits to Starscream Soundwave and TheLegoNowItAll for the air intakes on the hood.

Still no place for more than 2 tail lights on the rear end…

Meet the GTB:

A little mod on the front: Now with “grill tiles” for the grill. I also put the new rear end on the GTB (I’m still waiting for the red SNOT brackets…) and moved the roof section half a stud to the front.

“Oh no, we’ve wrecked it, Tubbs!”
“No problem Crocket, we’ll take this one instead.” :-))

Oh, a Cobra
Wanna race? :-))

So this is my 4-wide LEGO Ferrari 365 GTS/4 Daytona Spyder in “Miami Vice Black”.
I hope you like it as much as I do :-))

MOCpages Backup: CSPMC3: 898 Alien Planet Explorator

A MOCpages backup

Rated 5 out of 5 (36 ratings)
3,102 visitors
29 comments
Added January 8, 2015

CSPMC3: 898 Alien Planet Explorator

Where no CS astronaut has gone before: There was a prototype of the “Alienator” long before the Blacktron era – The Alien Planet Explorator.

My entry to the Classic Space Pocket Money Contest 3:
The 898 Alien Planet Explorator.

BREAKING NEWS:
For a long time there have been rumours about a prototype of the famous Blacktron “Alienator” that was meant to be part of the first line of space exploration vehicles from Stardate 1979. Now a private collector who wants to remain anonymous has got his hands on the original data. And not only that, he has also found a special workshop to build a prototype. The working title of this prototype according to the data is “Alien Planet Explorator”, a possible origin of the name “Alienator”. These are the first exclusive photos…

The vehicle is a mobile sensor array for ground analysis. Every “foot” of the vehicle contains a lot of different sensors. With every step of the vehicle a new area of the ground is analysed.

The front part of the vehicle can be seperated from the main section and be used as a scooter. The rear section can analyse the ground autonomically. The operator returns when necessary to analyse data or for repairs.

The rear section can be entered via the opening roof. There is a main computer console for the further processing of the collected data.

With the roof closed a small sealed room with a controlled environment is created for the astronaut.

By moving the big cushion the working chair can be converted into a bunk.

Some additional photos…

Parts count, the easy way:

Ten rows with ten parts each = 100 parts.

And now for the alternative models:

Alternative 1
A small communication outpost with a little monorail

Alternative 2
A one man scout ship

There were some bricks left, so I added a flood light.

You never know when you need one ;-)).


So this is my contibution to the Classic Space pocket Money Contest 3, the Lego 898 “Alien Planet Explorator”. I hope you like it as much as I do :-)).

And before I forget it: Thanks to you, David and David, for this wonderful contest! :-))


Bonus photos:
1) My “1979” model compared to the Blacktron “Alienator”

So, which one is the original? ;-))

2) My CSPMC models

CSPMC1 (left), CSPMC2 (front) and CSPMC3 (right)

3) The LDD model

Main model + 2 alternatives

MOCpages Backup: Magic Folding “Fidget” Cube

A MOCpages backup

Rated 5 out of 5 (66 ratings)
9,199 visitors
34 comments
Added May 31, 2014

Magic Folding "Fidget" Cube

A magic folding „Fidget“ cube – also known as promotion or merchandising cube – built with Lego parts and fully functional.

After some other 3D Lego Puzzles I had the idea to build a “magic folding cube”. Cubes like this are often used for promotional or merchandising purposes. I have a picture cube from the first “Lord of the Rings” movie which works the same way. It’s not really a puzzle when you play with it, but it was a puzzle to build ;-)).

The idea was to build it as small as possible with an edge length of two studs for the eight “sub cubes”. The only possible hinges for such a cube were 1×4 / 2×2 hinge plates. I analysed the position of the hinges on my picture cube and tried to transform them into a working Lego model. I tried a lot of SNOT elements which all didn’t work. Then Lego released a new inverted 1×2 / 2×2 SNOT bracket and the folding cube worked with it ;-)).

I wanted to put a black and white “checkered” pattern on the cube, just like I had done with my Soma Cube before. But the brackets only existed in black, grey and red, so I chose a black and red pattern instead. For that I seperated the hinge plates and recombined them.

This is the result:

A complete folding sequence:
You can go on and on and on …

The “snake” of cube segments:

So this is my magic Lego folding „Fidget“ cube.
I hope you like it :-))

Update January 24, 2018:

You can find additional information about the basic structure (the “skeleton”) of the folding cube here on MOCpages. An LDD file with many variations of the design can be found there, too.

MOCpages Backup: Presentation Platform for Small Scale Vehicles

A MOCpages backup

Rated 5 out of 5 (35 ratings)
2,560 visitors
21 comments
Added May 27, 2014

Presentation Platform for Small Scale Vehicles

A platform for presentation and photography of small scale LEGO vehicles.
The idea was a platform for the presentation of my 4-wide vehicles, especially to take photos from different angles without changing position or zoom factor of the camera. I started with a square platform based on a 16×16 base plate, but the platform was a little small to get a reflection of the whole car on the platform. Black was the best colour to get a cool reflection.

The ideal form would be a circle. An octagon formed by four 10×10 plates with 45 deg cutout was already getting close. A circle formed by 16 round 1×1 tiles (representing spots in the floor) added some extra coolness.

In the center of the platform there is a little turntable to change the angle of the car in front of the camera without “moving” the car itself:
Transparent plates, tiles and jumper plates are used to fix the car on the turntable.

For an “odd” length of the model (in studs) the jumper plates are used to center the model on the platform.

For an “even” length of the model the plate and the tile are used.

Just turn the turntable…

… to change the photo angle of the model …

… without changing the position of the model on the photo.
You only need a tripod to freeze the position of your camera ;-))

It works great for an animated GIF, too.

So this is my presentation platform for small scale LEGO vehicles.
I hope you like it :-))