MOCpages Backup: Black/White Checkered Soma Cube

A MOCpages backup

Rated 5 out of 5 (19 ratings)
3,927 visitors
13 comments
Added February 29, 2012

Black/White Checkered Soma Cube

A classic Soma Cube with a black and white checkered pattern.

I’ve posted the LDD version of this puzzle a while ago. With my last Pick-A-Brick order I’ve finally odered the last parts to be able to build it with real bricks.

So this is the result:

I’ve built the puzzle pieces in the simpliest way, which means the orientation with the most single cubes connected in a vertical way. The horizontal connections are more complicated, I used 1×2 Technic bricks with two holes and connected them with Technic pins with friction. For the corners I’ve combined 1×1 Technic bricks and 2×2 corner bricks. You can take a look at the images of the LDD version to see how it works.

I’ve designed this cube by myself, but later I found out that a similar cube had been done at least twice before: One built by Topsy Cret and one by Jeremy Moody. It looks like they both have a similar (if not the same) design inside.

So this is my checkered Soma Cube.
I hope you like it :-))

MOCpages Backup: Countach in a Bottle (4-Wide)

A MOCpages Backup

Rated 5 out of 5 (66 ratings)
10,512 visitors
48 comments
Added December 3, 2011

Countach in a Bottle (4-Wide)

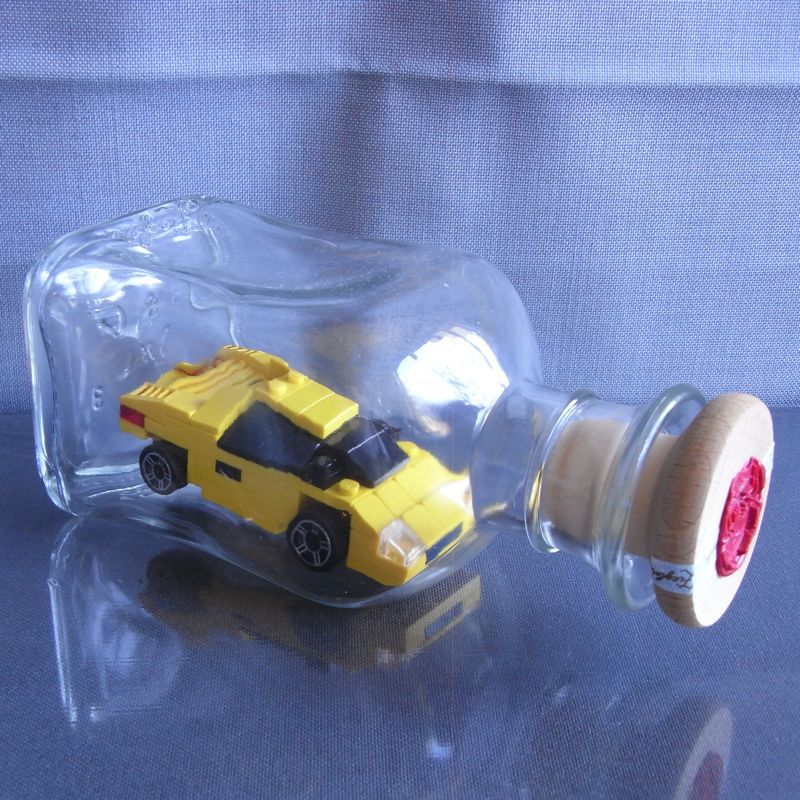
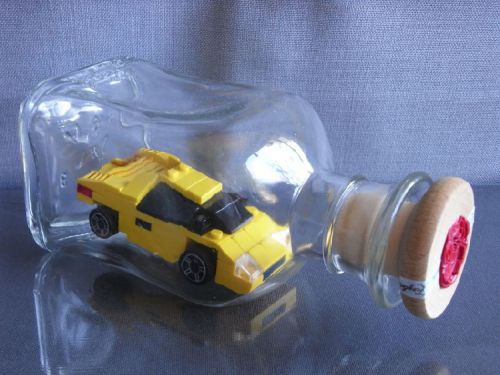
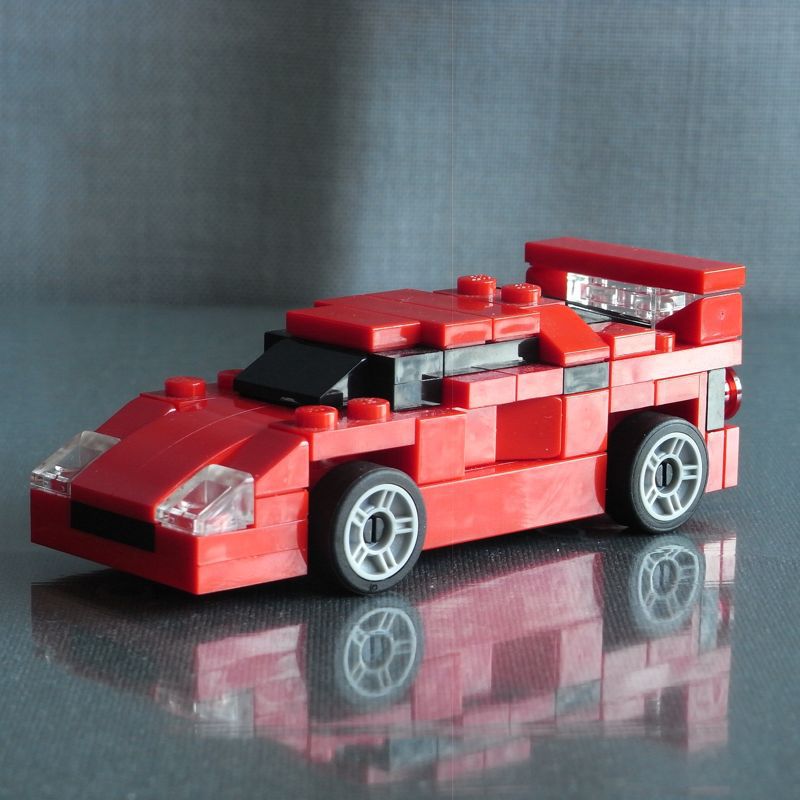
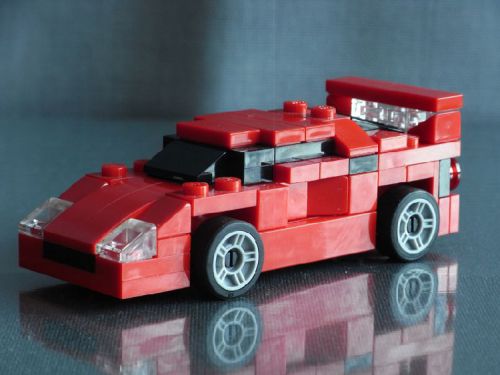
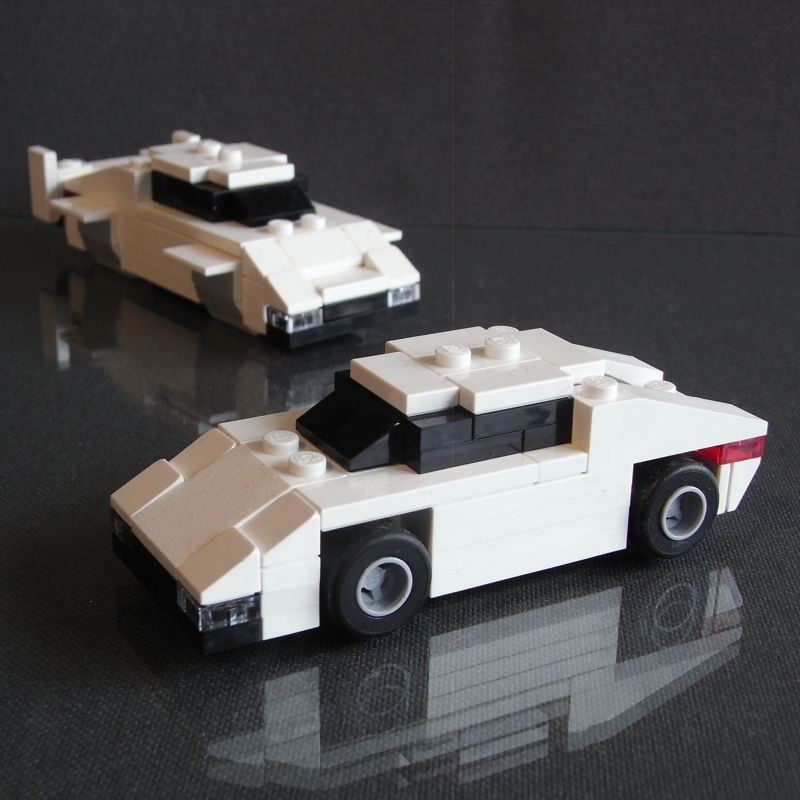
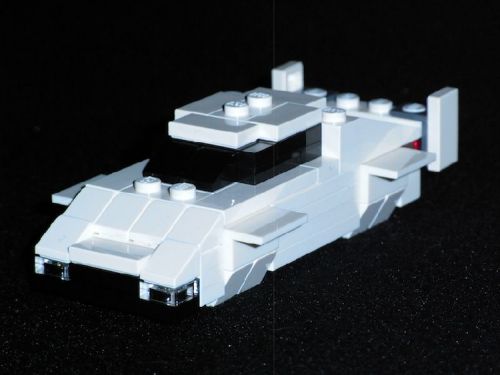
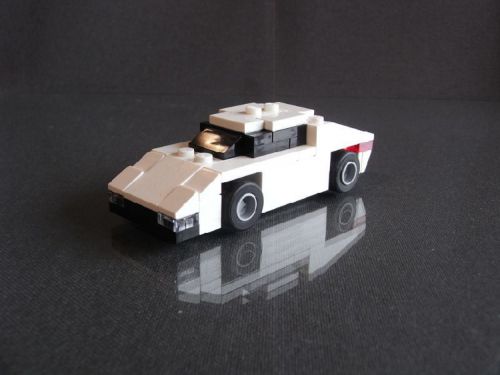
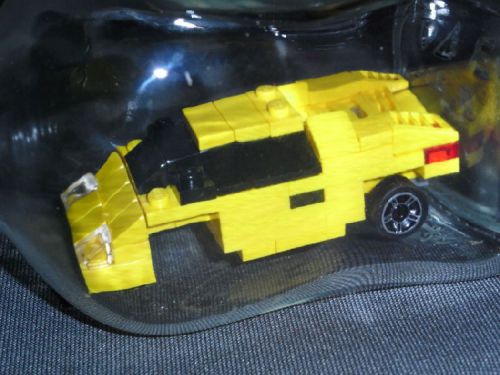
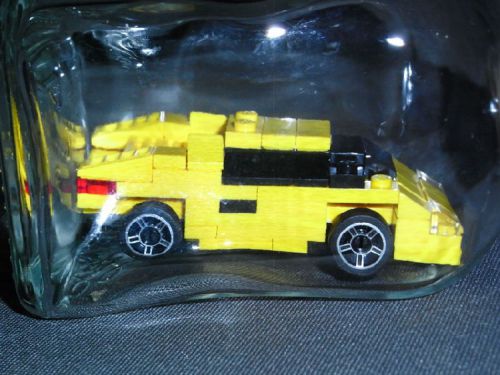
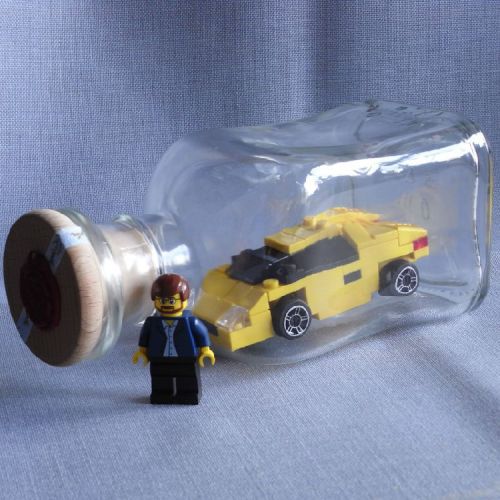
A 4-wide Lamborghini Countach LP400 built in a bottle

I got the inspiration for this when I saw the Ship-in-a-bottle built by Jeremy Moody and I thought: “I have to build a car in a bottle”. That was about 2 1/2 months ago and this was my secret project for this time. I wanted to be the first one to do this 😉


I didn’t change the exterior design of the LP400, only the colour and the “underware”. Yellow was an official colour for the LP400, some of the first models were painted yellow. So I chose this colour. I’d like to build a white one, but one of the main parts, the 1×2 “cheese wedge” with grill doesn’t exist in white, yet.


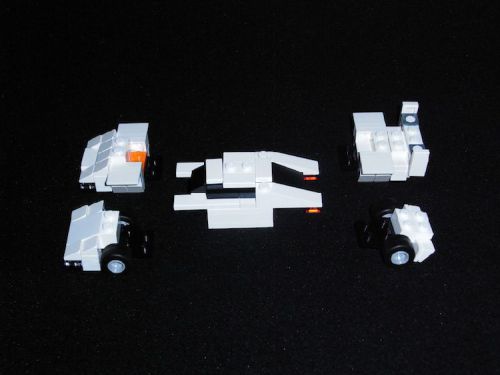
This one is modular, as the whole model doesn’t go through the bottleneck. So, these are the modules which had to go though the bottleneck one by one.


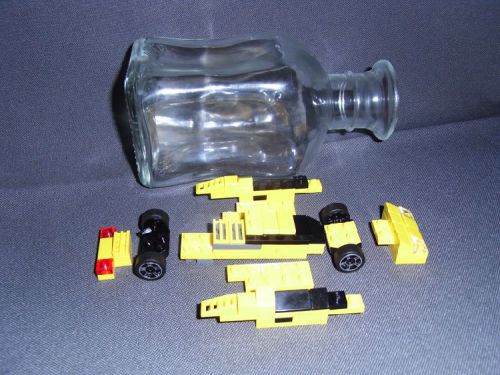
Meanwhile I was looking for the right bottle. It had to have the right size, not too small and not too big. And it had to have a (more ore less) square cross section. And the bottleneck had to be big enough to get at least the wheels through it.


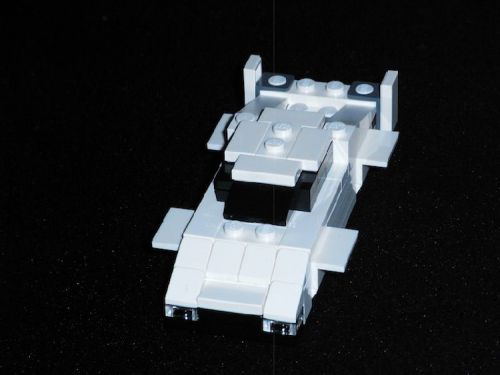
The first three modules mounted together. Up to this point the building was quite easy.


The rear end and rear axle mounted. On this photo you can see the biggest difficulty during the building: The “dimples” on the sides of the bottle make the interior almost round. It was almost impossible to fix the model to connect some of the modules.


I thought the side panels would be difficult to mount, but these just snapped into their place, to my great delight, I have to say. The front end instead, was like a pain in the $%& to mount. Everytime I wanted to fix it, something flipped away and it didn’t connect. I tried that for more than two hours until I came up with the idea to build a special tool for it. I’ll show that one on one of the following photos.


Yes, it’s done. Poooh, that was tough!


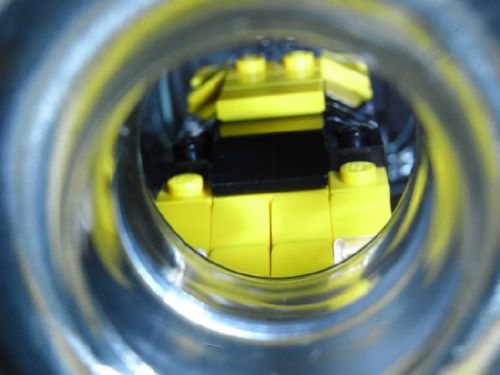
A look through the bottleneck.


If you think, that opening is big, here’s LEGO Nils crawling through it :-)) I still have to admit, that the bottleneck for Jeremy’s Ship-in-a-bottle was a lot smaller. So if you like this model, please take a look at his one, too. It’s just amzing.


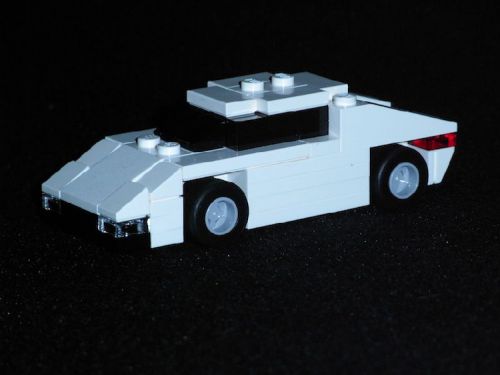
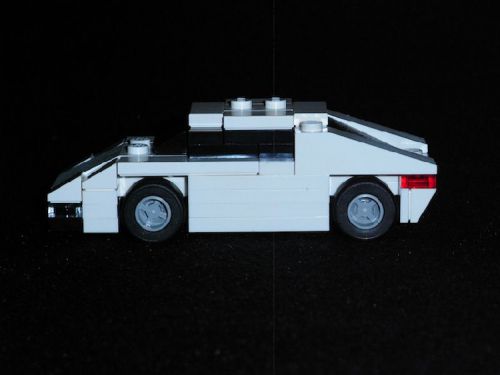
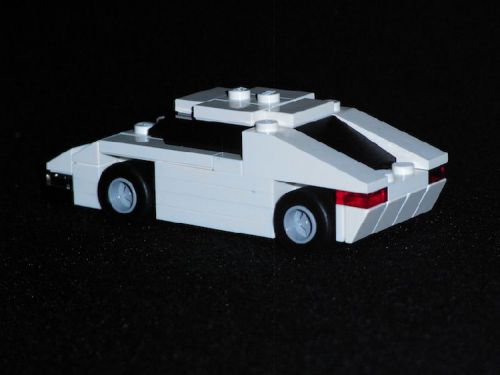
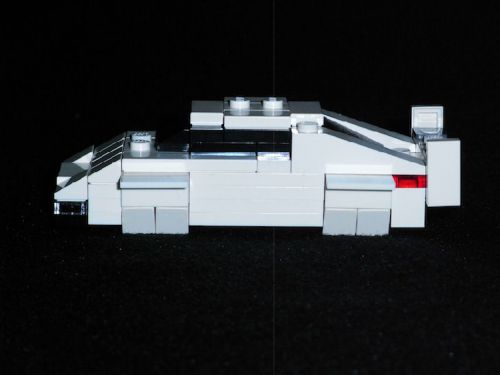
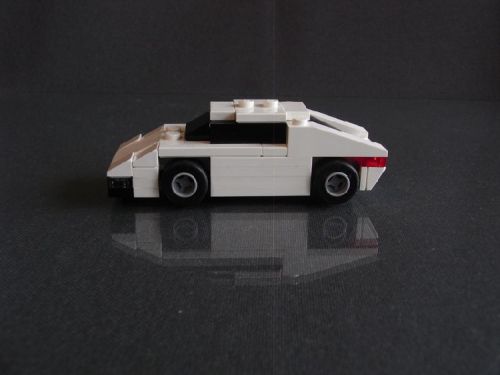
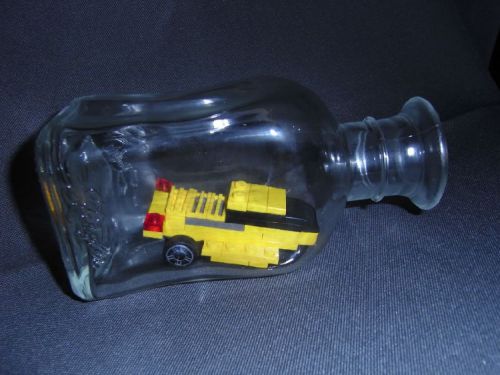
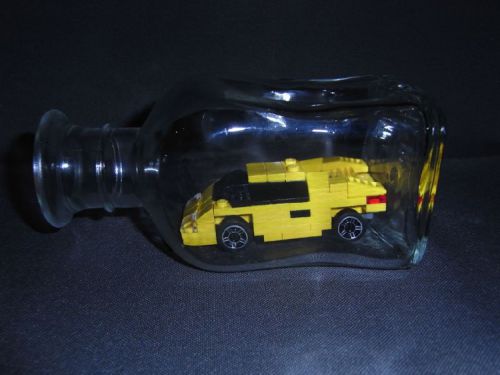
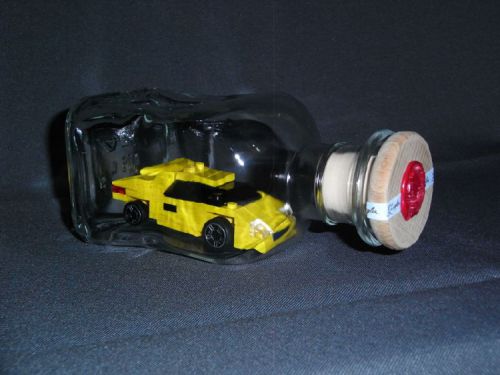
Side view: You can see that the Lambo just fits into the bottle. There’s no big gap in the length.


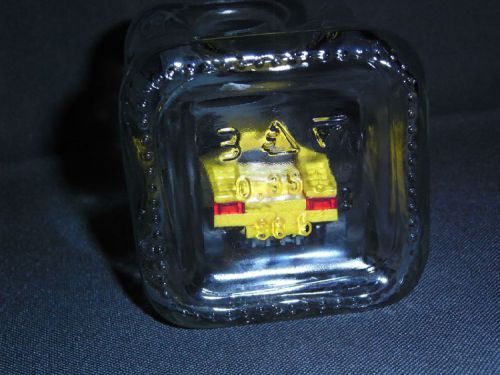
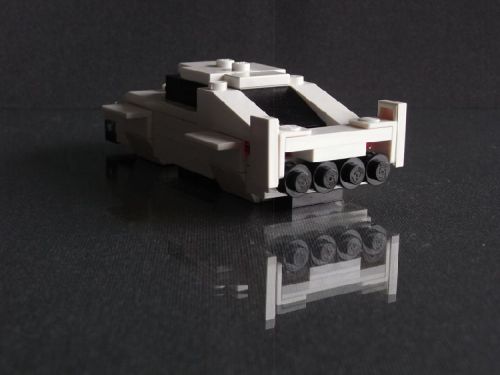
Rear view: You can see it’s a 0,35 litre bottle, half of the content of a whine bottle. I don’t know how much this is in anglo-american units. I only know a pint is more ore less 0,5 litres and I think that’s all I need to know :-))


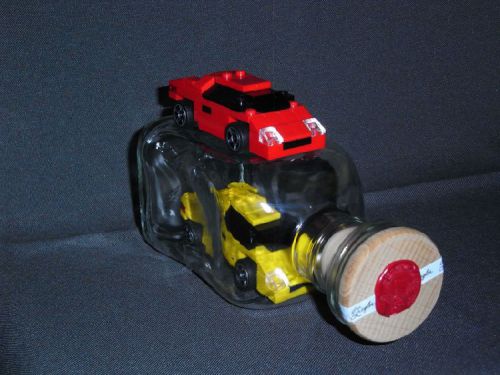
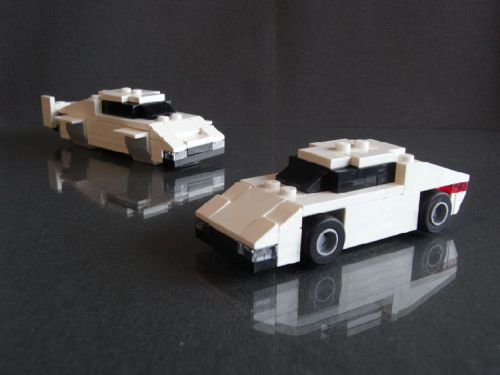
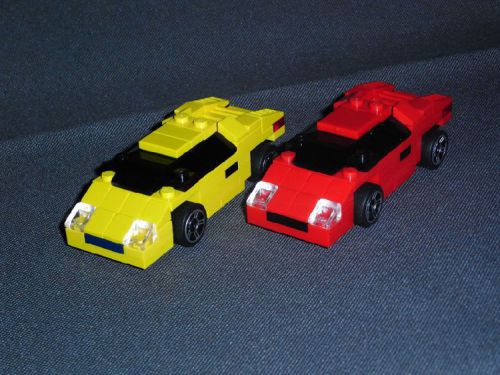
The seperated twins…


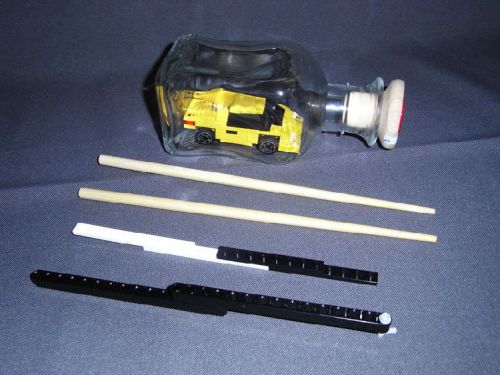
And these are the tools I used to build this one: A pair of chopsticks, some long plates mounted as a stick and the special tool I mentioned earlier: Two joined Technic beams with a connector peg. The knob of the connector peg connected to the front end and made it possible to locate the front end exactly where it had to go. Meanwhile I used one of the chopsticks to fix the model. So this tool saved me from going mad.


If you think building in a bag is difficult, try it in a bottle ;-). Or don’t, believe me, it’s nerve-wracking :-/ OK, it was a lot of fun, too :-))

Well this is my 4-wide LEGO Lamborghini Countach LP400 built in a bottle. I hope you like it :-))

MOCpages Backup: Ferrari F40 V1.2 (4-Wide)

A MOCpages backup

Rated 5 out of 5 (16 ratings)
7,198 visitors
9 comments
Added October 31, 2011

Ferrari F40 V1.2 (4-Wide)

Ferrari F40 in 4-wide with new design on the rear end, including diffusor.

This is another update for my 4-wide F40 (the last one for now). I got all the parts that I wanted for V1.1, but watching some photos I realized, that the rear still didn’t look right:

The rear end of the real F40 is almost flat with a diffusor in the middle. So I included this detail on my F40. I also played a little with the colours in the middle part. I finally decided to put a black background behind the tail lights and a dark grey one behind the grill.

Side view: I changed the 1×4 bracket on the rear end by two 2×2 brackets to get rid of the small gap under the bracket. First I didn’t like the black plates behind the tail lights in this view, but they looked so cool in the rear view that I kept them. And finally, I got the black 1×2 cheese wedges with the grill for the rear window.

Bonus picture: New (old) front view, heavily influenced by Rhys’ 5-wide F40

Update November 16, 2012:
A new set of grey rims for the F40So this is V1.2 of my 4-wide LEGO Ferrari F40

MOCpages Backup: Ferrari F40 V1.2 (4-Wide)

A MOCpages Backup

Rated 5 out of 5 (16 ratings)
7,050 visitors
9 comments
Added October 31, 2011

Ferrari F40 in 4-wide with new design on the rear end, including diffusor.

This is another update for my 4-wide F40 (the last one for now). I got all the parts that I wanted for V1.1, but watching some photos I realized, that the rear still didn’t look right:

The rear end of the real F40 is almost flat with a diffusor in the middle. So I included this detail on my F40. I also played a little with the colours in the middle part. I finally decided to put a black background behind the tail lights and a dark grey one behind the grill.

Side view: I changed the 1×4 bracket on the rear end by two 2×2 brackets to get rid of the small gap under the bracket. First I didn’t like the black plates behind the tail lights in this view, but they looked so cool in the rear view that I kept them. And finally, I got the black 1×2 cheese wedges with the grill for the rear window.

Bonus picture: New (old) front view, heavily influenced by Rhys’ 5-wide F40

Update November 16, 2012:
A new set of grey rims for the F40So this is V1.2 of my 4-wide LEGO Ferrari F40

MOCpages Backup: 007 Lotus Esprit S1 (4-Wide)

A MOCpages Backup

Rated 5 out of 5 (21 ratings)
6,160 visitors
19 comments
Added October 27, 2011

This is my 4-wide model of the Lotus Esprit Series 1 (S1) as used by James Bond in the movie “The Spy Who Loved Me”

This model also was part of my second DESIGNbyME set. The 1×4 slopes aren’t available in the LEGO Shop, so I ordered them via Bricklink and in the set I ordered 1×4 bows instead.
Front left view

Side view

Rear left view. I realized that the rear end looks very much like the one of Angka’s Esprit. Believe it or not, I didn’t copy that. It was just the best way to build the rear end of a 4-wide Esprit and we did it the same way. But I have to admit that Angka’s Esprit was the inspiration for me to build one myself. I had seen his version a few weeks before starting with this one.

Front view

Rear view

As the James Bond car it also needs a submarine mode. This is it:
Front view

Rear view

Side view

Front top view


The design is modular: You can take off the front and rear part and replace them by the submarine parts. The other way it’s a bit more tricky, but it still works OK.

So this is my 4-wide LEGO 007 Lotus Esprit S1. I hope you like it…

Update December 29, 2012:
Some new photos…


This is the photo update for my 4-wide LEGO 007 Lotus Esprit S1.
I hope you enjoy the new photos :-))