MOCpages Backup: Presentation Platform for Small Scale Vehicles

A MOCpages backup

Rated 5 out of 5 (35 ratings)
2,560 visitors
21 comments
Added May 27, 2014

Presentation Platform for Small Scale Vehicles

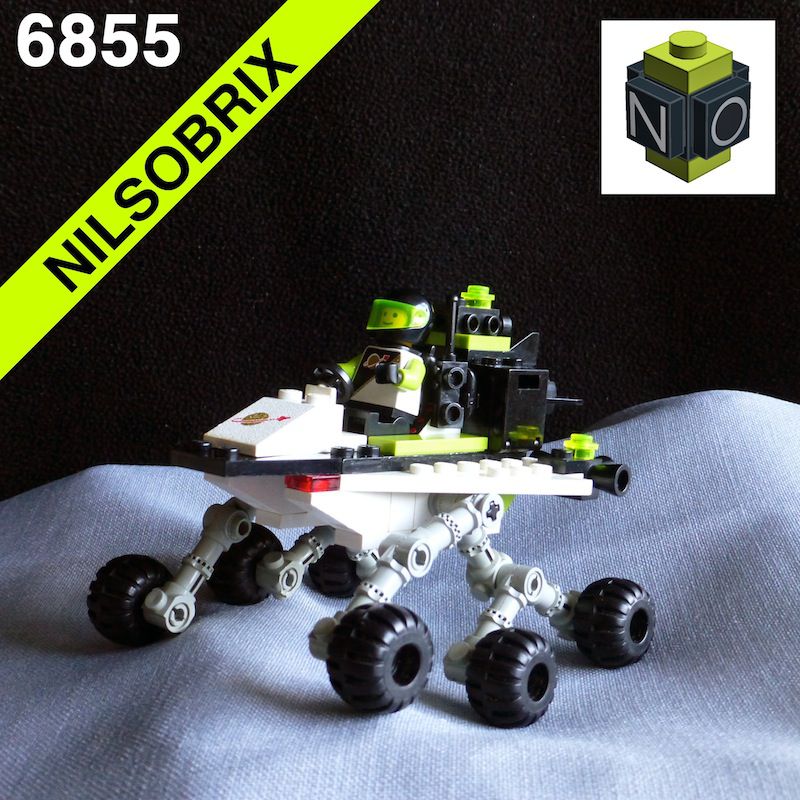
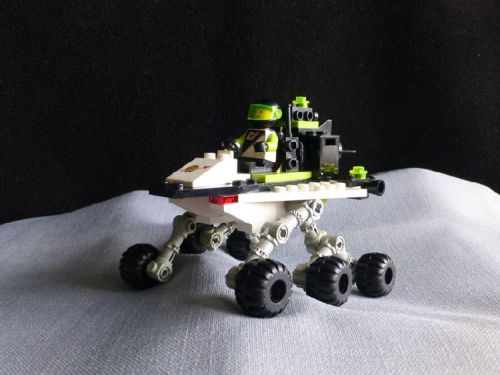
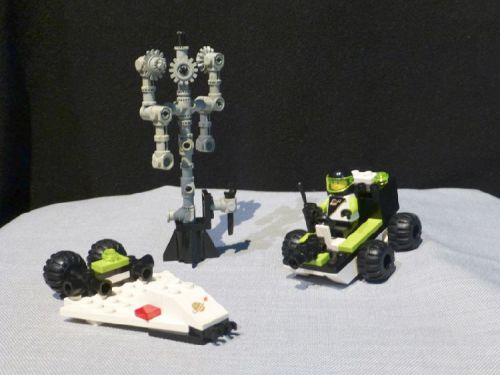
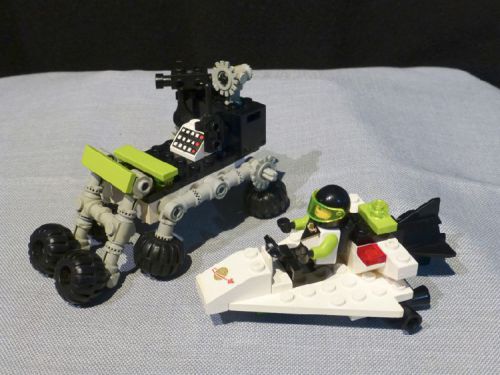
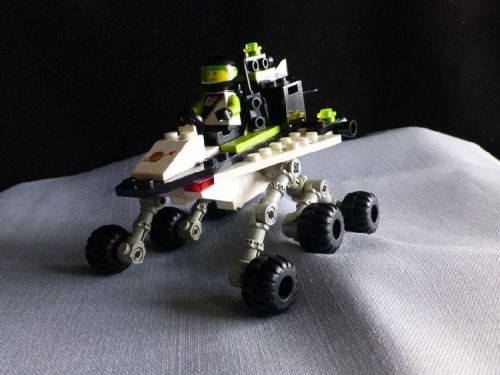
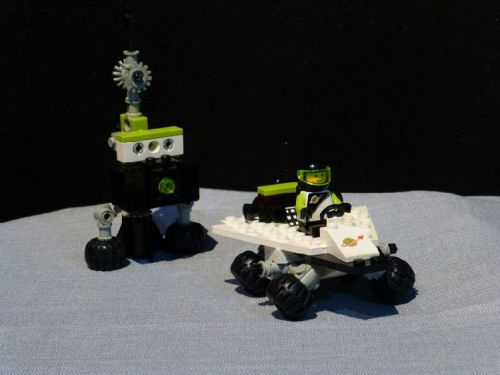
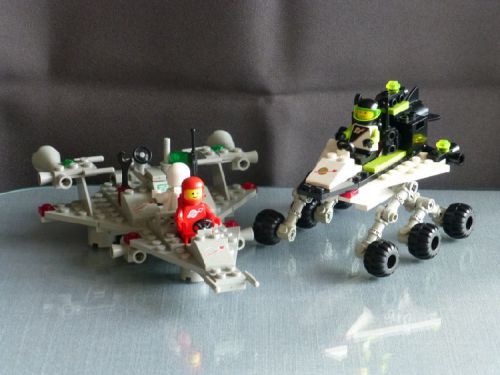
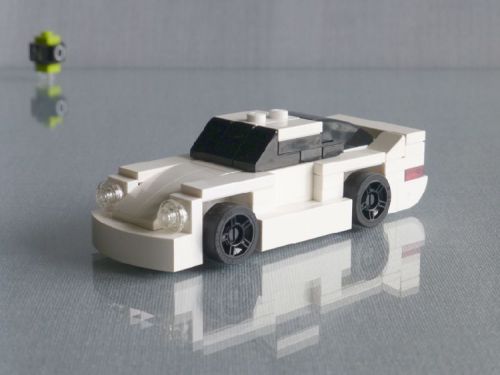
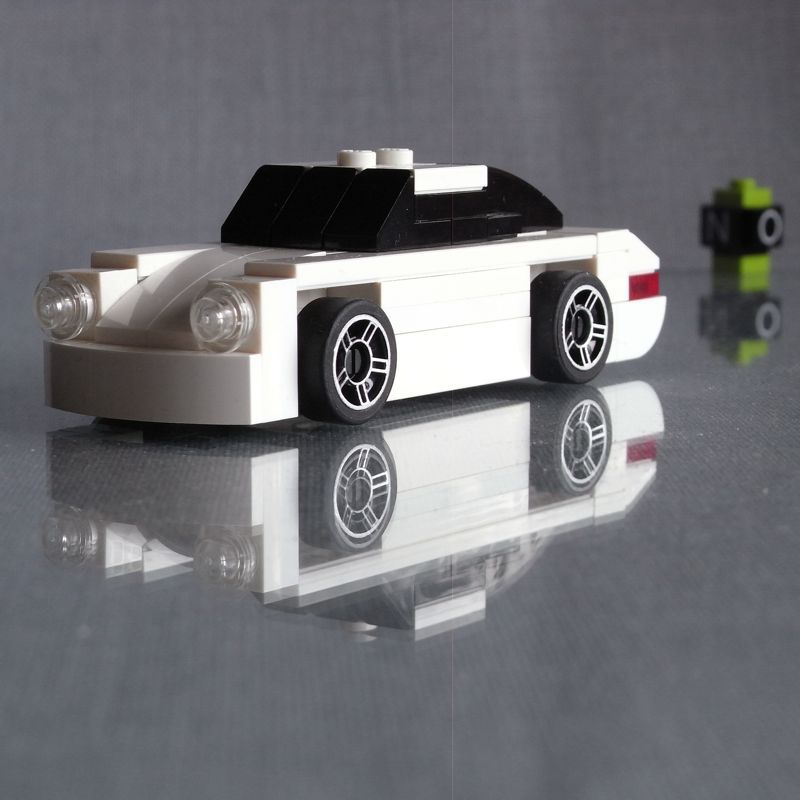
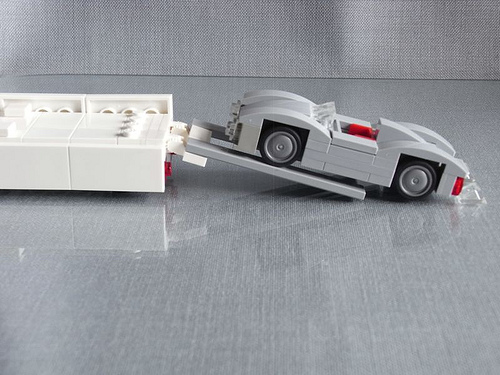
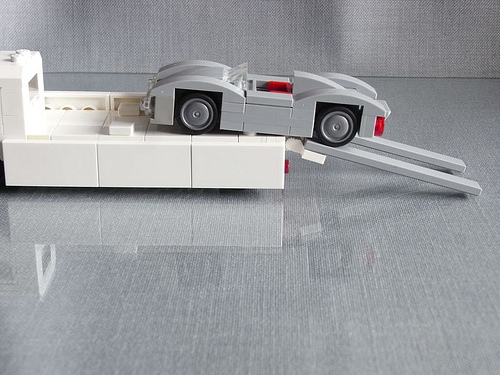
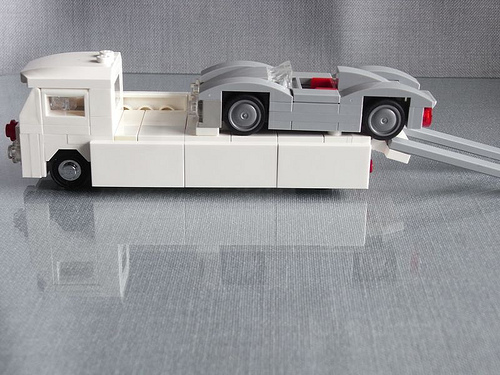
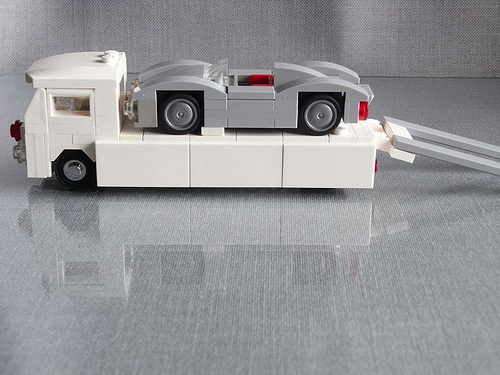
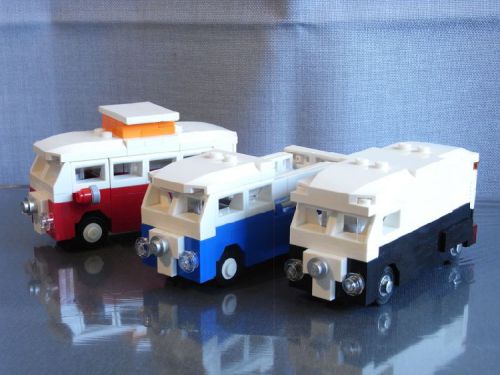
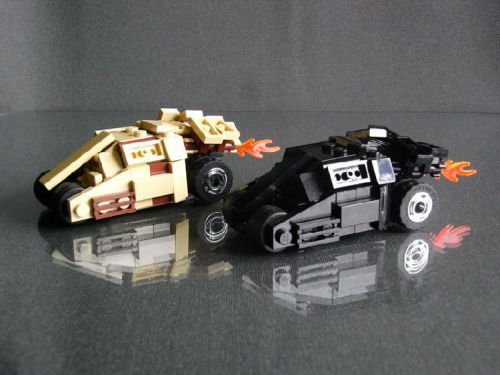
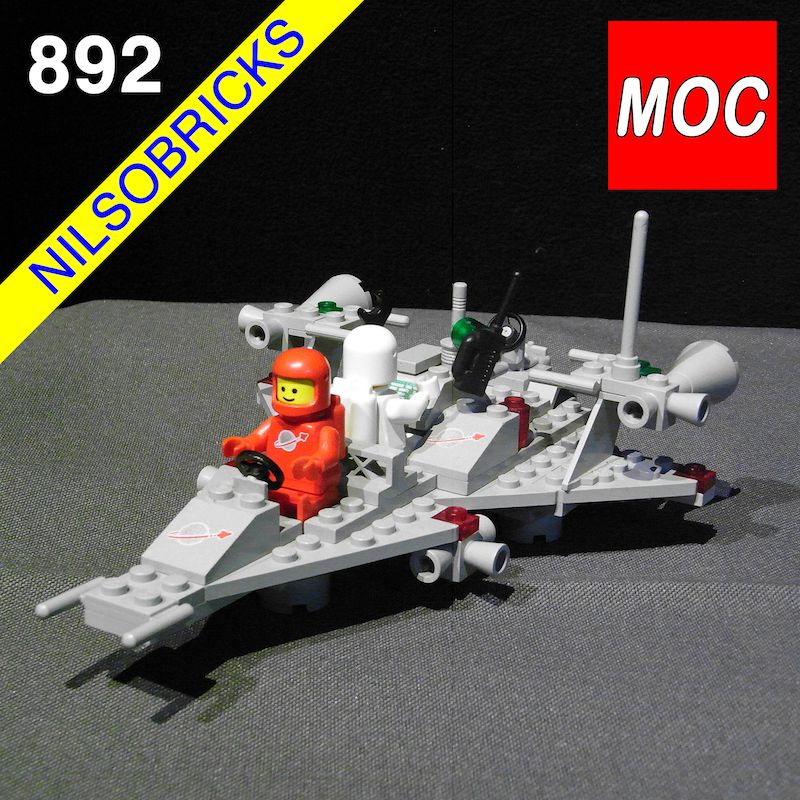
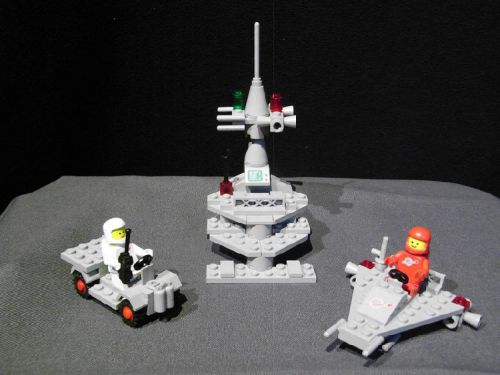
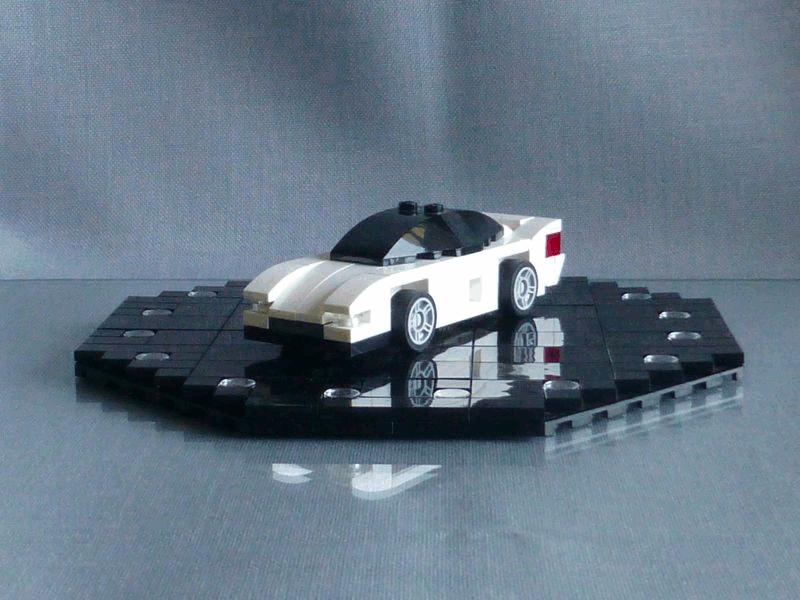
A platform for presentation and photography of small scale LEGO vehicles.
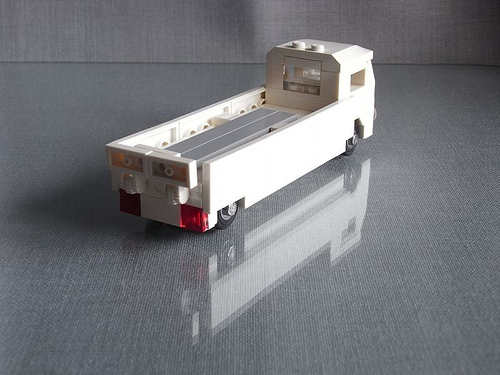
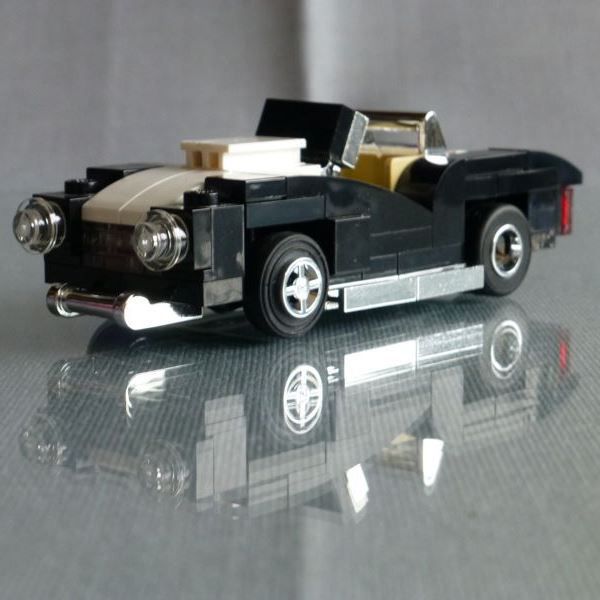
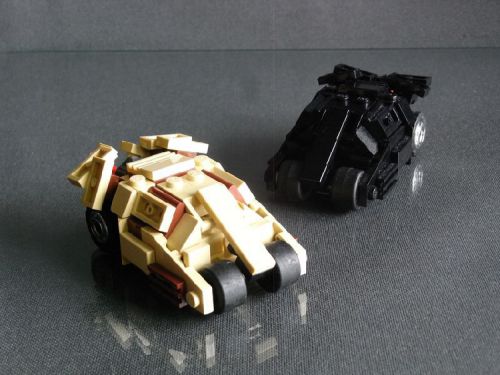
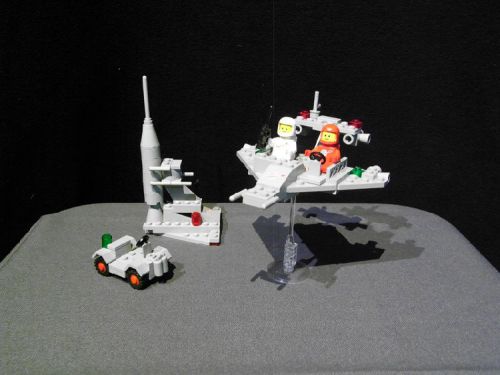
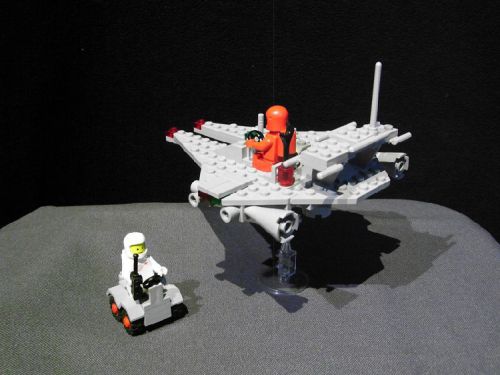
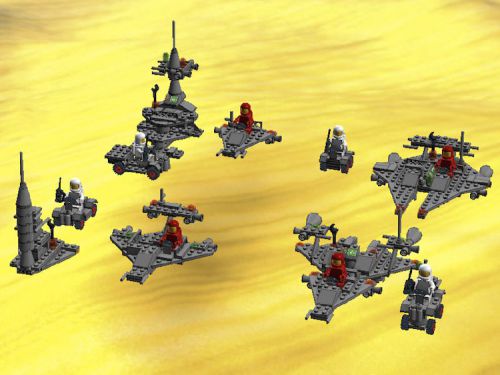
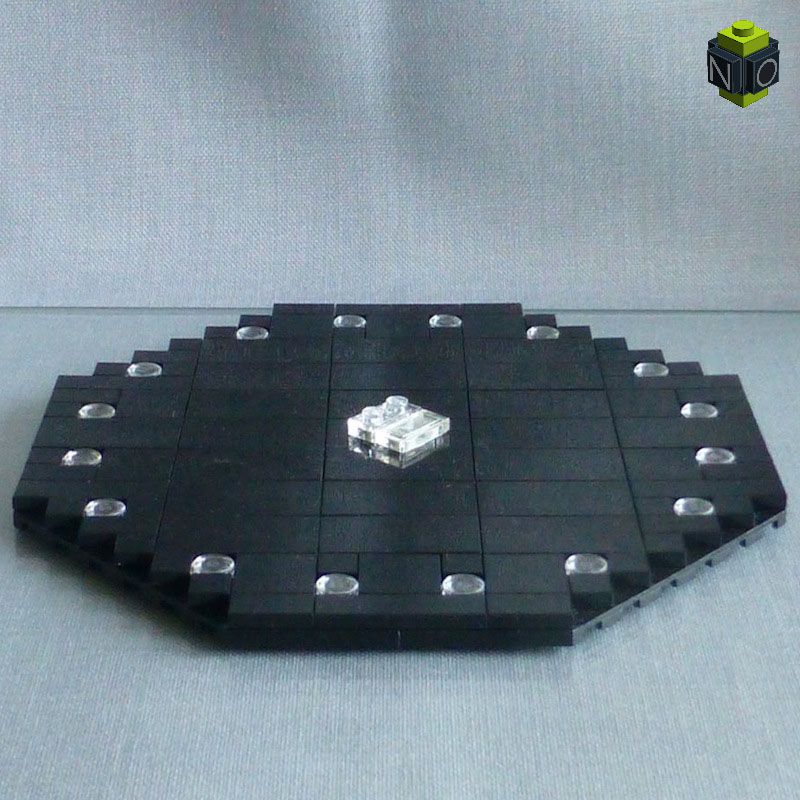
The idea was a platform for the presentation of my 4-wide vehicles, especially to take photos from different angles without changing position or zoom factor of the camera. I started with a square platform based on a 16×16 base plate, but the platform was a little small to get a reflection of the whole car on the platform. Black was the best colour to get a cool reflection.

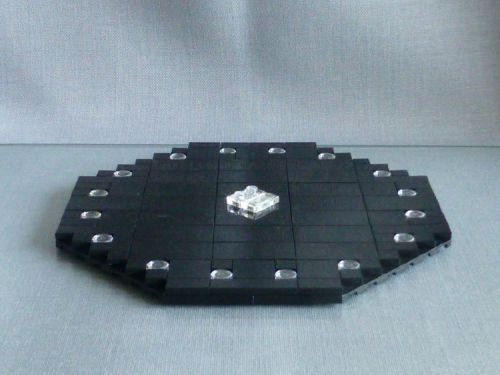
The ideal form would be a circle. An octagon formed by four 10×10 plates with 45 deg cutout was already getting close. A circle formed by 16 round 1×1 tiles (representing spots in the floor) added some extra coolness.

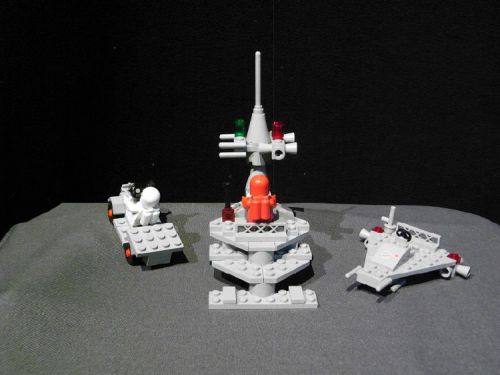
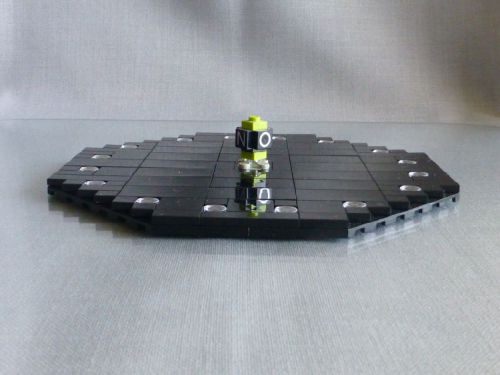
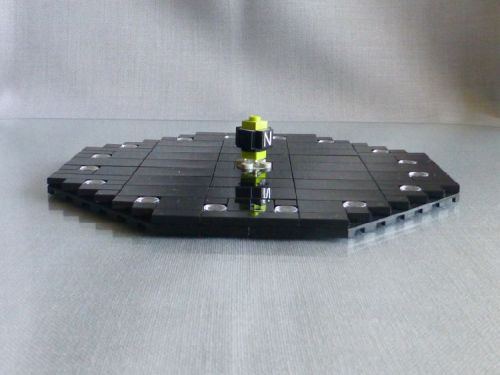
In the center of the platform there is a little turntable to change the angle of the car in front of the camera without “moving” the car itself:
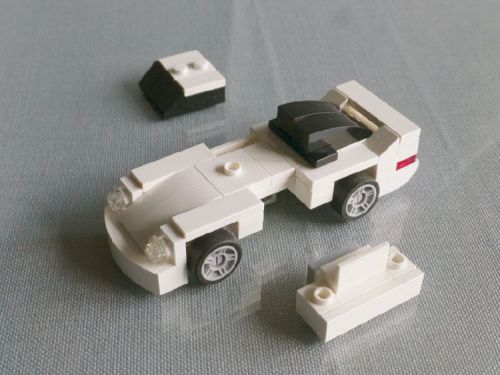
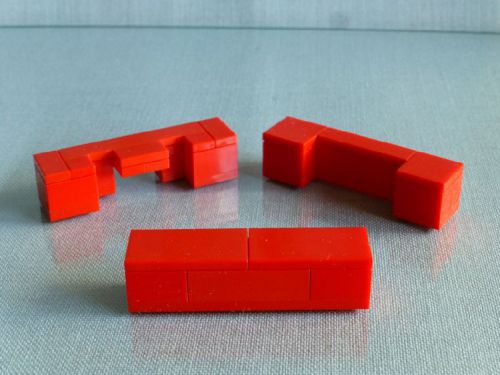
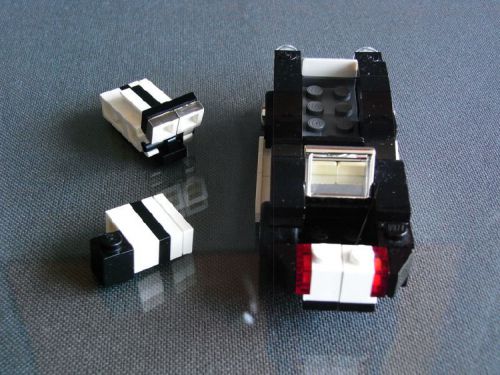
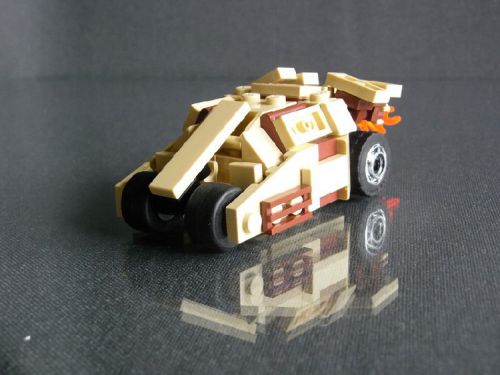
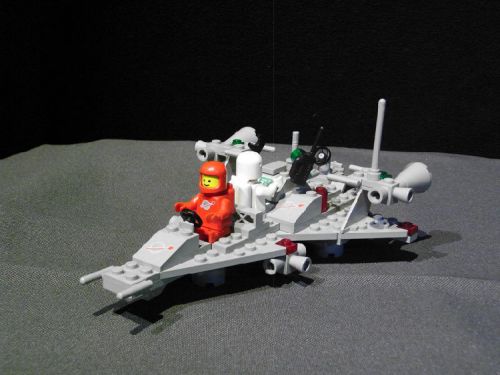
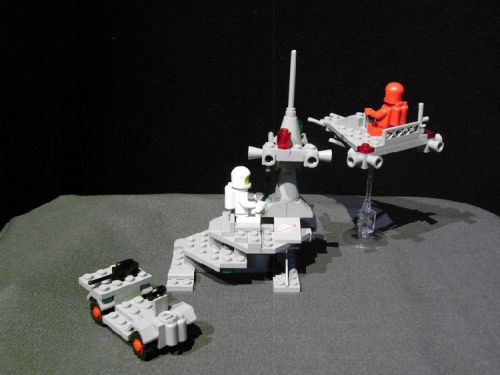
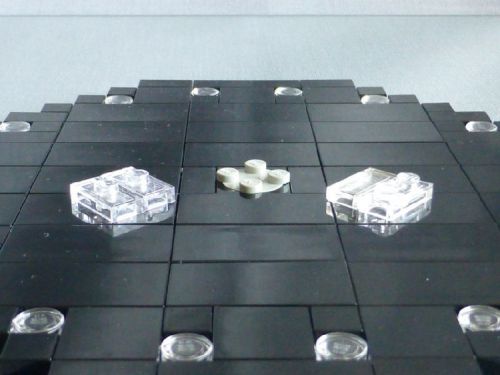
Transparent plates, tiles and jumper plates are used to fix the car on the turntable.

For an “odd” length of the model (in studs) the jumper plates are used to center the model on the platform.

For an “even” length of the model the plate and the tile are used.

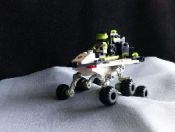
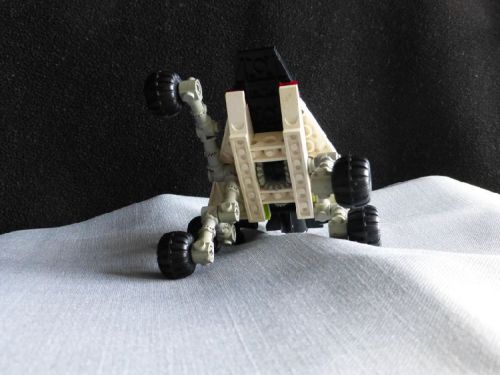
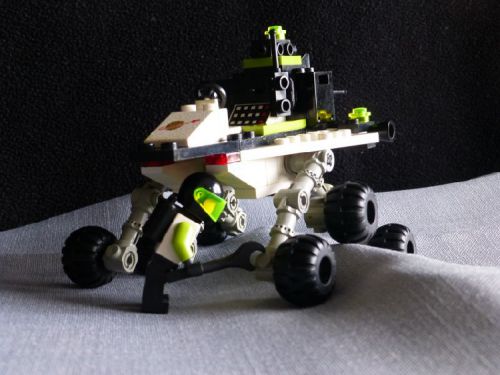
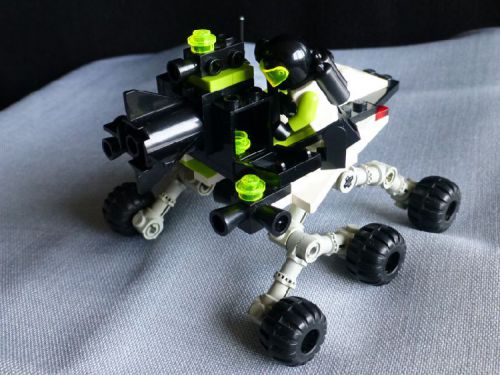
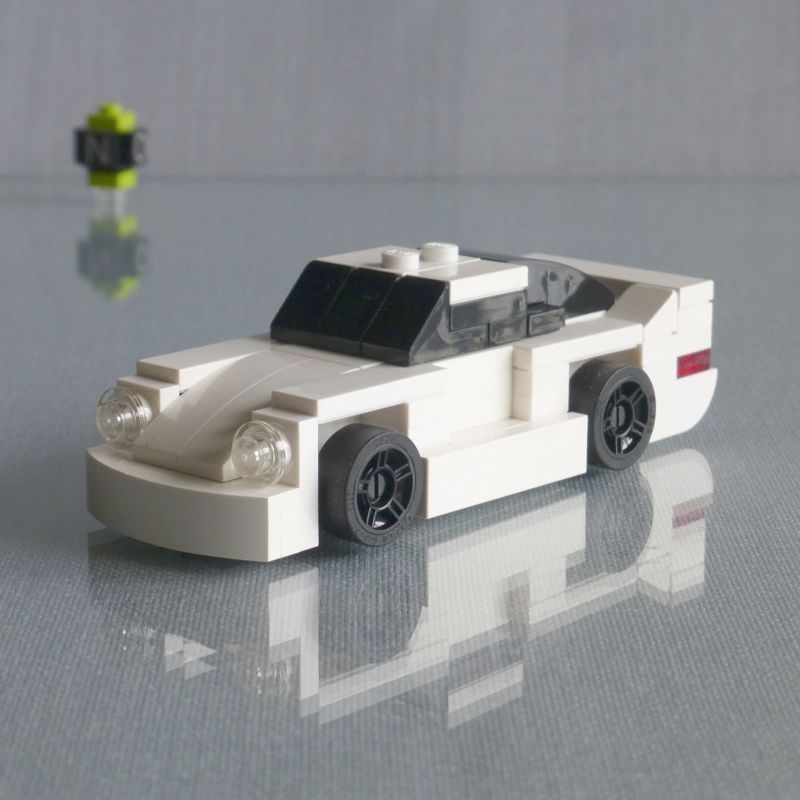
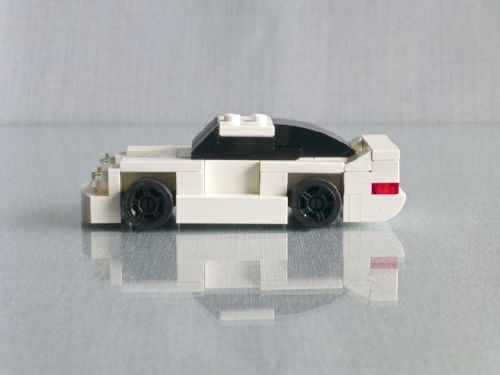
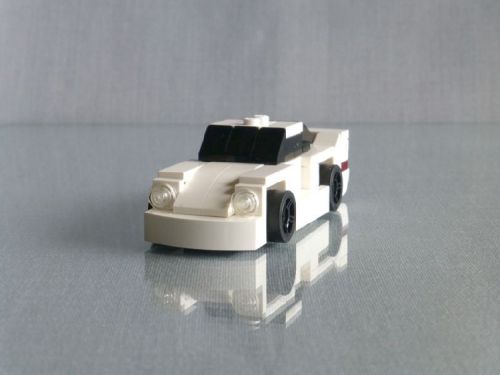
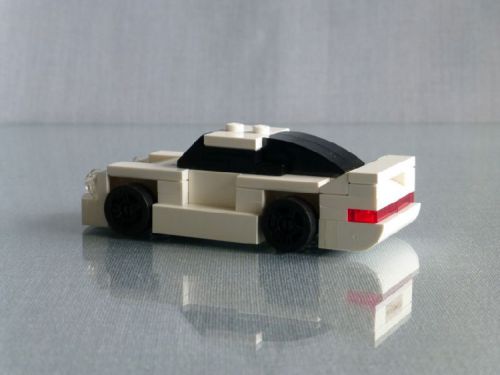
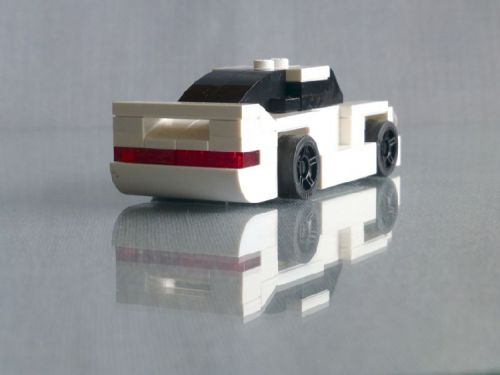
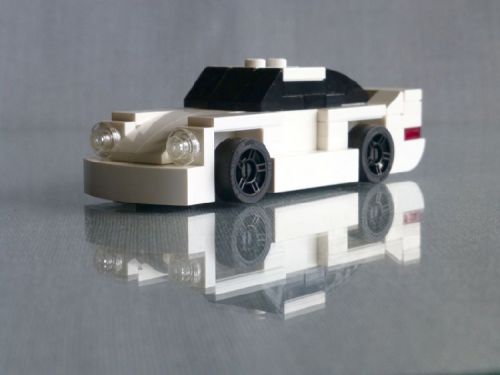
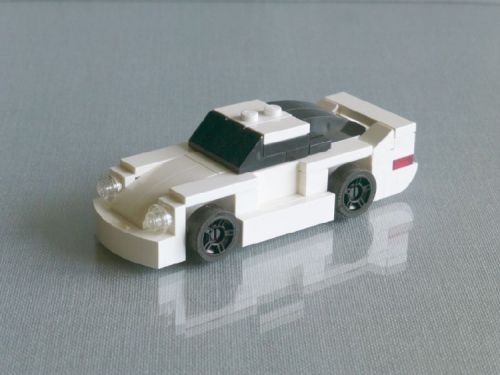
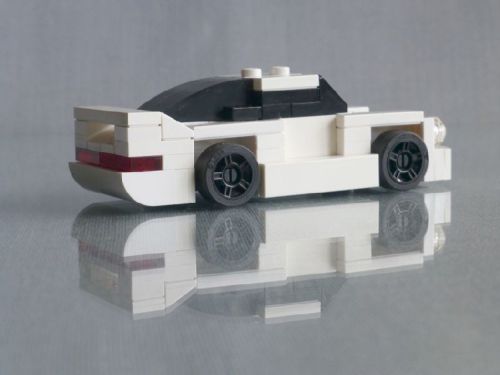
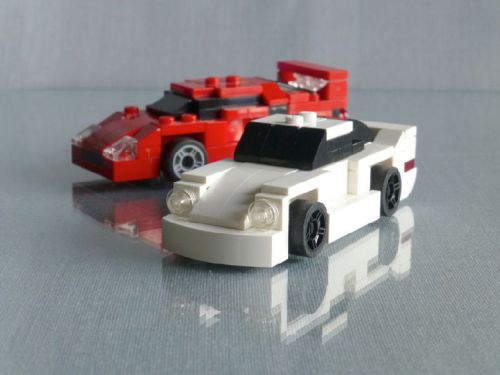
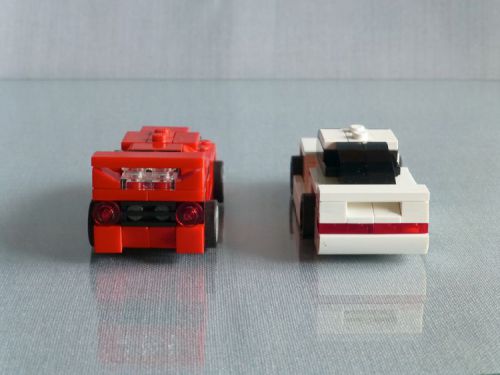
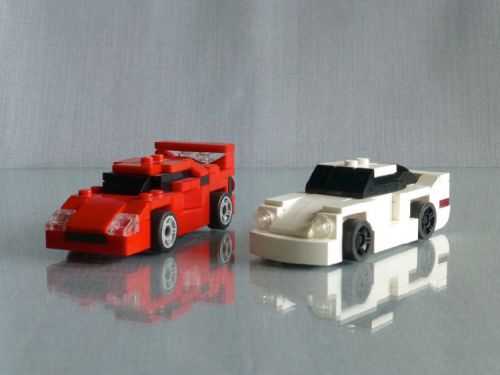
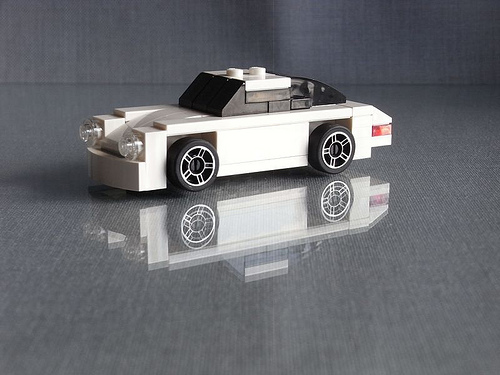
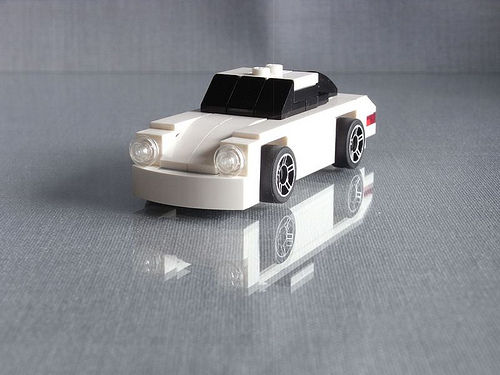
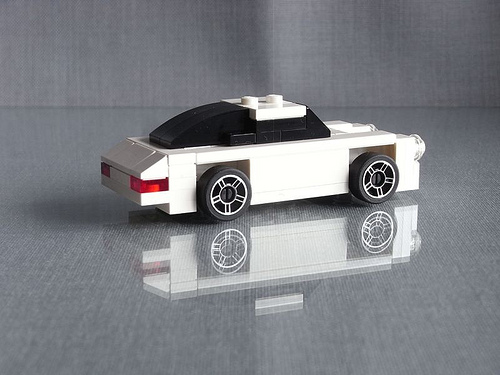
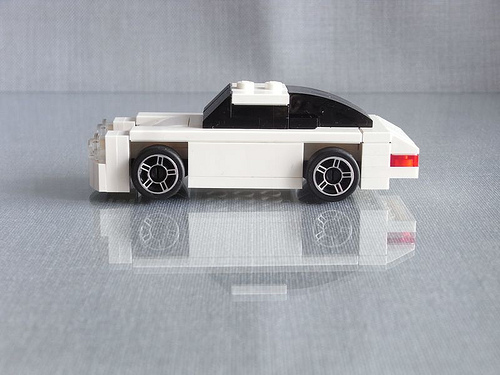
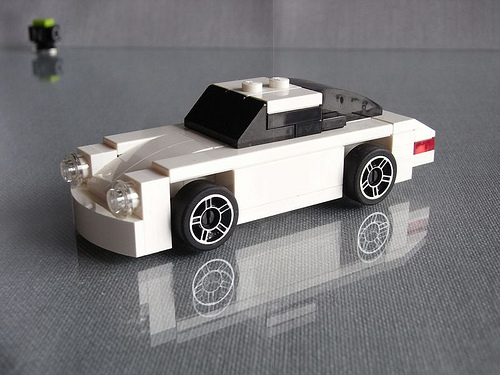
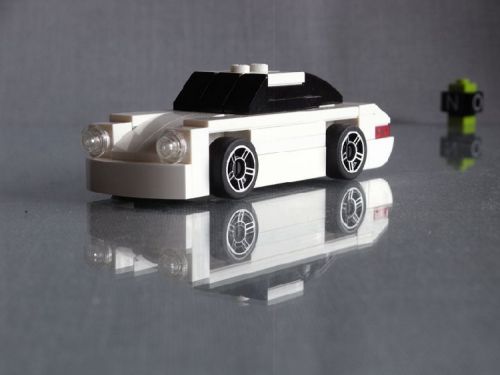
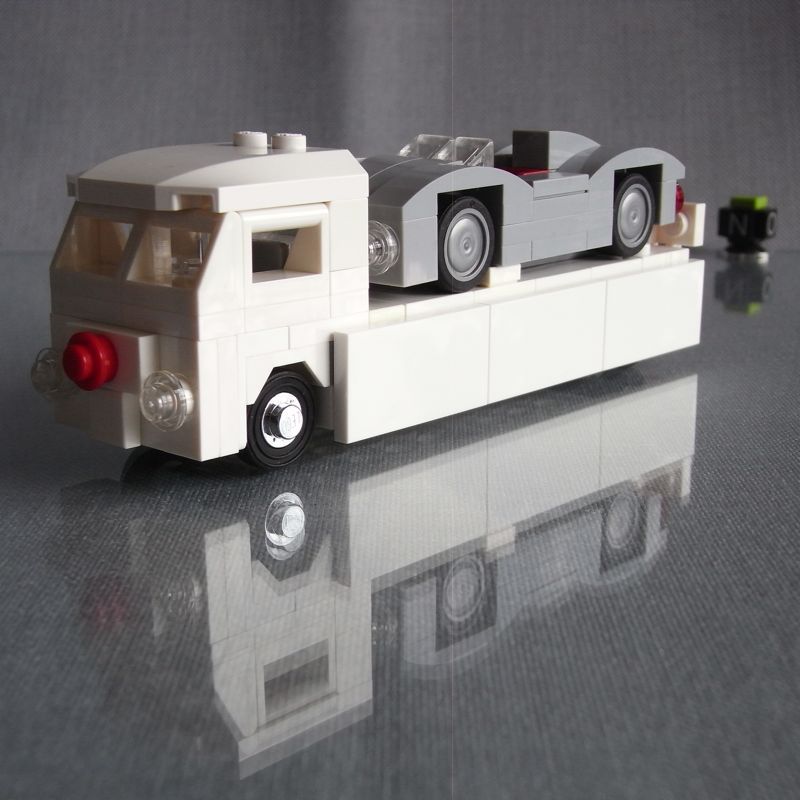
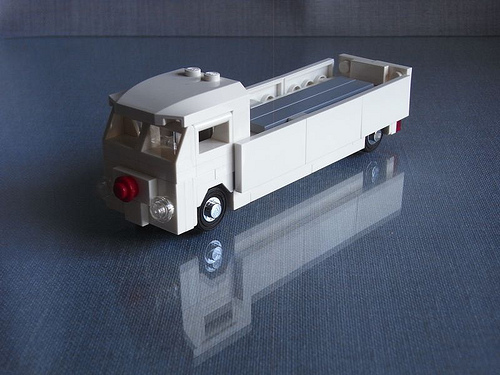
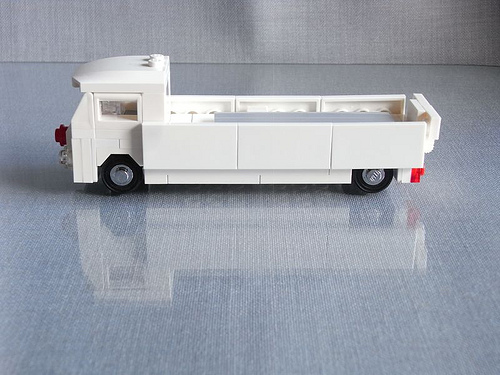
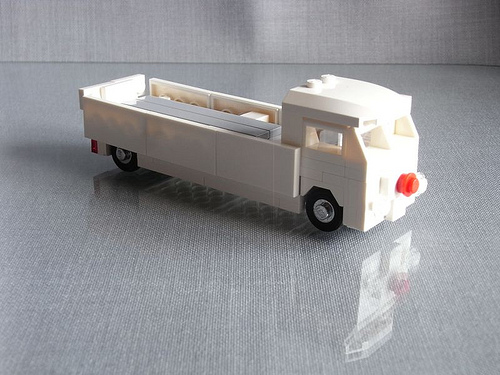
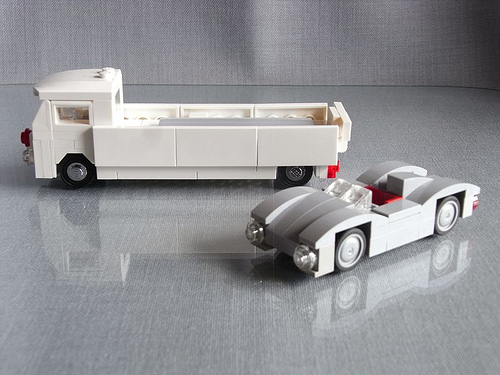
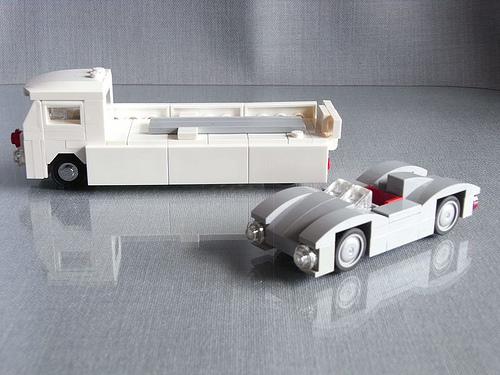
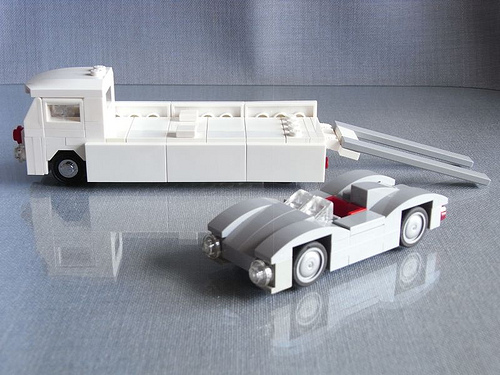
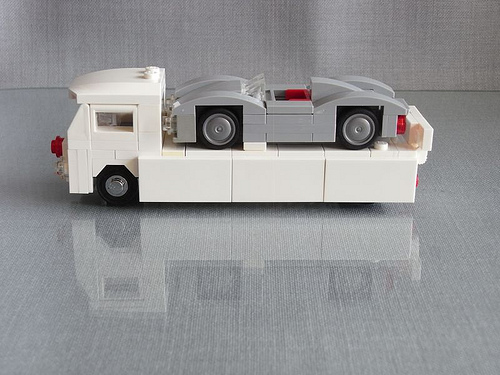
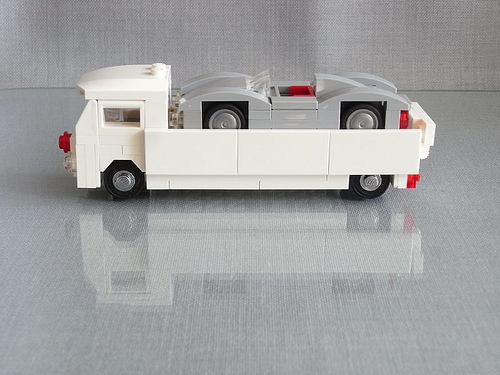
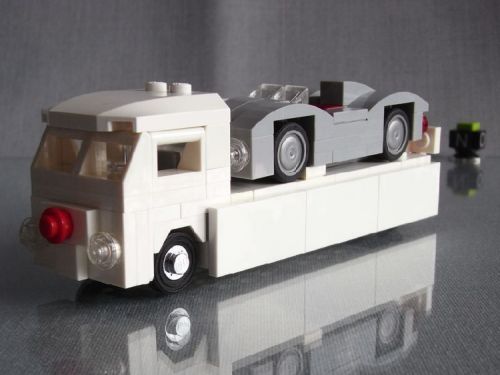
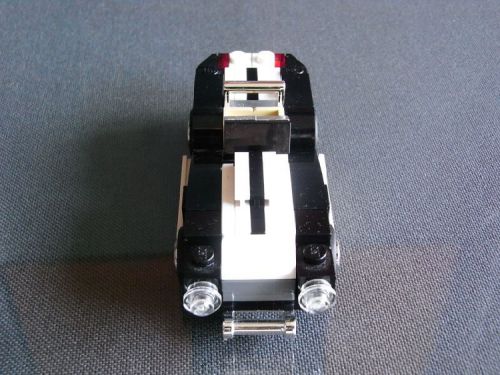
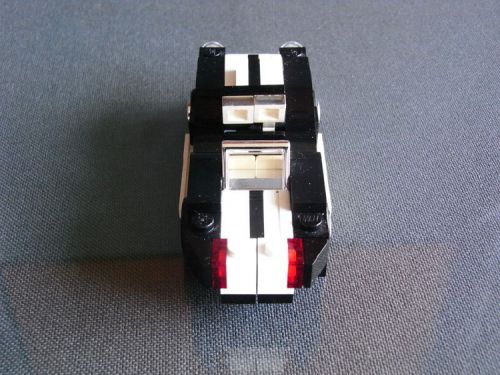
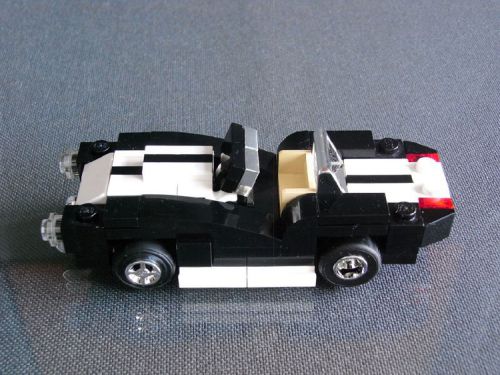
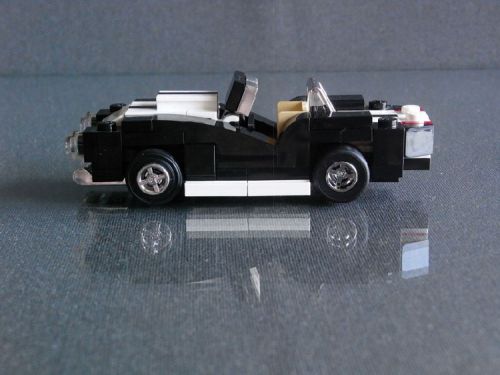
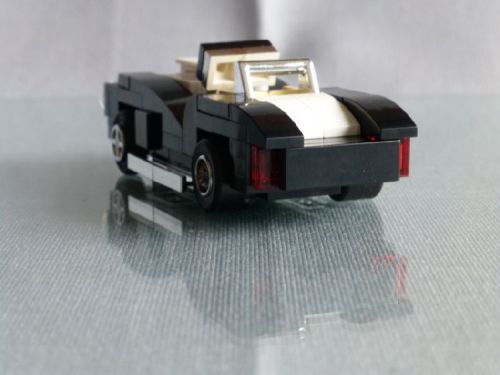
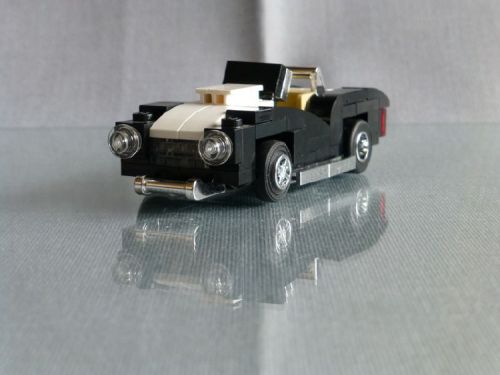
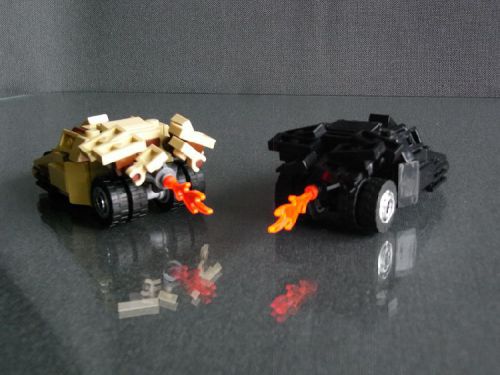
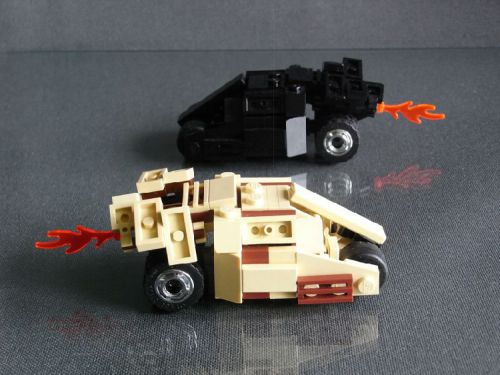
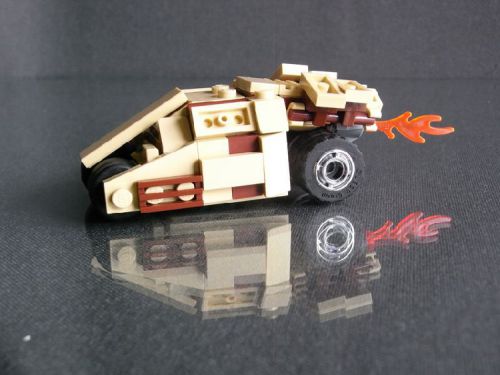
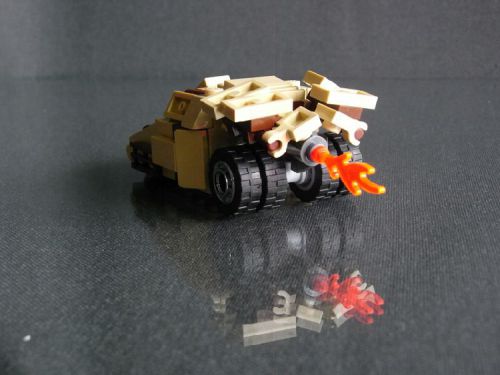
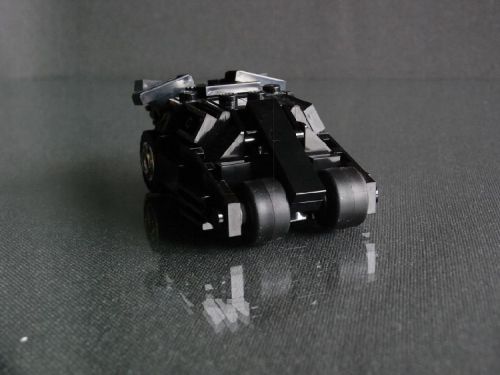
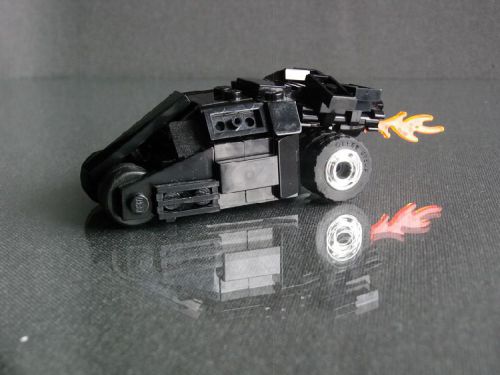
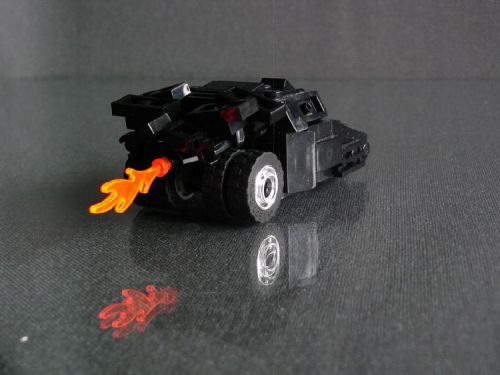
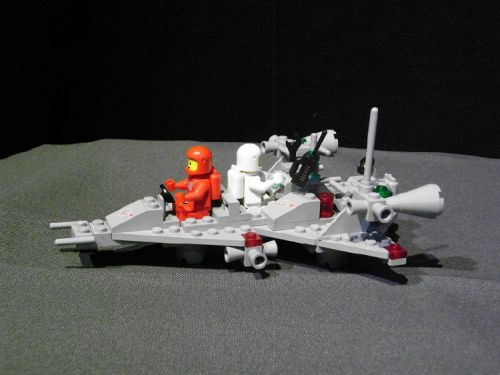
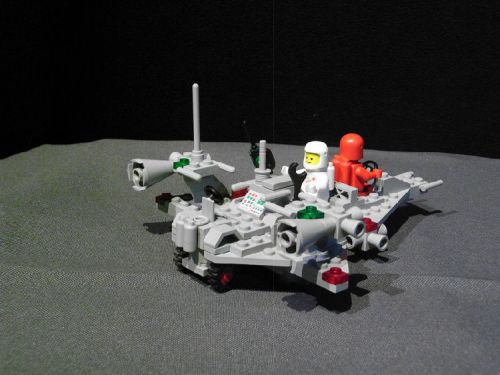
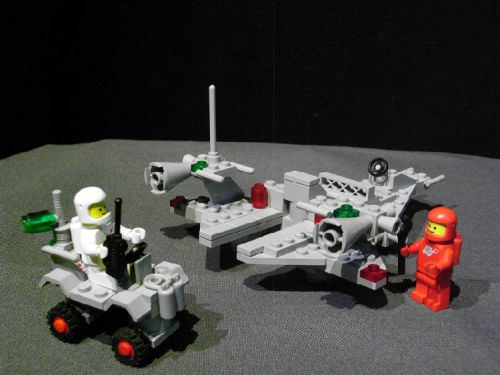
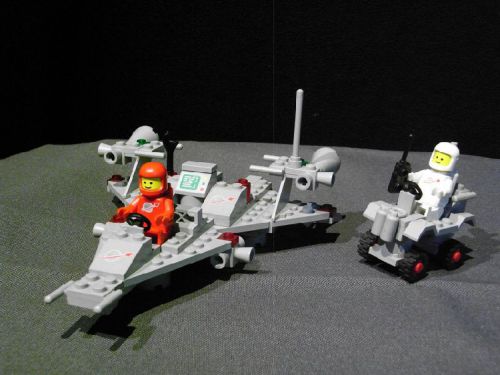
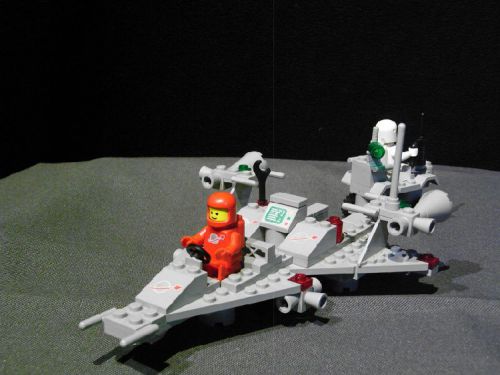
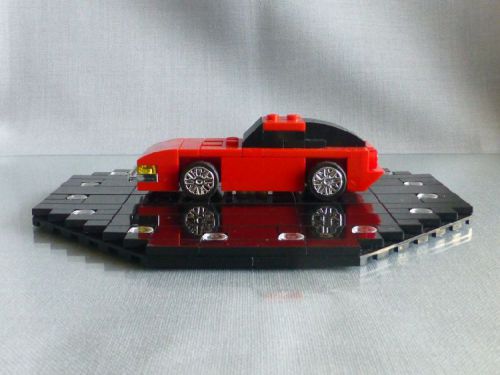
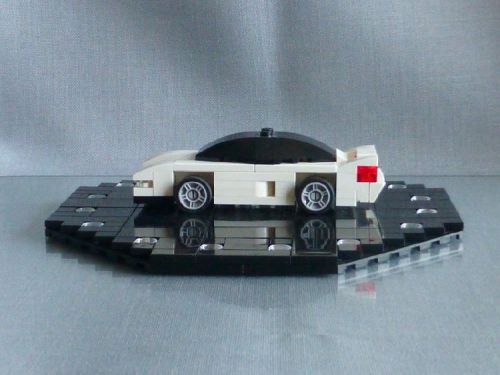
Just turn the turntable…

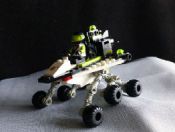
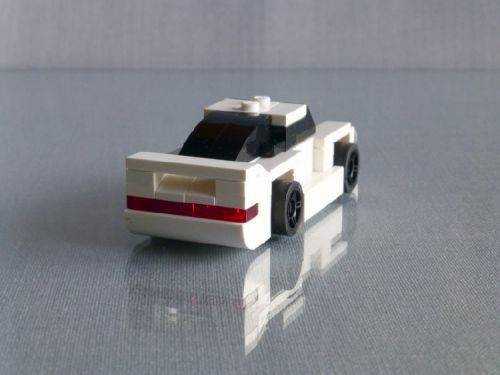
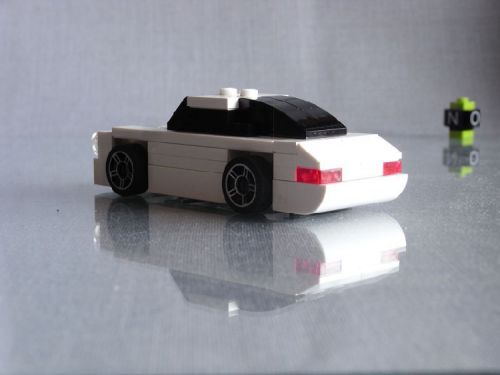
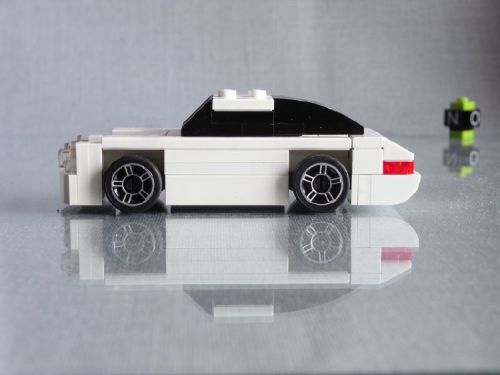
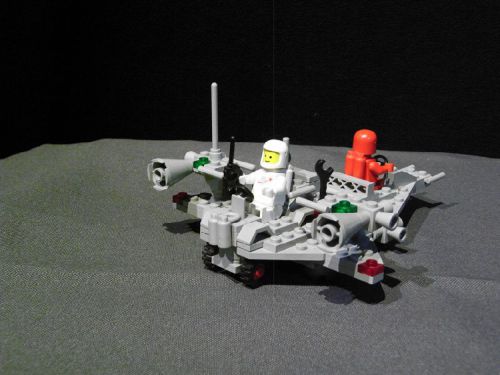
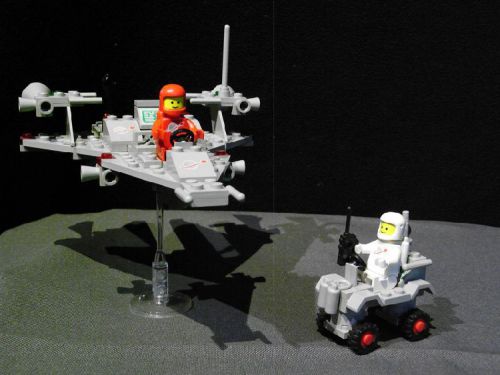
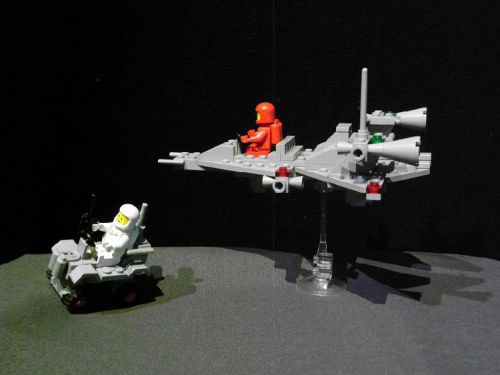
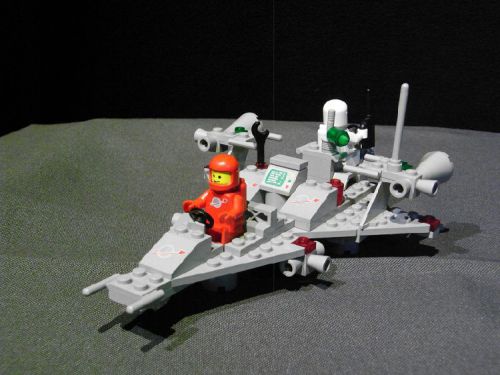
… to change the photo angle of the model …

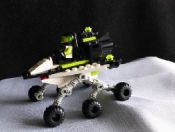
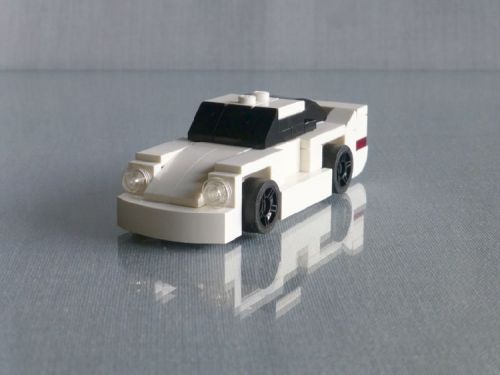
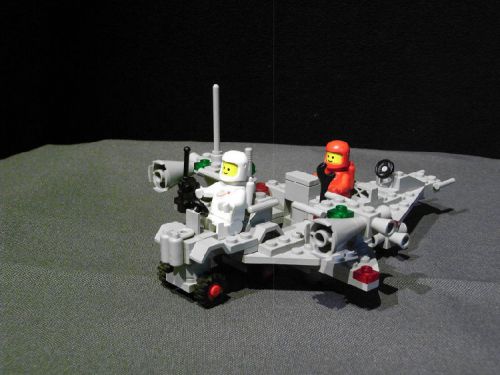
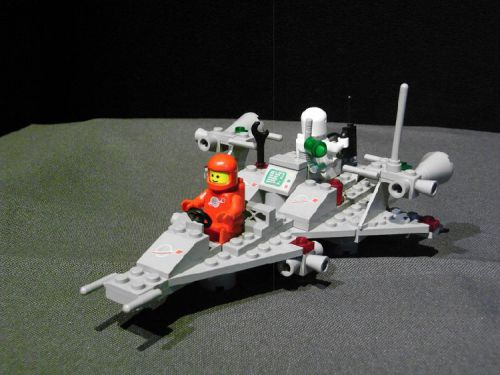
… without changing the position of the model on the photo.
You only need a tripod to freeze the position of your camera ;-))

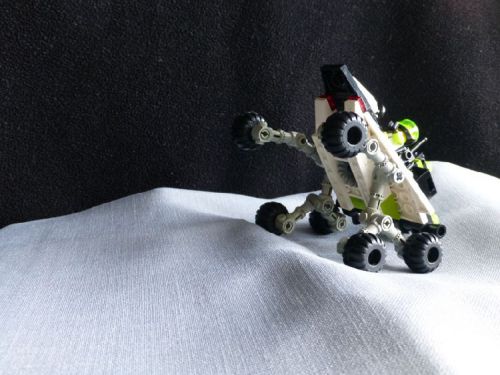
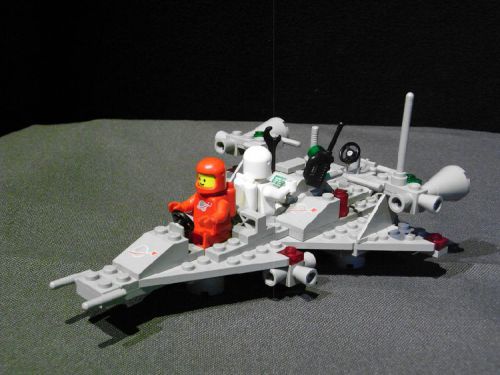
It works great for an animated GIF, too.

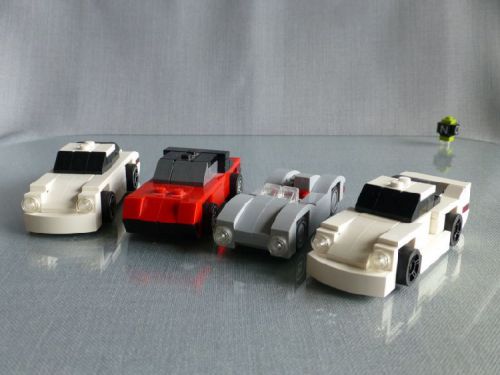
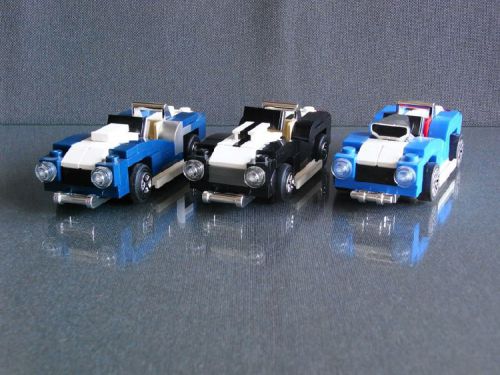
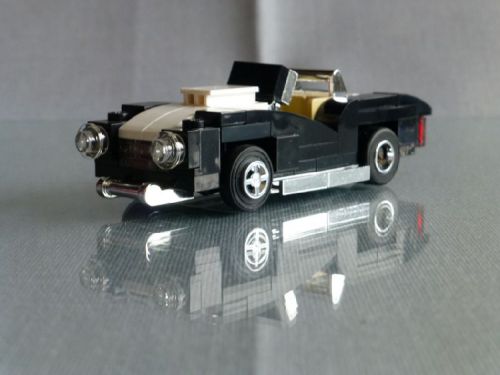
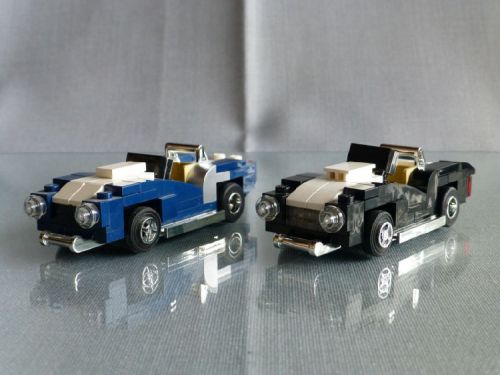
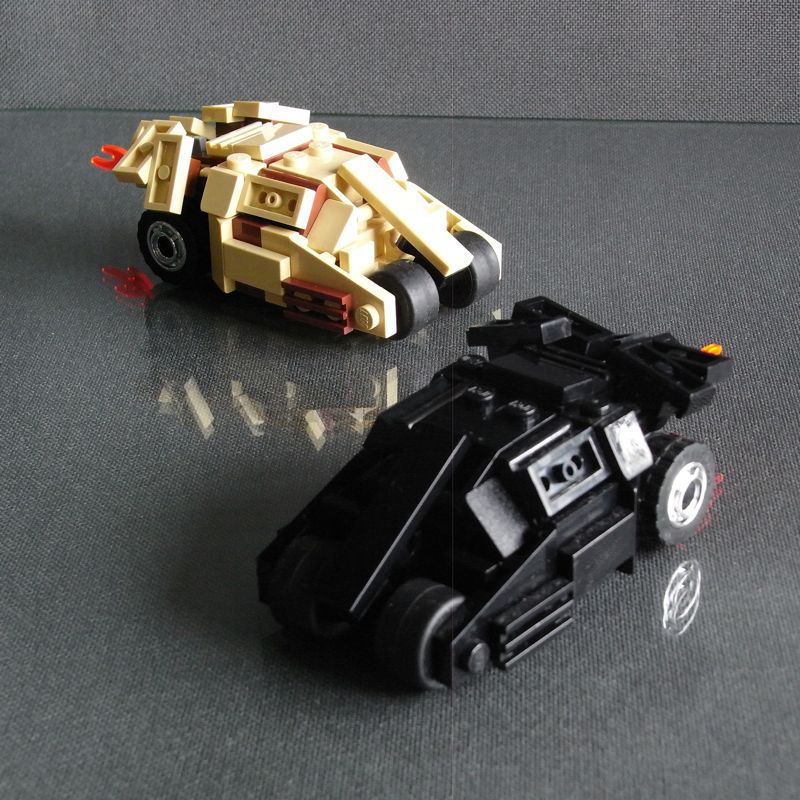
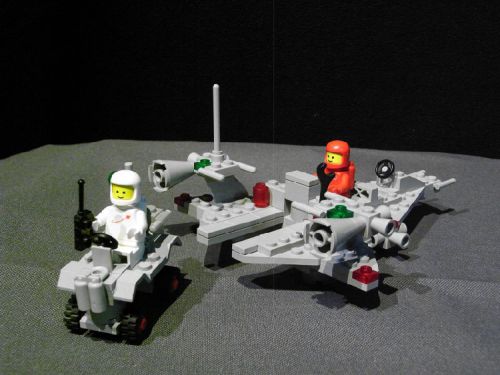
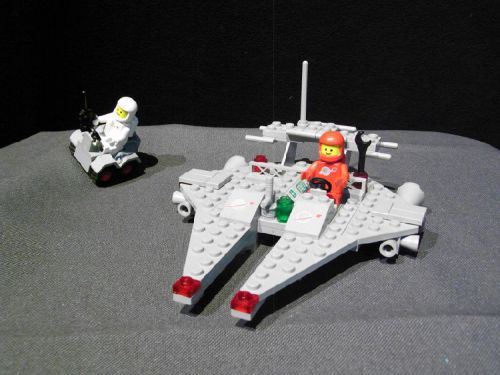
So this is my presentation platform for small scale LEGO vehicles.
I hope you like it :-))

MOCpages Backup: CSPMC2: 6855 Limeuron Exploration Rover

A MOCpages backup

Rated 4 out of 5 (45 ratings)
4,447 visitors
30 comments
Added December 29, 2013

CSPMC2: 6855 Limeuron Exploration Rover

My entry for this year’s Classic Space Pocket Money Contest: The 6855 Exploration Rover with an original Mars Rover “Rocker-Bogie” suspension and my new “Limeuron” colour scheme.

First of all thanks to “The Davids” for repeating this fantastic contest this year. For me there’s no better way to spend some of the free time during the Christmas Holidays :-)).

With the “New Colour Scheme” rule I had to cancel my original idea of building a later CS model in 1979 style. I’ll add that one to the “CSPM” group, later…

The basic idea was to build a rover with the original Mars Rover suspension. This special suspension has always fascinated me, so I started to do some research about it. The suspension is called a “Rocker-Bogie” suspension. When I was looking for photos with the suspension I immediately found photos of Lego models, too ;-)). The center piece is a differential. The first photos I found where from Keith Enevoldsen’s models. One version of the suspension with a differential bar is also included in the official 21104 Lego model of the Mars Rover “Curiosity”. I used a differential gearbox like the “Pathfinder” Rover “Sojourner”.

I was surprised to see that the suspension is quite sturdy. You can swoosh the rover around applying quite a pressure to the wheels without parts falling off. A simulated jump with some “airtime” wasn’t any problem, either.

The colour scheme is based on my favourite Lego colours lime and black combined with the typical white of the Futuron models. The Astronaut has a Futuron uniform with arms in lime colour and a visor in trans neon green. My name for the theme is “Limeuron” – Guess, why …! ;-))

And here it is: My 6855 “Limeuron Exploration Rover”

A little sequence of the working suspension:

Wheelie time… :-))

And here is the diffential at work:

Time for some maintenance:

One of the storage boxes:

And the obligatory alternative models built with the parts of the original model:

Alternative model #1:
A smaller rover, a scooter and an antenna for radio communication.

Alternative model #2:
Another small scooter and an analysis and storage platform.

Parts count, the easy way:
10 x 10 = 100

This is my entry for the 2013 Classic Space Pocket Money Contest, the 6855 Limeuron Exploration Rover with Rocker-Bogie suspension. I hope you like it :-))

Bonus photos:

Last minute alternative: A scooter/rover and a cargo rocket
Scooter mode with landing gear.

Rover mode with suspension and balloon tires.

CSPMC meeting:
2012 (1979) meets 2013 (1984).

MOCpages Backup: Porsche 959 (4-Wide)

A MOCpages Backup

6,995 visitors
32 comments
Added July 10, 2013

Porsche 959 (4-Wide)

My 4-wide version of Porsche’s Group B Beast, the 959.

What happens if you give anabolic steroides to a Porsche 911? You get a 959! 4-wheel drive, 6-speed gearbox, the first engine with a sequential twin-turbo and an amazing “bodykit” combined with the classic design of the 911.

The 959 was first built as a Group B Rally car and finished 1st and 2nd in the 1986 Paris-Dakar Rally. The street version was the world fastest production car when it hit the streets (Vmax = 195 mph / 317 kph). It was first beaten by the Ferrari F40.

I wanted to build the 959 quite for a while, but I have to admit that Loek Marcus was faster. He was the first buider I know who made a 4-wide 959. But it was Tom’s (DeTomaso Pantera’s) “fault” that I really started building this one. He wrote a comment for my latest 911 that mentioned the 959.

I started with the 911 and tried to combine it with some details from my Audi Sport quattro S1. It became quite difficult to combine the “3-wide” center section of the S1 with the side panels of the 911. There was always a “half plate offset” in the way. But I finally found a solution.

Enough words, time for the photos:

The rear end with the big wing:
This design was only possible with the new 1×2 “half bows”

The “spy” shot:

Back to 1989:
Accolade presents…
The Duel – Test Drive II

(If that doesn’t mean anything to you, take a look here)

F40 vs. 959
3, 2, 1 … Go! 🙂

The beauty and the beast … But which one is which? ;-))

My 4-wide Porsche family:
911, 914, 550 spyder and 959.

So this is my 4-wide LEGO Porsche 959.
I hope you like it. :-))

MOCpages Backup: Japanese 3D Puzzle

A MOCpages backup

Rated 5 out of 5 (20 ratings)
3,744 visitors
12 comments
Added June 23, 2013

Japanese 3D Puzzle

A classic Japanese 3D Puzzle. The (originally wooden) design built with “normal” and Technic bricks.

I’m a fan of these Japanese 3D puzzles. This one is one of the simplier versions, only 6 parts with 3 different forms:

Take this one out to dismantle the whole thing:

6 parts:

3 different designs of the parts:

And the Technic version:

This is how it’s done:

A few axles, some pins and a lot of 2L lever beams.

This is my Japanese 3D puzzle made with “normal” and Technic LEGO bricks.

MOCpages Backup: Porsche 911, Model 964, V1.2 / V1.3 (4-Wide)

A MOCpages Backup

Rated 5 out of 5 (29 ratings)
6,205 visitors
24 comments
Added March 19, 2013

V1.2 and V1.3 of my 4-wide Porsche 911, model 964, including a new front and a new roof line.

Time for a new version of this German classic sports car.

Even after my V1.1 I still wasn’t 100% satisfied with the iconic shape of the classic Porsche 911. The sillhoutte was too long, especially the roof section and the front.

So I tried some more designs and this is the result (for now) ;-))

This model really was waiting for the white 1×4 bow… I mainly bought 31006 for these parts and the 1×2 “grill wedges”


Here you can see the evolution of my 4-wide 911: V1.0, V1.1 and V1.2 (top 1st).

No changes on the rear end

I love this view. It looks so 911 on this one ;-))

Another rear side view.

And again: The new profile.

So this is V1.2 of my 4-wide LEGO Porsche 911, Model 964. I hope you like it :-))

Update March 28, 2013: V1.3
With V1.2 posted a few days ago I had an idea for a new rear end.
As the change isn’t really big I decided to update this page instead of posting a new one. So this is it:
A new SNOTty rear bumper with a “half plate offset”.

Side view:
New SNOT side panels to match the height of the front and rear bumper.

So this is V1.3 of my 4-wide LEGO Porsche 911, Model 964. I hope you like this one, too :-))

And last, but not least, for my fellow LEGO purists:

————————————-
DECLARATION OF PURITY

Foreign parts: No
Cut flextube or pneumatic hose: No
Other cut or modified parts: No
Custom chrome: No
Custom stickers or decals: No
Cut Lego stickers: No
Paint: No
————————————-

MOCpages Backup: VW T1 Renntransporter “Rennstall Bunker” (4-Wide)

A MOCpages Backup

6,828 visitors
33 comments
Added March 11, 2013

VW T1 Renntransporter "Rennstall Bunker" (4-Wide)

The Volkswagen T1 flatbed “Renntransporter” with longer wheelbase as used by the “Rennstall Bunker” in the late 1950s

I already built the 550 spyder with the T1 Renntransporter in mind. I wanted to build this team in 4-wide scale since I first saw Senator Chinchillas fantastic big version in the Classic Race Teams group.

So this is basically a 4-wide version of his model.

I already had made some 4-wide T1, especially my small version of the 10220 Camper. So the basic design of the T1 was already there.

I wanted to have the Porsche and the T1 as 4-wide models, so I had to leave the idea of hinges for the side panels. Instead of hinges and tiles like on my earlier double cab flatbed Transporter I used three 2×4 tiles on each side. To imitate the opening of the side panels the tiles can be positioned 1 stud lower.

Ah, the cargo has arrived ;-))
Art Bunker (USA) / Charles Wallace (USA) finished the Sebring 12 Hours 1957 (the 2nd race of the 1957 FIA World Sportscar Championship) 8th overall and 1st in the Sport 1500 “Class F”, driving Bunker’s Porsche 550 spyder.

On the flatbed between the wheels of the loaded car there is room for two 1×8 tiles.

The tiles can be used as rails for a ramp to load and unload the Transporter.

There is goes…

And there it is, ready to go…

Credits: Please take a look at the 4-wide T1 models built by Isaac, Hot Rod, Dylan, Klingus and Ben and you’ll find one or another detail I used on this model.

Bonus photo:
The rest of the Volkswagen T1 family: Camper, Flatbed Transporter and Panel Van.

So this is my VW T1 Renntransporter as used by the Rennstall Bunker. I hope you like it :-))

MOCpages Backup: Shelby Cobra 427 V2.1/V2.2 (4-Wide)

A MOCpages Backup

Rated 5 out of 5 (33 ratings)
5,295 visitors
25 comments
Added February 9, 2013

Two more updates for my 4-wide Ford AC Cobra 427: SNOT Stripes and a new rear end.

When I first saw these SNOT stripes on Starscream Soundwave’s 4-wide Viper I knew I had to make some of these for my Cobra, too. The original design of the stripes on a 4-wide is most probably from J K’s Zonda and there are some cool instructions made by Loek Marcus how to attach them to a 4-wide. But I had no idea how to put them into my Cobra without messing up the design.

One day I took my notebook on a larger train tour and had a few hours to work on this problem with LDD. I finally found a way to attach the stripes in the front without changing the overall look of the car. And then I had the idea to use slider plates to create an air scoop on top the hood including the stripes.

This is the result:
Yes, I really …

… love …

… these stripes :-))

And this is how they are done.

The rest of the design didn’t change.

So this is V2.1 of my 4-wide LEGO Shelby Ford AC Cobra 427, now with SNOT stripes and air scoop. I hope you like it as much as I do :-))

Bonus photo:
The latest family picture of my 4-wide Cobras.

Update December 9, 2013:
With the new 1x2x2/3 “half bow” parts I had some ideas for new shapes on the Shelby Cobra:
Smooth lines on the hood. The thin black stripe had to go in this version, but the SNOT air scoop is still there.

The new rear end:
The tail lights are “borrowed” from Karsten’s VW Bus.

So curvy…

And another front view:

Evolution of the snake:
V2.0 and V2.2 of my 4-wide Lego Shelby Cobra 427 – I had to use the black V2.1 model for V2.2, but the dark blue V2.0 is still here.

MOCpages Backup: Batmobile Tumbler V1.2 (4-Wide)

A MOCpages backup

Rated 5 out of 5 (35 ratings)
5,626 visitors
25 comments
Added January 13, 2013

Batmobile Tumbler V1.2 (4-Wide)

An update for my 4-wide tumbler with a new front, new flaps on the rear end and a camouflage version.

After some other projects now it’s time for a 4-wide, again. I already finished an intermediate version in MOCtober but then I was busy with NnoVVember, the CS Pocket Money Contest and some more models that had been waiting to be posted…

Well here it is, Version 1.2 of my 4-wide Tumbler, and
– TADAA –
This time I made a camouflage version, too :-))

It was very hard to find all the needed parts in tan or reddish brown. I made seven (!) BrickLink orders until I had all of the parts I needed. The most difficult parts to get were the tan side panels. I could have bought a small LEGO set for the money I paid for these. But they look so cool! ;-))

Some changes on the front: The Tumbler now has the double front windows and the “nose” section looking a lot more like the original. I had the idea to use the large tile from Chris Rogers’ Tumbler. His Tumbler is bigger, but the look is very similar.


And a little change on the rear end: The hinge plates I used for the 1×2 flaps on the previous versions didn’t exist in tan or brown, so I looked for a new way to build them. The new ones are even more flexible, they now can tilt and turn a few degrees.

Side view: Mainly the changes on the front stand out.

The camouflage version only, it’s the model from “Batman Begins”:

“Does it come in black?” – Of course, it does! ;-))

This is V1.2 of my 4-wide Lego Tumbler Batmobile.
I hope you like it :-))

MOCpages Backup: Lighthouse in a Bottle

A MOCpages backup

Rated 5 out of 5 (48 ratings)
5,553 visitors
31 comments
Added January 1, 2013

Lighthouse in a Bottle

A microscale version of the German lighthouse “Westerheversand” built in a bottle.

I definitely left my comfort zone for this one. My Dad is a lighthouse fan and travels a lot to take photos of these unique buildings. For his birthday my mother had the idea to build a LEGO lighthouse in a bottle just like I had done with my Lamborghini Countach.

I picked the lighthouse “Westerheversand” because it is one of the most beautiful and famous German lighthouses and one of my dad’s favourites.

Microscale buildings are far away from my comfort zone. Considering that, the design process was a lot a fun. Just like for the Countach I built modules small enough to go through the bottleneck and then mounted them inside. These are the modules:

The most difficult part was to find a bottle in which I could build the model. It had to have an almost square shape in the front view and a big bottleneck for the Technic “belt wheel” I used for two platforms. A Whiskey bottle had the right size for the lighthouse but the opening of the bottleneck was smaller than it looked from the outside.

So I had to cut off a part of the bottleneck to get a bigger opening:

The opening now is just big enough for this wheel:

And this is the result:

Another front view, now with some daylight:

And a rear view:


This is my micro scale LEGO lighthouse “Westerheversand” built in a bottle.
I hope you like it :-))

Oh, I almost forgot this:
A Happy New Year to all of you :-))

MOCpages Backup: CS Pocket Money Contest: 892 Surface Explorer

A MOCpages backup

Rated 5 out of 5 (32 ratings)
4,851 visitors
28 comments
Added December 20, 2012

CS Pocket Money Contest: 892 Surface Explorer

My entry for the Classic Space Pocket Money Contest: The 892 Surface Explorer, a surface scooter carrying a little rover for further exploration.
First of all, thanks to the Davids for the idea and the realization of The Classic Space Pocket Money Contest. When I first saw the invitation I thought that it was just like made for me :-))

I knew that I wanted to do something like the 6890 Cosmic Cruiser but with the original 1979 look. And it had to carry a rover, not a scooter. When I came home that day I immediately started the design process. This is the result:

The 892 Surface Explorer

Here you can see the rover. It glides with its mudguards on some tiles in the rear of the scooter. It is fixed on its rear end to the scooter with a single 1×2 tile.

Once the driver has taken his seat, the rover can be detached by moving the 1×2 tile.

And there it goes.

Meanwhile the other spaceman can work on the computer…

…or fix something.

He can also take his seat again…

… and go for a spin.

There…

…and back again.

Moving the rover back into its position.

There it is…

And fixed again.

You can count the parts if you want:

There should be 86. LDD counts 102 parts including 5 for each of the 2 sets of newer wheels (instead of 1) and 5 for each of the 2 spacemen (instead of 1). All of the parts should have been available in 1979. In fact, many of them are from 1979 ;-))

And now for the alternative models…
Each of the alternative models uses all of the 86 parts!

Alternative model #1:

A 2 seated scooter (similar to 442/891), a rover (similar to the one in set 483/920) and a little rocket launch pad.

3 – 2 – 1 – Ignition! – Lift off!

Let’s see what’s that over there…

Alternative model #2:
A small scooter (similar to 885), a little pick-up truck and a radio relay station.

A spaceman can go for further exploration with the truck…

…or with the scooter.

Alternative model #3:
A big 2 seated scooter and a mini rover.

Let’s see how fast this thing can go!

Any similarities in shape to certain Corellian freighters are pure coincidence ;-))

So this is my entry for the Classic Space Pocket Money Contest, the LEGO 892 Surface Explorer. I hope you like it :-))

Bonus feature #1: The LDD file with all 4 models

Feel free to download it and build your own one :-))

Bonus feature #2: Just playing around – Some more ideas for alternative models