Magic Folding Cube Basic “Skeleton”

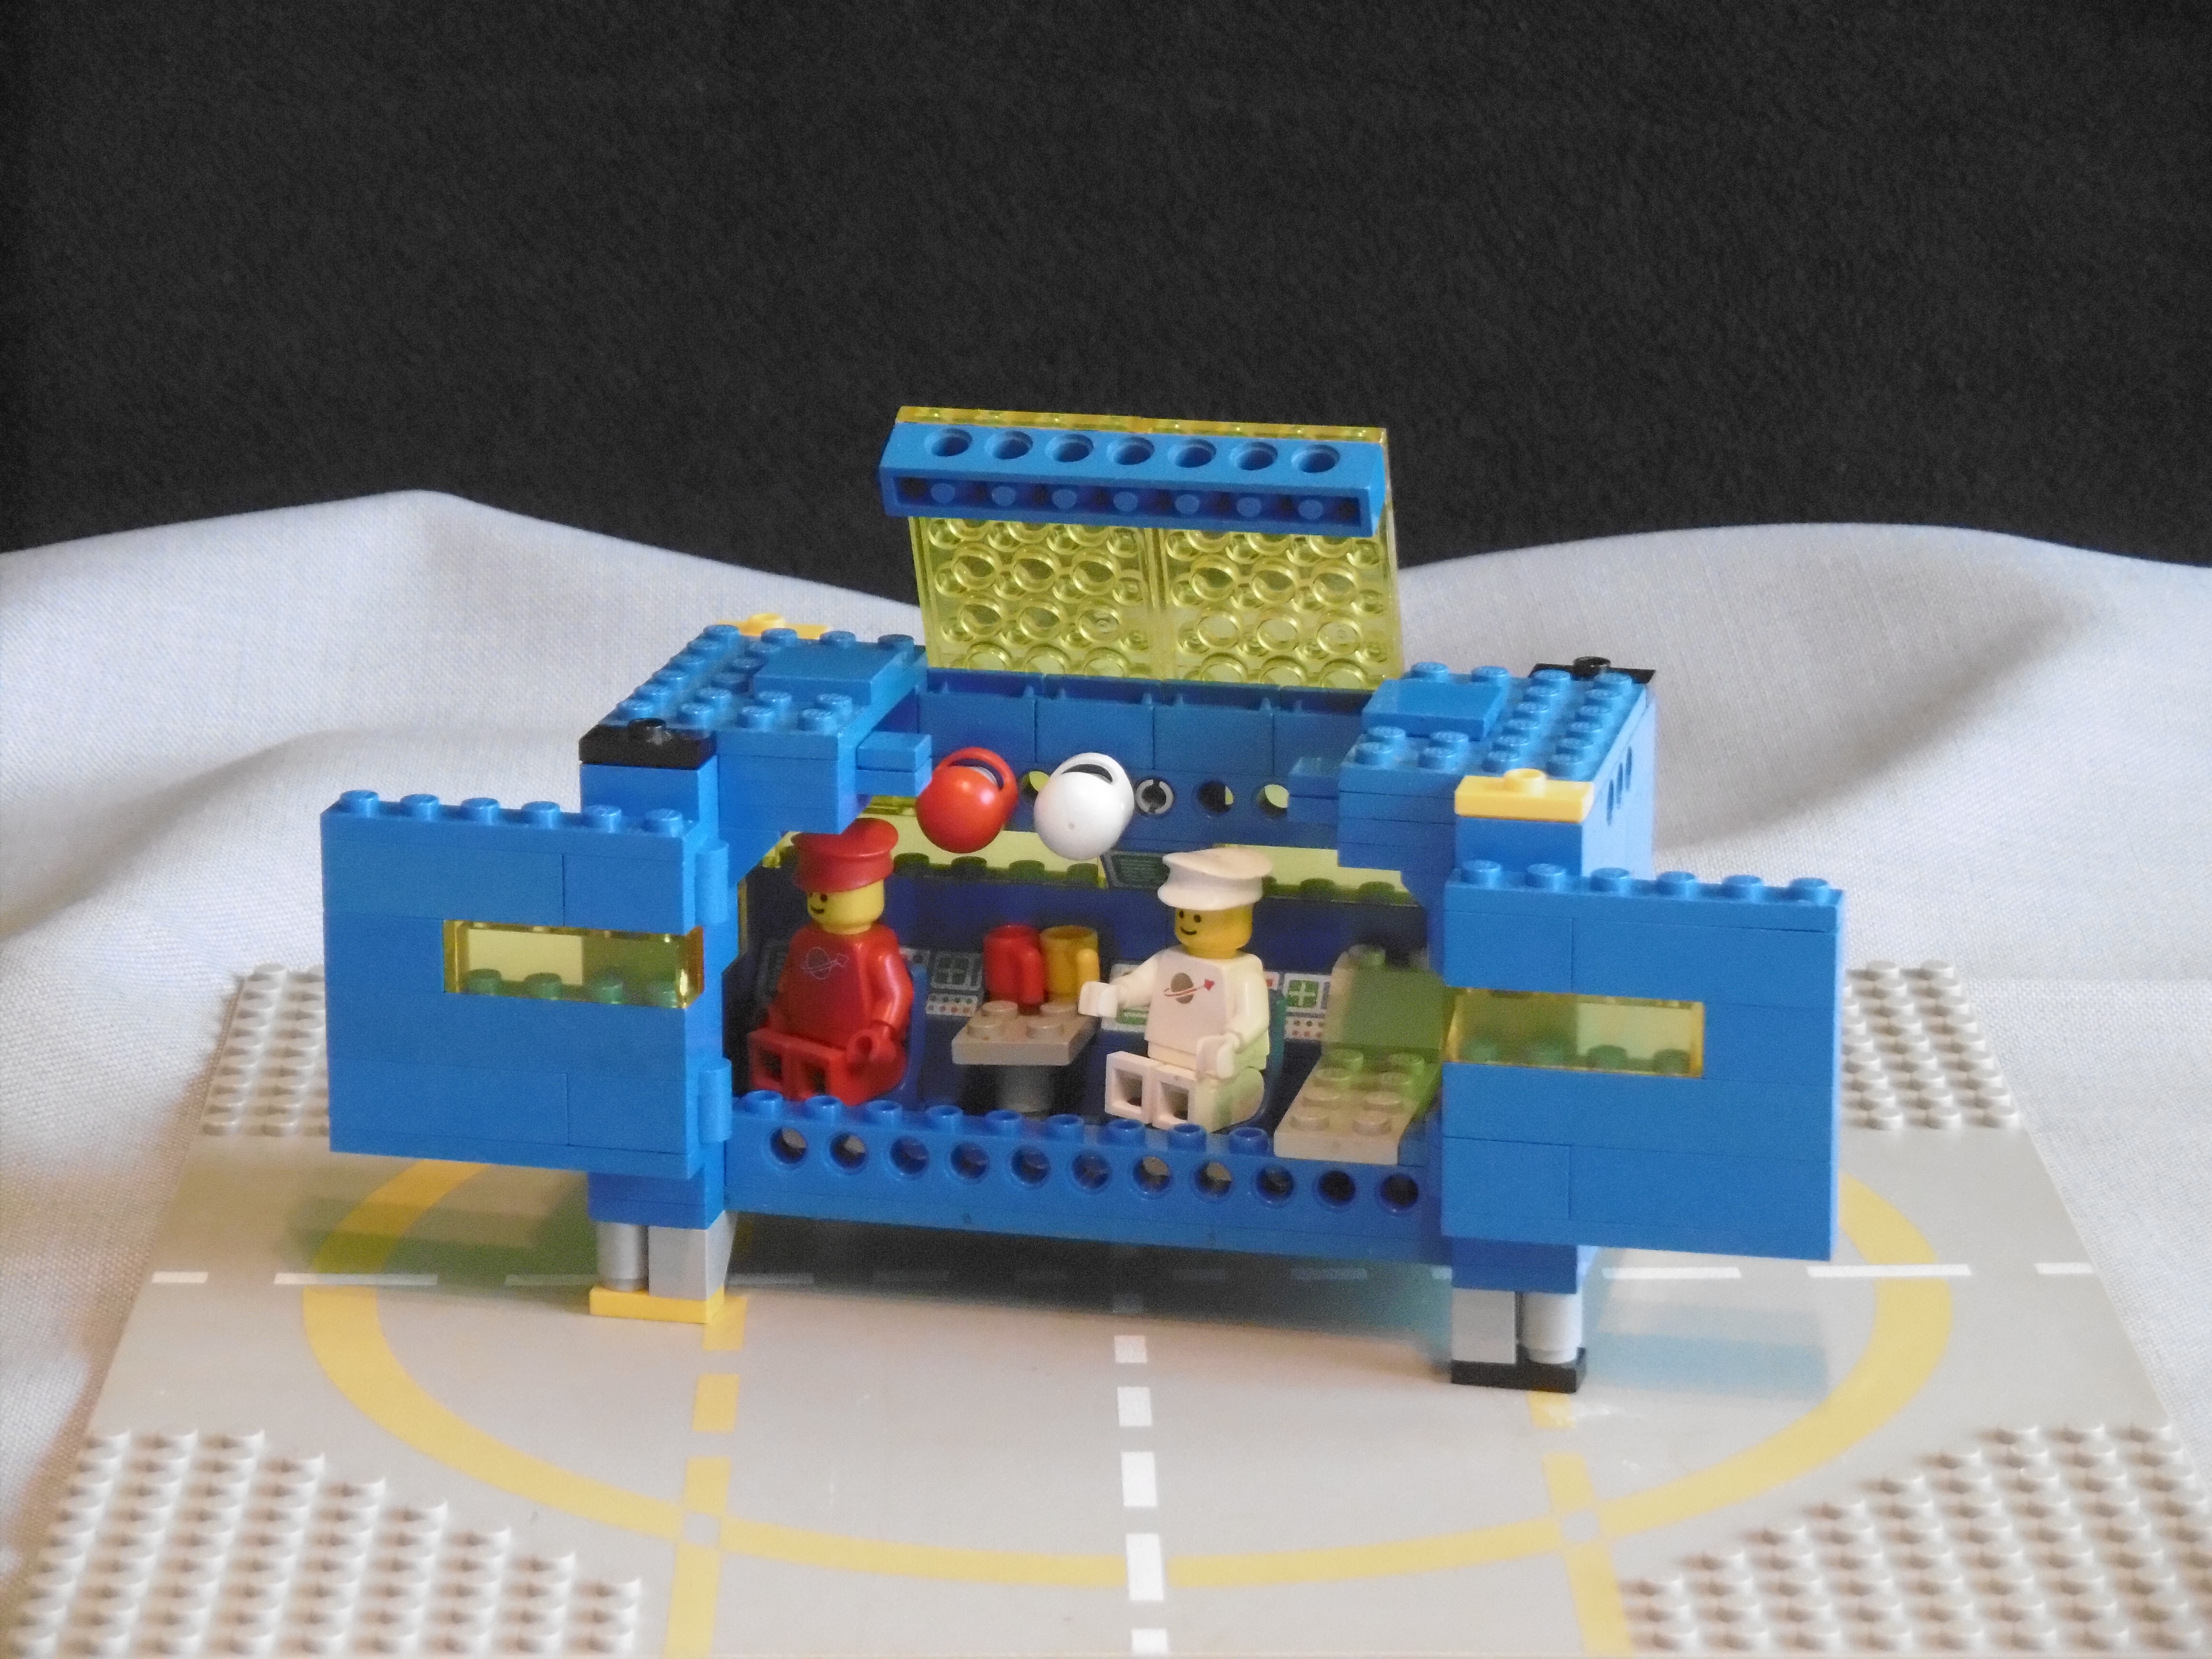
A basic “skeleton” for new design variations based on my Magic Folding “Fidget” Cube.

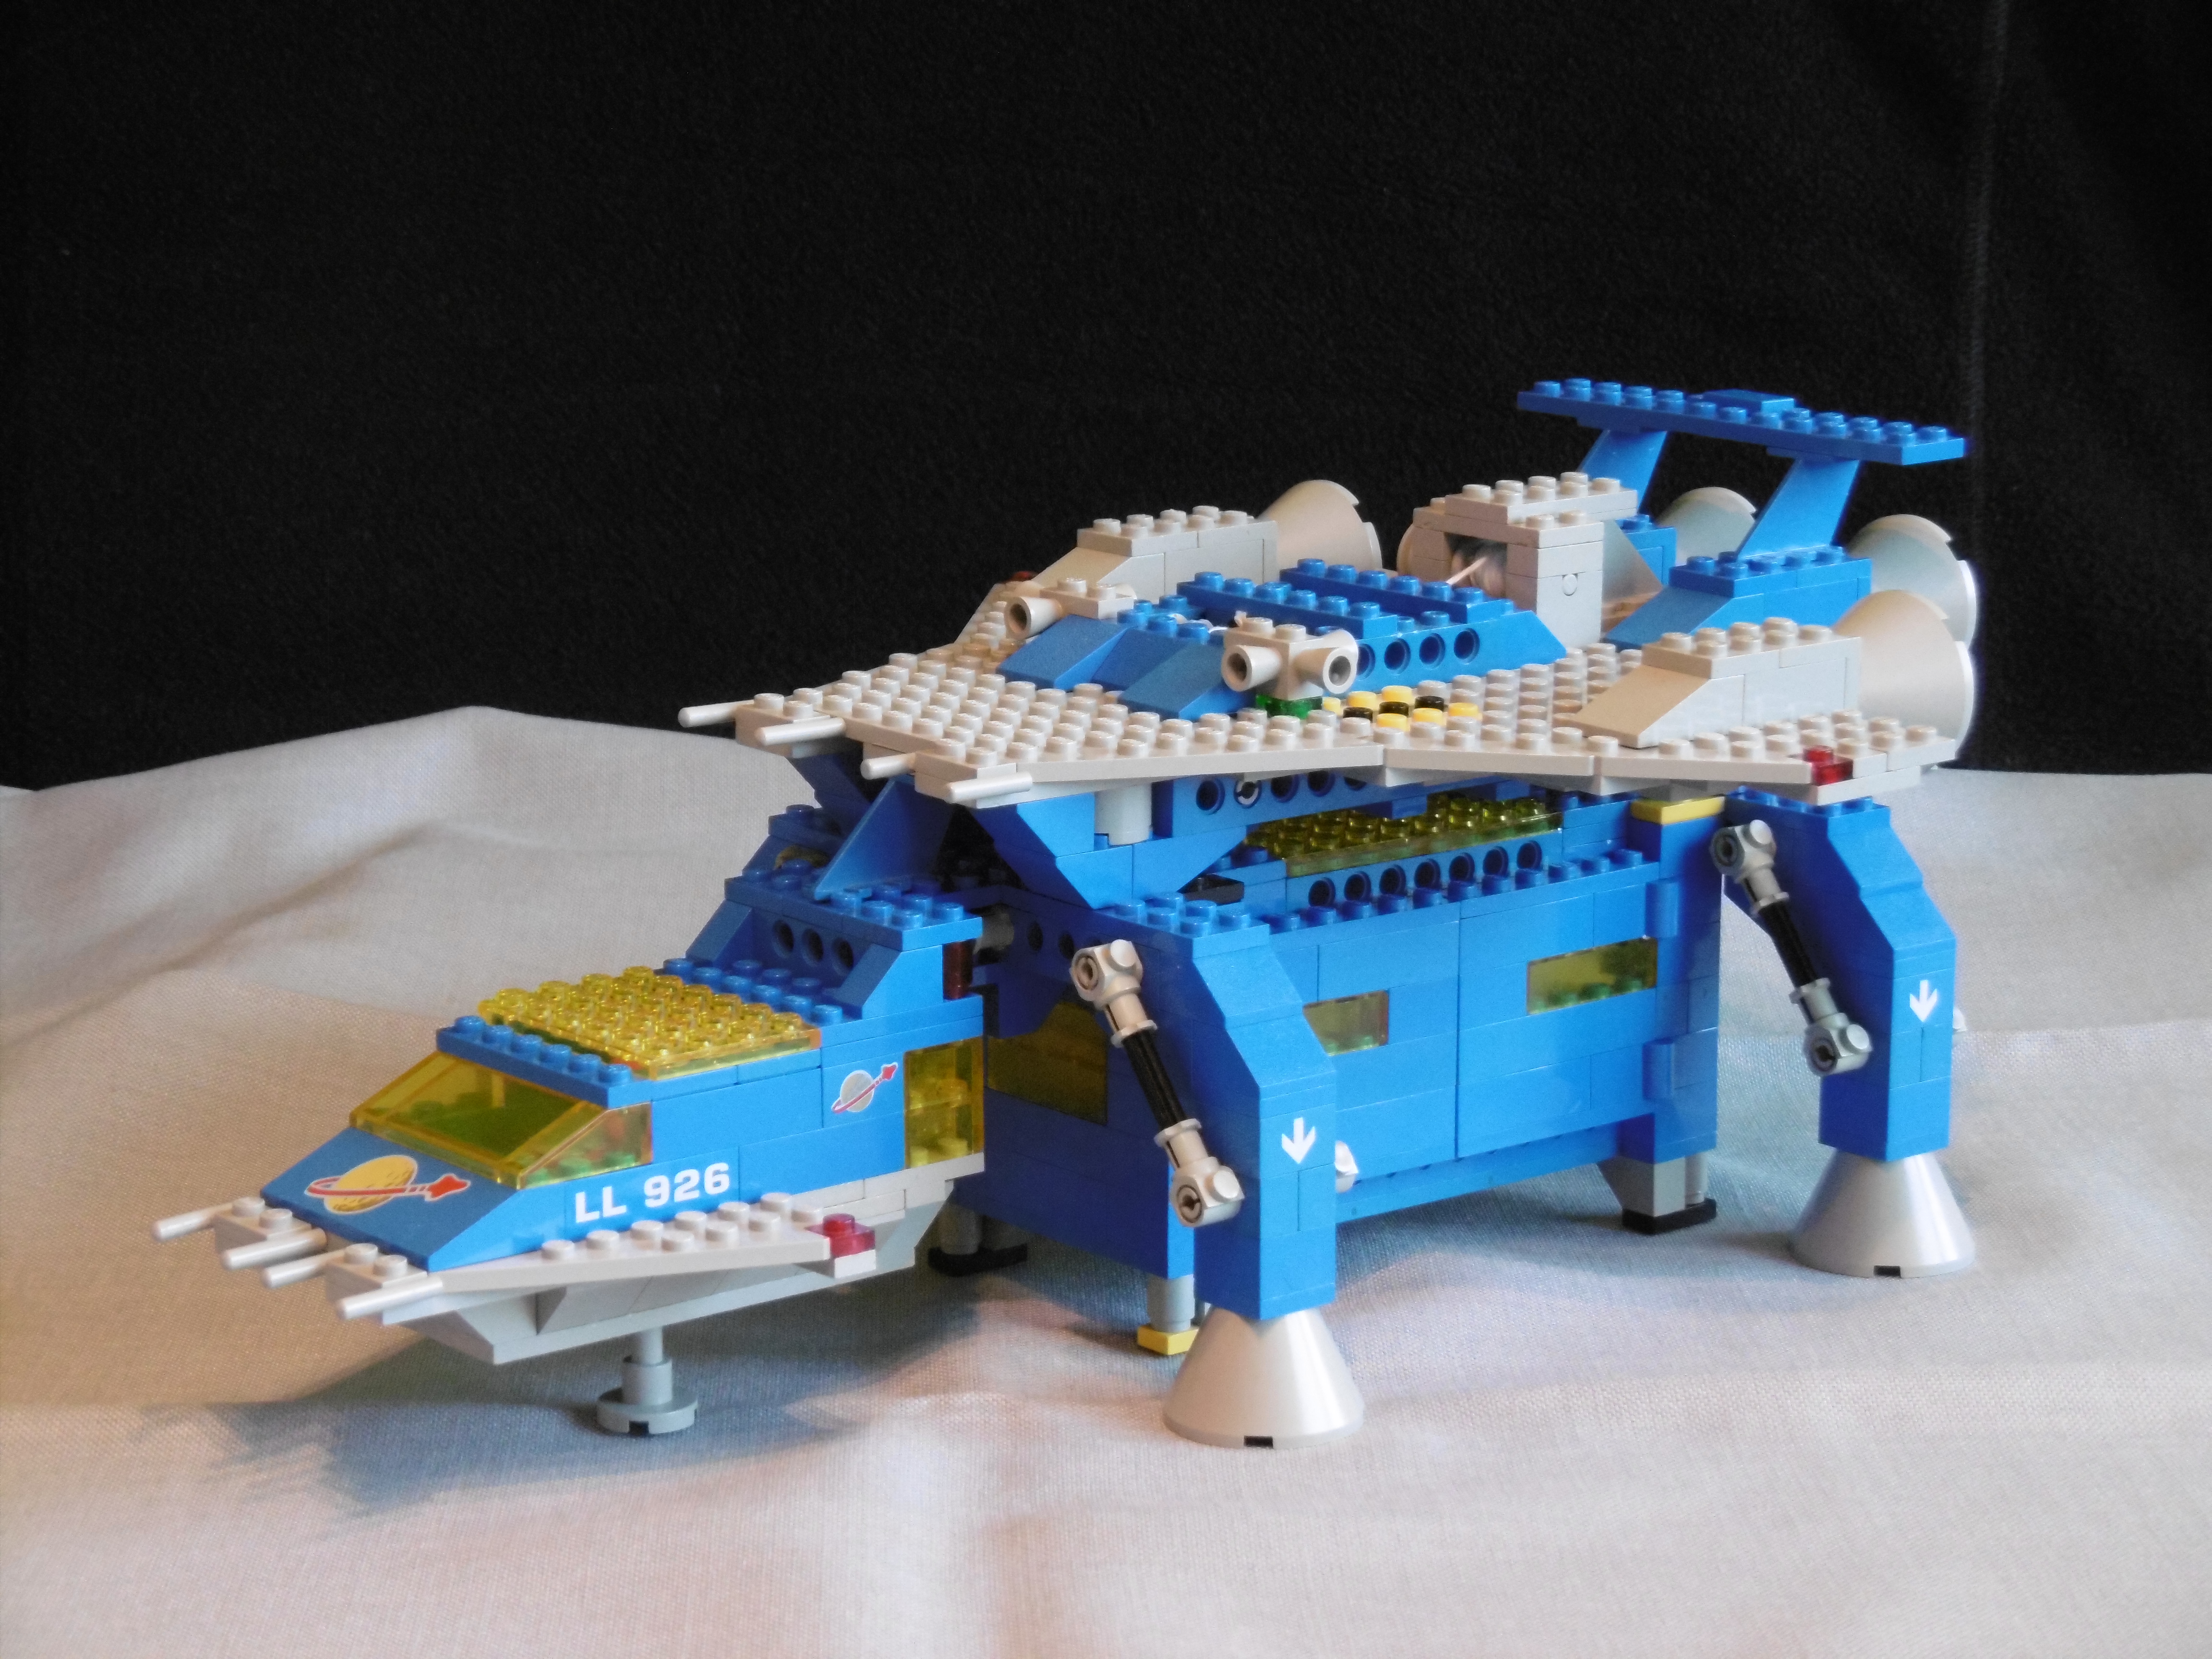
“Fidget Toys” have become quite popular ultimately and with all those spinners and tiny cubes on the market Lego fidget toys did get some attention, too. One of those Lego toys is a folding cube based on promotion picture cubes.

My Lego version is from 2014 and you can find quite a few of similar (or even identical) cubes sold as fidget toys in online “brick” shops.  I don’t know if they are copies, built by “reverse engineering” based on my cube or simply parallel developments based on the same ideas I had. But they exist and look just like my one.

Anyway, I thought I could go a step further with the design of the cube. A comment on my original cube on flickr inspired me to make a more interesting version that didn’t look just like “a cube”.

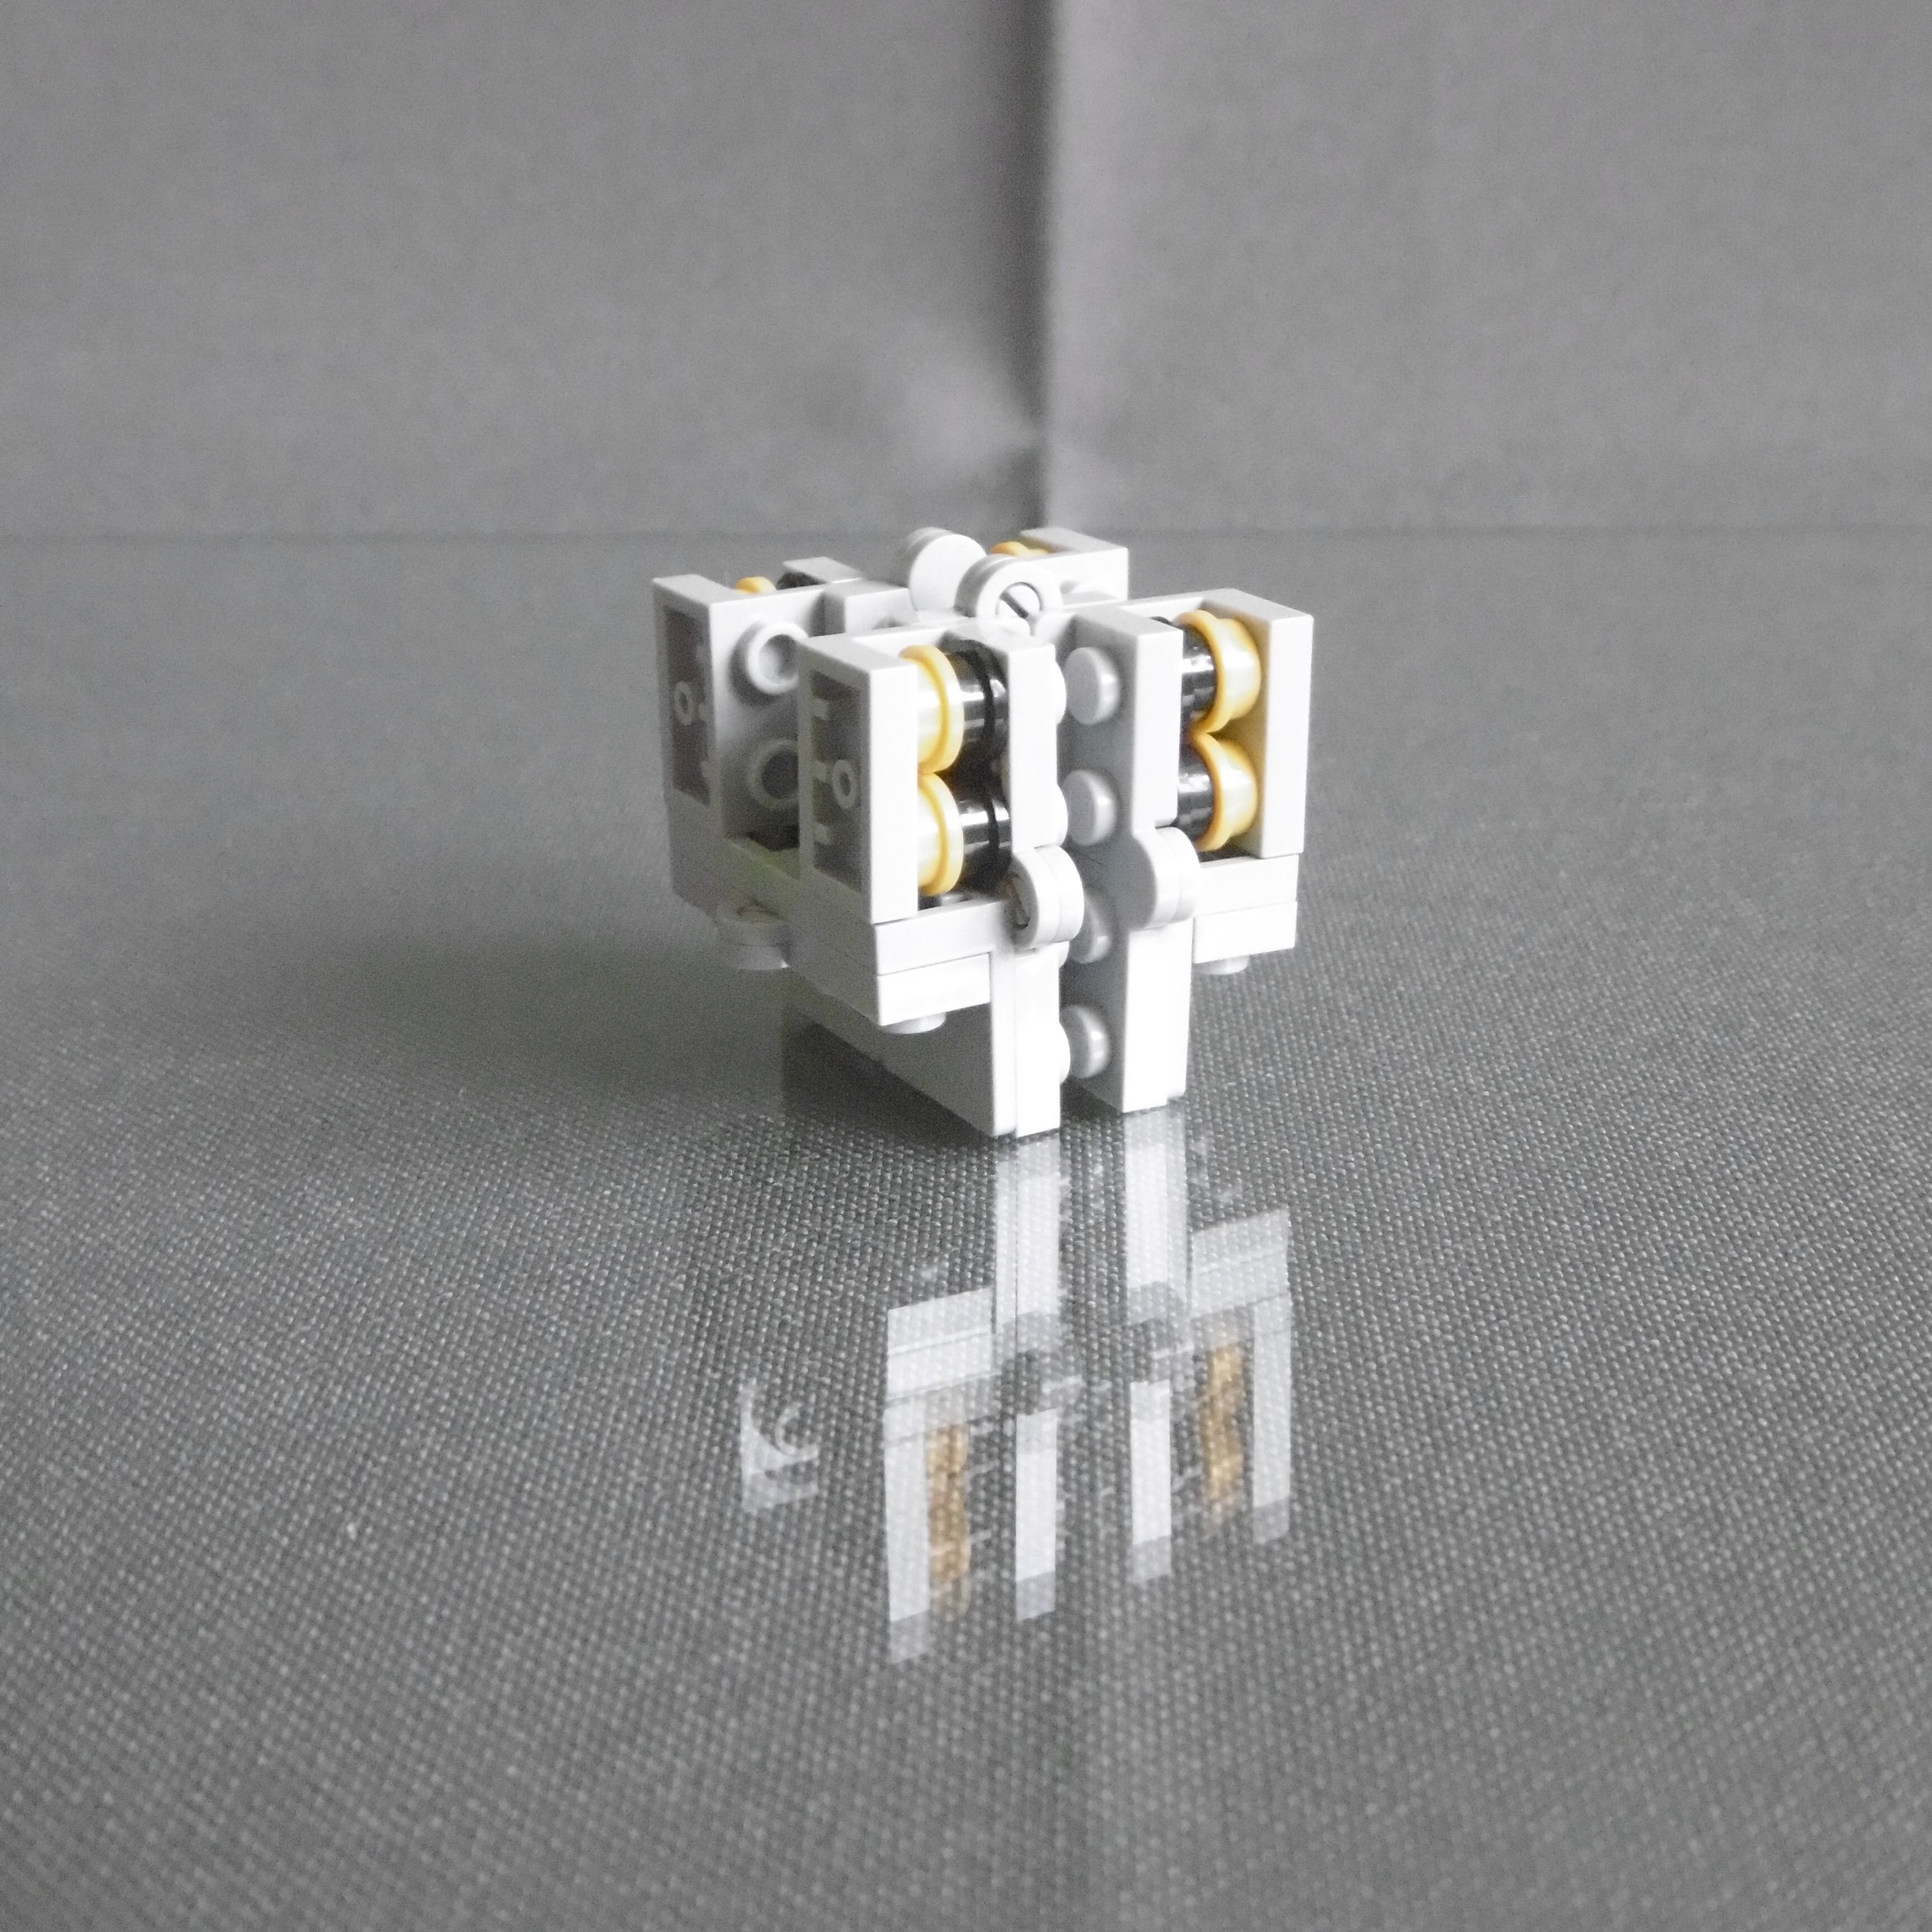
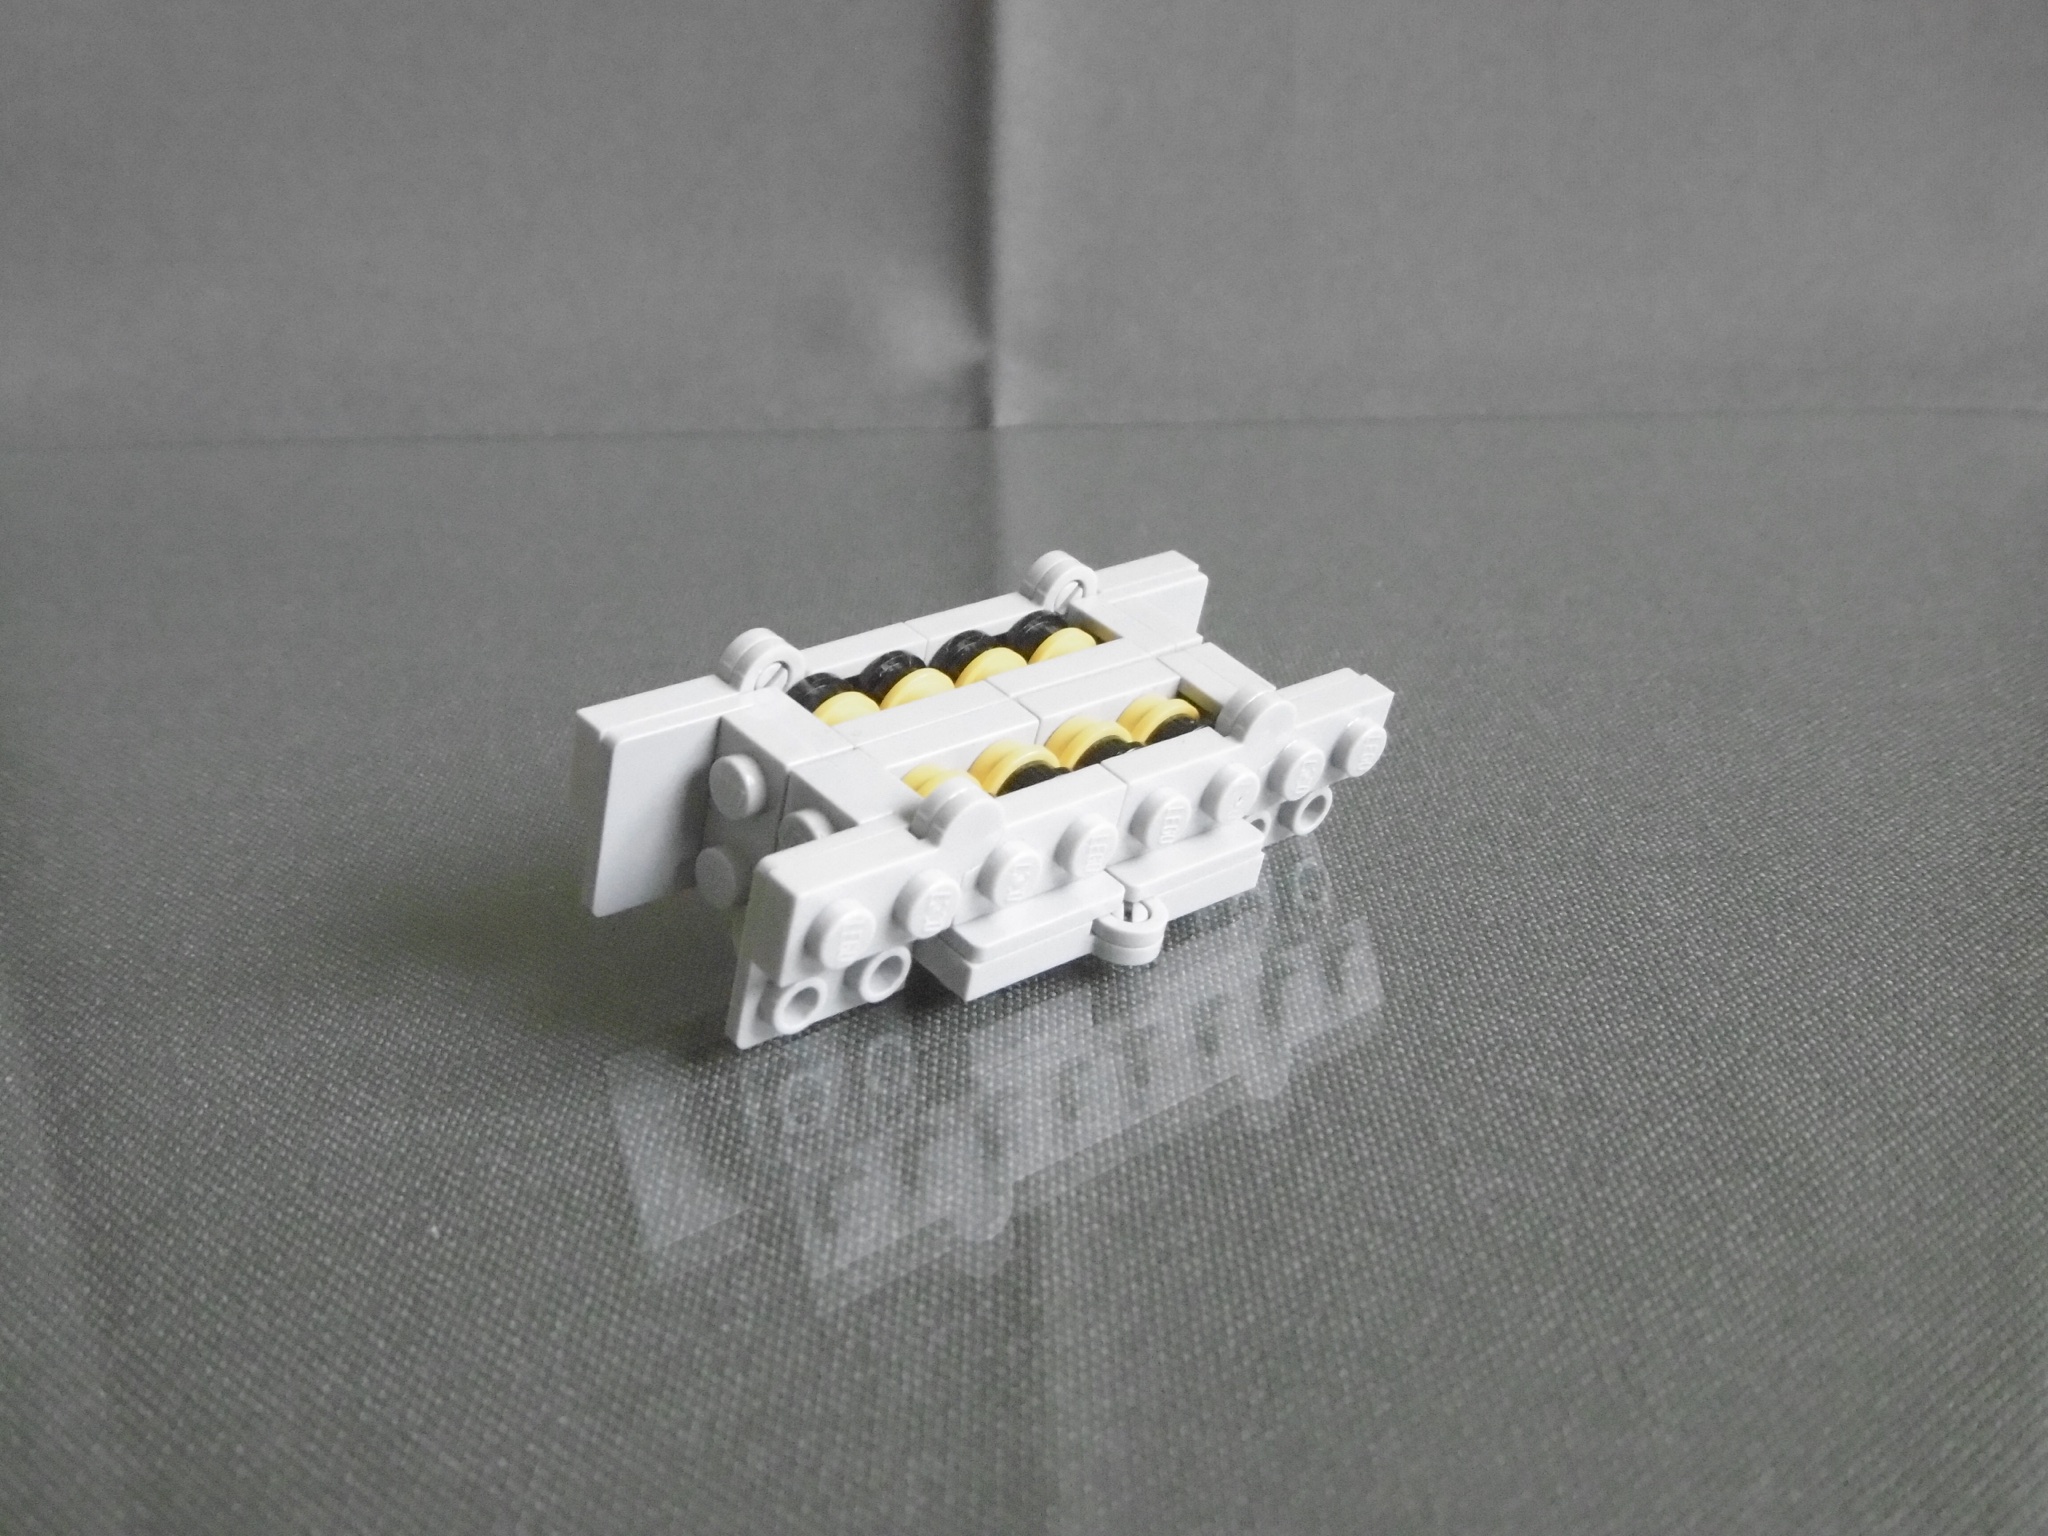
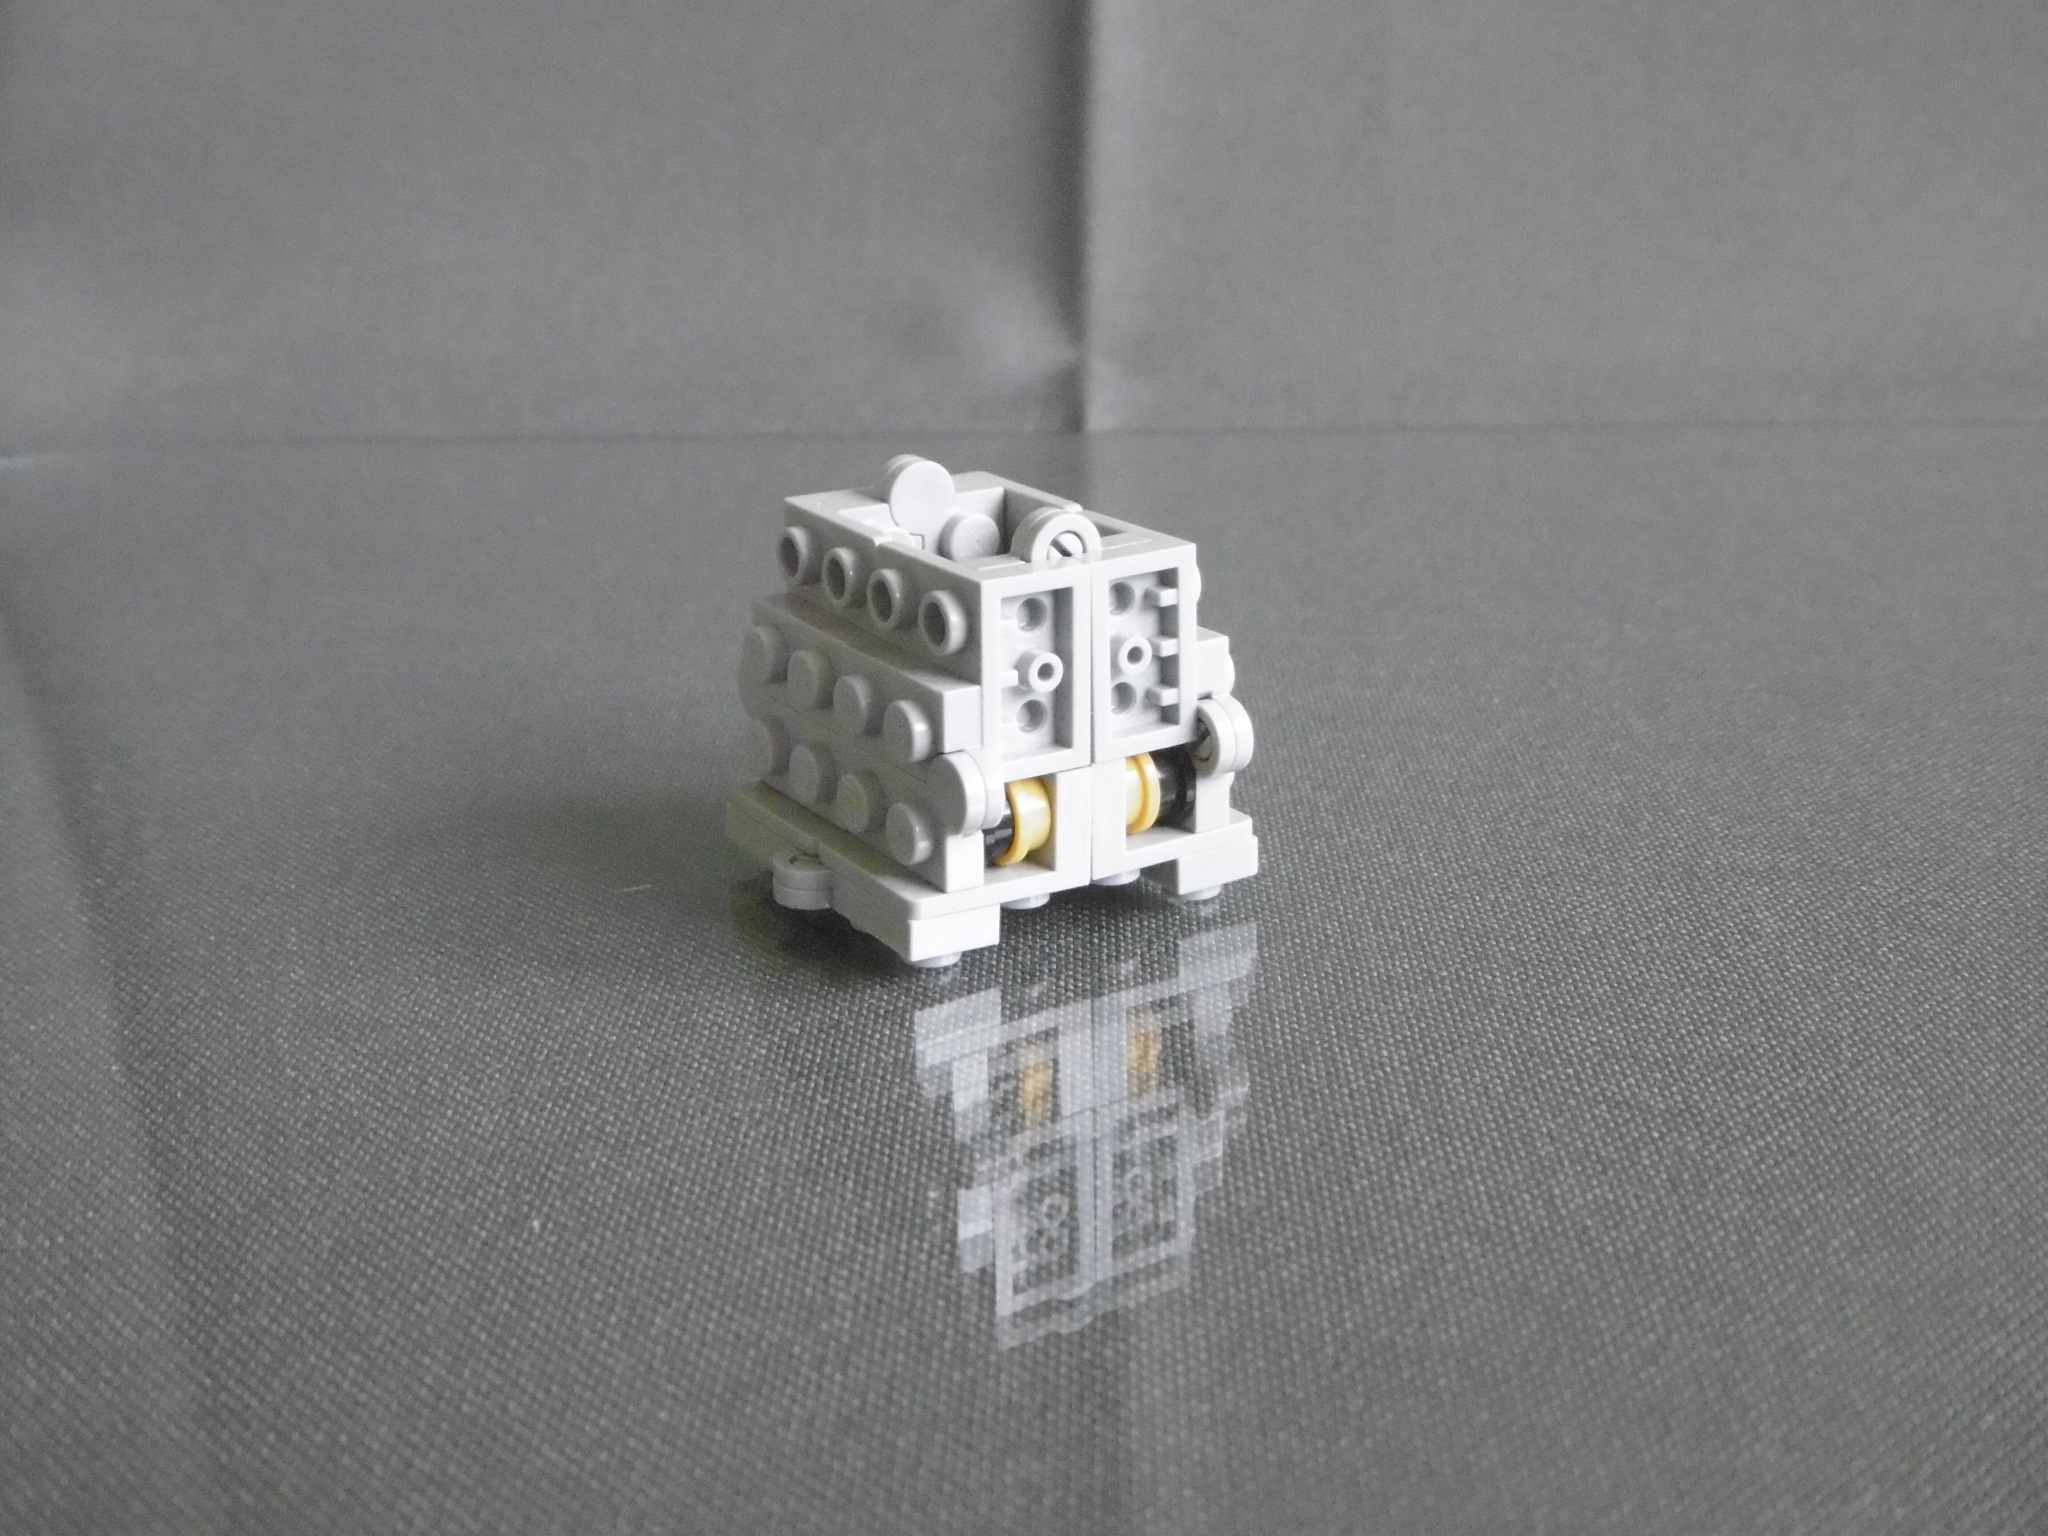
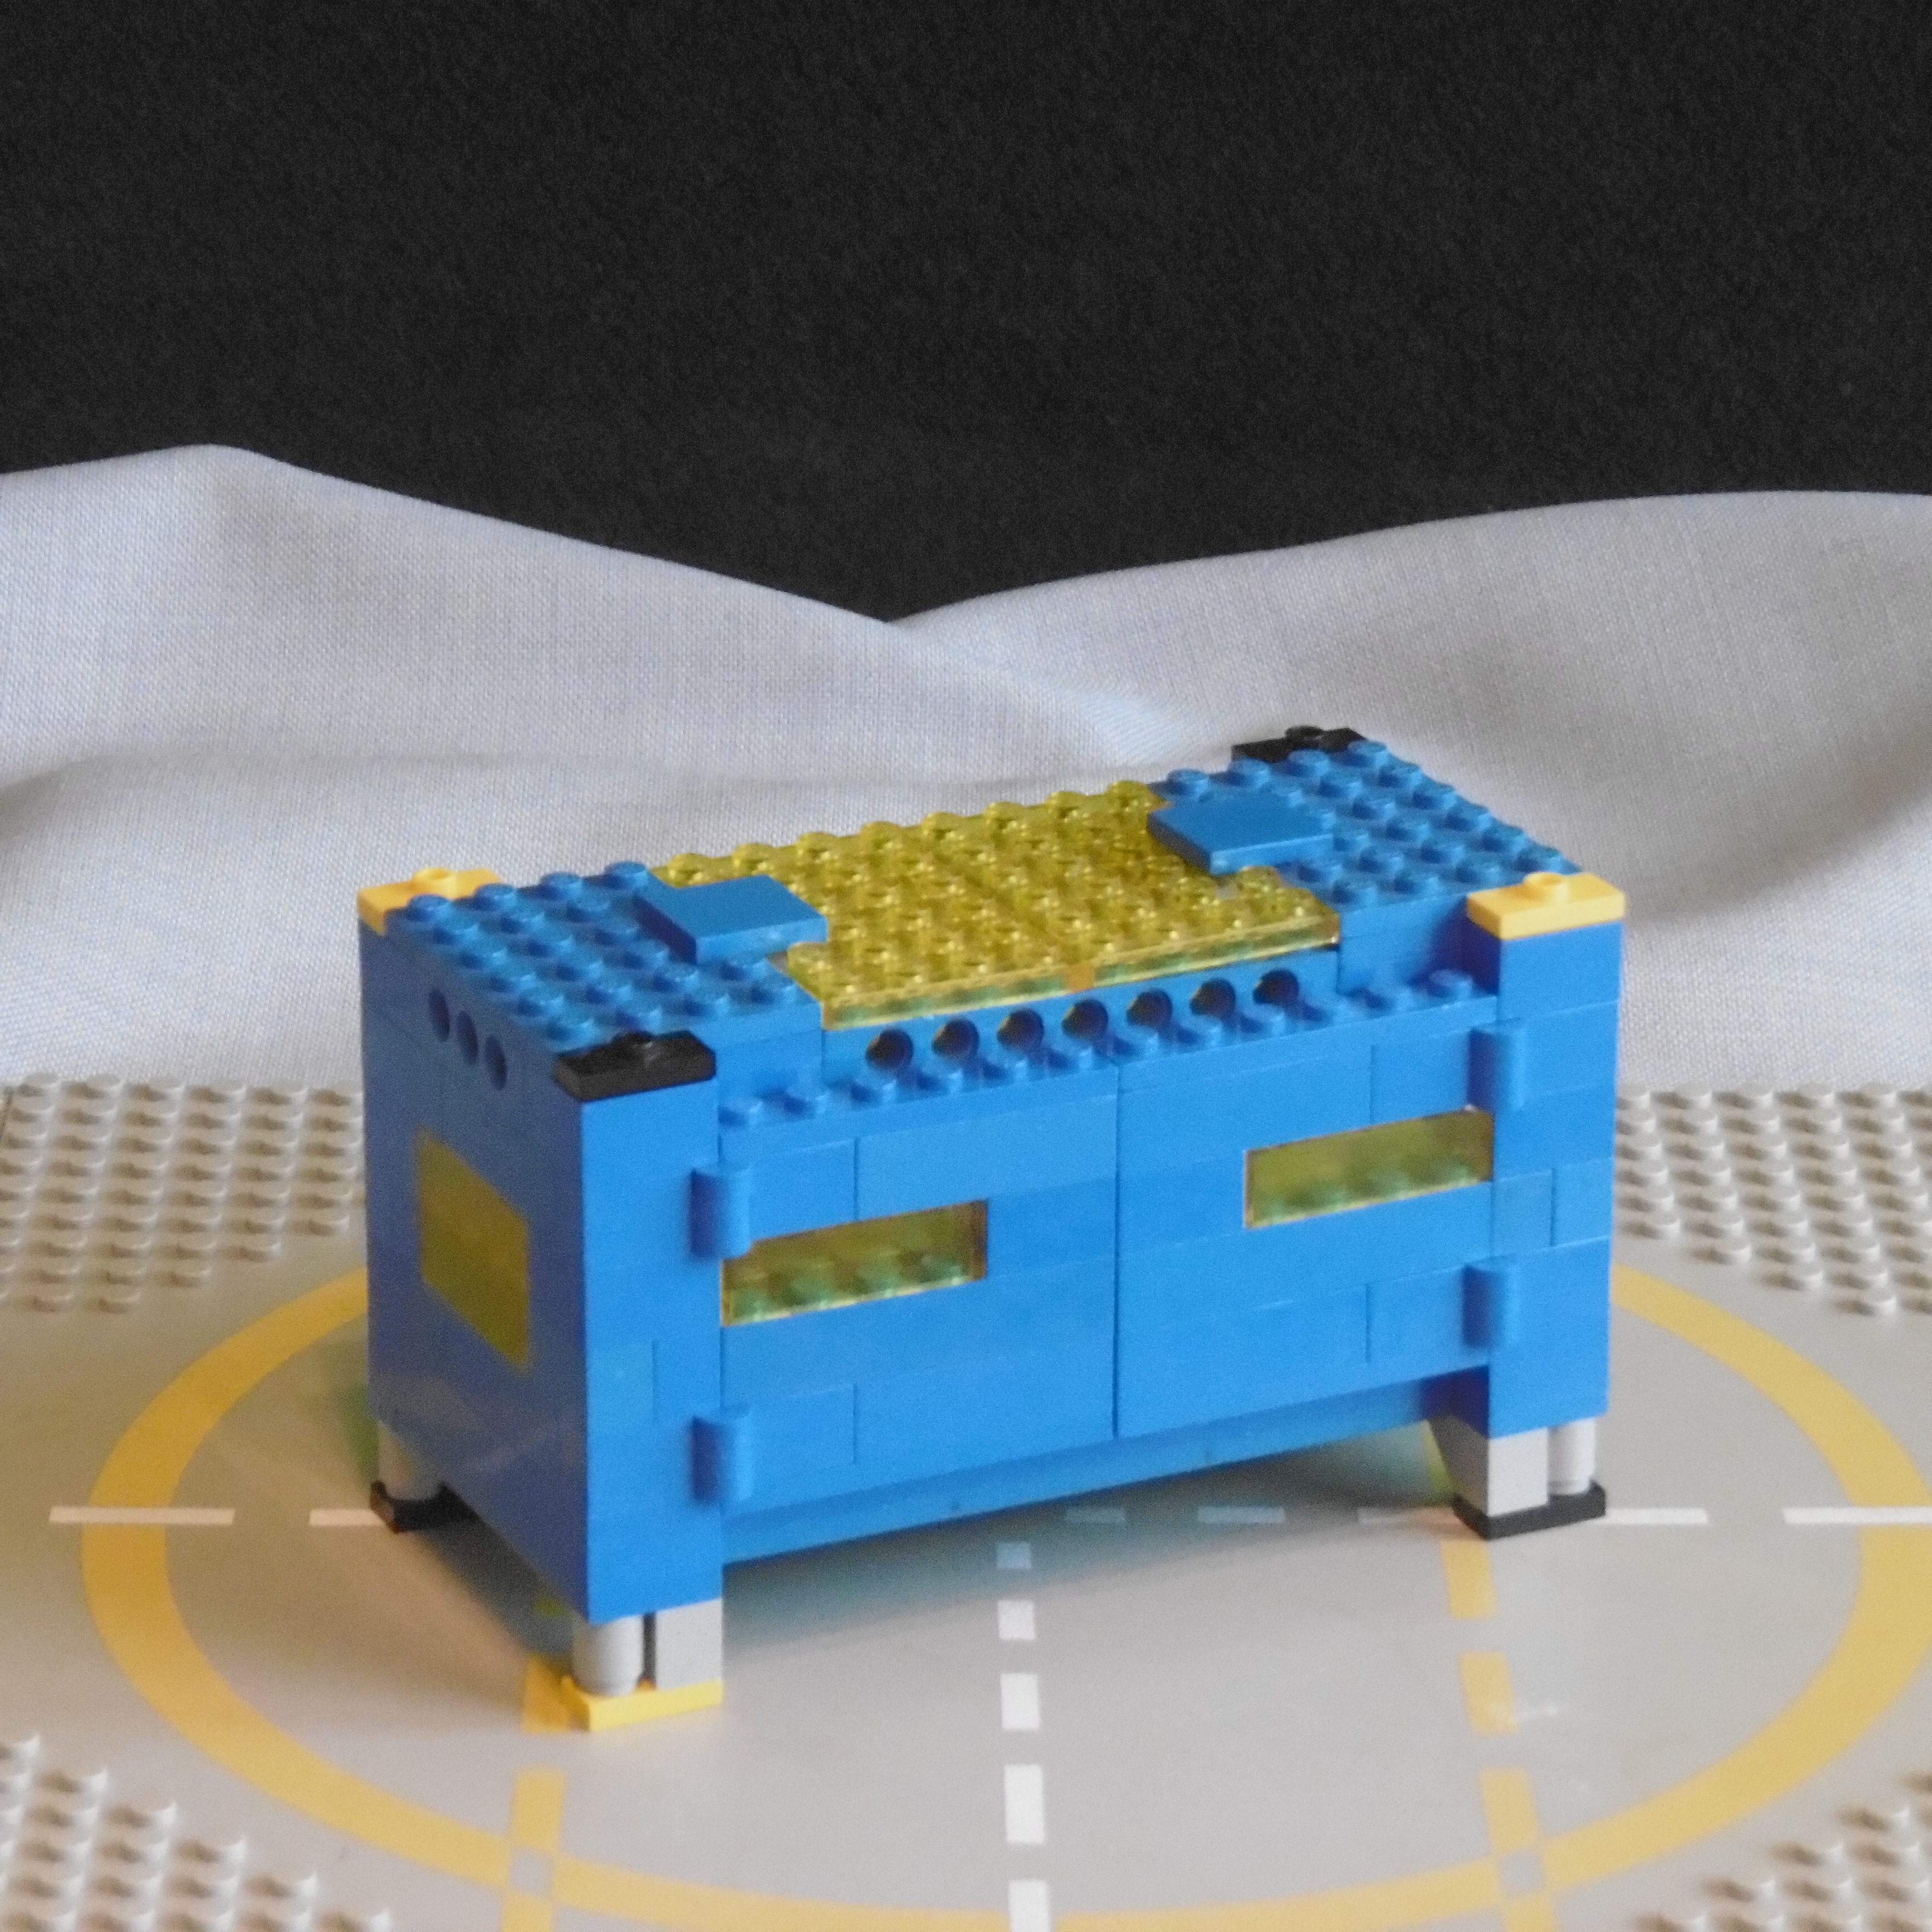
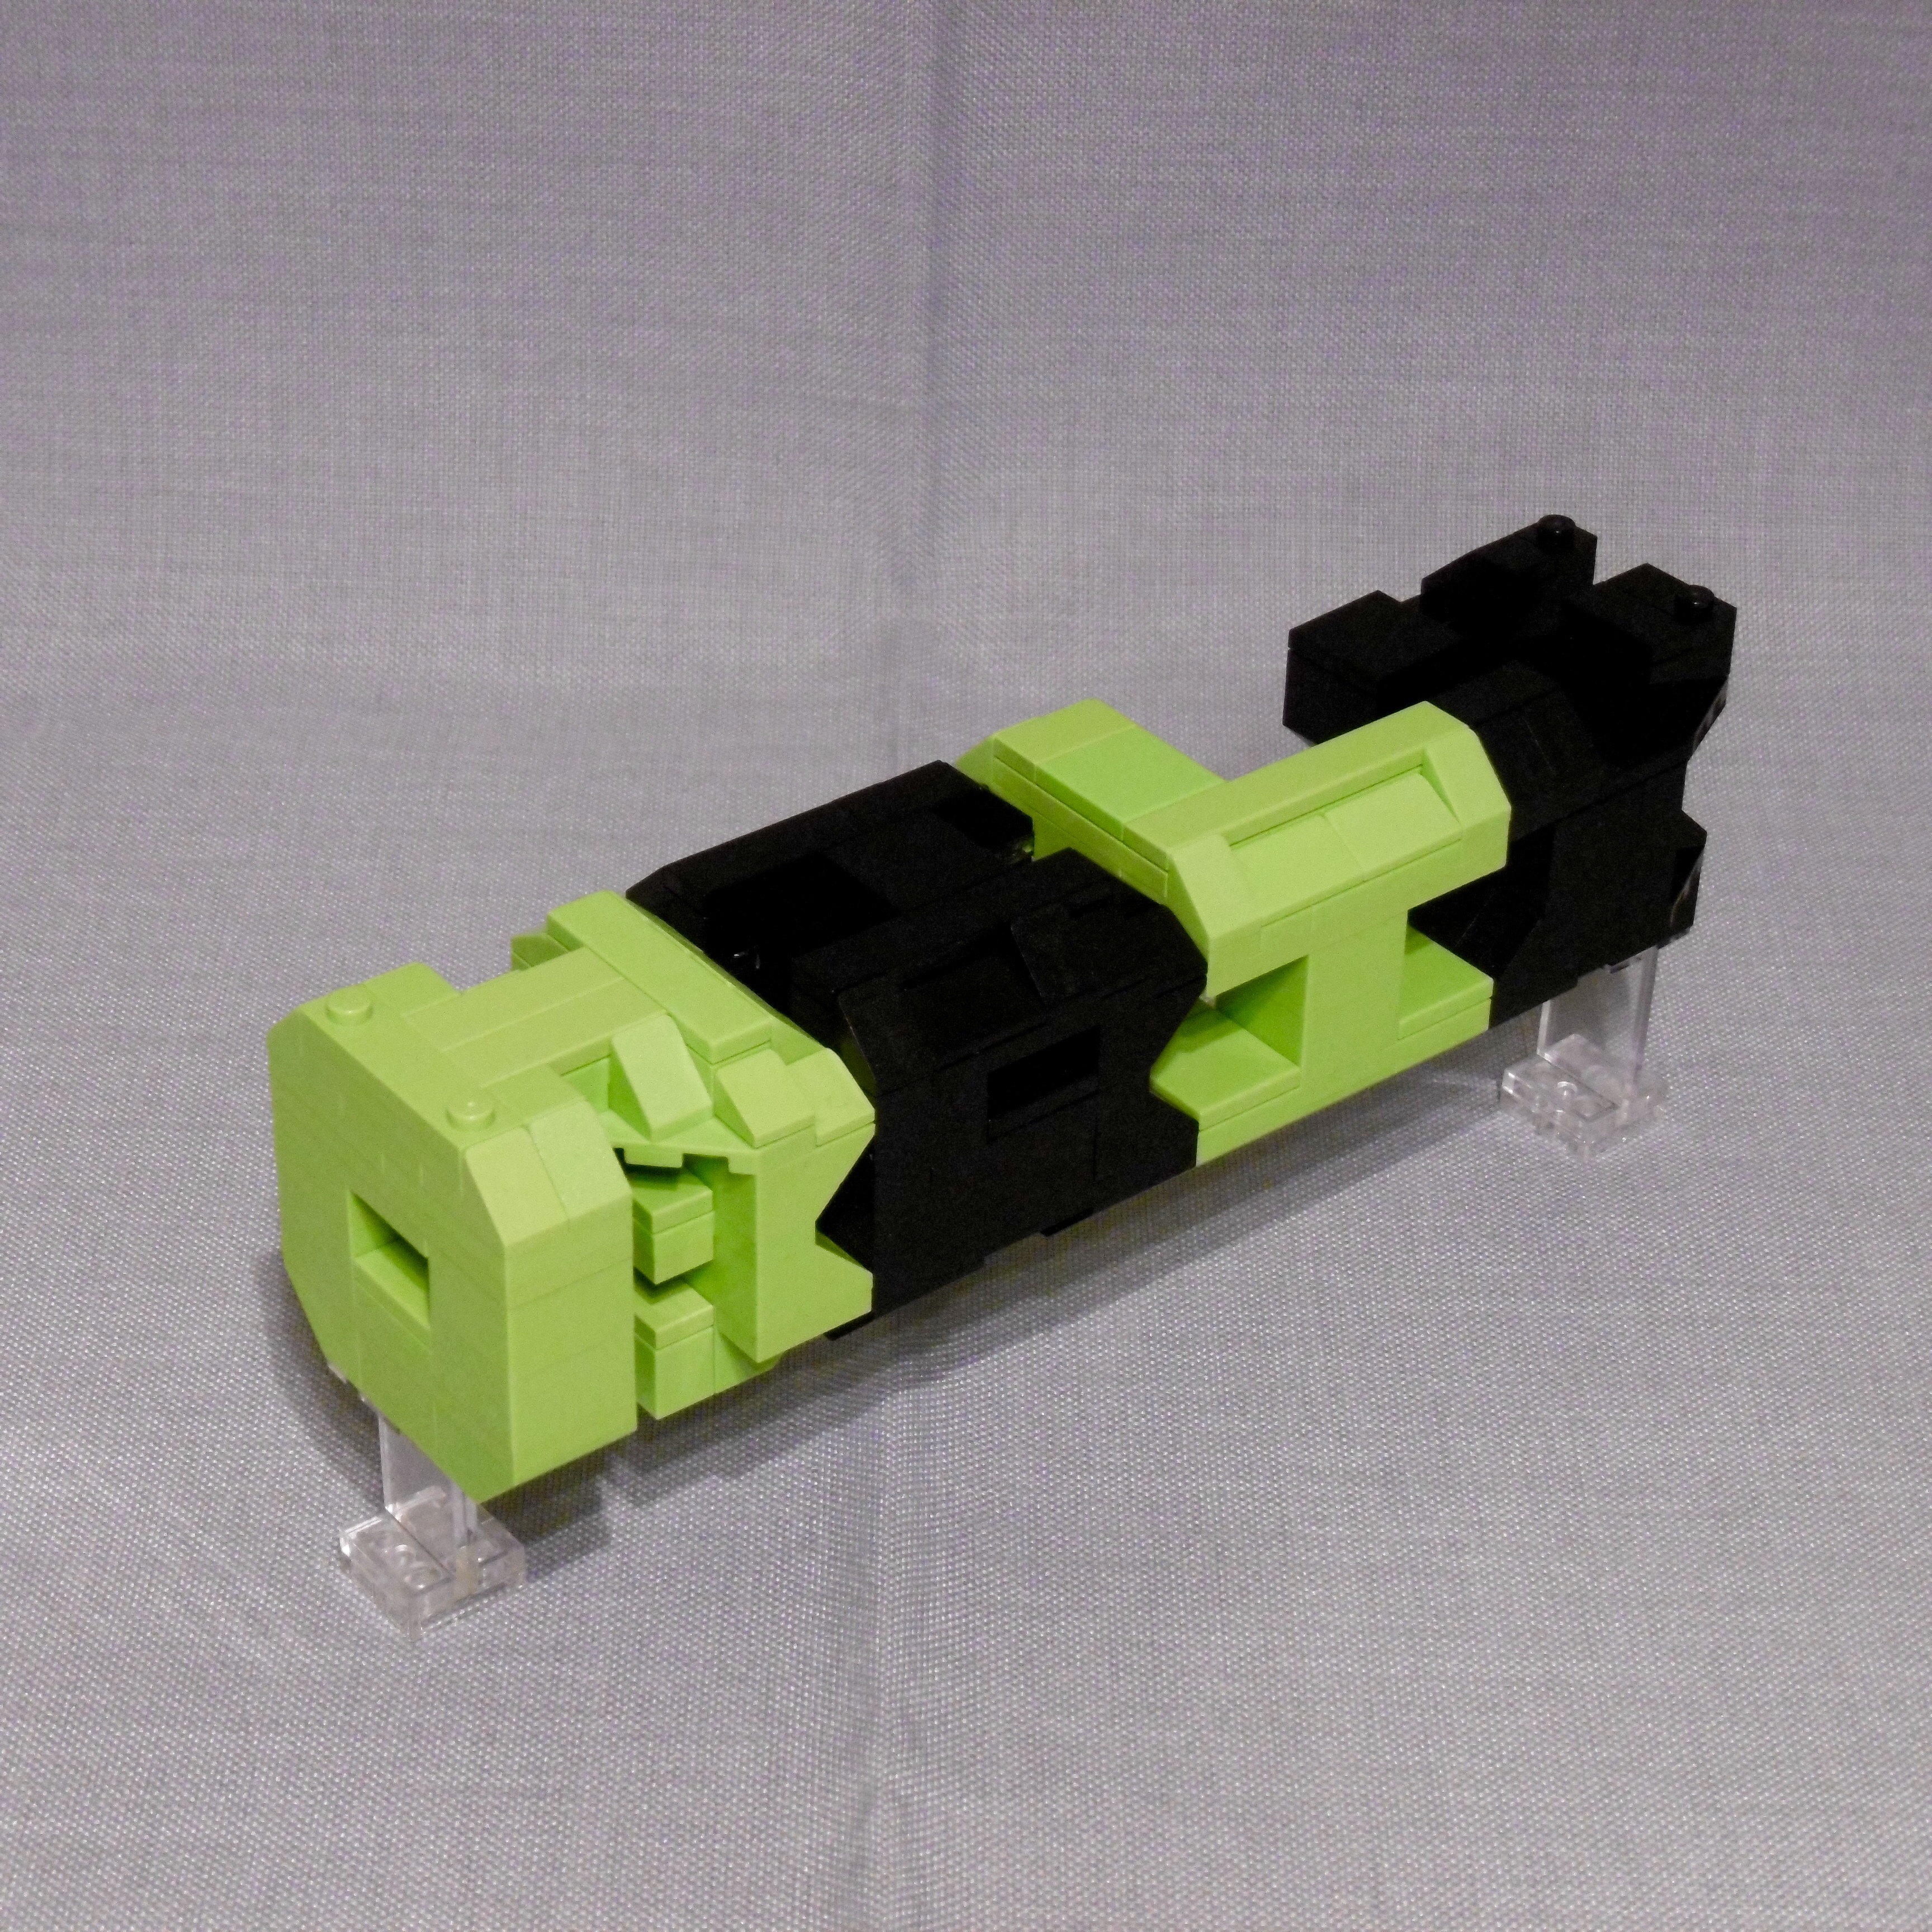
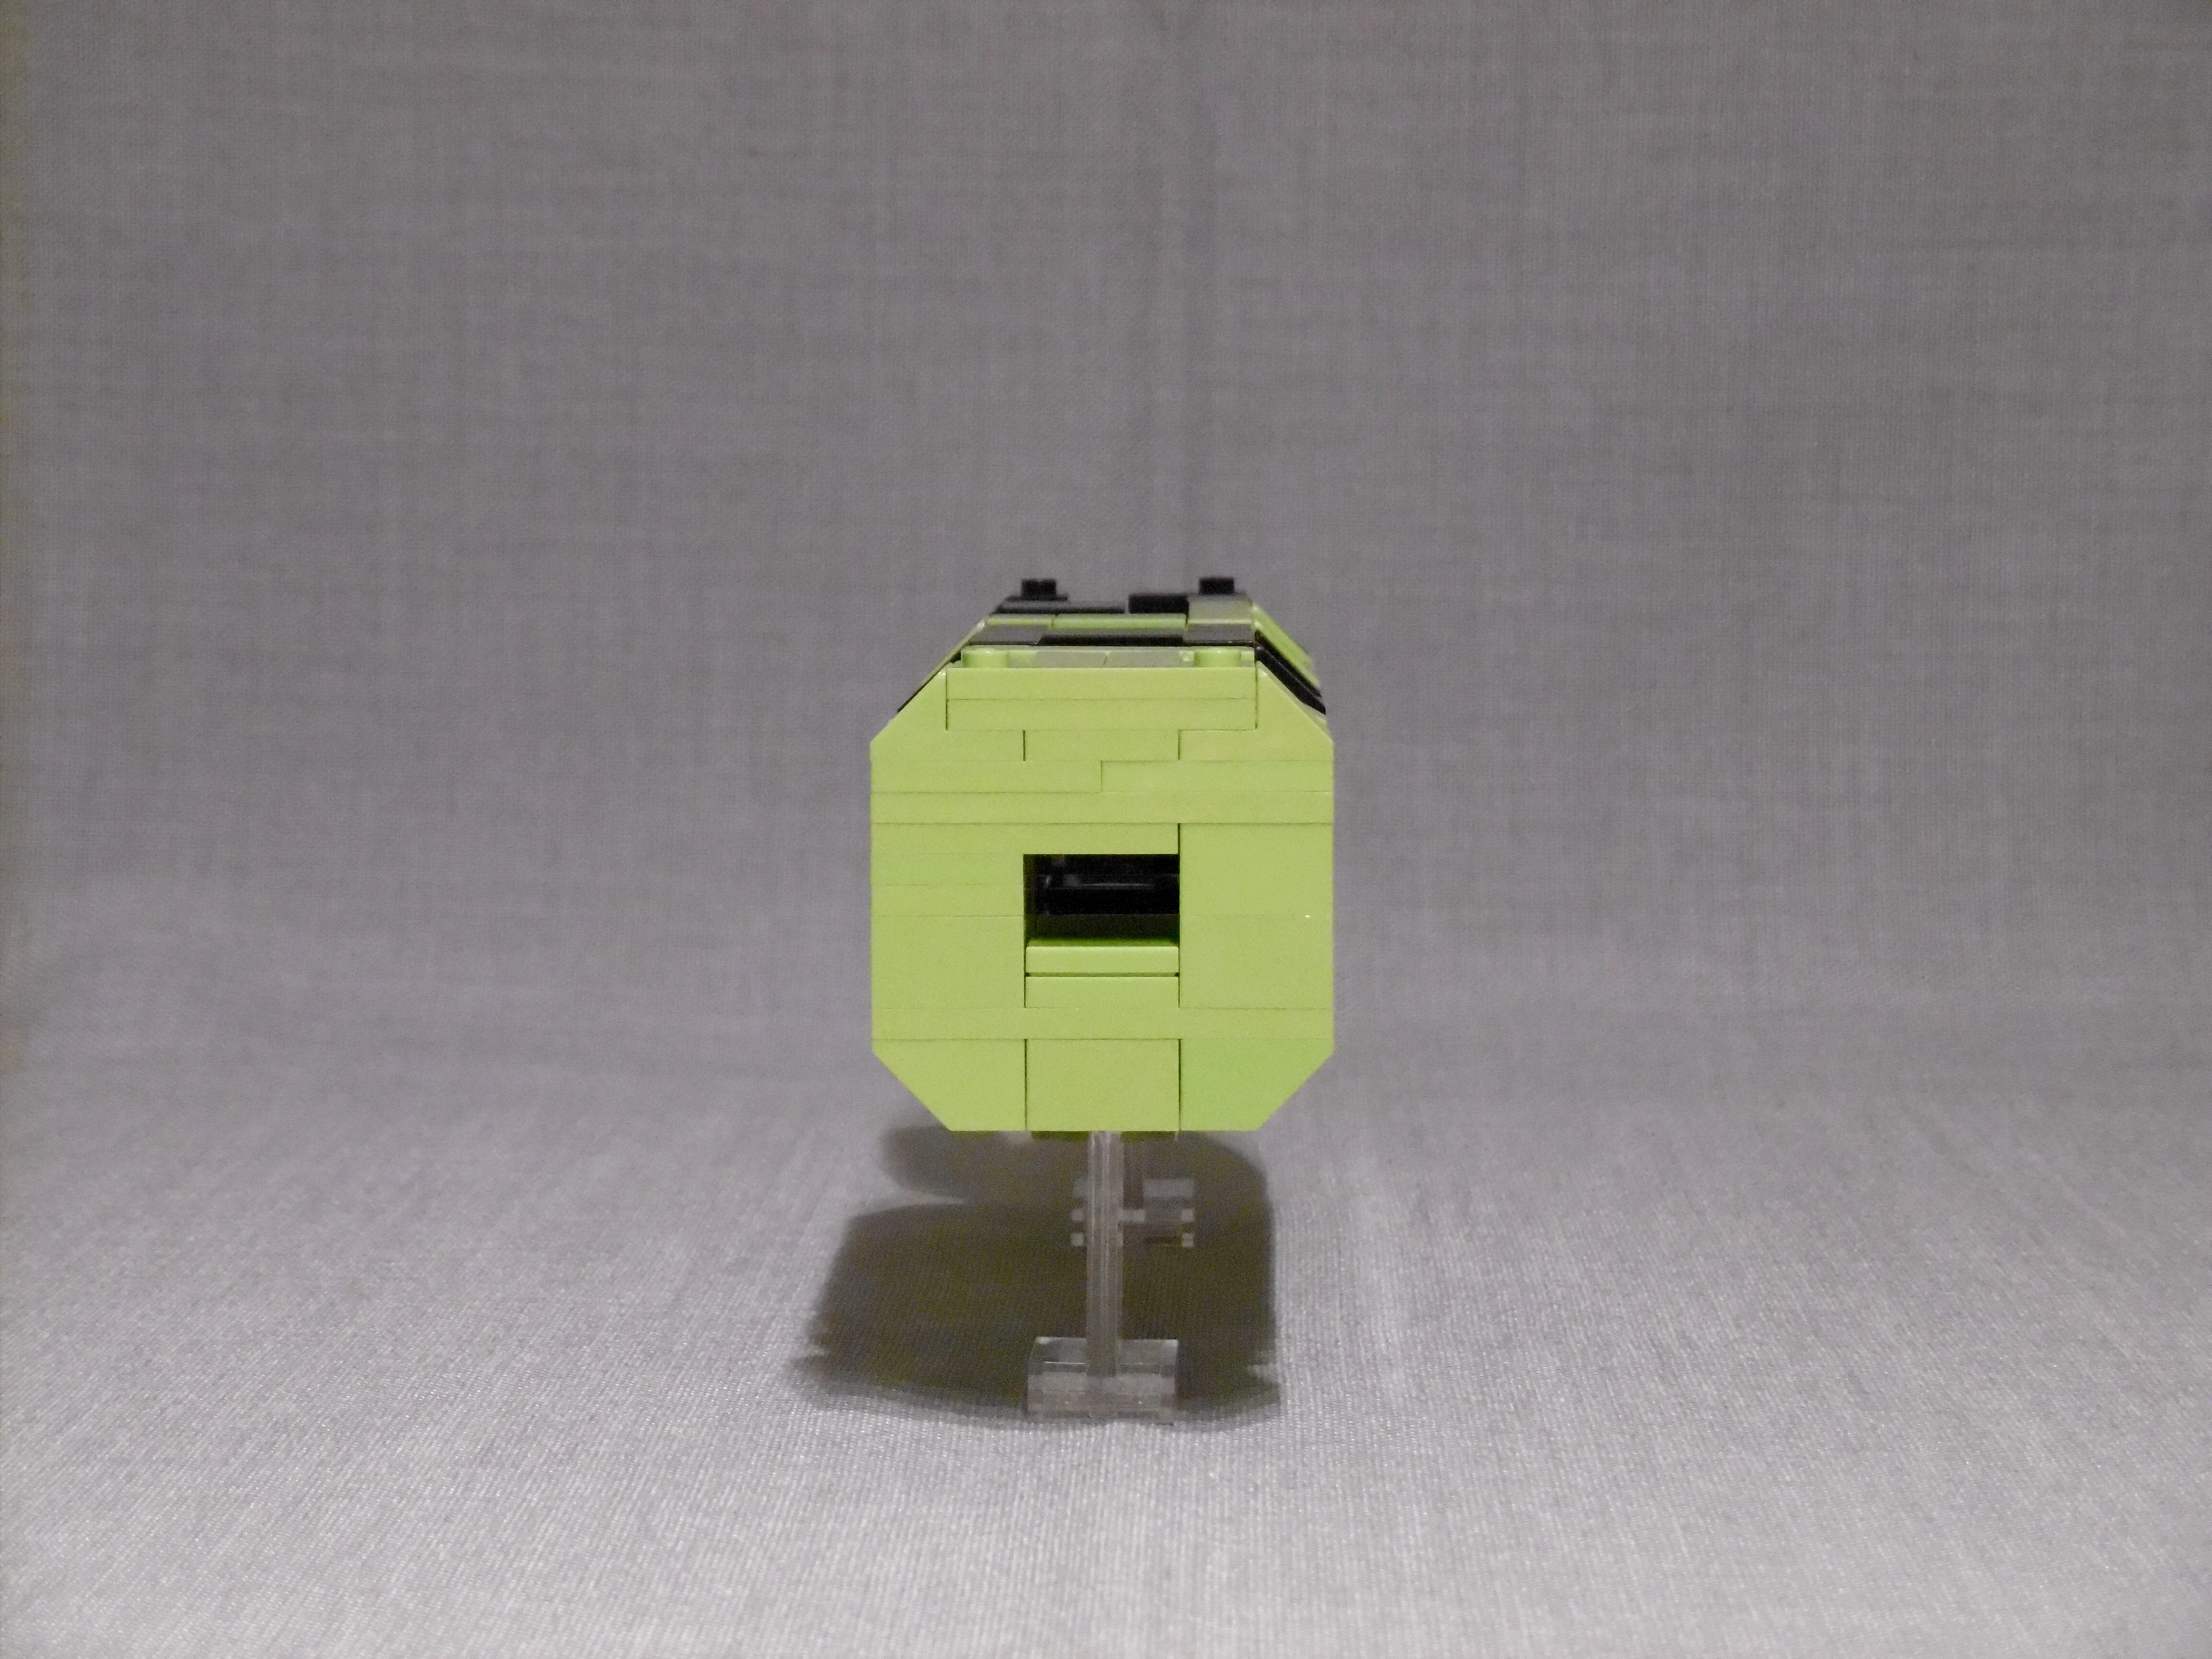
First of all I analyzed the design of the cube looking for the parts that were really needed to make it work. The result was a working “skeleton” of the cube which wasn’t more than the hinge plates, the SNOT brackets and a few plates as “connectors” between them:

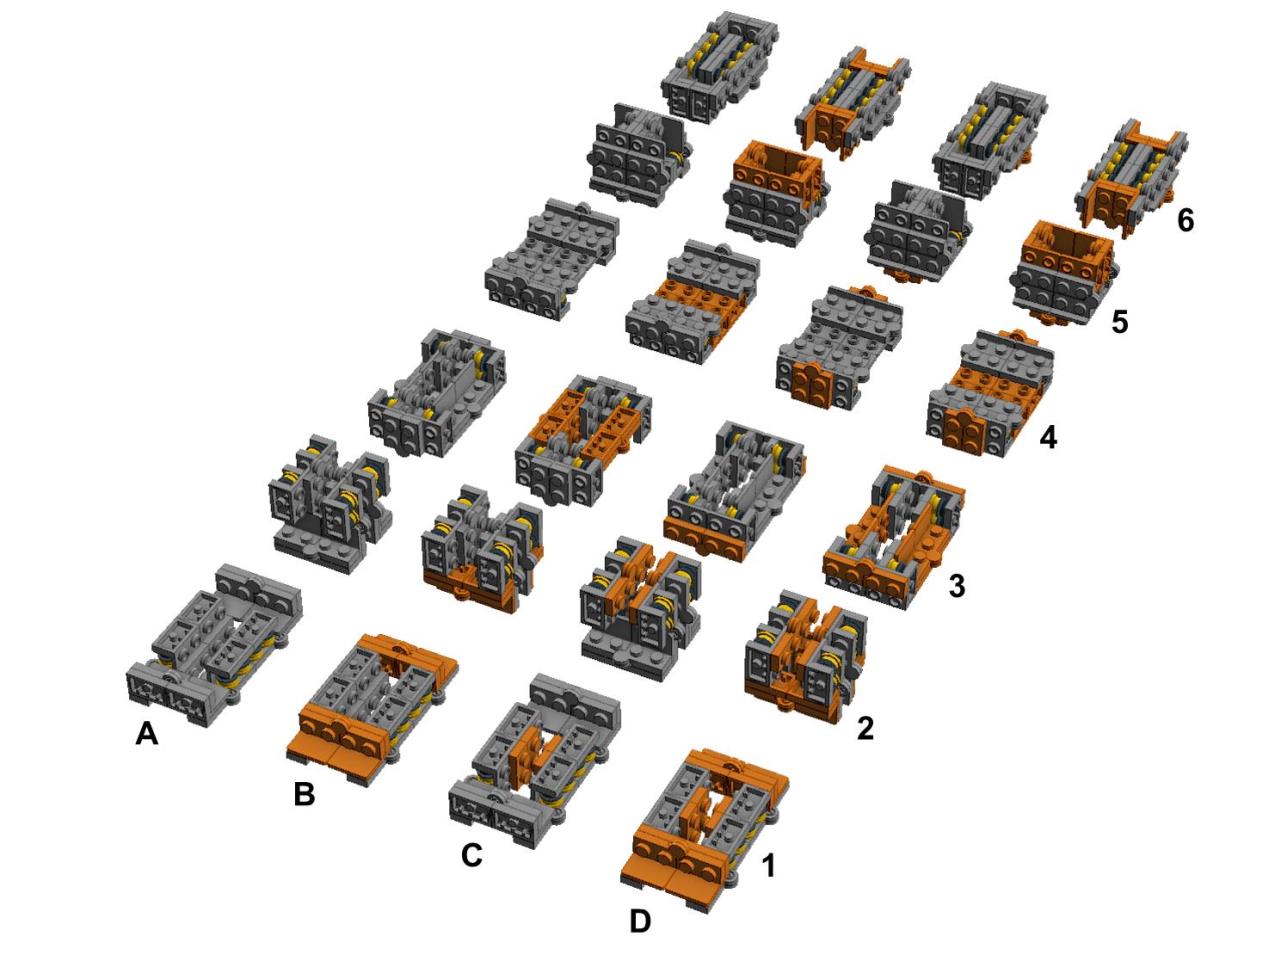
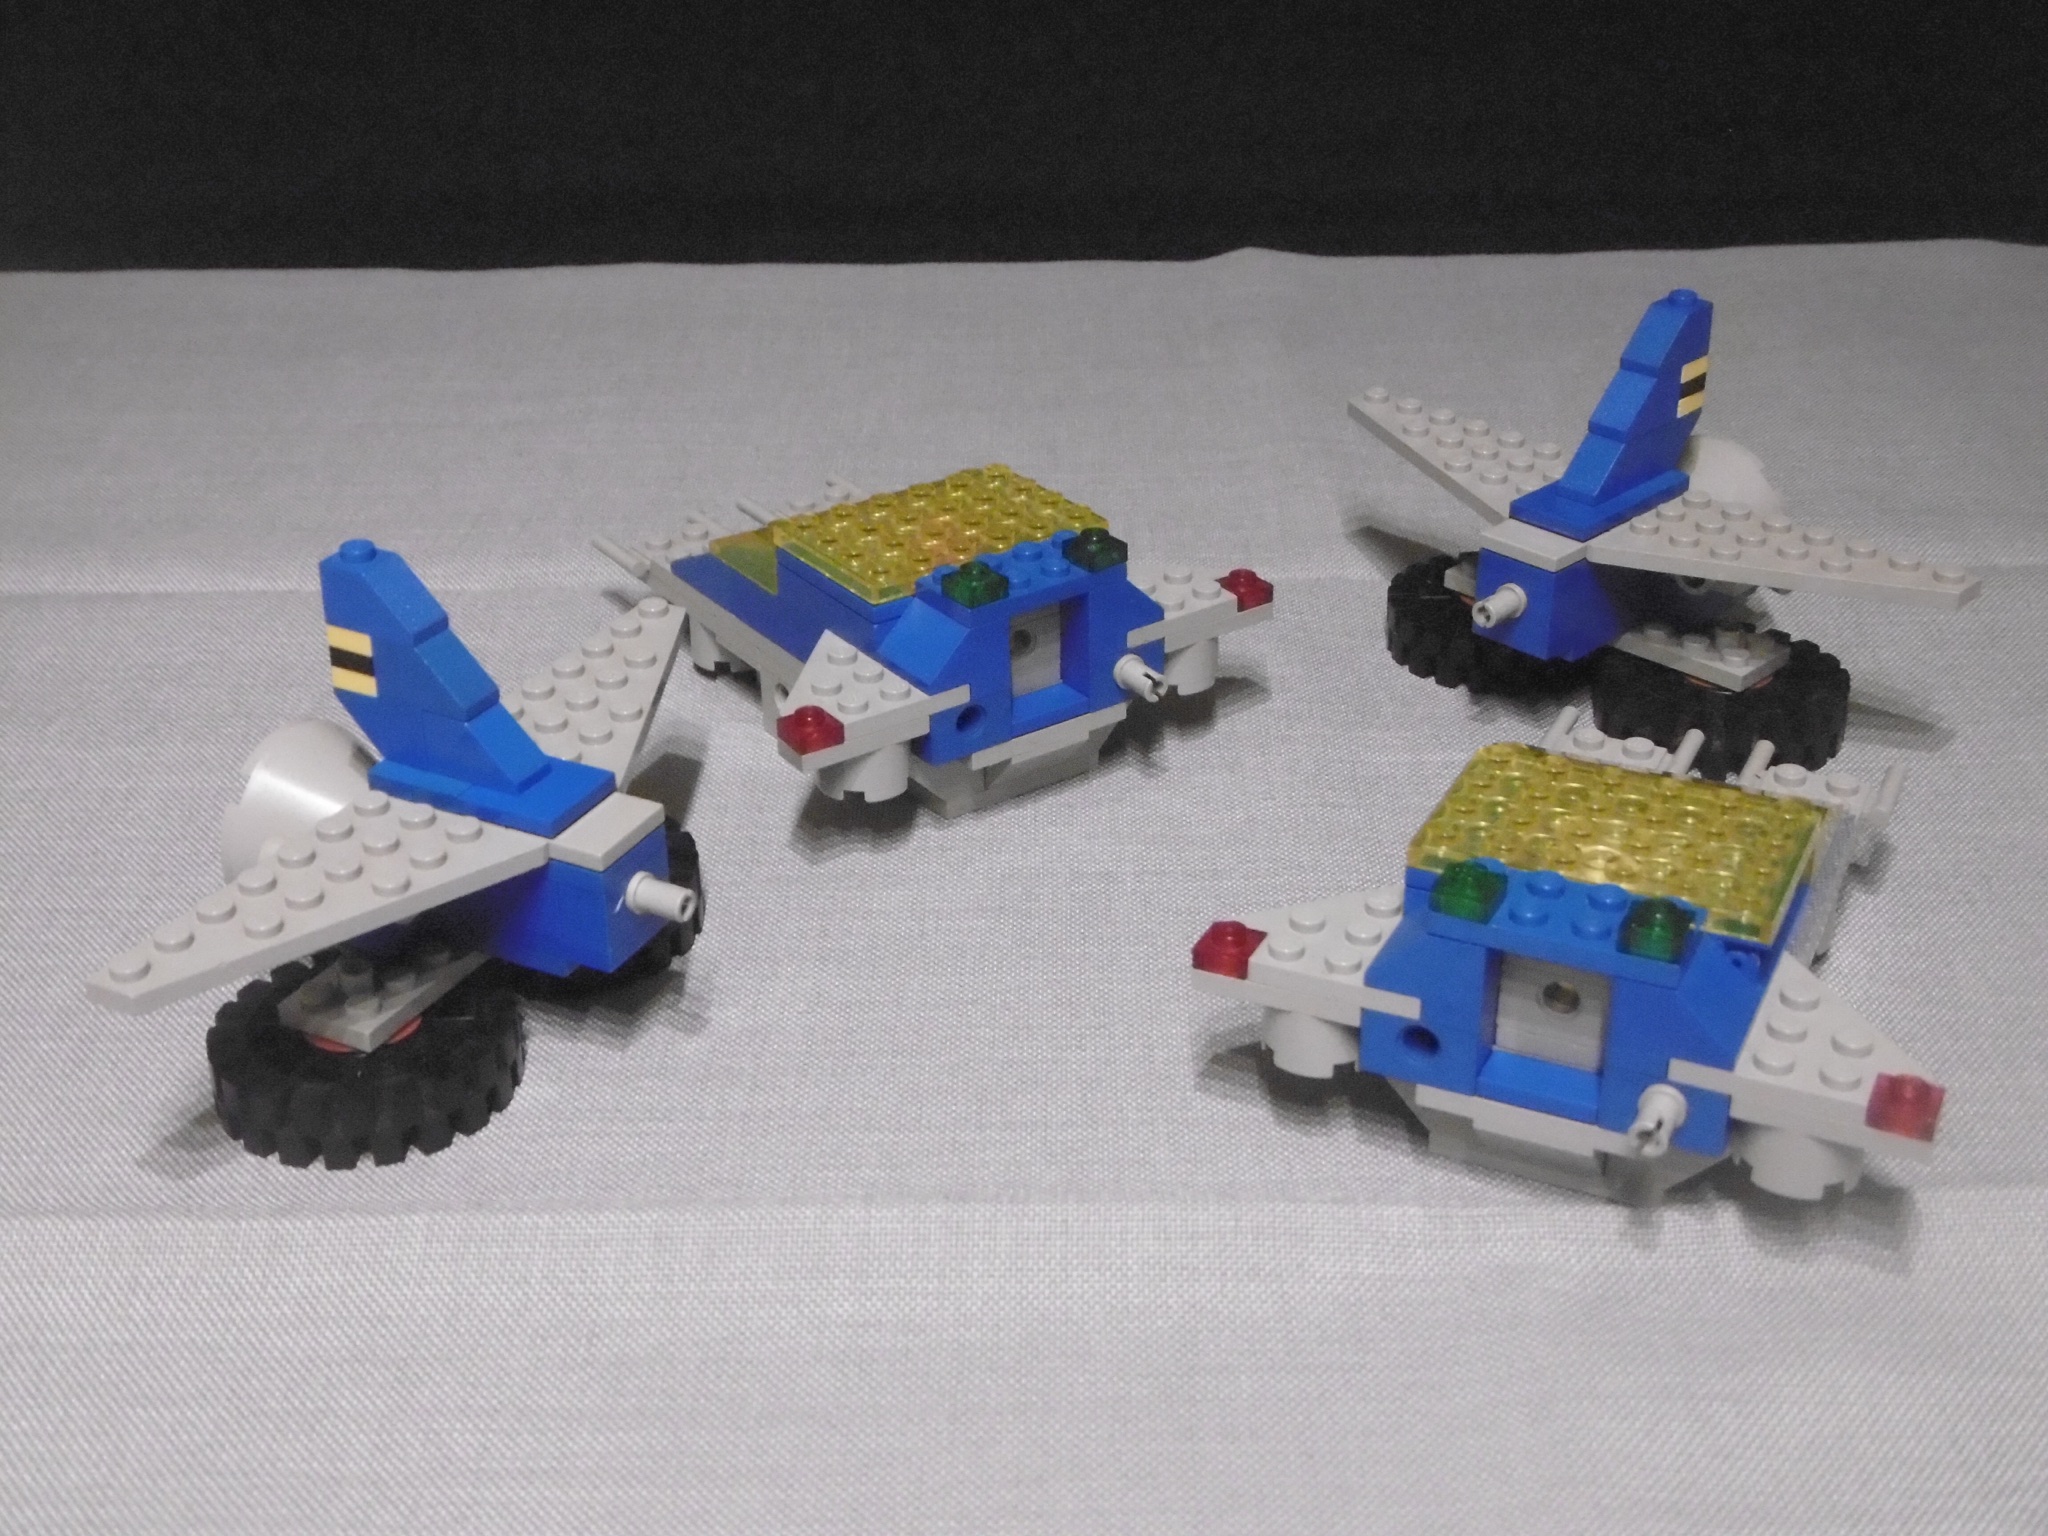
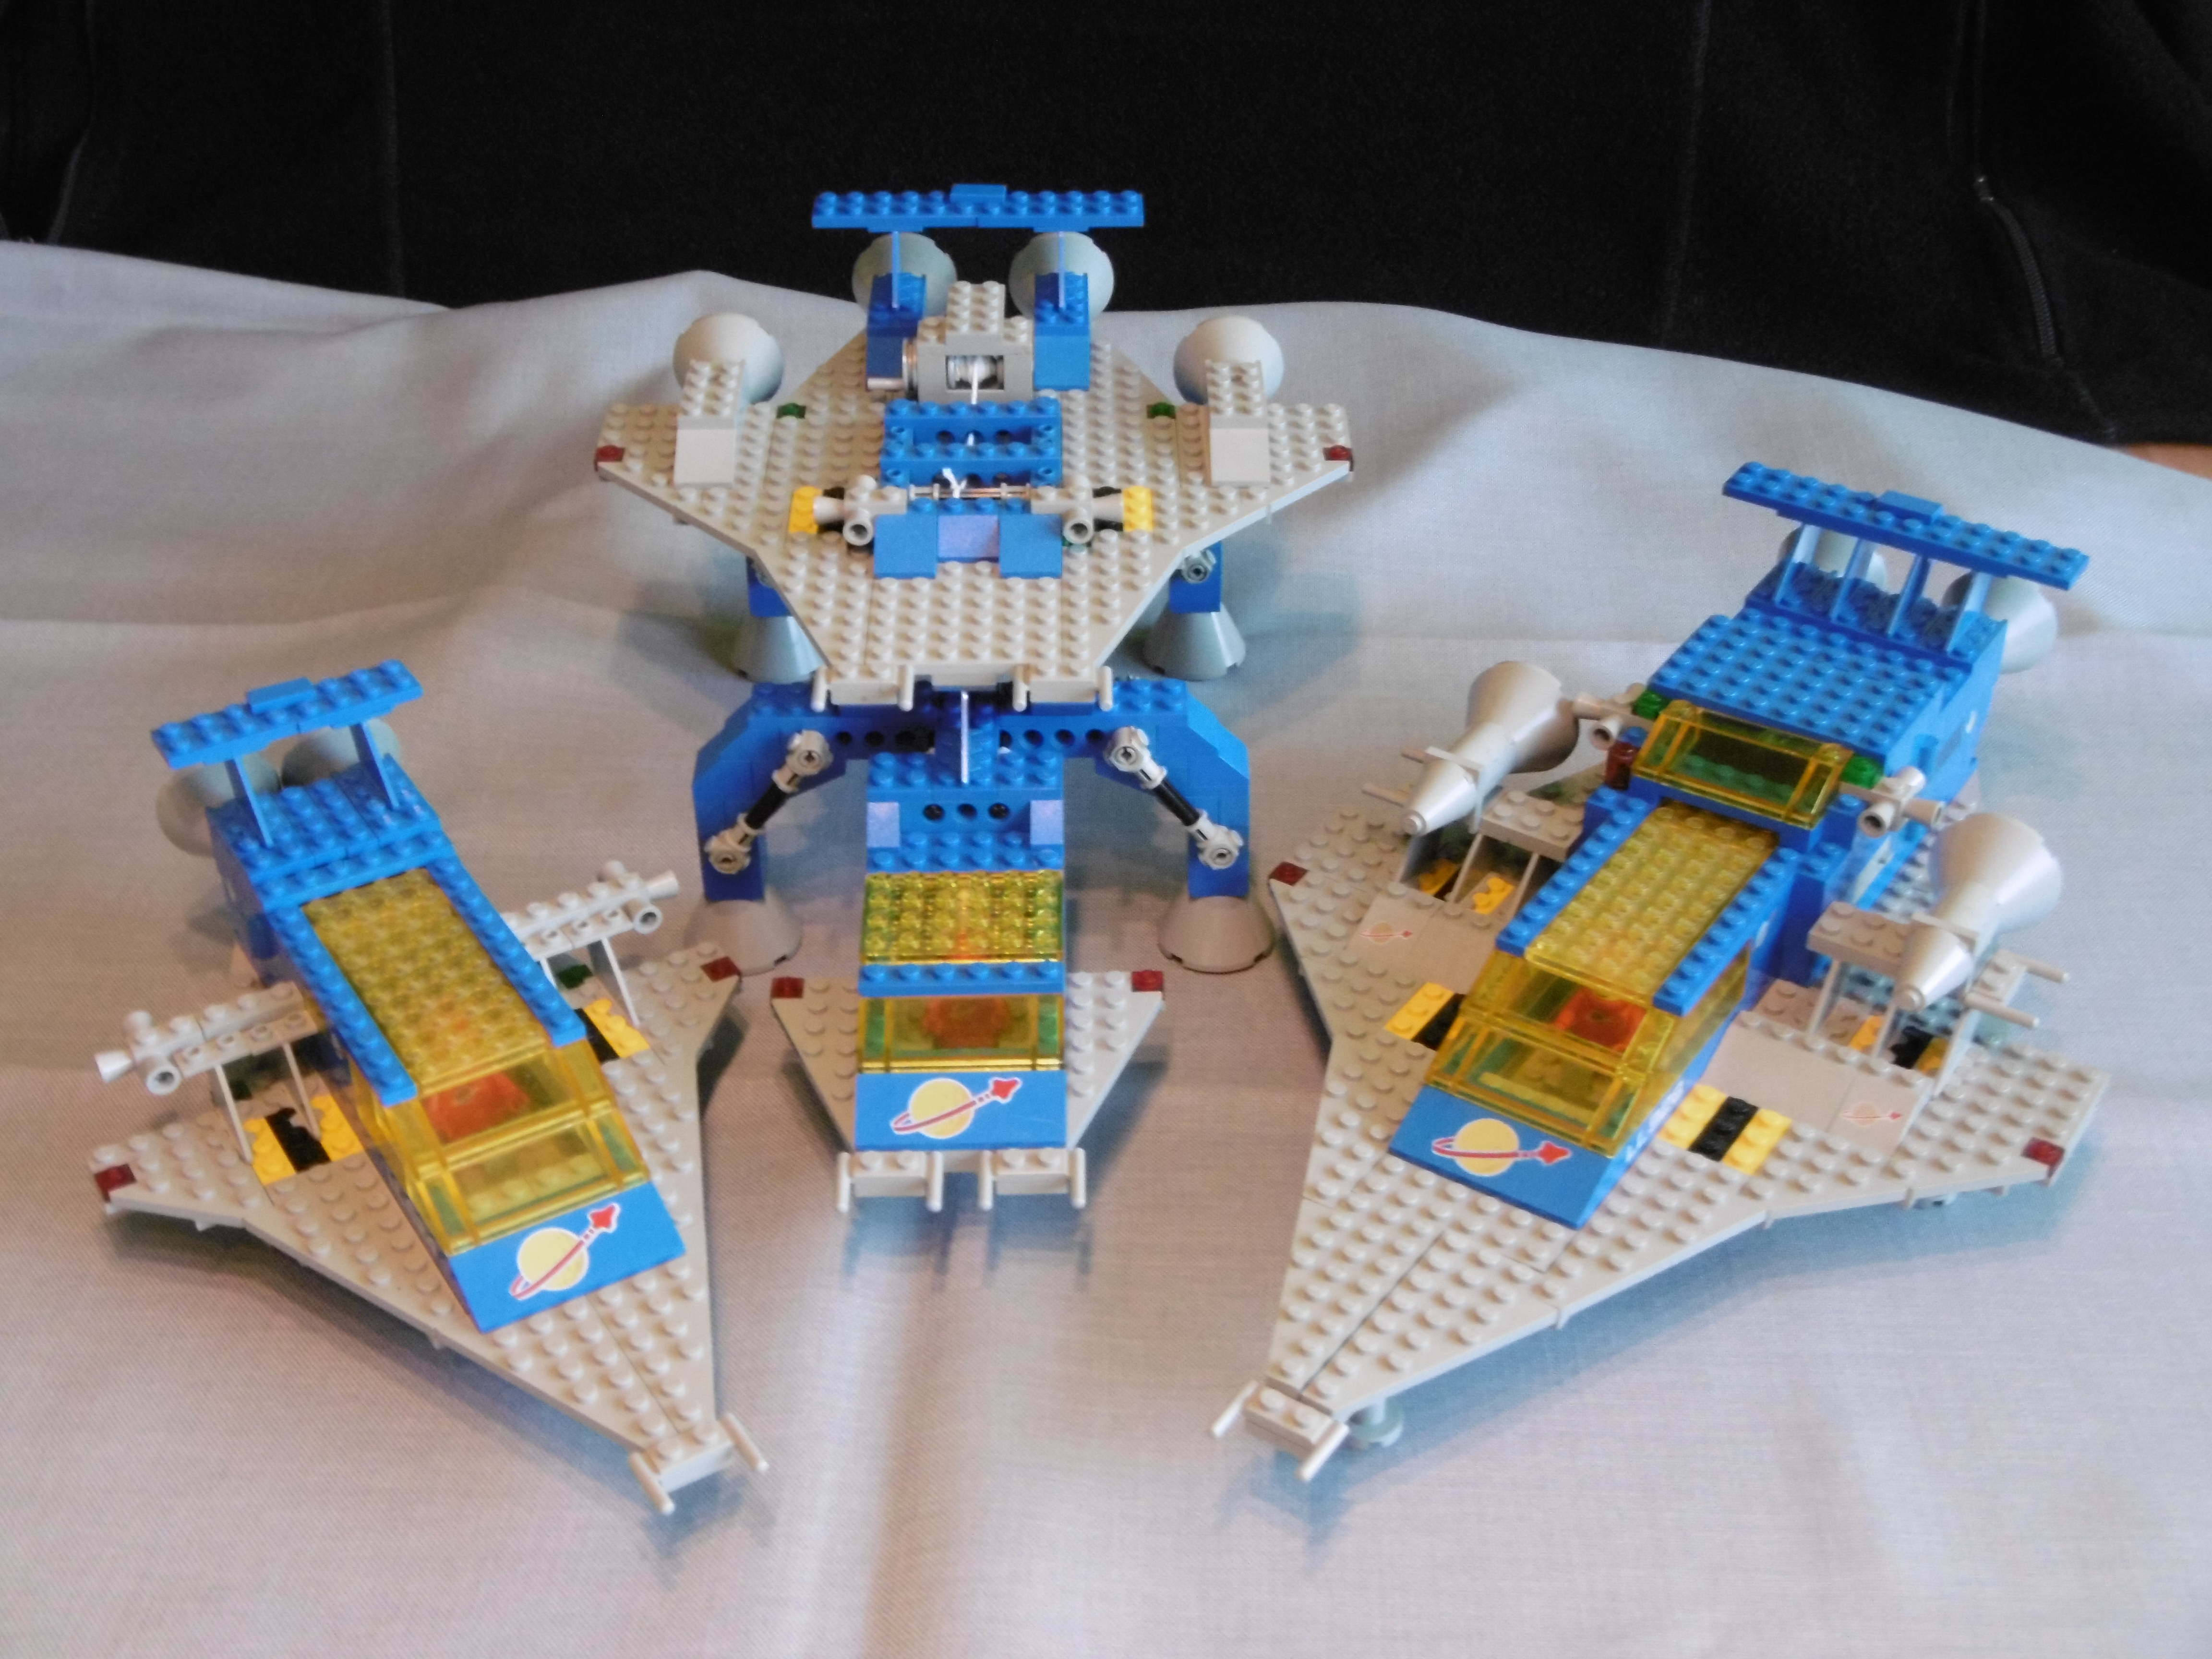
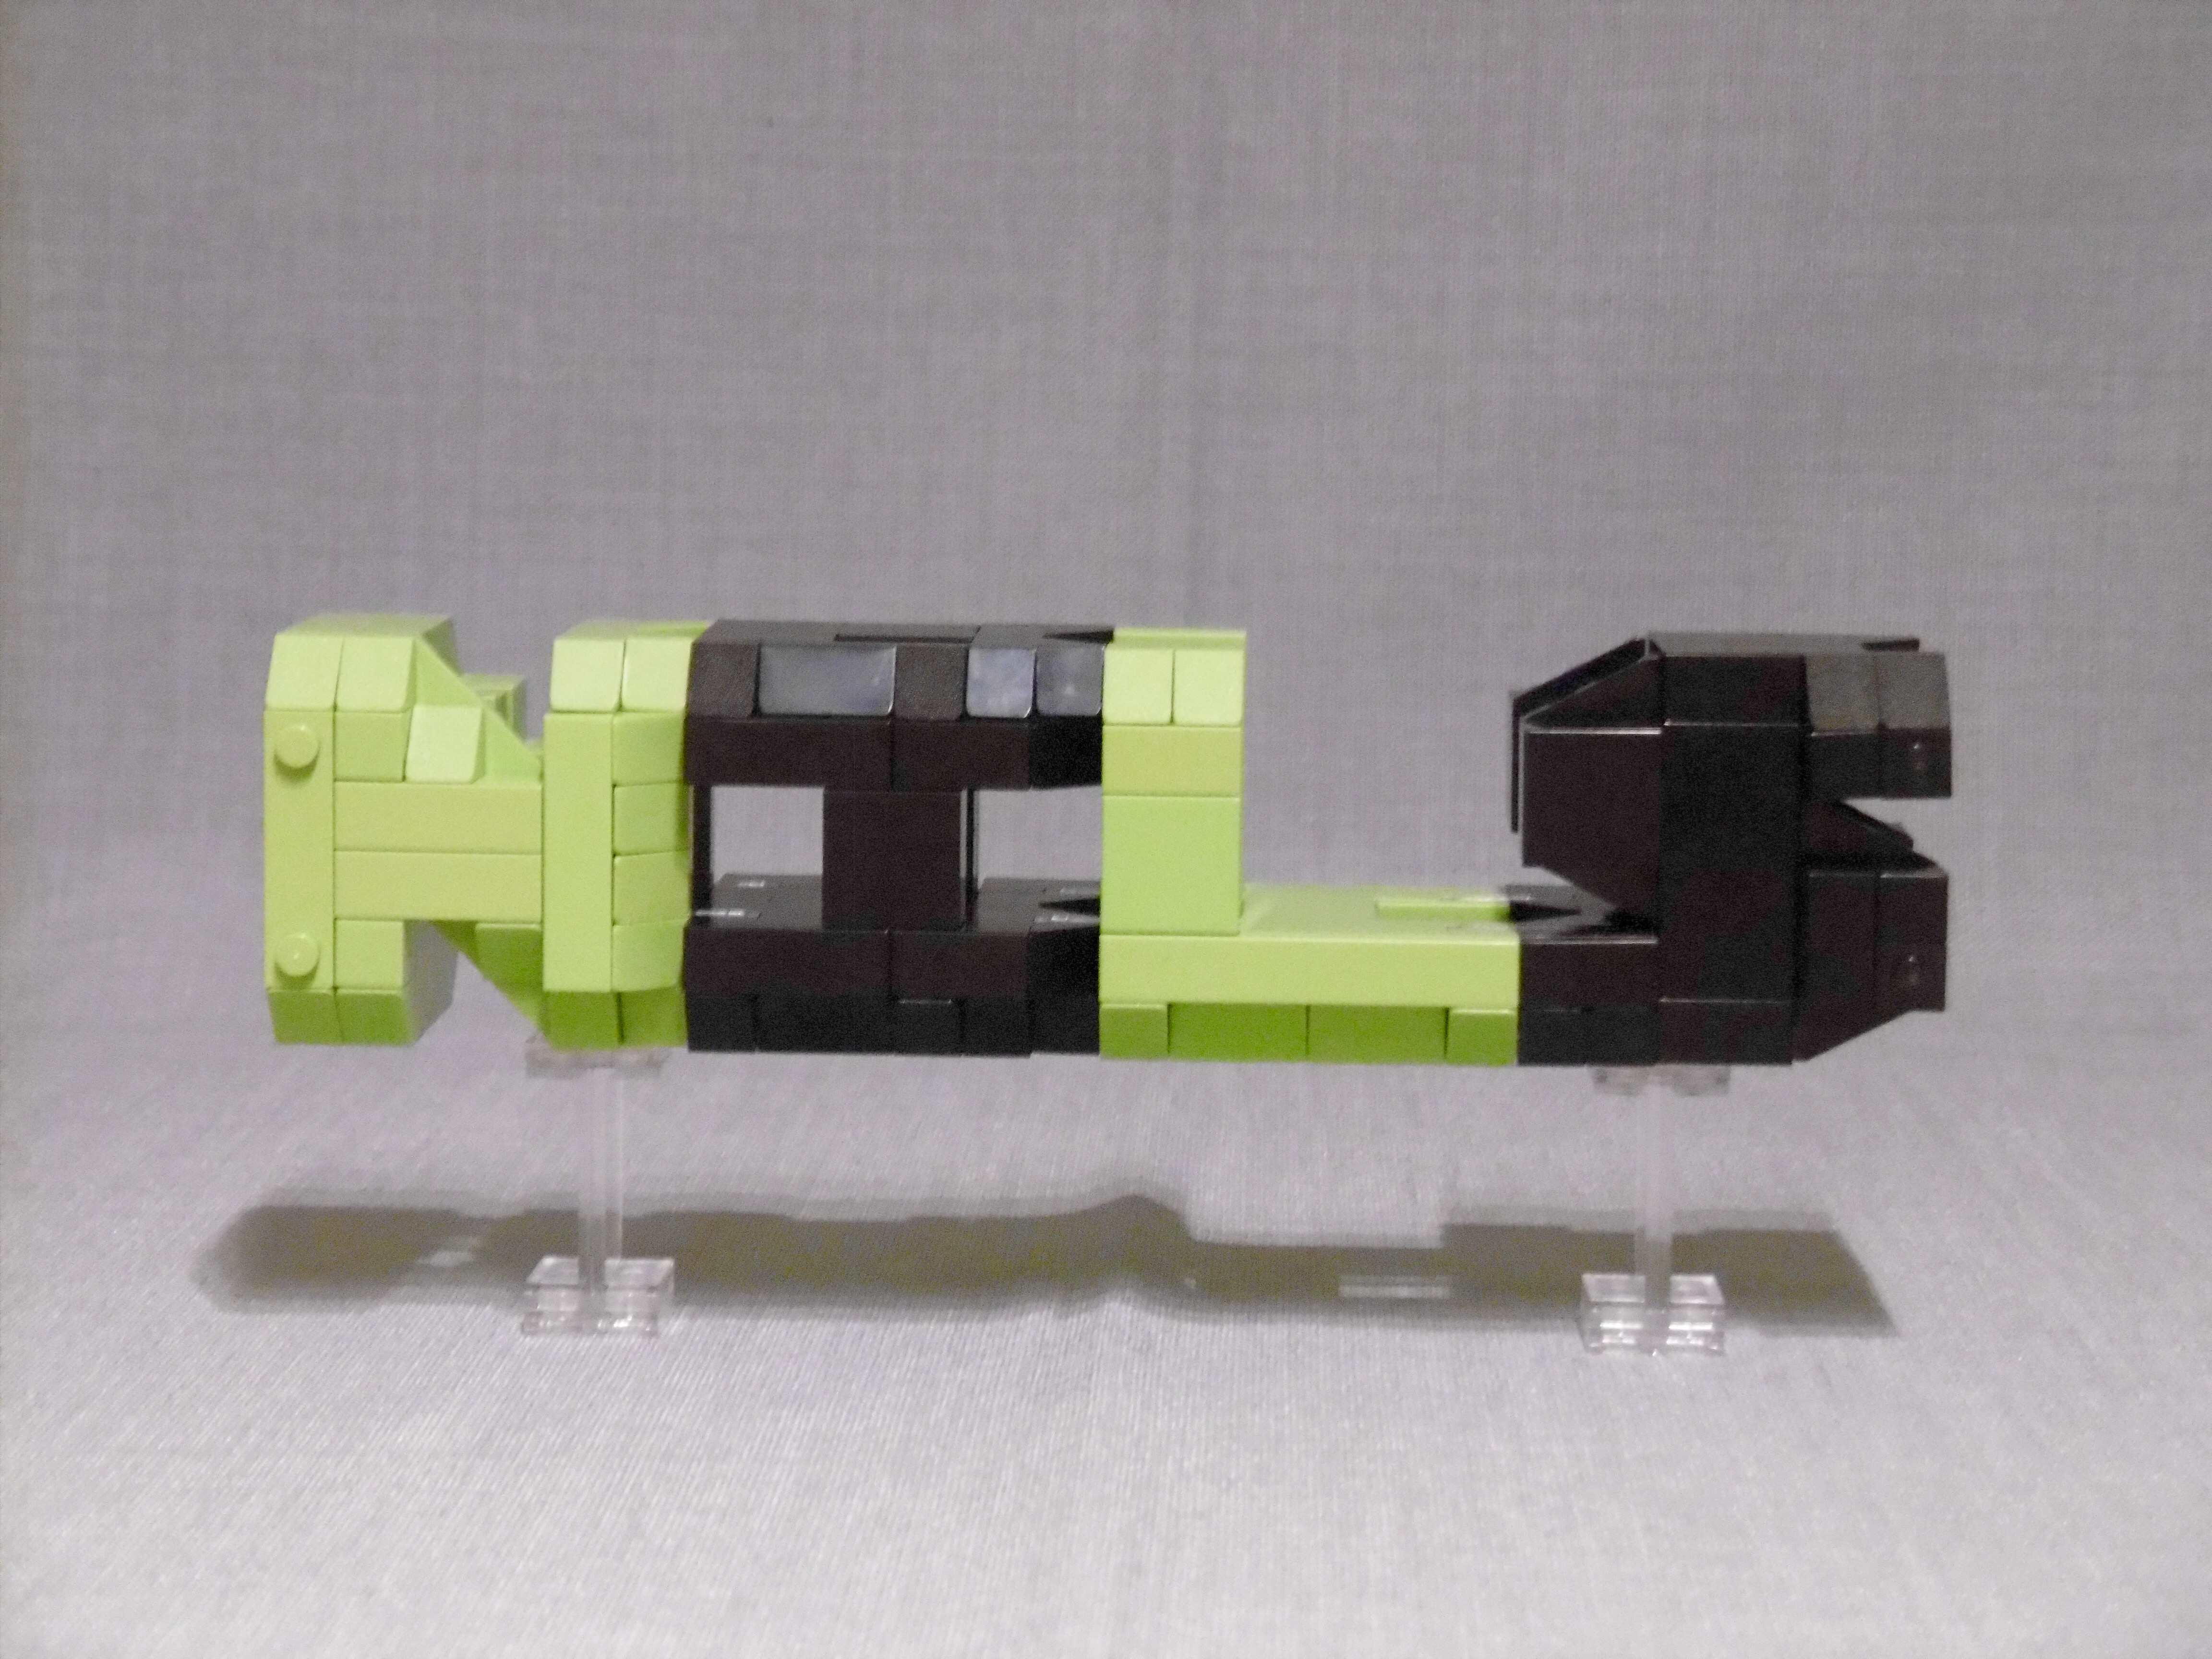
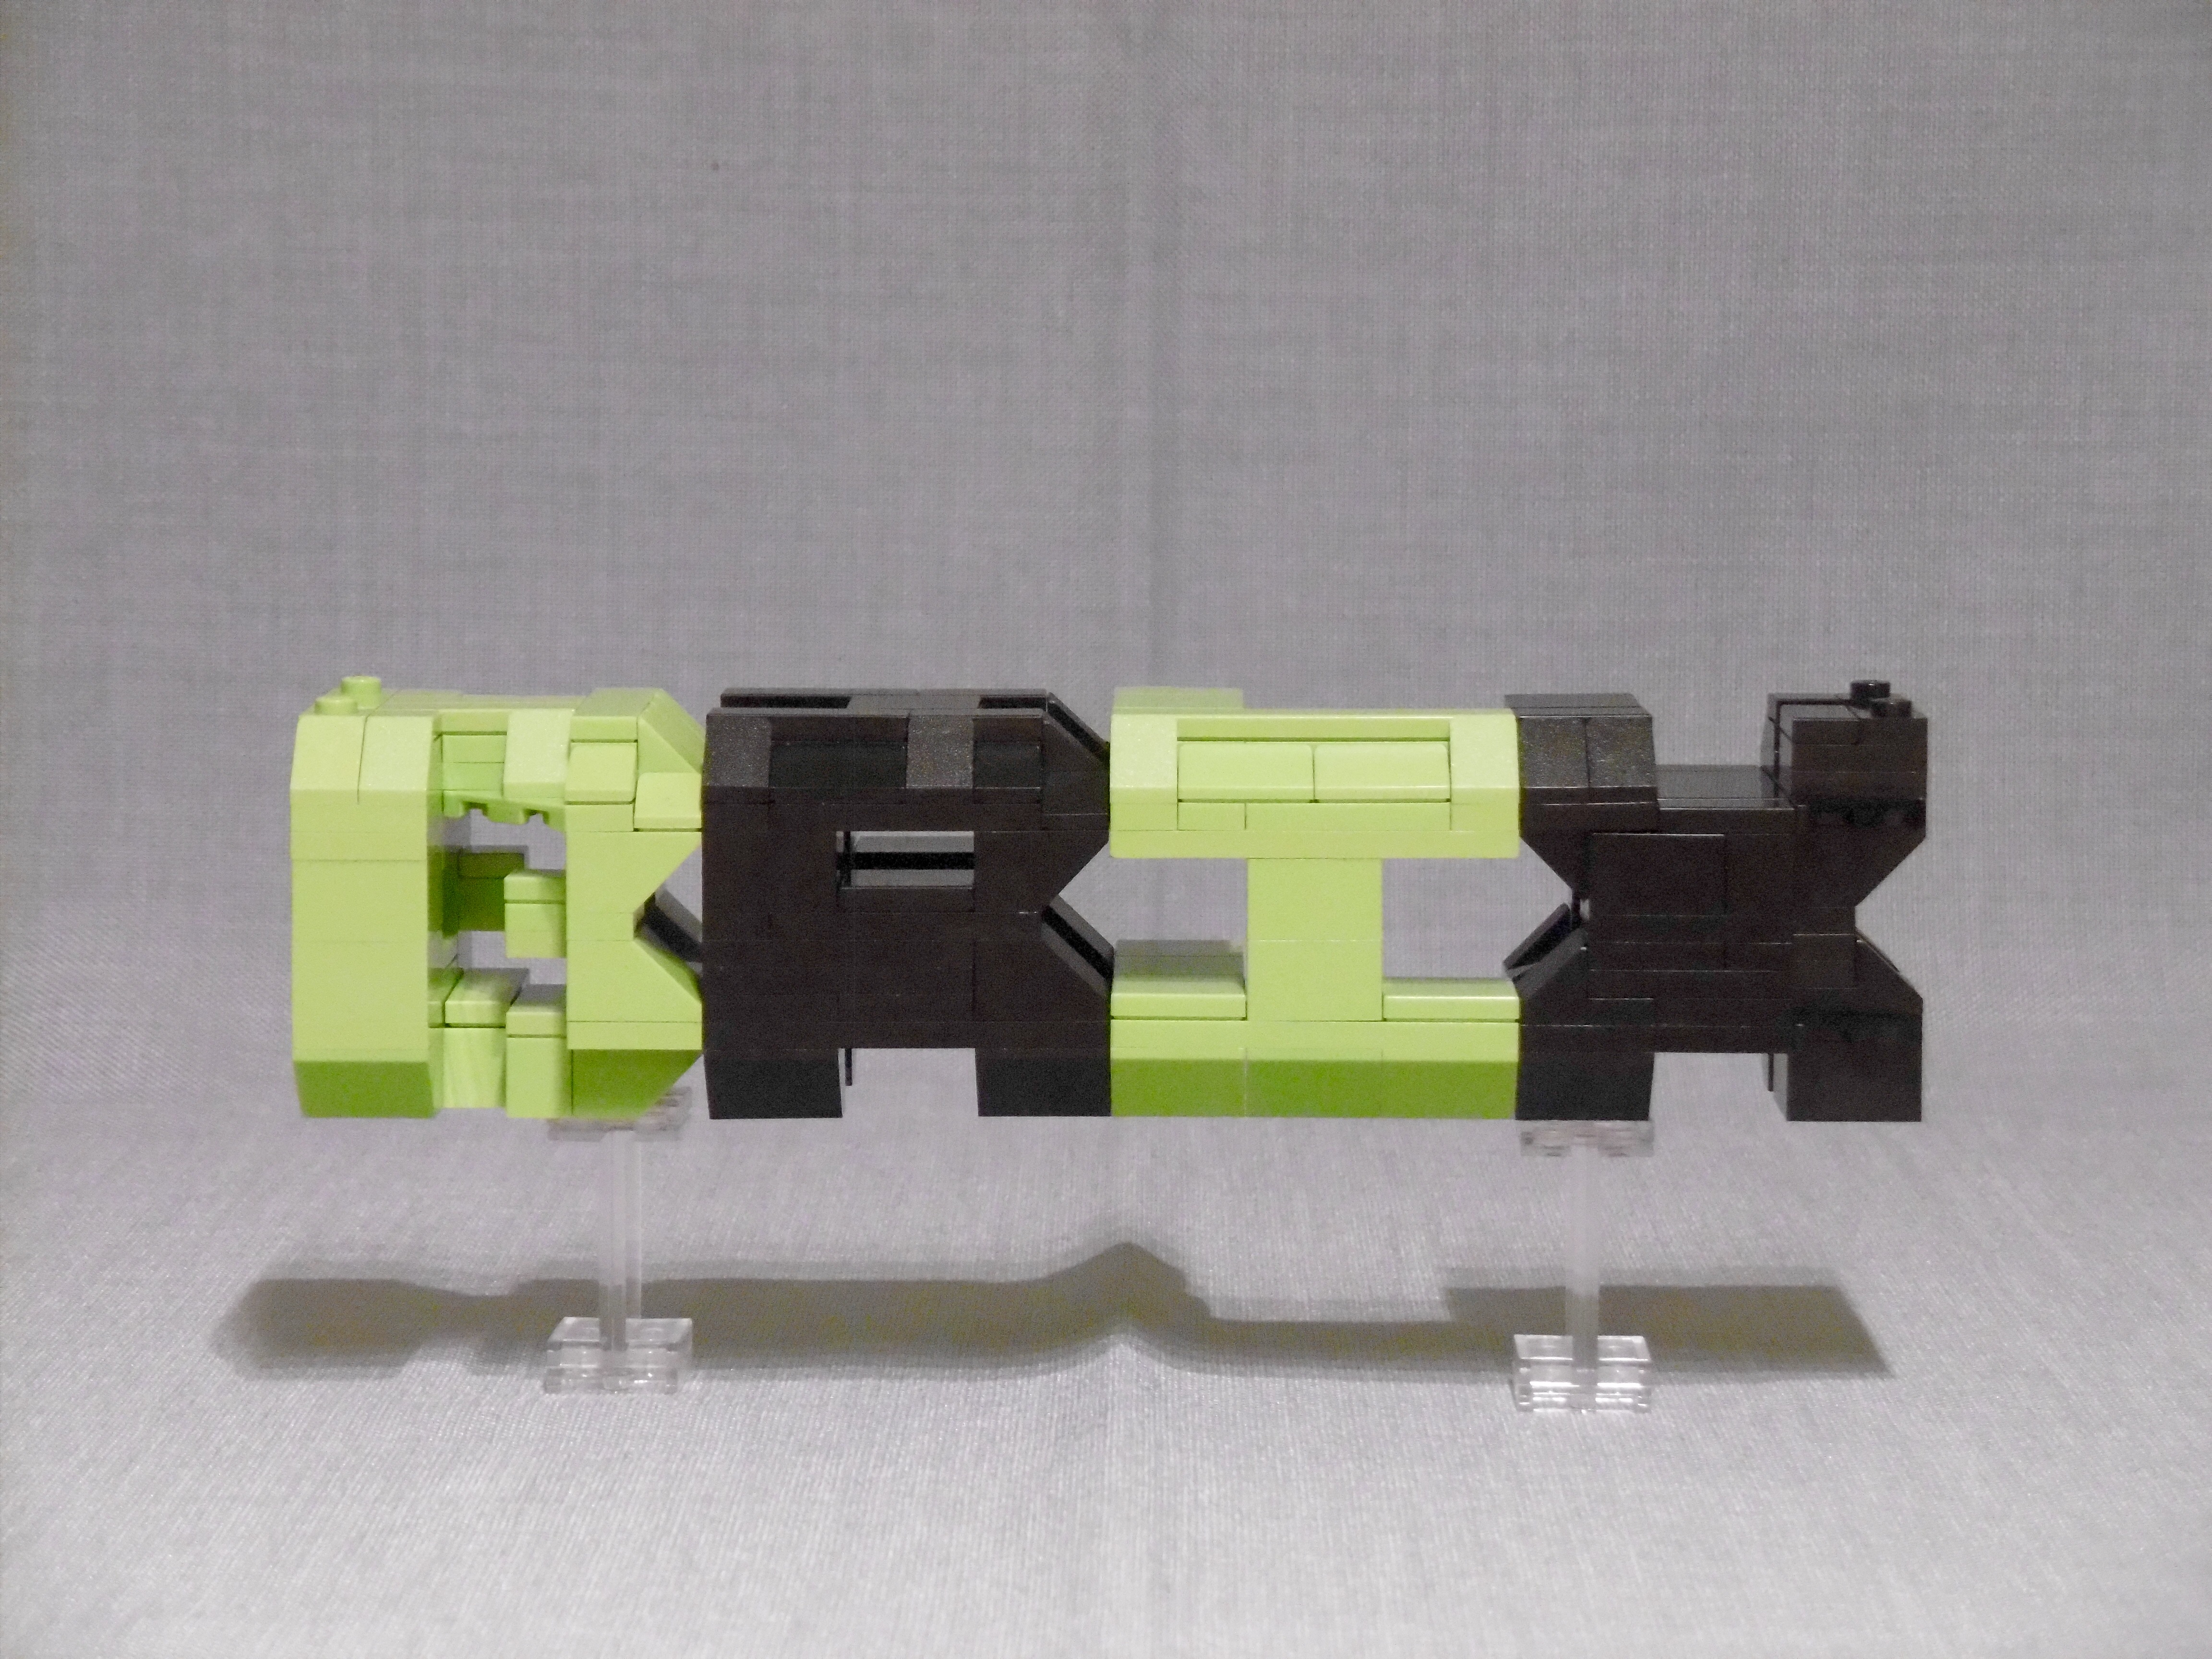
Based on this skeleton cube I found four variations of the basic design (A … D) with the pivot points at the same positions but with some different details (changes marked with orange parts). Each of the designs has six folding steps (1 … 6) so you get 24 different versions of a symmetrical cube or cuboid that you can use as a base for a foldable micro scale Lego model:

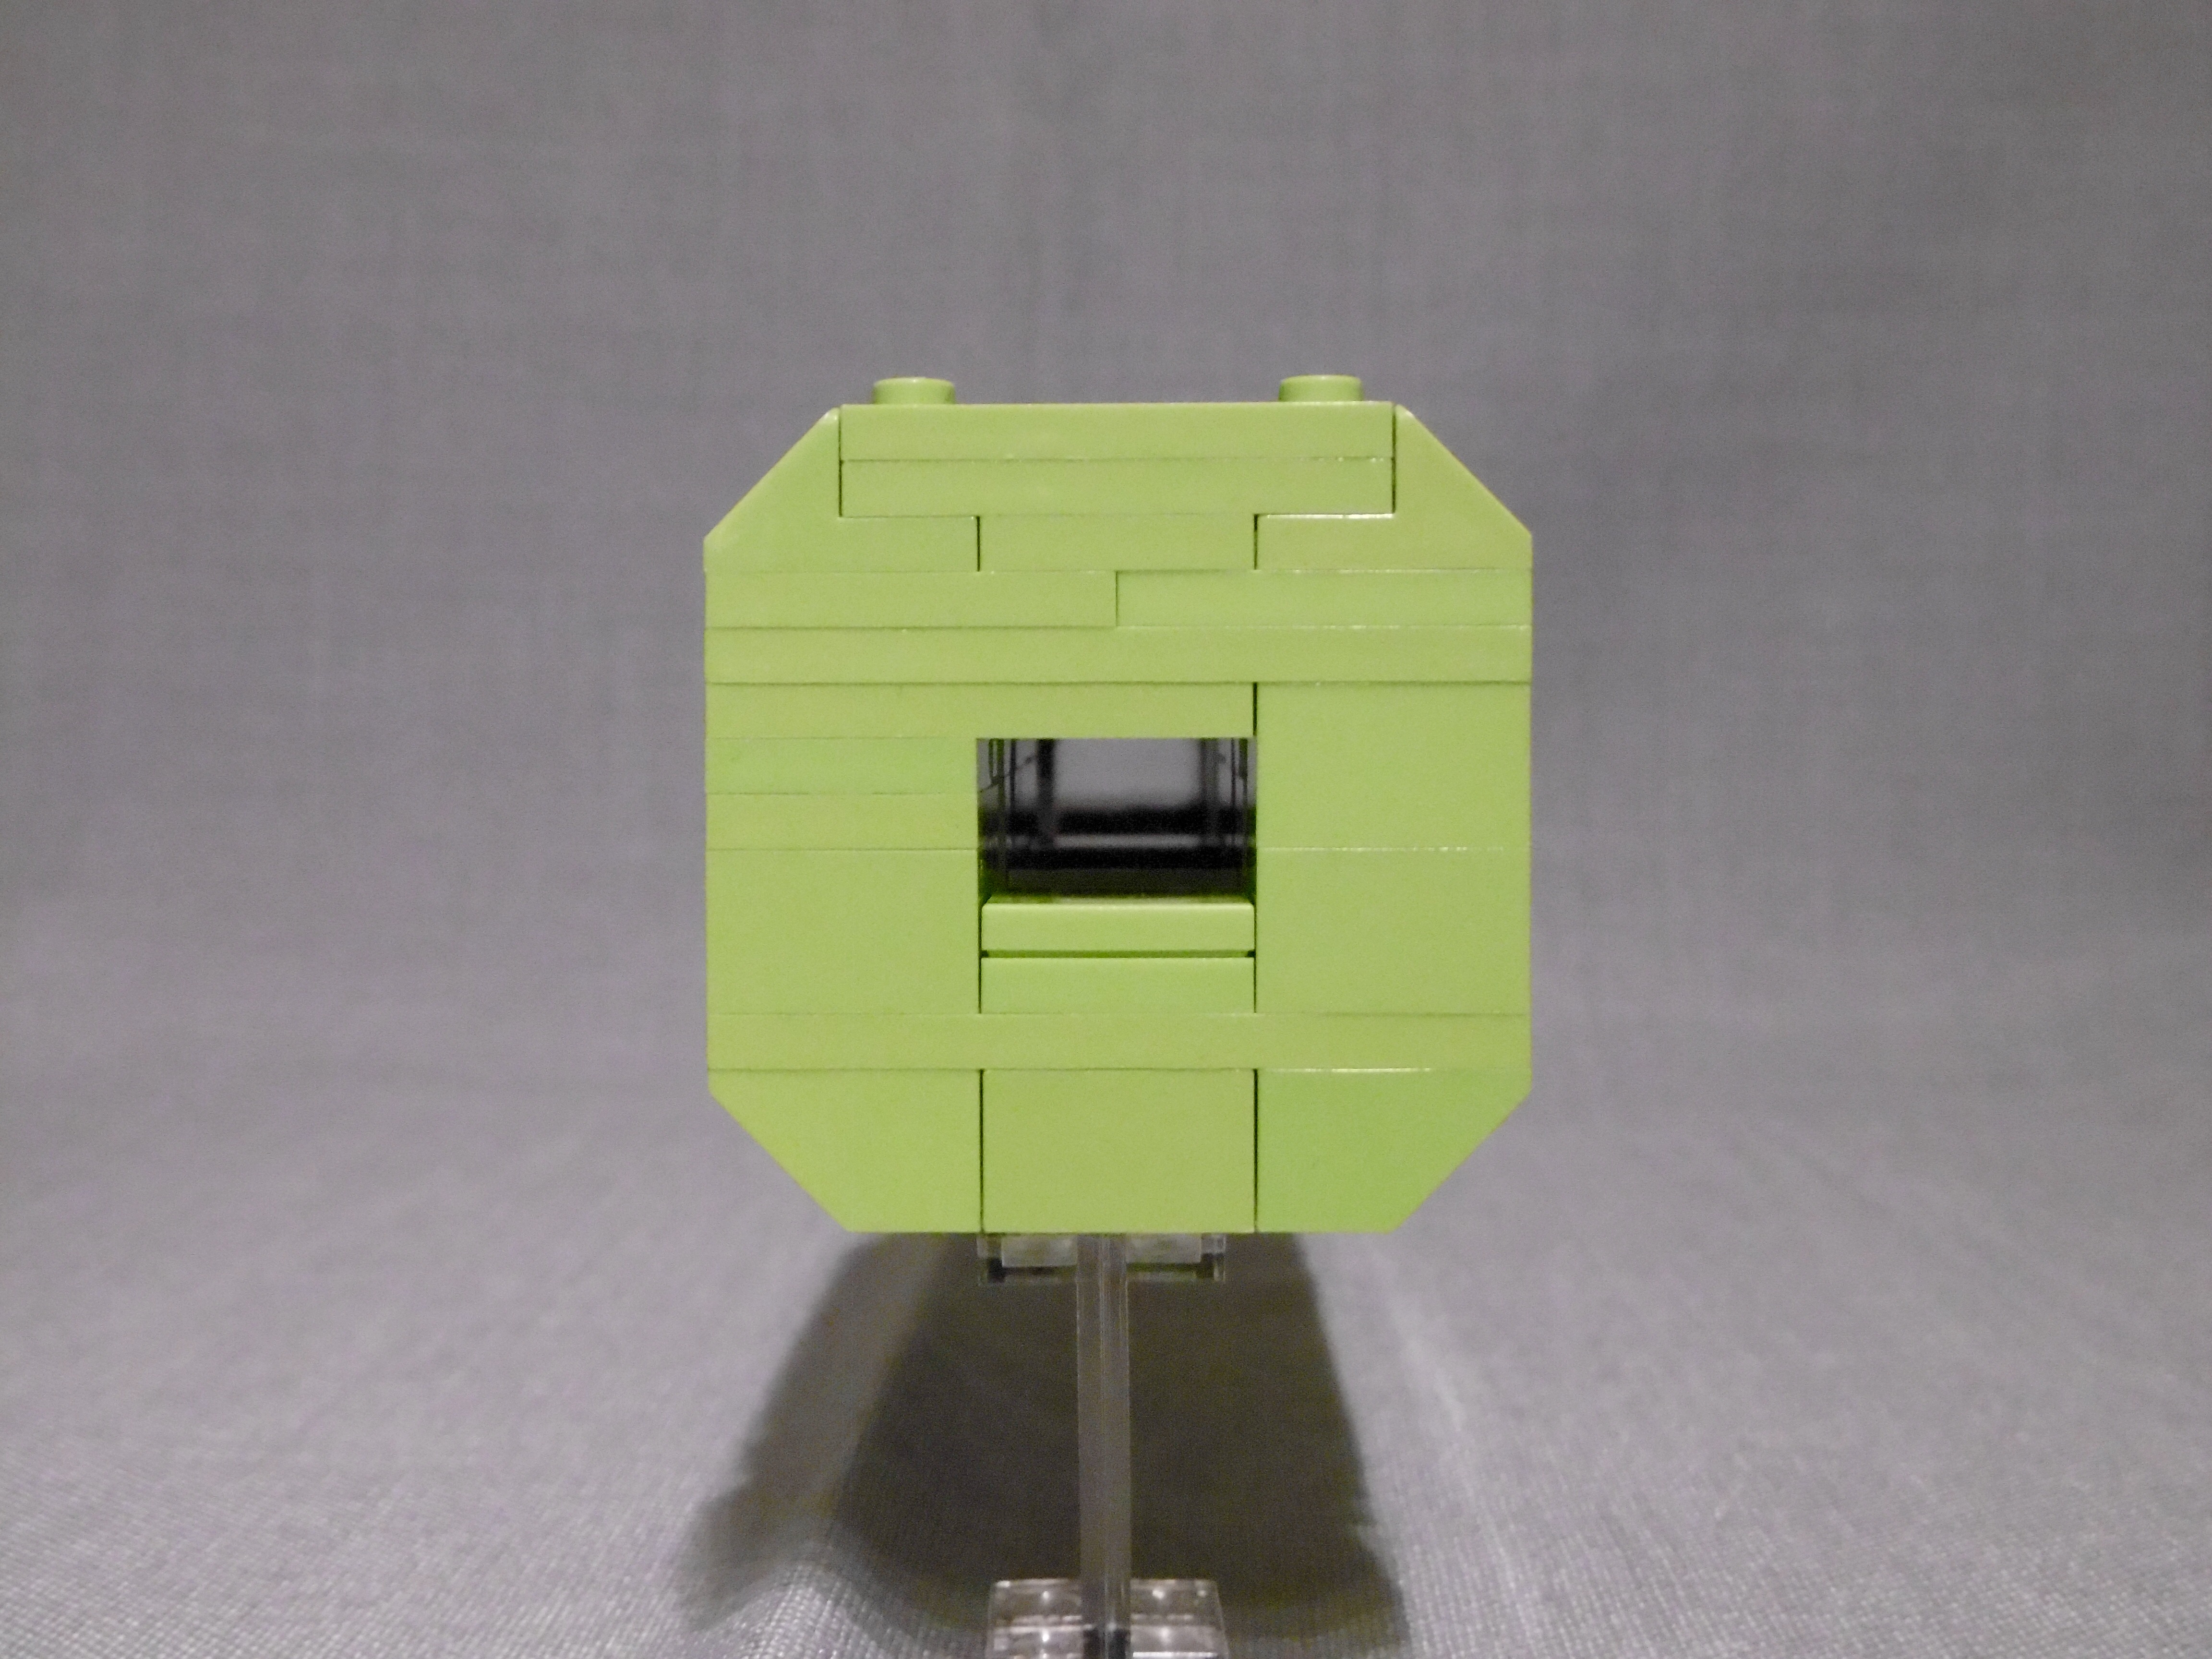
Each of these “skeletons” has a lot of free space for new folding cube designs. The 1×1 round plates (black and yellow in the “skeleton” model) can also be replaced by any parts that can fill a 1x2x2/3 gap.

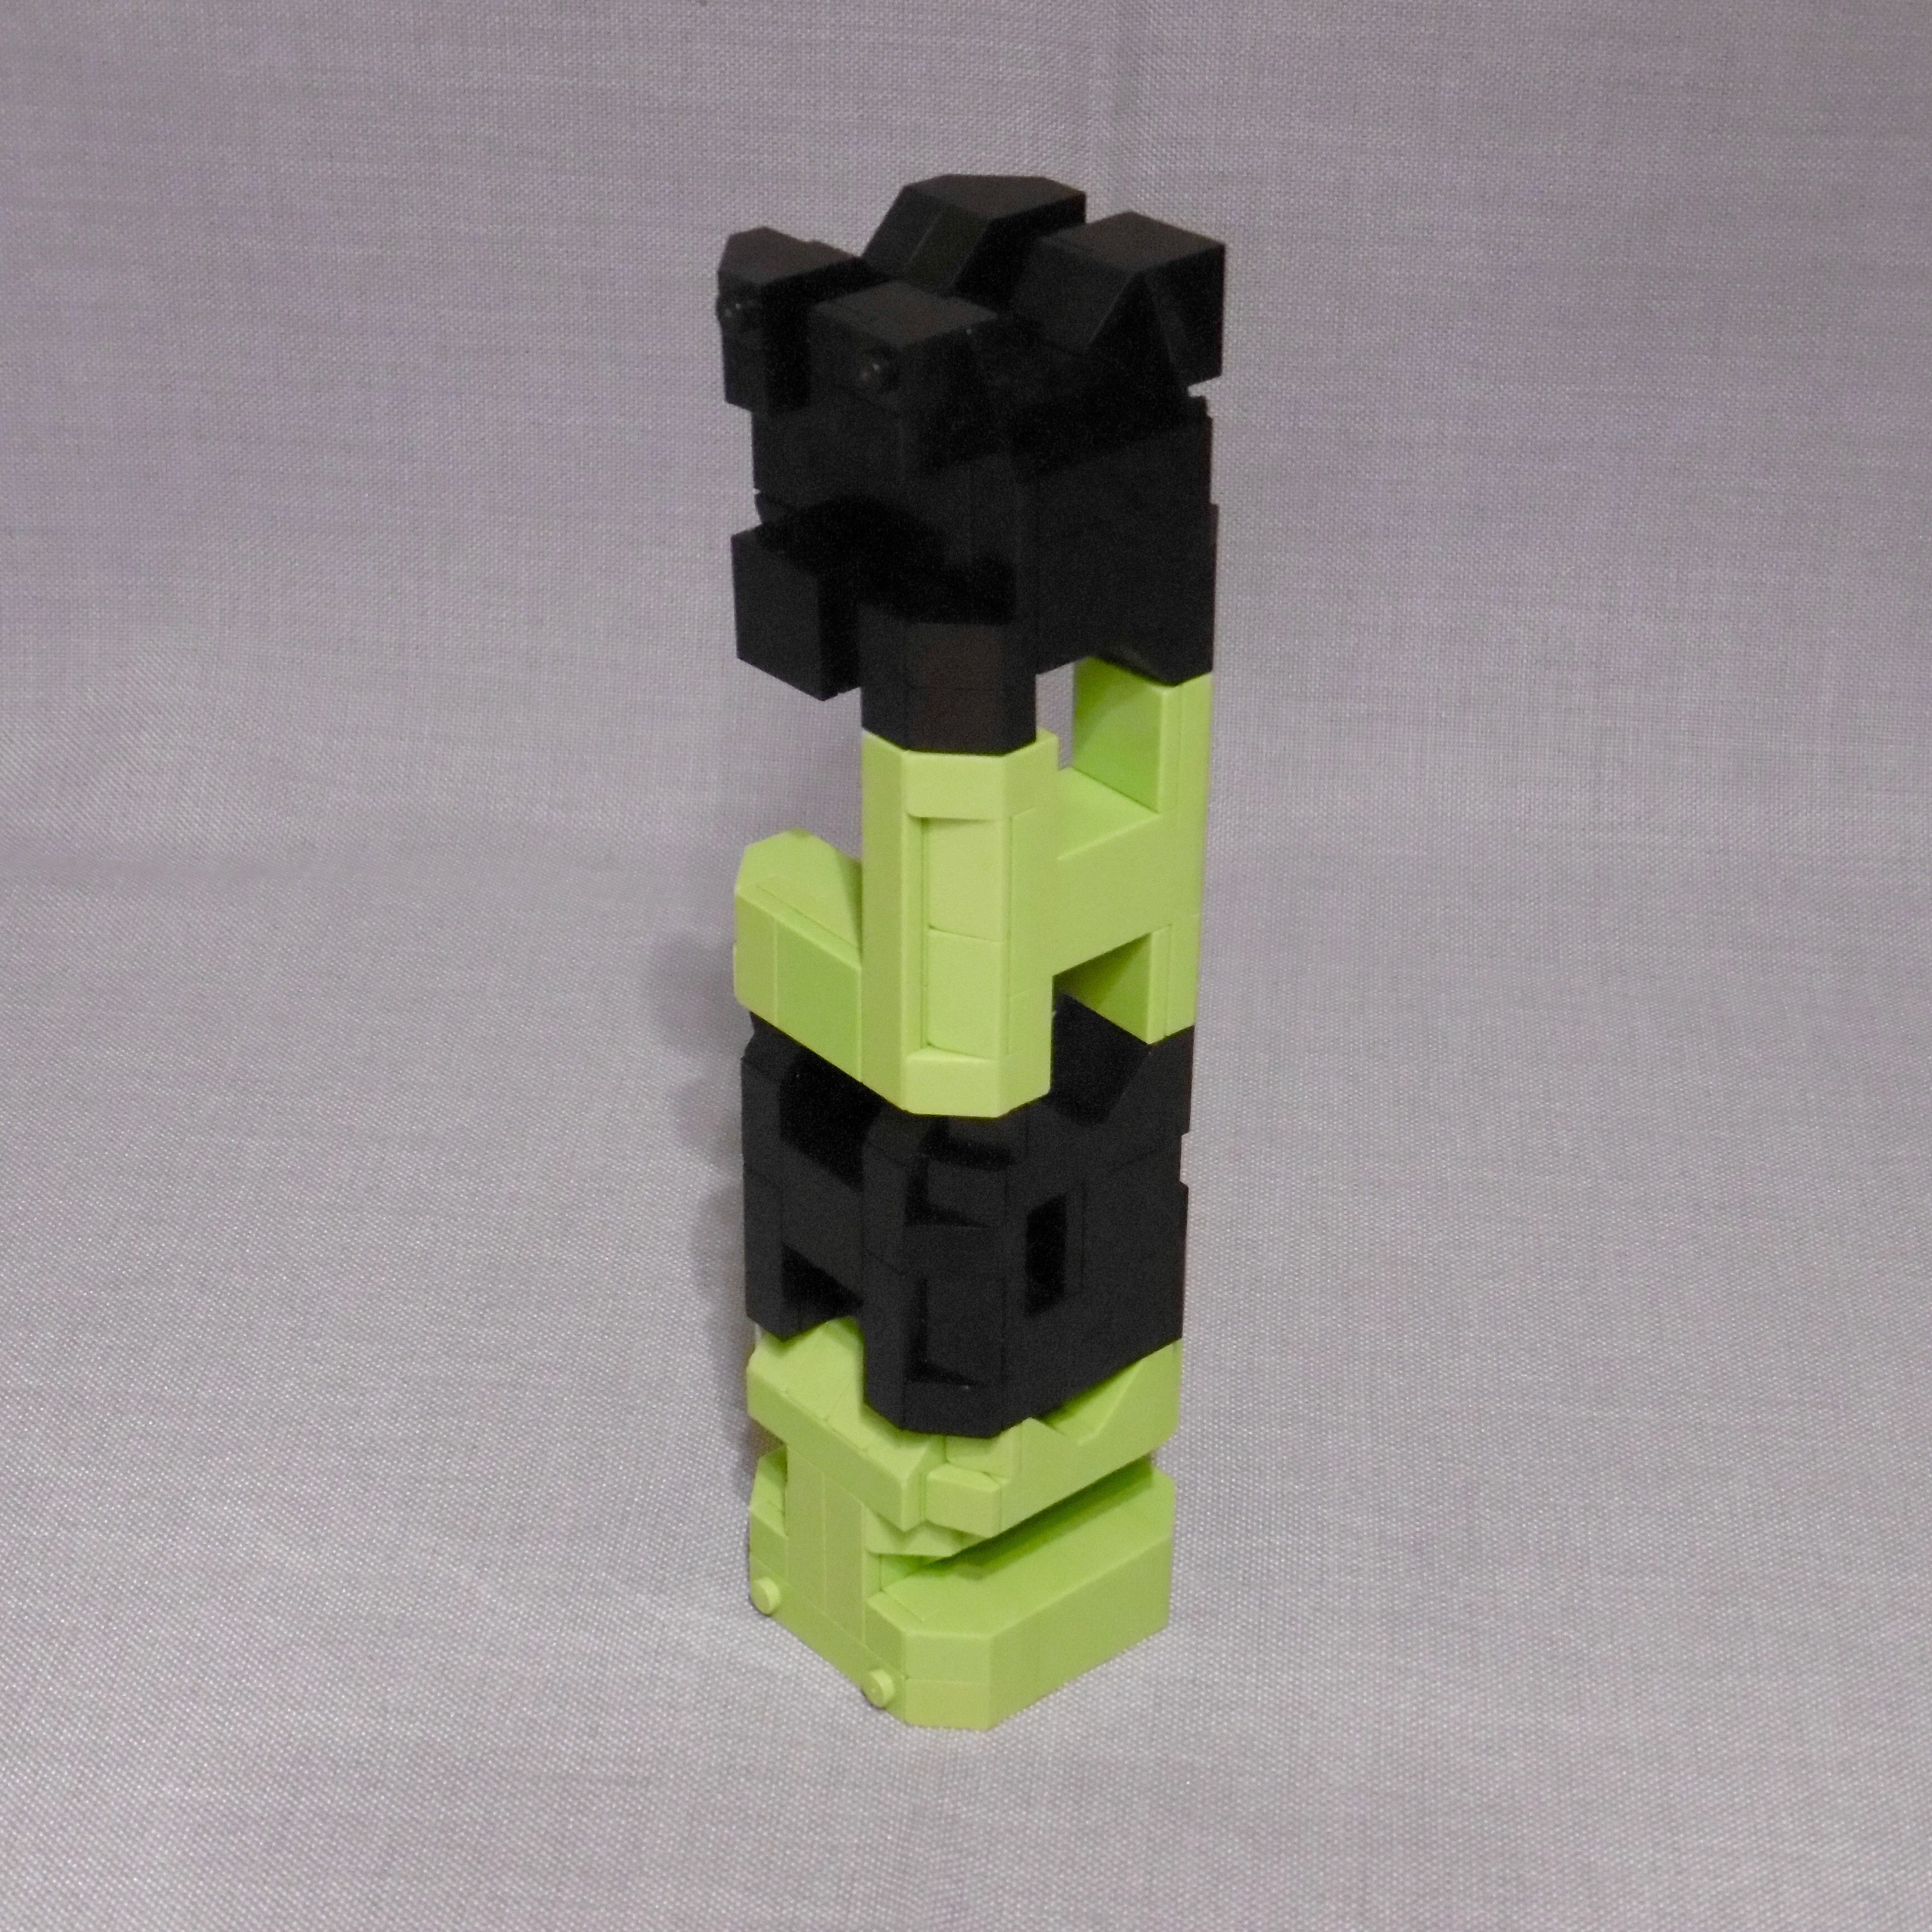
And there will be even more possible variations if you apply the “orange” changes only on one side of the cube/cuboid creating a non symmetrical “skeleton”.

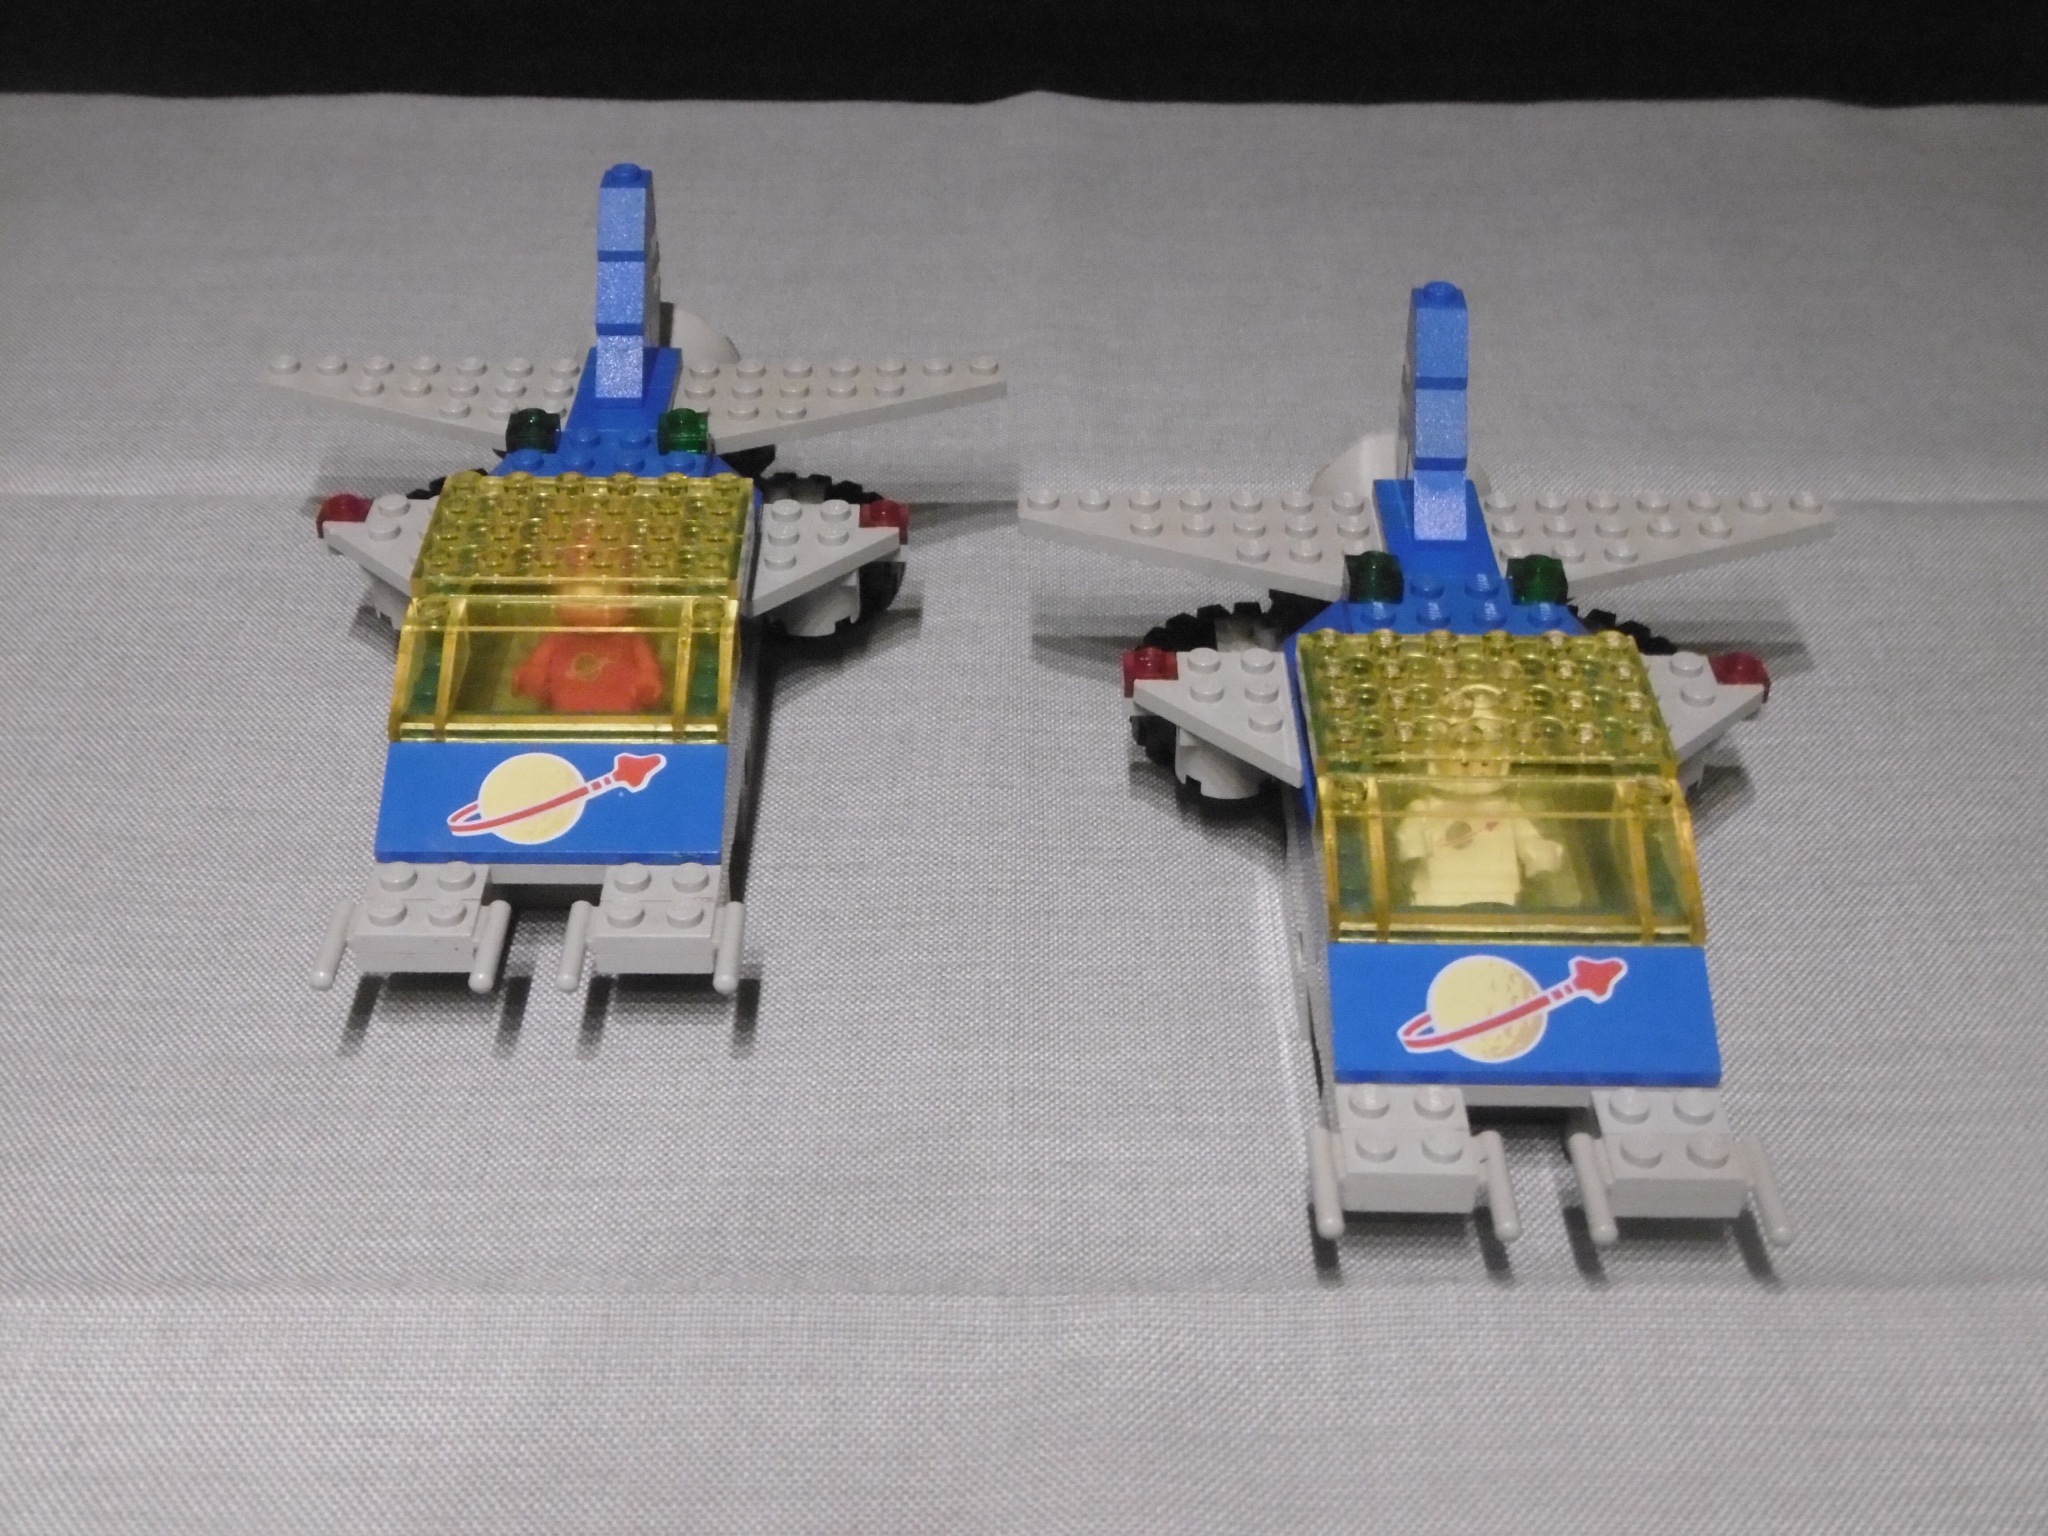
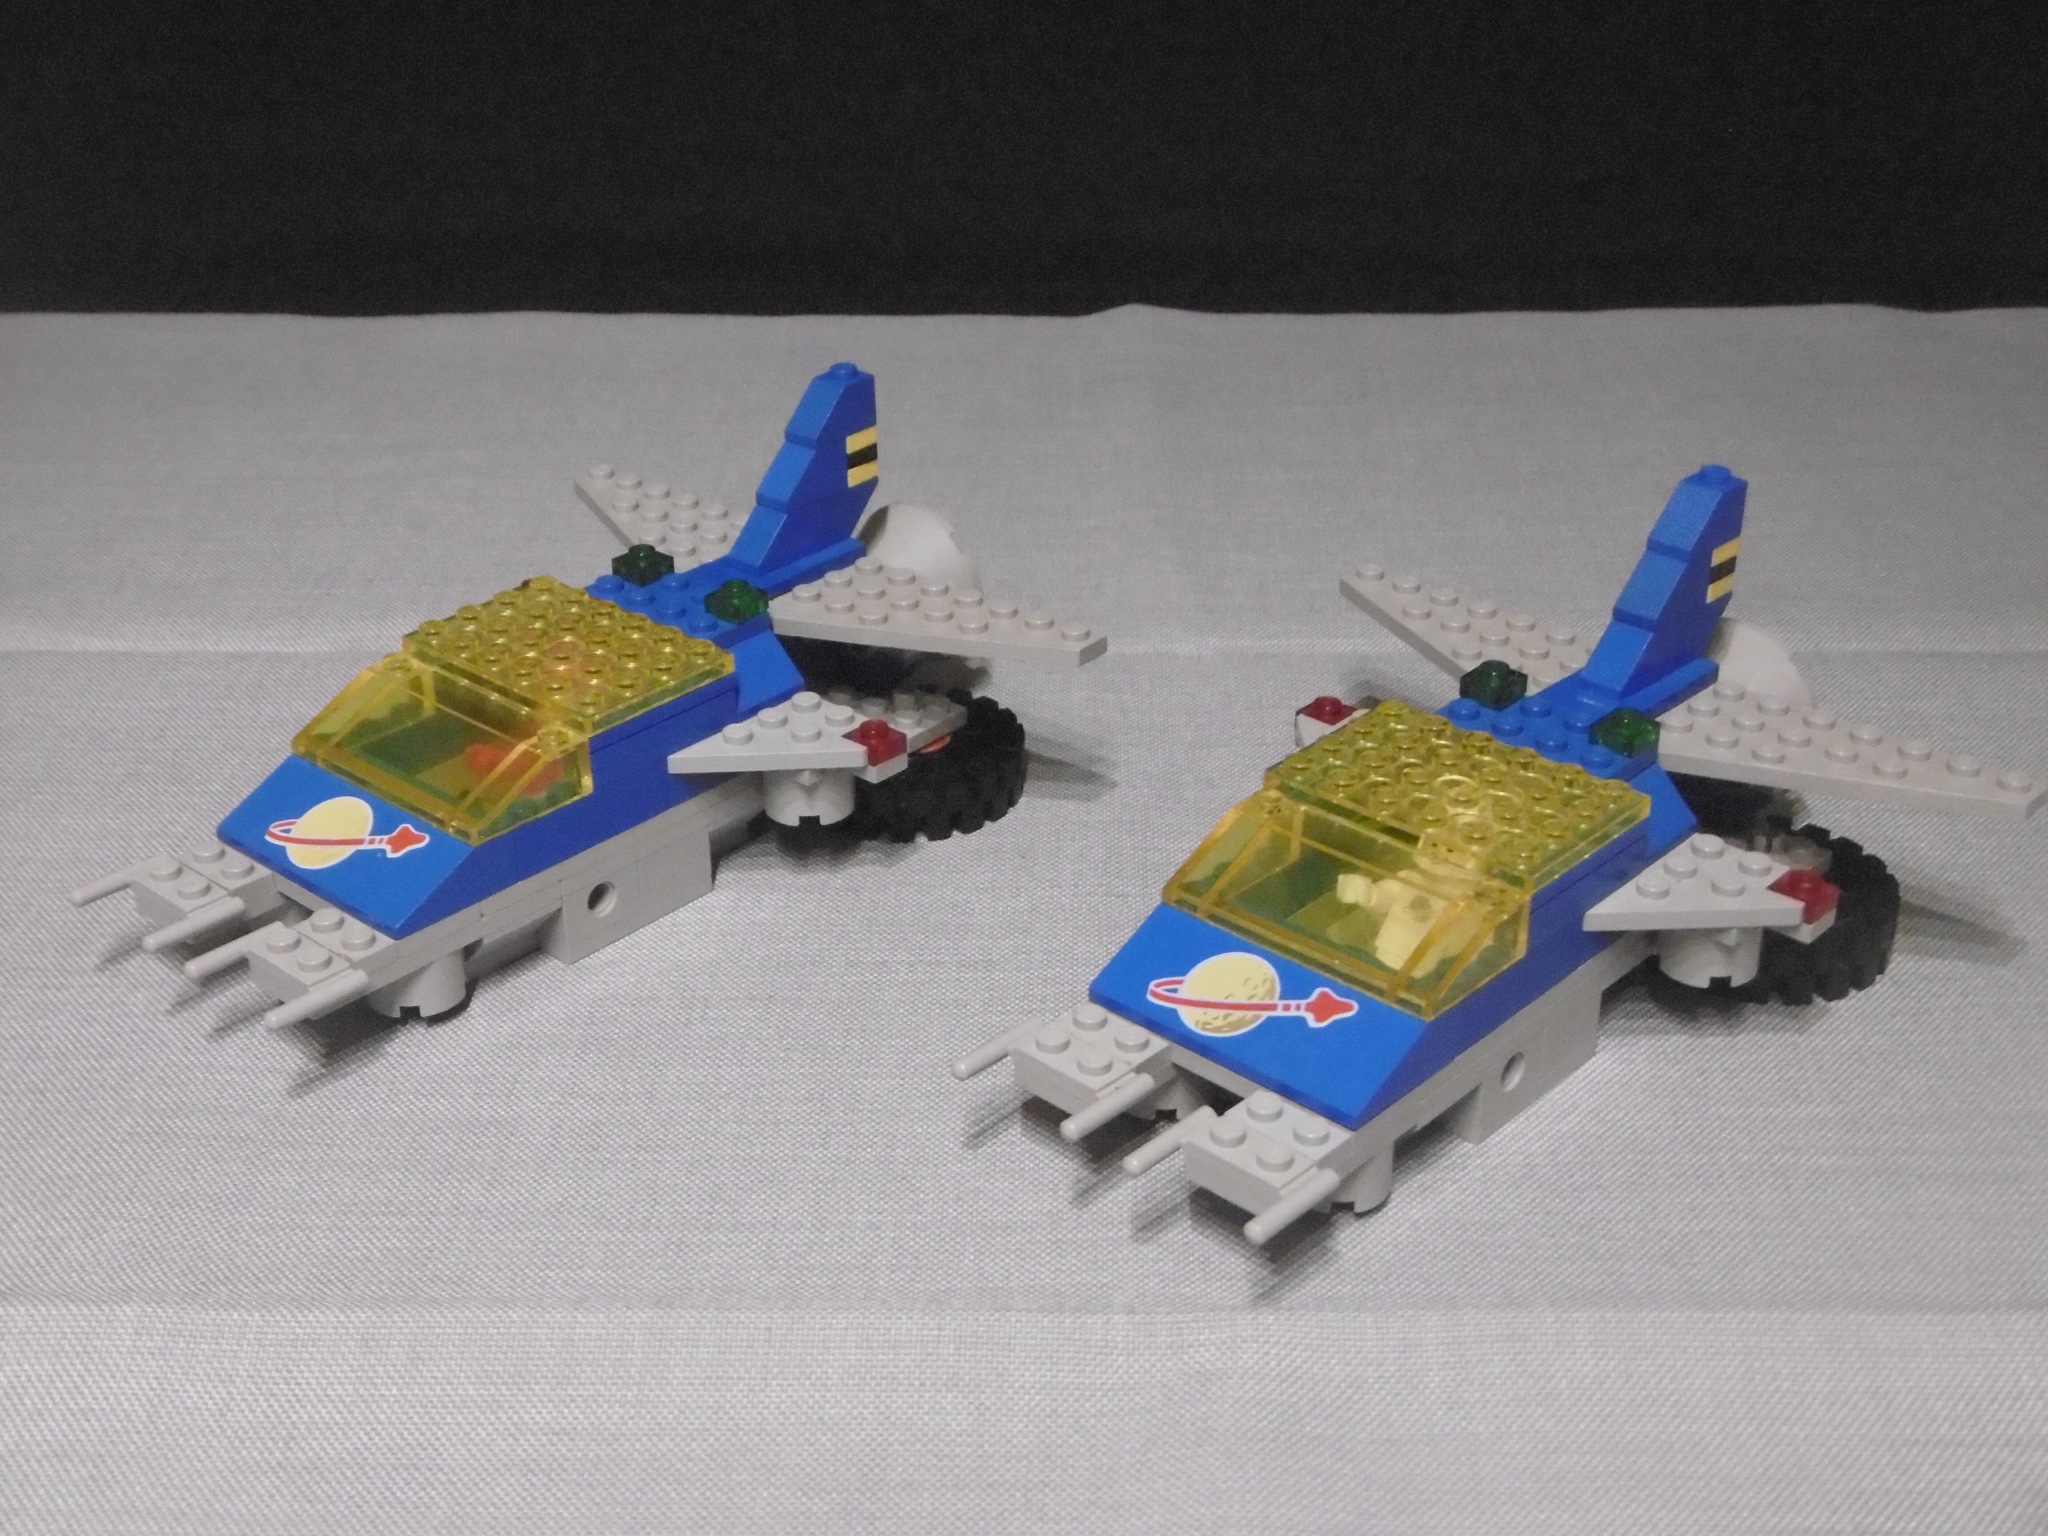
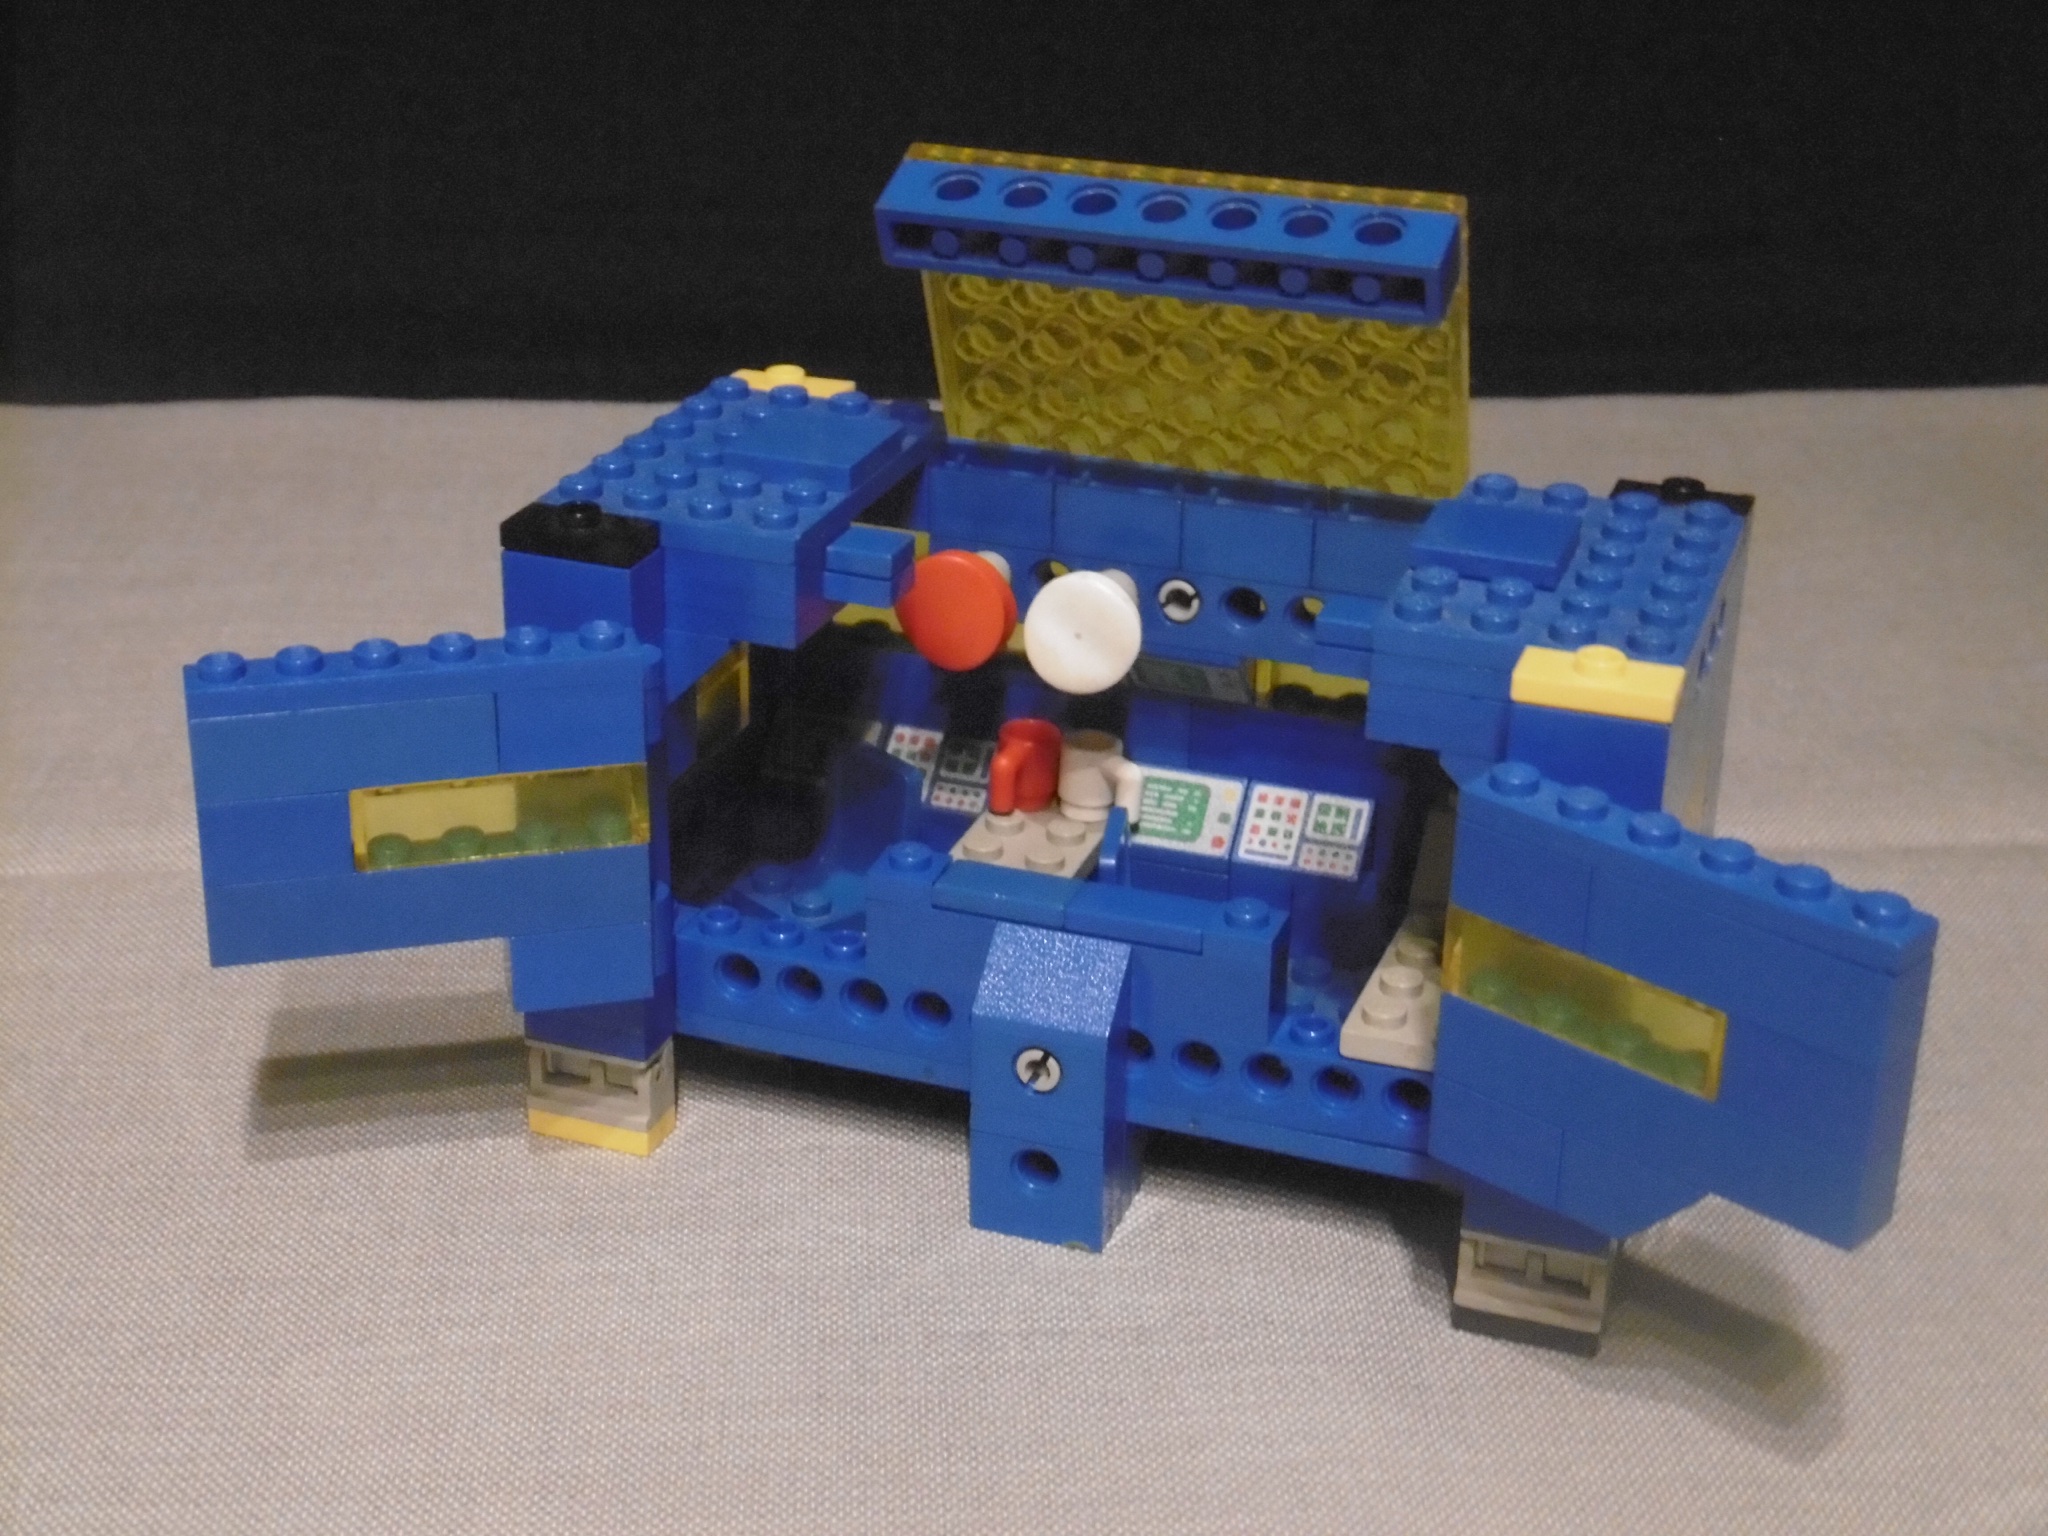
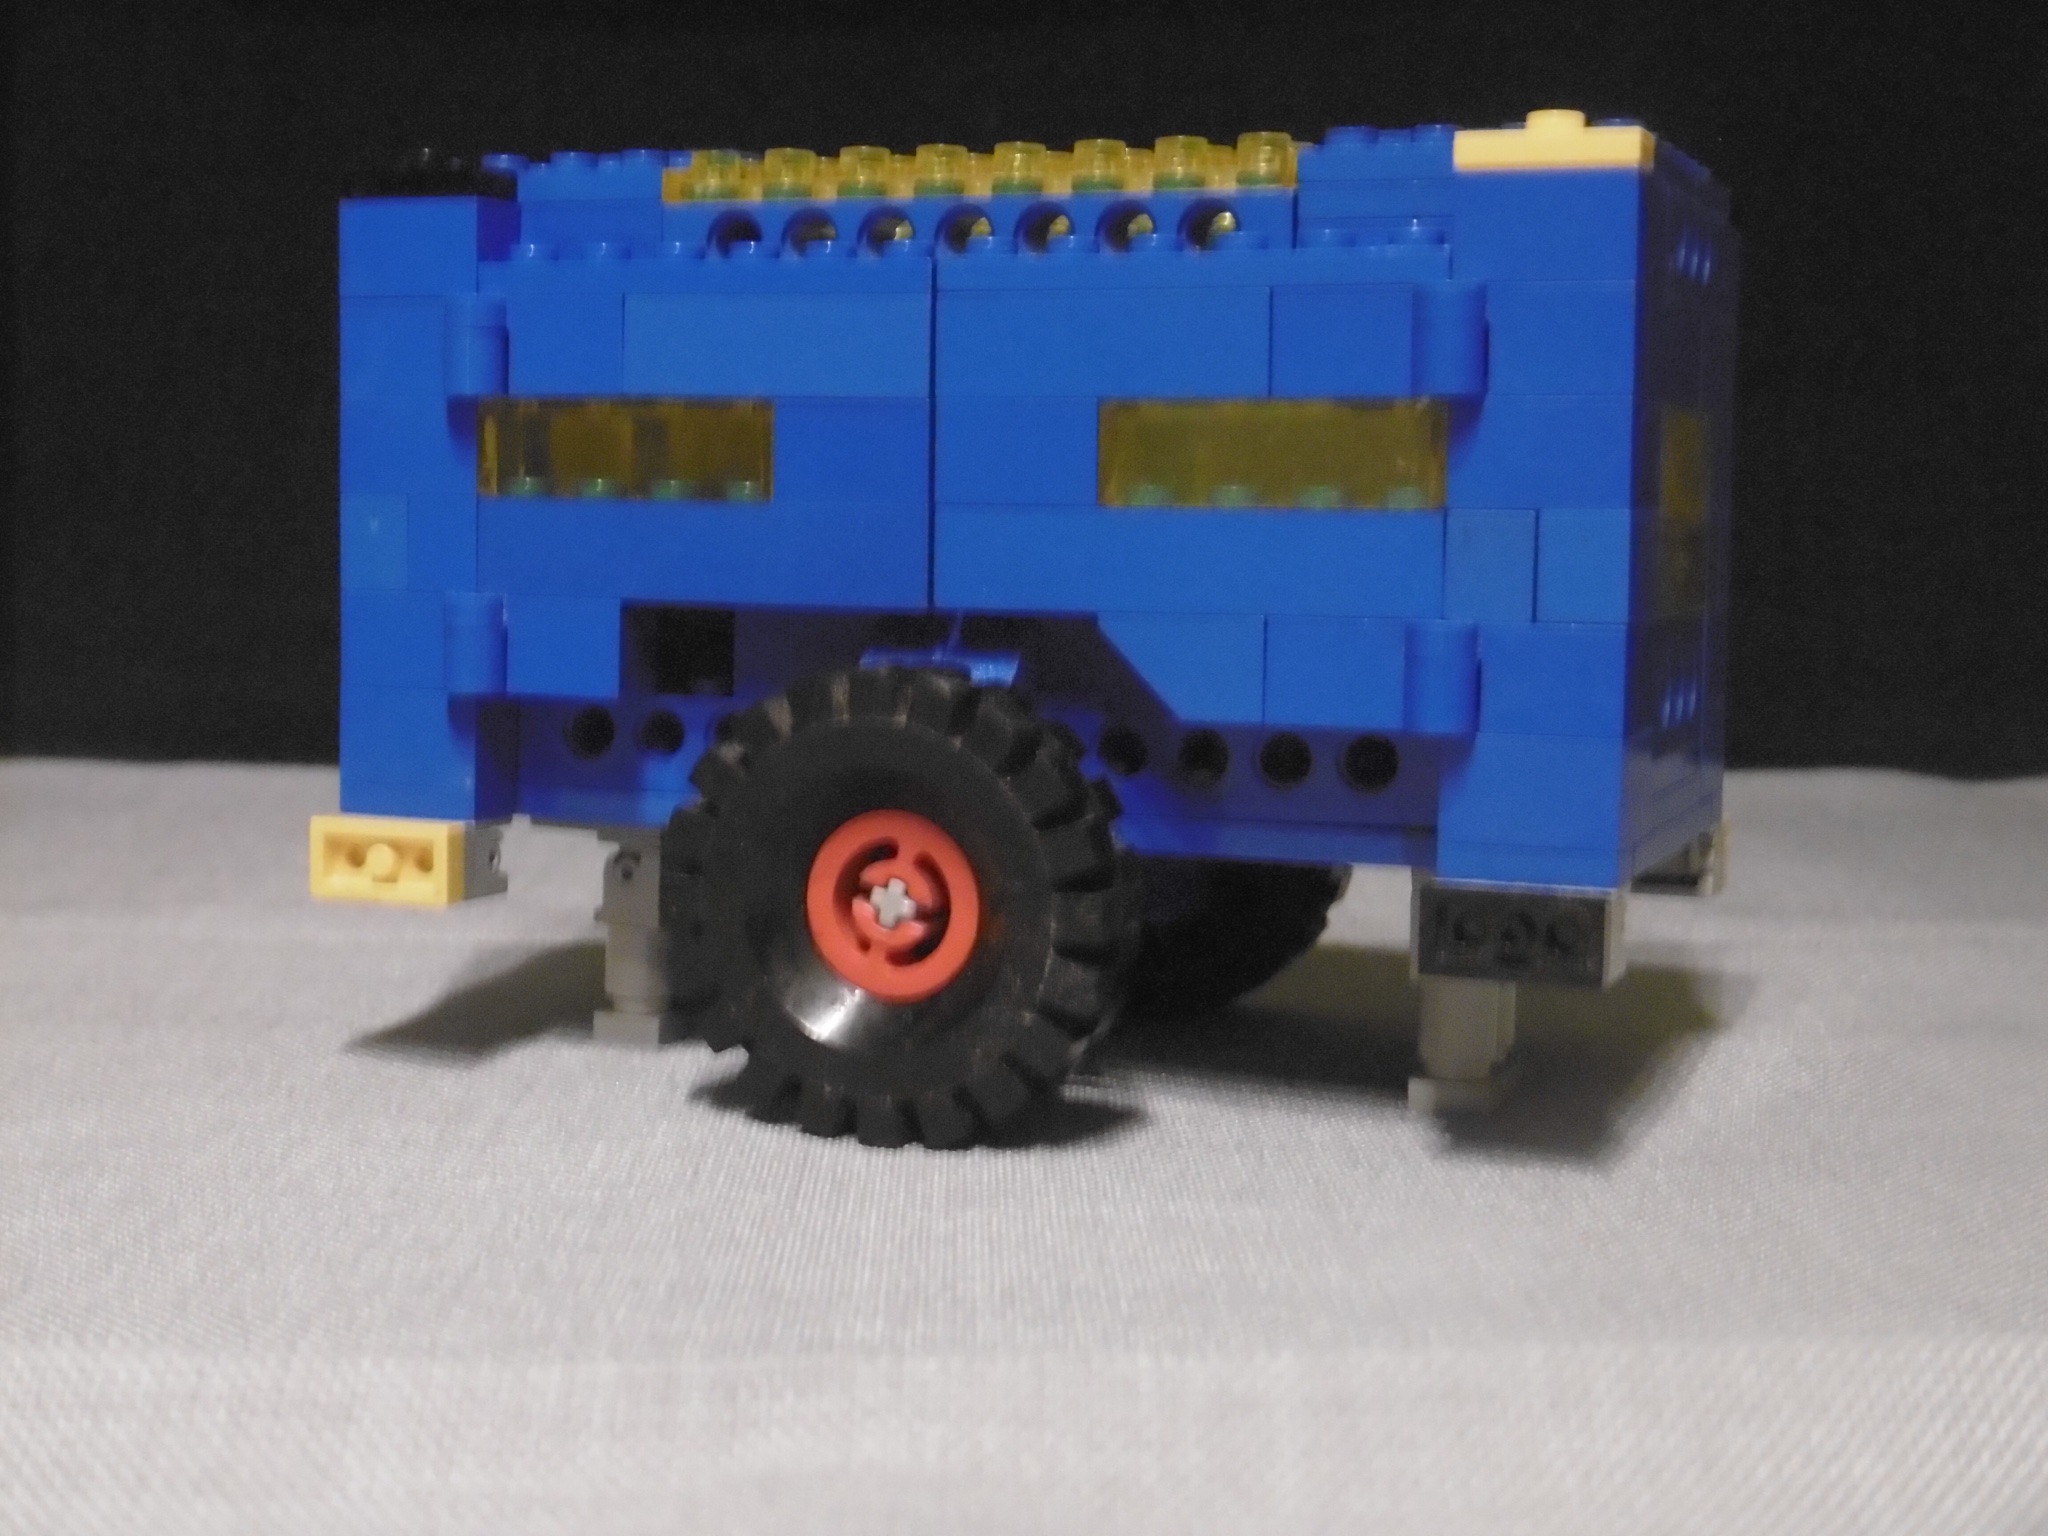
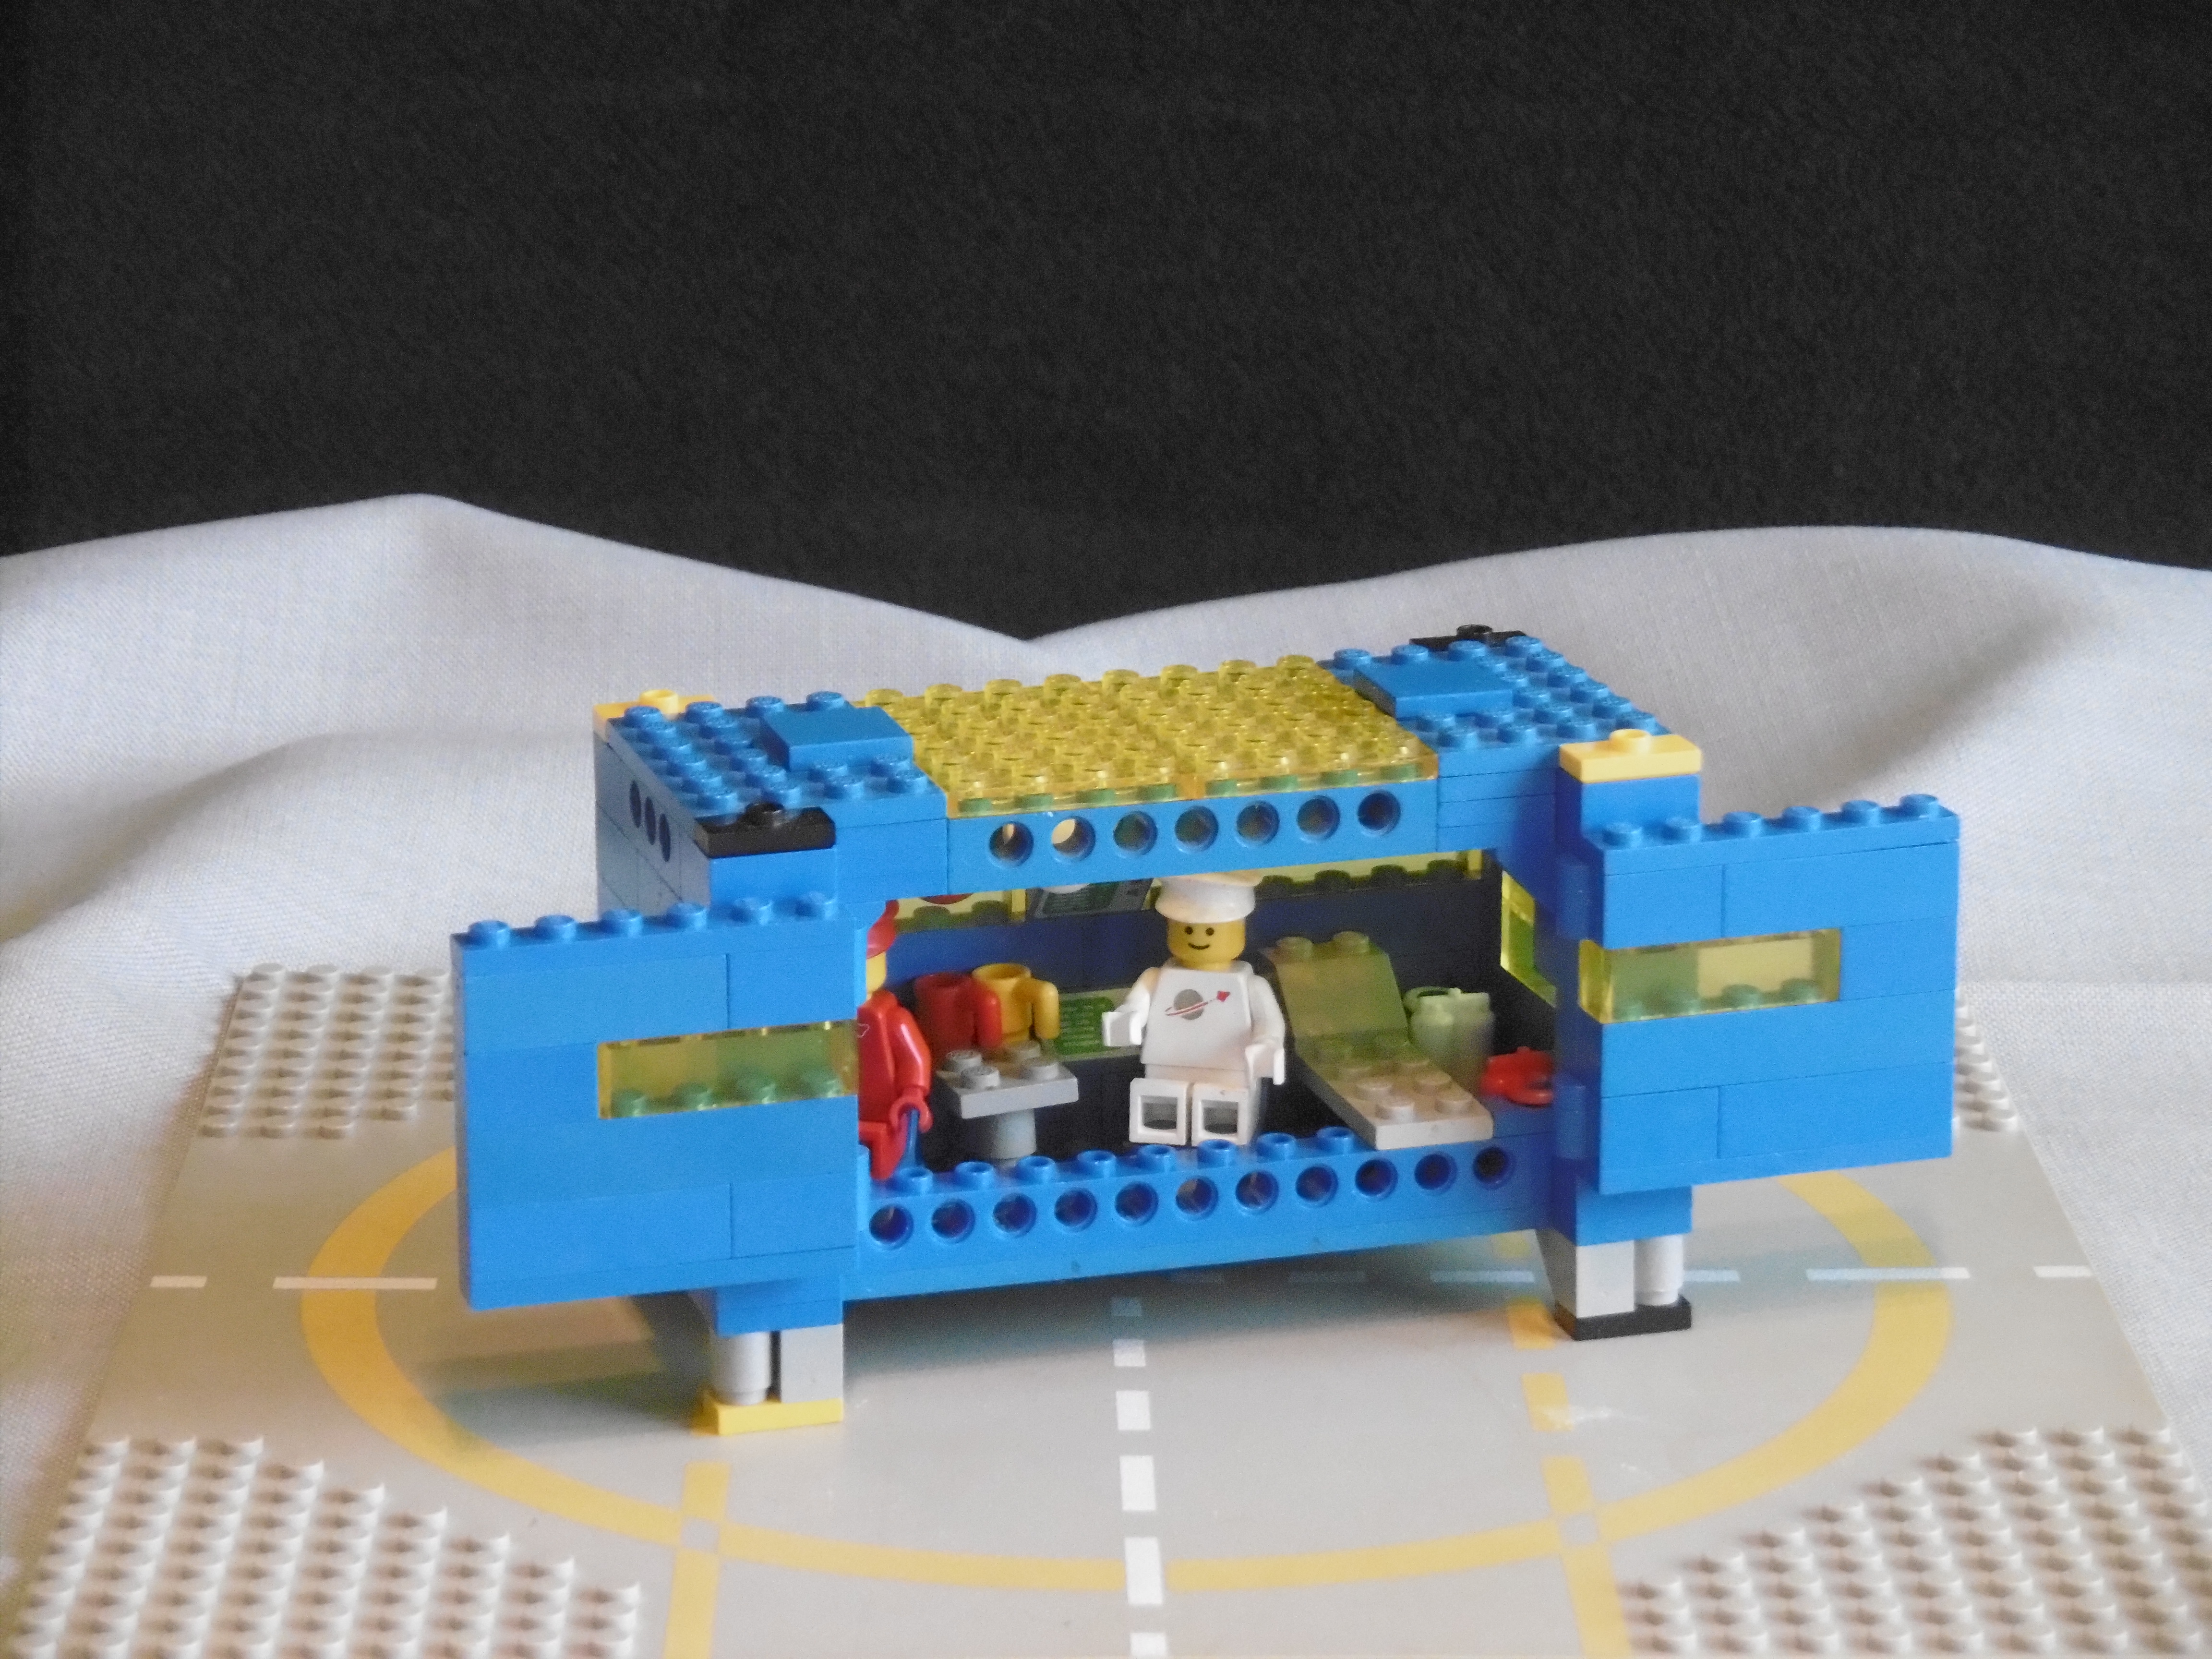
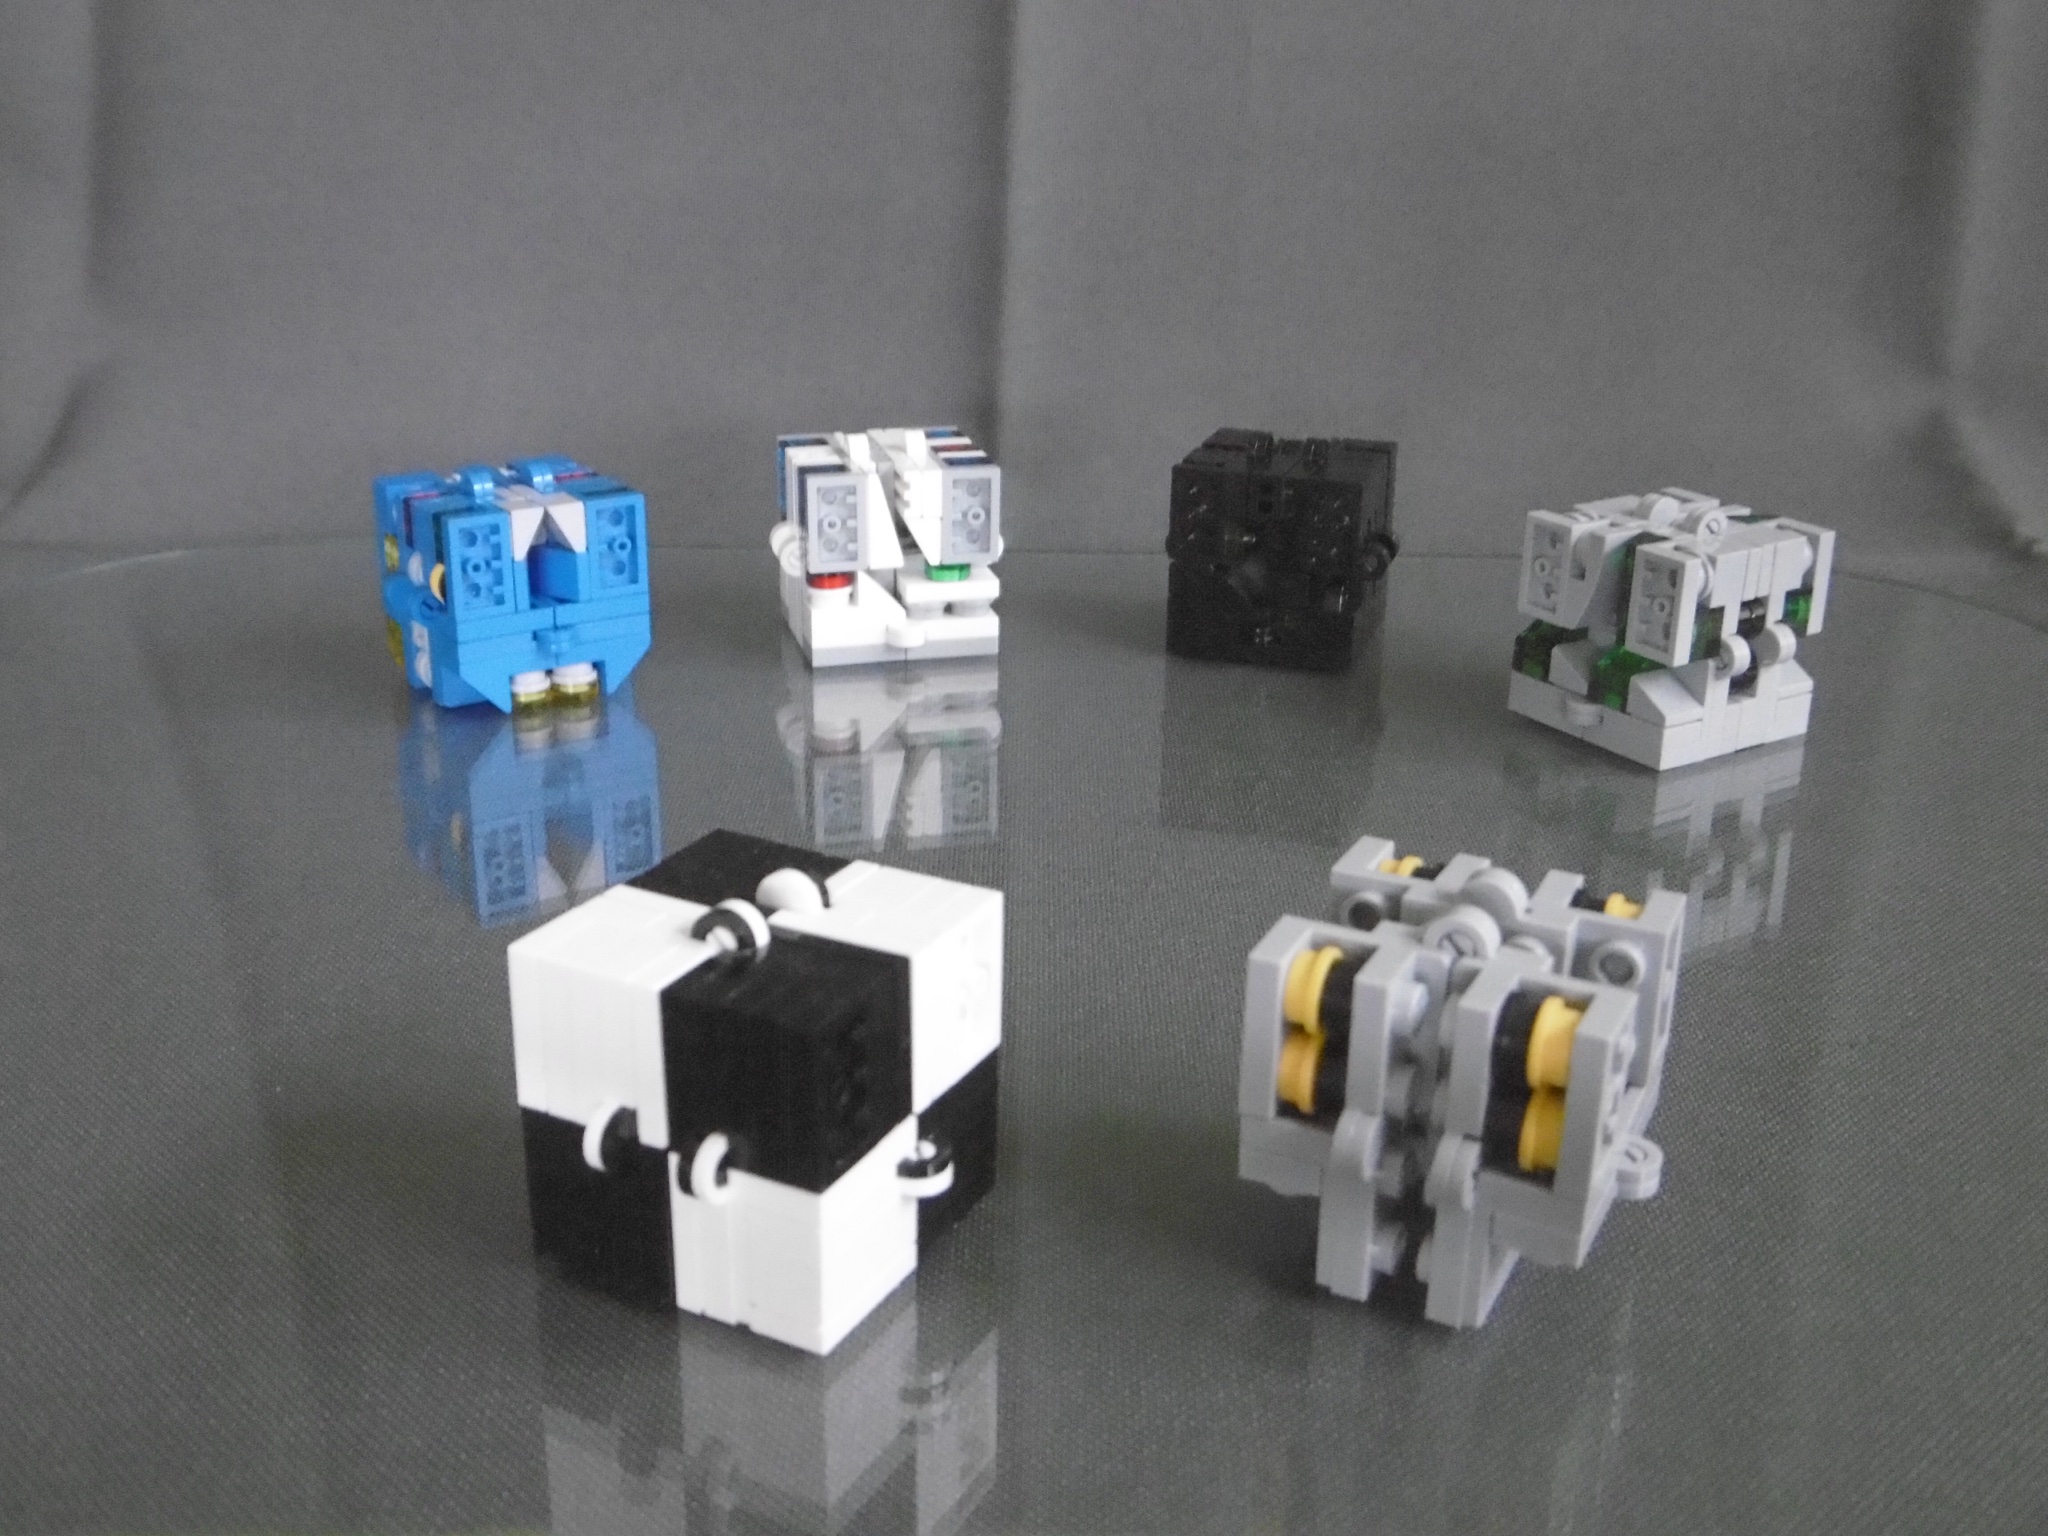
After all you have a lot of possibilities to build some cool stuff around it.

So this is the basic skeleton for my Lego Magic Folding “Fidget” Cube. I hope you like it! :-))

Feel free to use it for your own folding cubes.
Credits would be appreciated if you did so ;-)).

1979 Classic Space Solar Power Transporter

A 1979 version of the Classic Space 6952 Solar Power Transporter from 1985, including a middle section with a small transportable base.

This was my “bigger” space project I have been working on the last few months. 6952 has always been one of my favorite Classic Space sets of all time. I always wanted one (my cousin had one), but have never bought one (Hey that’s a good idea for Christmas…). So I thought about it and how it might have looked as a 1979 set (still my favourite CS era).

The design process (with LDD as usual) already took it’s time until I had the final idea for the middle section. The building process instead didn’t take much time, as I already had most of the needed parts in my CS parts collection.

First thing first – These are my two little Vic Vipers that I’ve already posted for NNoVVember 2017:
The Vipers remain unchanged. They only wear two additional truck wheels underneath their rear wings. The first designs of the scout ships had a single “nose” and no single tail fin. But when I thought about a Vic Viper for NnoVVember 2017 I thought that they would look really cool with these two design elements.

You can have a better look on the wheels on this picture:
You can also see the holes on the side needed to fix them in rover mode.

The rear wing sections can be disconnected to build the rover:

Add the wheels, connect the cabin sections and there you go, just like the original model:

And now it’s time for the middle section:
This is only a small modification of my Transportable Base posted in January this year. I’ve added four foldable “feet” in the corners, two foldable supports underneath and two centre “feet” to fix two wheels.

A little modification of the doors*, two extra 1×4 Technic bricks on the side, and that’s it…

* Oops, there is a 1×2 inverted slope missing on the left side (must have been my son). I didn’t notice that when I took the pictures – Too late now! ;-))

The interior still is quite the same:
There is only a little change for the wheel holder. The corners can be used as a holder for the Astronauts’ oxigen cylinders.

Just add two wheels, fold down the grey side supports, fold up the corner “feet” and you get a nice little “Space Caravan”:

Add two couplings …


… and you are ready for the big expedition vehicle:

The complete vehicle:

The rear wing sections of the scout ships can be attached on the top of the middle section, just like on the original model. The roof can still be opened.


A single cabin section can be seperated and operate as a scout ship while the rest of the vehicle moves on:


The middle section in “Transport Mode” with the two Vic Viper scout ships is ready to be picked up …

… by the the  LL926 Space Crane Transporter:With a little modification on top of the wing section LL926 can carry the middle section and the couplings.

Ready to go…


So this is my 1979 Lego Classic Space Solar Power Transporter.

I hope you like it :-))

1979 Classic Space Solar Power Transporter
BrixBlog | flickr | MOCpages

Classic Space Vic Viper

A Vic Viper vor NnoVVember 2017 in 1979 Classic Space design.

This is a little spaceship I’ve built for a bigger project. I’ve had it finished for a while when I realized that with a few small modifications it could become a cool little Vic Viper. This is it:

Another bird’s eye front view (“Vic Viper Shot”)

What’s better than a Classic Space Vic Viper?
A pair of them! ;-))


So this is my Lego Classic Space Vic Viper in 1979 design.
I hope you like it… :-))

Classic Space Vic Viper:
BrixBlog | flickr | MOCpages

21303 Wall-E with Power Functions RC

A mod of the 21303 Lego Ideas “Wall-E” set adding Power Functions motors and remote control.

When I saw the official Lego Ideas Wall-E set I knew I had to have one. But with 50,- € it wasn’t cheap at all, especially considering the extra 60+ € that I would need for the Power Functions elements to motorize the set.

When I decided to go for it anyway, it was almost too late for that. I was lucky to get a set without box or instructions at the original price. That was OK for me, but not my original plan ;-)).

The plan was: “No Wall-E without Radio Control!”. So I started looking for possible solutions other fans had found.

The most popular conversion is the one built by Youtube user PPung Daddy, but I wasn’t really satisfied with it. The cables of the motors were positioned too close to the ground, the battery box wasn’t really fixed and the IR receiver looked almost like a backpack.

So these were my main tasks when I tried to build my own version of an RC Wall-E.

I looked for better positions for the M Motors, but the best thing was just turning them by 90 deg to position the “cable exits” on the rear side. The motors are fixed by two Technic pins, the driving axles and 10 SNOT 1×2 Technic bricks with cross axle holes.file-d68dd6e4-684b-4e0d-92c2-e175cf0b421c-13893-00000dfc3d5d8d36

There isn’t much space inside Wall-E’s “belly” so I looked for the lowest possible position to locate the battery box. I built a new ground plate with a 4×8 cut out, so the ground plate of the box is now part of it. For this solution I had to get rid of the hinges of the front plate, but that was OK for me. Now the plate is just fixed by four SNOT studs.

The front of the box rests on two 1×2 Technic bricks with cross axle holes, which are fixed by an 8L axle running through them. To change the batteries you just remove the axle, then you can flip down the box.file-1ce1fd37-e838-409d-b23c-072820c24e7e-13893-00000dfc3f807535

file-fed0048e-0dd9-43d4-8a03-2daad443ebe0-13893-00000dfc422e93a5

You can switch the battery on and off by pressing the lime green lever. The hole in front of the neck part is big enough to do that without removing any parts. Looking inside you can even see the green LED of the battery.

file-2271bcd3-cb64-429b-9c2c-69404f9c239e-13893-00000dfc40c87a9c

The neck of the robot is fixed in a higher position, so the lower neck piece is one stud shorter to keep the original look.

With the lower position of the battery box it was possible to locate the IR receiver on top and more “integrated” into the design of the robot.file-d4c8e8d9-315c-49c4-b6e1-a6cf2e72e3a9-13893-00000dfc3e887f1b

With the rear panel fixed by one of the original 1×4 SNOT bricks and a modified plate with hinges on top Wall-E’s rear side looks almost like the original model. And I think even the motors look OK where they are.

I’m really satisfied with the result. The only thing I’d still like to improve is the fixation of the motors. Even 10 studs for each motor aren’t strong enough to keep the motors in position for a very long time. The torque is just too high for that. But that’s OK for me (for now).file-7def1f8d-a72e-4fa2-be42-88d358567d57-13893-00000dfc3c4975d9


So, this is my Lego Ideas 21303 Lego Wall-E with Power Functions motors and remote control (RC).

I hope you like it. My son does ;-))

NILSOBRIX: 21303 Wall-E with Power Functions RC
BrixBlog | flickr | MOCpages | Youtube

Classic Space Transportable Rover

Febrovery 2017: A Generation 1 Classic Space Rover designed for maximum mobility.

I’ve always thought that the original Rover from the 928 Galaxy Explorer set was cool, but far to small to be as cool as LL928 itself. So the task For Febrovery was just that: Build a Rover with maximum size and coolness but still small enough for LL928’s cargo bay. And to get the real look only bricks available in 1979 should be used.

This is the result.file-ea65468e-9154-45cf-a0a6-b1f8cee9d14d-5944-000008a2cd9d2055

file-09d06944-c58e-4fb2-8542-4e19ee01f597-5944-000008a2cba61bda
The Pickup bed of the Rover works as a transport pallet which can be moved with a forklifter.

file-74f4322c-1eca-4213-8c2e-3dc841d94669-5944-000008a2c84f49b9The transport pallet has just the right size for the cargo bay of my LL924M.

file-add156ad-3531-46a6-9072-821d4dac2301-5944-000008a2c7378fcfCargo bay doors closed, ready for take-off.

file-175af886-1895-49fd-a142-a0db656f8a61-5944-000008a2c5118e6bAnd now it’s time to transport the Rover itself. The cargo bay of LL928 still has the original size. I’ve only replaced the 2×4 brick in the front of the cargo bay floor with a 1×4 brick and two 1×2 tiles.

file-80e4ad1e-7700-486e-a406-9cec160c5cec-5944-000008a2c1ae2821Yes, the cargo bay doors really close around the Rover.

b027_33091498406_8135fa5fc1_oAnd another way to transport the Rover: A standard cargo box mounted underneath my LL926 Space Crane.

b027a_32750724780_47eeacc759_oThe cargo box used as a garage for the Transportable Base.

b027b_33091519936_7f45900609_oTwin tyres on all four wheels and a high ground clearance are a great combination for an All Terrain Rover.

b027c_33006237411_032229543c_oJust like the 891/442 Space Scooter/Space Shuttle it has two steering wheels to be piloted by either of the two Astronauts.

b027d_32317792373_fcbf56657b_oSo this is it, my G1 Lego Classic Space Transportable Rover for Febrovery 2017. I hope you like it :-))

NILSOBRIX: Classic Space Transportable Rover
BrixBlog | flickr | MOCpages

LL926 Space Crane

img_0761

A Space Transport/Crane Ship in Generation 1 Classic Space design

The design of this model started with a question: “How would something like a Sikorsky Skycrane look in Classic Space design?” The ship should have the same functions as the helicopter: Be able to carry a transport container and lift and carry a big payload with a winch.

The ship is designed around a central frame with a high wing on top. Between the crew cabin and the four legs of the ship there is a big space for the payload. The winch is positioned in the center of the frame, so the thrust of the four landing thrusters is concentrated  in the same axis.

And here it is:

img_0751

Front view: You can see the two main beams of the frame with the two pairs of landing legs positioned below.img_0752

Bird’s eye view: The crane cable runs though the opening in the centre of the frame. The winch is positioned behind the opening. The  shape of the main wings is based on the LL928 Galaxy Explorer.img_0757

The crane at work: LL926 landing with a payload container “at the hook”img_0735

And … Touchdown! The “LL 926” bricks are custom printed bricks based on the original design of the 1979 space ships.img_0736

Detail: The container can be connected to the cargo frame by pushing 4 axles into the container using the technic bushes on the axles.img_0736

Rear left view:img_0740

Detail: The rear locking mechanism (locked)img_0740

Top view: A cabin for pilot and crane operatorimg_0744

Detail: The crane operator at work

img_0764
So this is my Lego Classic Space LL926 Space Crane.
I hope you like it. – My son does :-))

Bonus picture: LL926 with LL924M and LL928img_0758

Classic Space Transportable Base

img_0722

A small transportable base for two Astronauts in Generation 1 Classic Space design. 

The basic idea is a modular system for space transportation and the building of planetary bases, more or less like modern temporary (or permanent) office buildings based on ISO Containers. This is the smallest module of such a modular base; a transportable unit for two Astronauts.

The size is more or less the same of the original 926 Command Center; 8 studs wide and 16 studs long. The base has 4 “telescopic” legs to adjust the height and get a horizontal ground plate. The combination of 1×1 round bricks, 1×2 inverted slopes and 1×2 plates is sturdy, simple and for me it even looks cool.

The design is based on the first Classic Space sets from 1979/1980. As far as I know all the used bricks should have been available in 1979.

And now some photos. Let’s open the doors…

img_0729

There are two computer stations, a table and a bed. It might be possible to replace the bed with two bunks, but the playability is better with a bed. So the astronauts will have to do “hot bunking” as usual on a lot of military vessels and submarines.

img_0727

The center of the roof can be unlocked by moving the 2×2 tiles and then be opened. There is storage room for the air tanks and helmets and the most important thing for long hours of hard work at the computer stations – coffee ;-)). The hats are the only ones that were available in 1979, but I think they look OK.

img_0818

So this is my Classic Space Transportable Base.

I hope you like it :-))


img_0731

Hey, what’s that?

A teaser ;-))

3D Ambigram: NILS-O-BRIX

img_0674

A 3D ambigram of the lettering NILS-O-BRIX. Looking at the sculpture from one of the three main views you see the different letterings NILS, O or BRIX.

An ambigram is a lettering or an image that can be viewed from two different points of view (usually by turning the image by a 180 deg). The meaning of the ambigram can be the same or different when viewed from the different points of view.

The most popular ambigrams  can probably be found in Dan Brown’s novel Illuminati and the movie with the same name based on the novel.

A 3D ambigram is a special kind of ambigram: It’s a 3D sculpture that has a different meaning when viewed from the three main views (top-front-side).

I’ve been fascinated by these things for a while, but when I read Illuminati for the first time a few months ago I decided to build one myself. I chose to build an ambigram of my “Brick brand” NILSOBRIX divided into the three letterings NILS, O and BRIX

I started with LDD with a design based on four 10x10x8 1/3 cubic blocks. When I finished the design I realized how big that thing really was. So I built a smaller version based on four 6x6x5 cubic blocks.

I decided to use two different colours to get a better seperation of the single letters. I used 1×2 clear transparent plates for the connection between the blocks (for the big one I had used 1×1 Technic bricks and pins for that). The rest was pure geometry.

The design is a pure “studs up” design (no SNOT this time) with slopes and wedges instead of curves.  The result is a “blocky” lettering looking a little like early 8bit computer letterings from the 1980s. I remember making similar letterings with PETSCII symbols on a C64 ;-)). I’ve also added a few of my signature studs on the top corners.

So, this is the result…

Top view: NILSimg_0666

Side view: Oimg_0660

Front view: BRIXimg_0670
(You can almost see a “NILS”-shaped shadow on the surface)

Additional detail:img_0652
The centre hole of the “O” goes all the way through the sculpture. It was really a challenge to achieve that without weakening the structure too much.

img_0655
So this is my 3D Lego ambigram showing the lettering NILS-O-BRIX.
I hope you like it :-))

LL924M Space Cruiser (LL924 MOD)

A long needed “nose job” for the LL924 Space Cruiser plus some extra storage space.

I’m a big fan of the first generation of Lego space ships from 1978/1979, but I’ve never been satisfied with the look of the “stumpy nose” of LL924.

After building LL928 for my little son a few months ago, it was time to build LL924 to  complete the first series of Lego spaceships (LL918 had already been waiting in the glass cabinet). But already during the building of the ship I realized that I HAD to change the design of the nose this time.

I decided to build a whole new wing section based on the design of LL918 and LL924. I only needed a few more plates than the original (including a pair of 45 deg plates on the wing tips) and even found the space for a complete yellow-black-yellow pattern on the wings.

And as I was already modifying the original design I decided to add some bricks and plates on the rear end to get some extra storing space.  This is the result:

More space for the cargo, in this case a 4×4 transport pallet.


Removing the “1×2 brick” in the cargo area from the original design there is enough space for the 4×4 base plate.

img_0806
The new wing shape in all it’s beauty.


The new LL924M compared to a transport scooter with the original LL924 wing shape.


So, this is my modified Classic Space Lego LL924 Space Cruiser (LL924M). I hope you like it :-))


Audi TT MkI (6-Wide SC Minifig Scale)

img_0547

A 6-wide Speed Champions model of my Audi TT MkI (8N)

The 75873 Audi R8 LMS Ultra was the first Speed Champions Set that I bought for my son (OK, I bought it for me, too, to get some of the new parts). Stickers on Lego Models (as well as on any other thing in our home) don’t last very long because of the special attention my son gives to them (1. pull off, 2. put on again, 3. go to 1.), so I have to replace them on all Lego models, especially the head and tail lights. I don’t really like them, so that’s no big deal.

In case of the R8 it led to additional inspiration. When I modified the front and rear end of the R8 I came to a version that looked more and more like a TT. So after building the R8 I was eager to build a TT. Of course, it had to be blue, just like the one I still have parked in the garage. So I bought a set of the 75871 Ford Mustang and modified the design of the R8 until it looked like a TT.

This is the result:img_0549
Finally, a matching ride for BrixoNils :-))

Side View:
img_0550
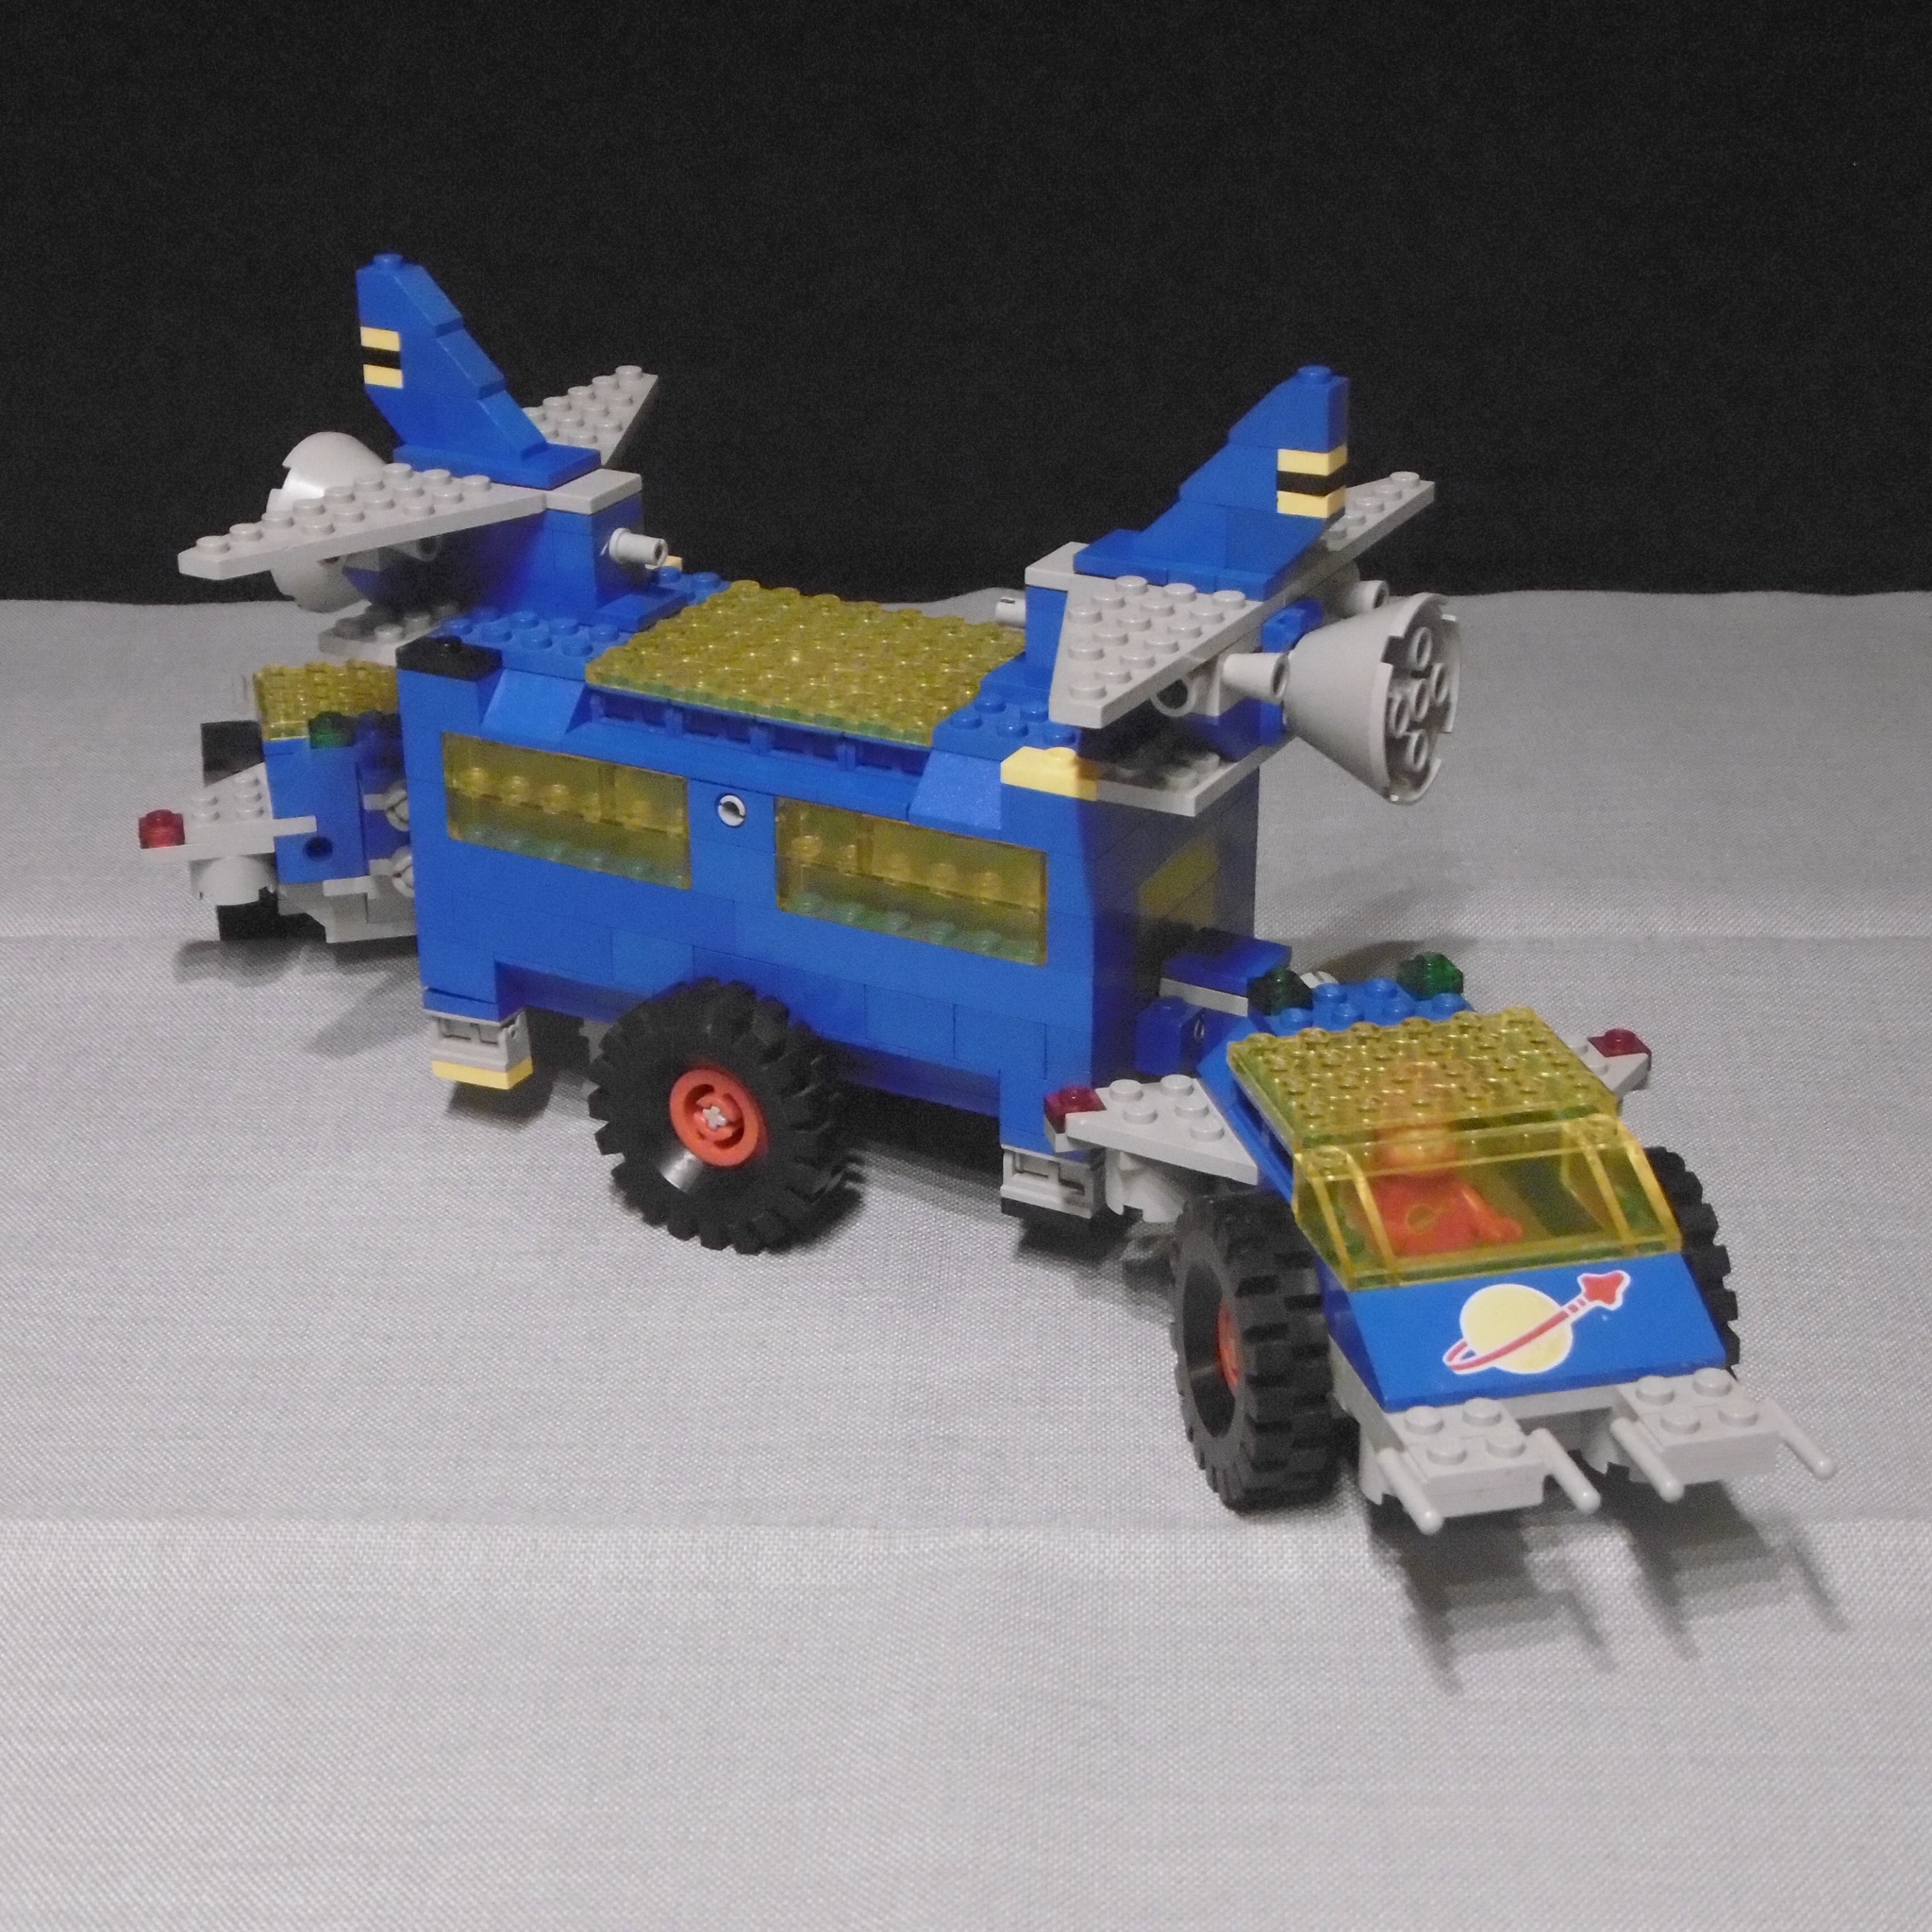
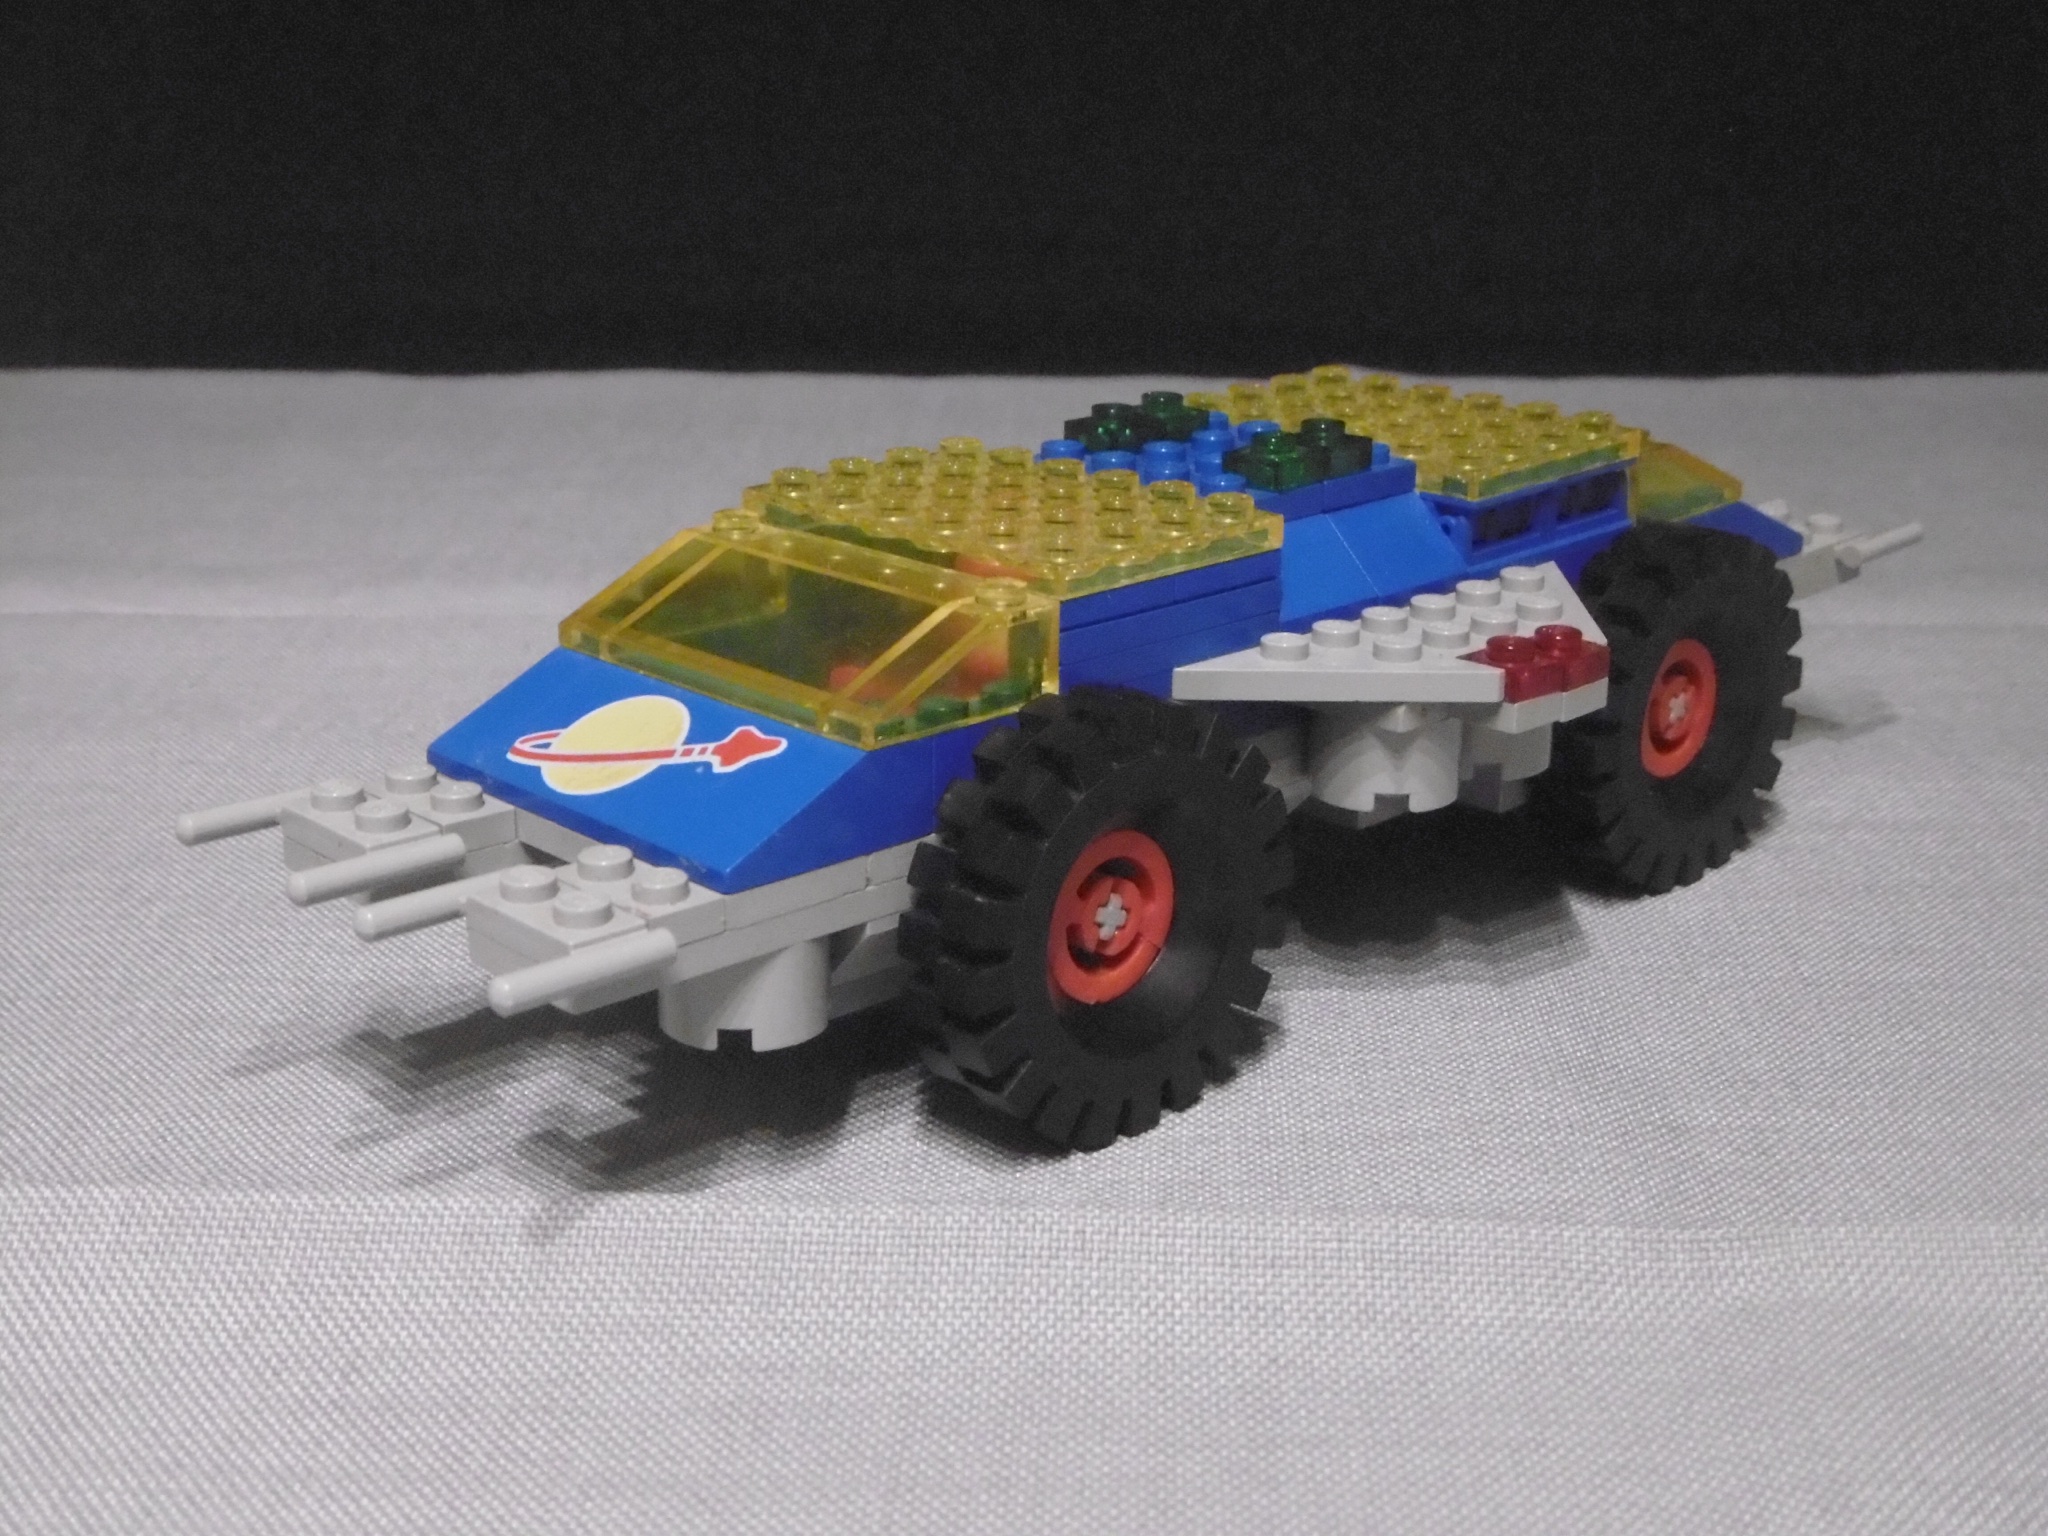
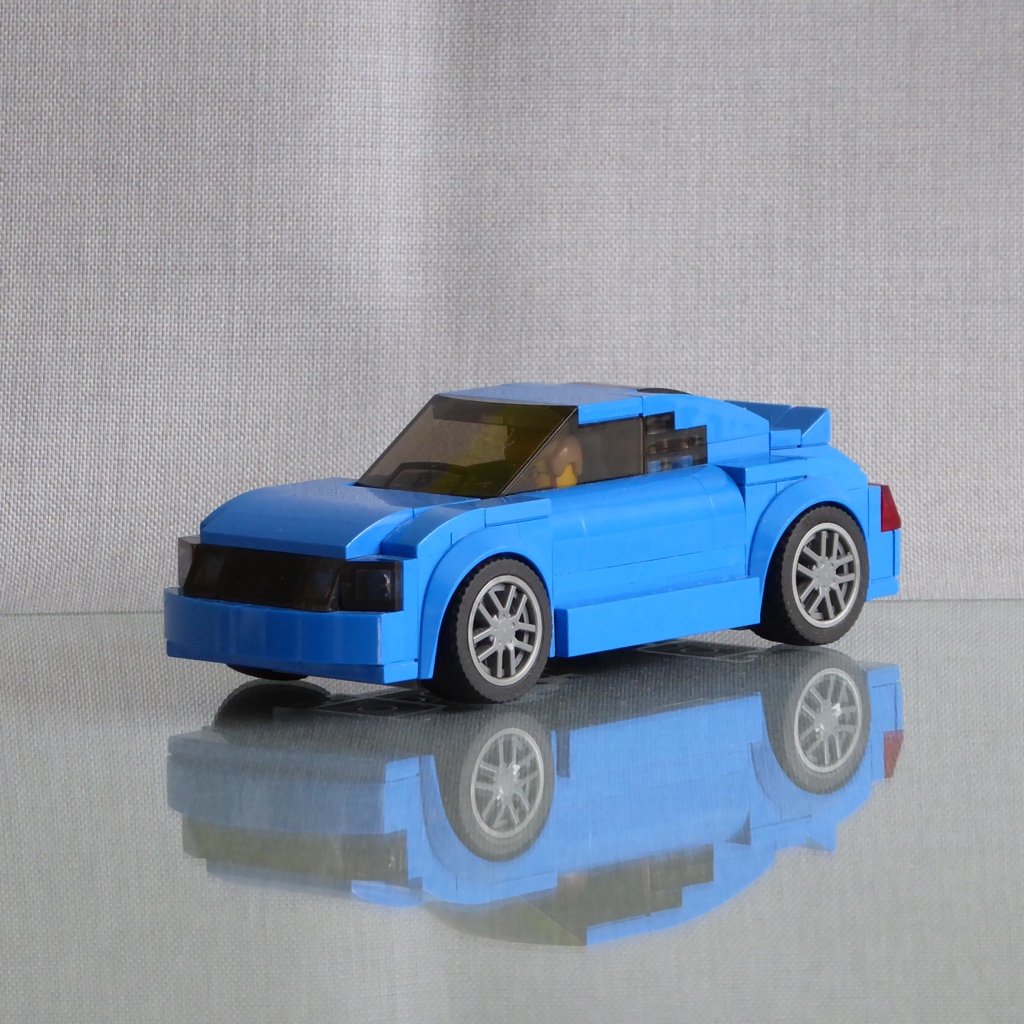
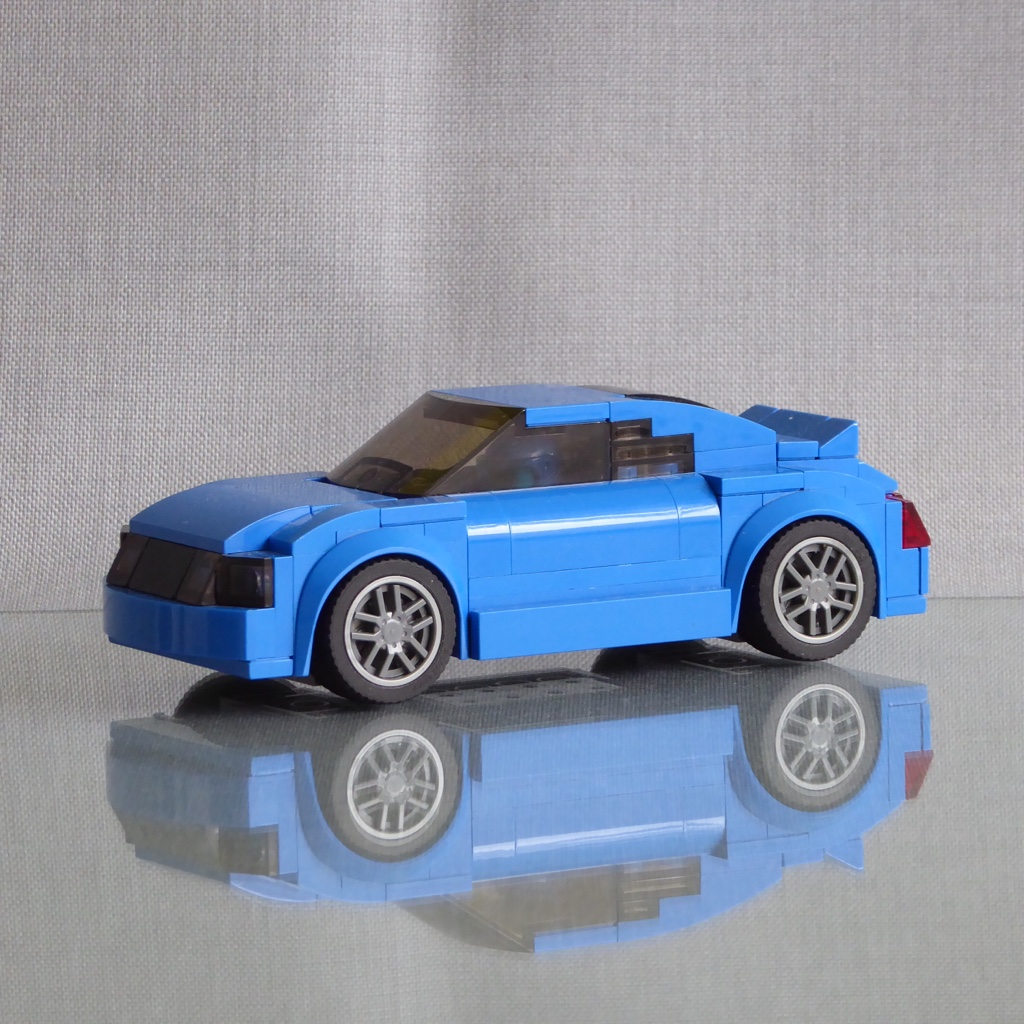
I decided to put on the spoiler, because the real one does have it, too. It doesn’t look too bad and it’s not wise to go at more than 200 kph on a German Autobahn without it…

Side/rear view:img_0551
Only one exhaust pipe for the FWD version (the quattro models have two).

img_0546
So this is my 6-wide Lego Speed Champions Audi TT MkI (8N). I hope you like it :-))